


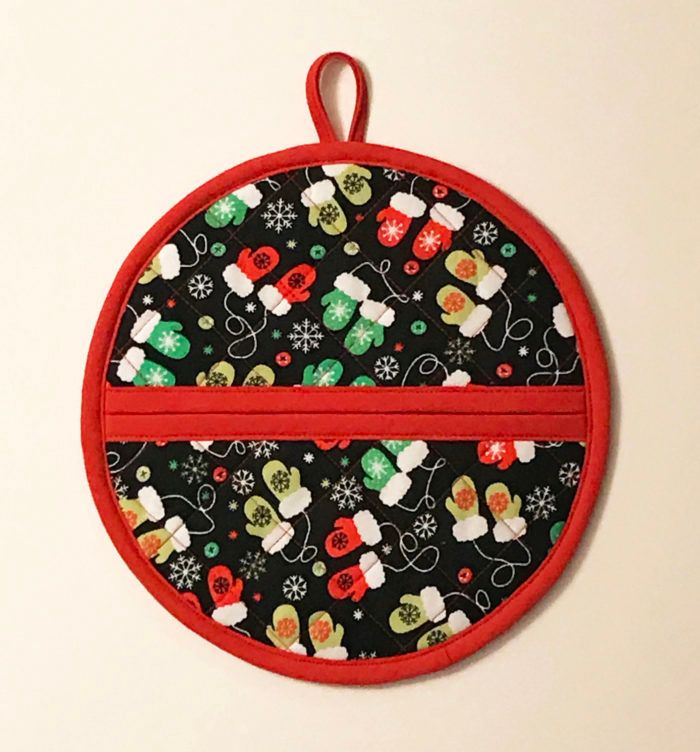
Easy-to-sew projects are perfect for the busy holiday season or any time of year. You can stitch up this quilted pot holder for yourself or a friend in under an hour. Choose from a variety of holiday-themed cotton fabrics or consider a more versatile print that’ll last year-round.
This pot holder includes pockets for your hand, for extra protection when you reach into a hot oven. Make a pair of matching or coordinating pot holders as the ideal present for someone who loves holiday baking.
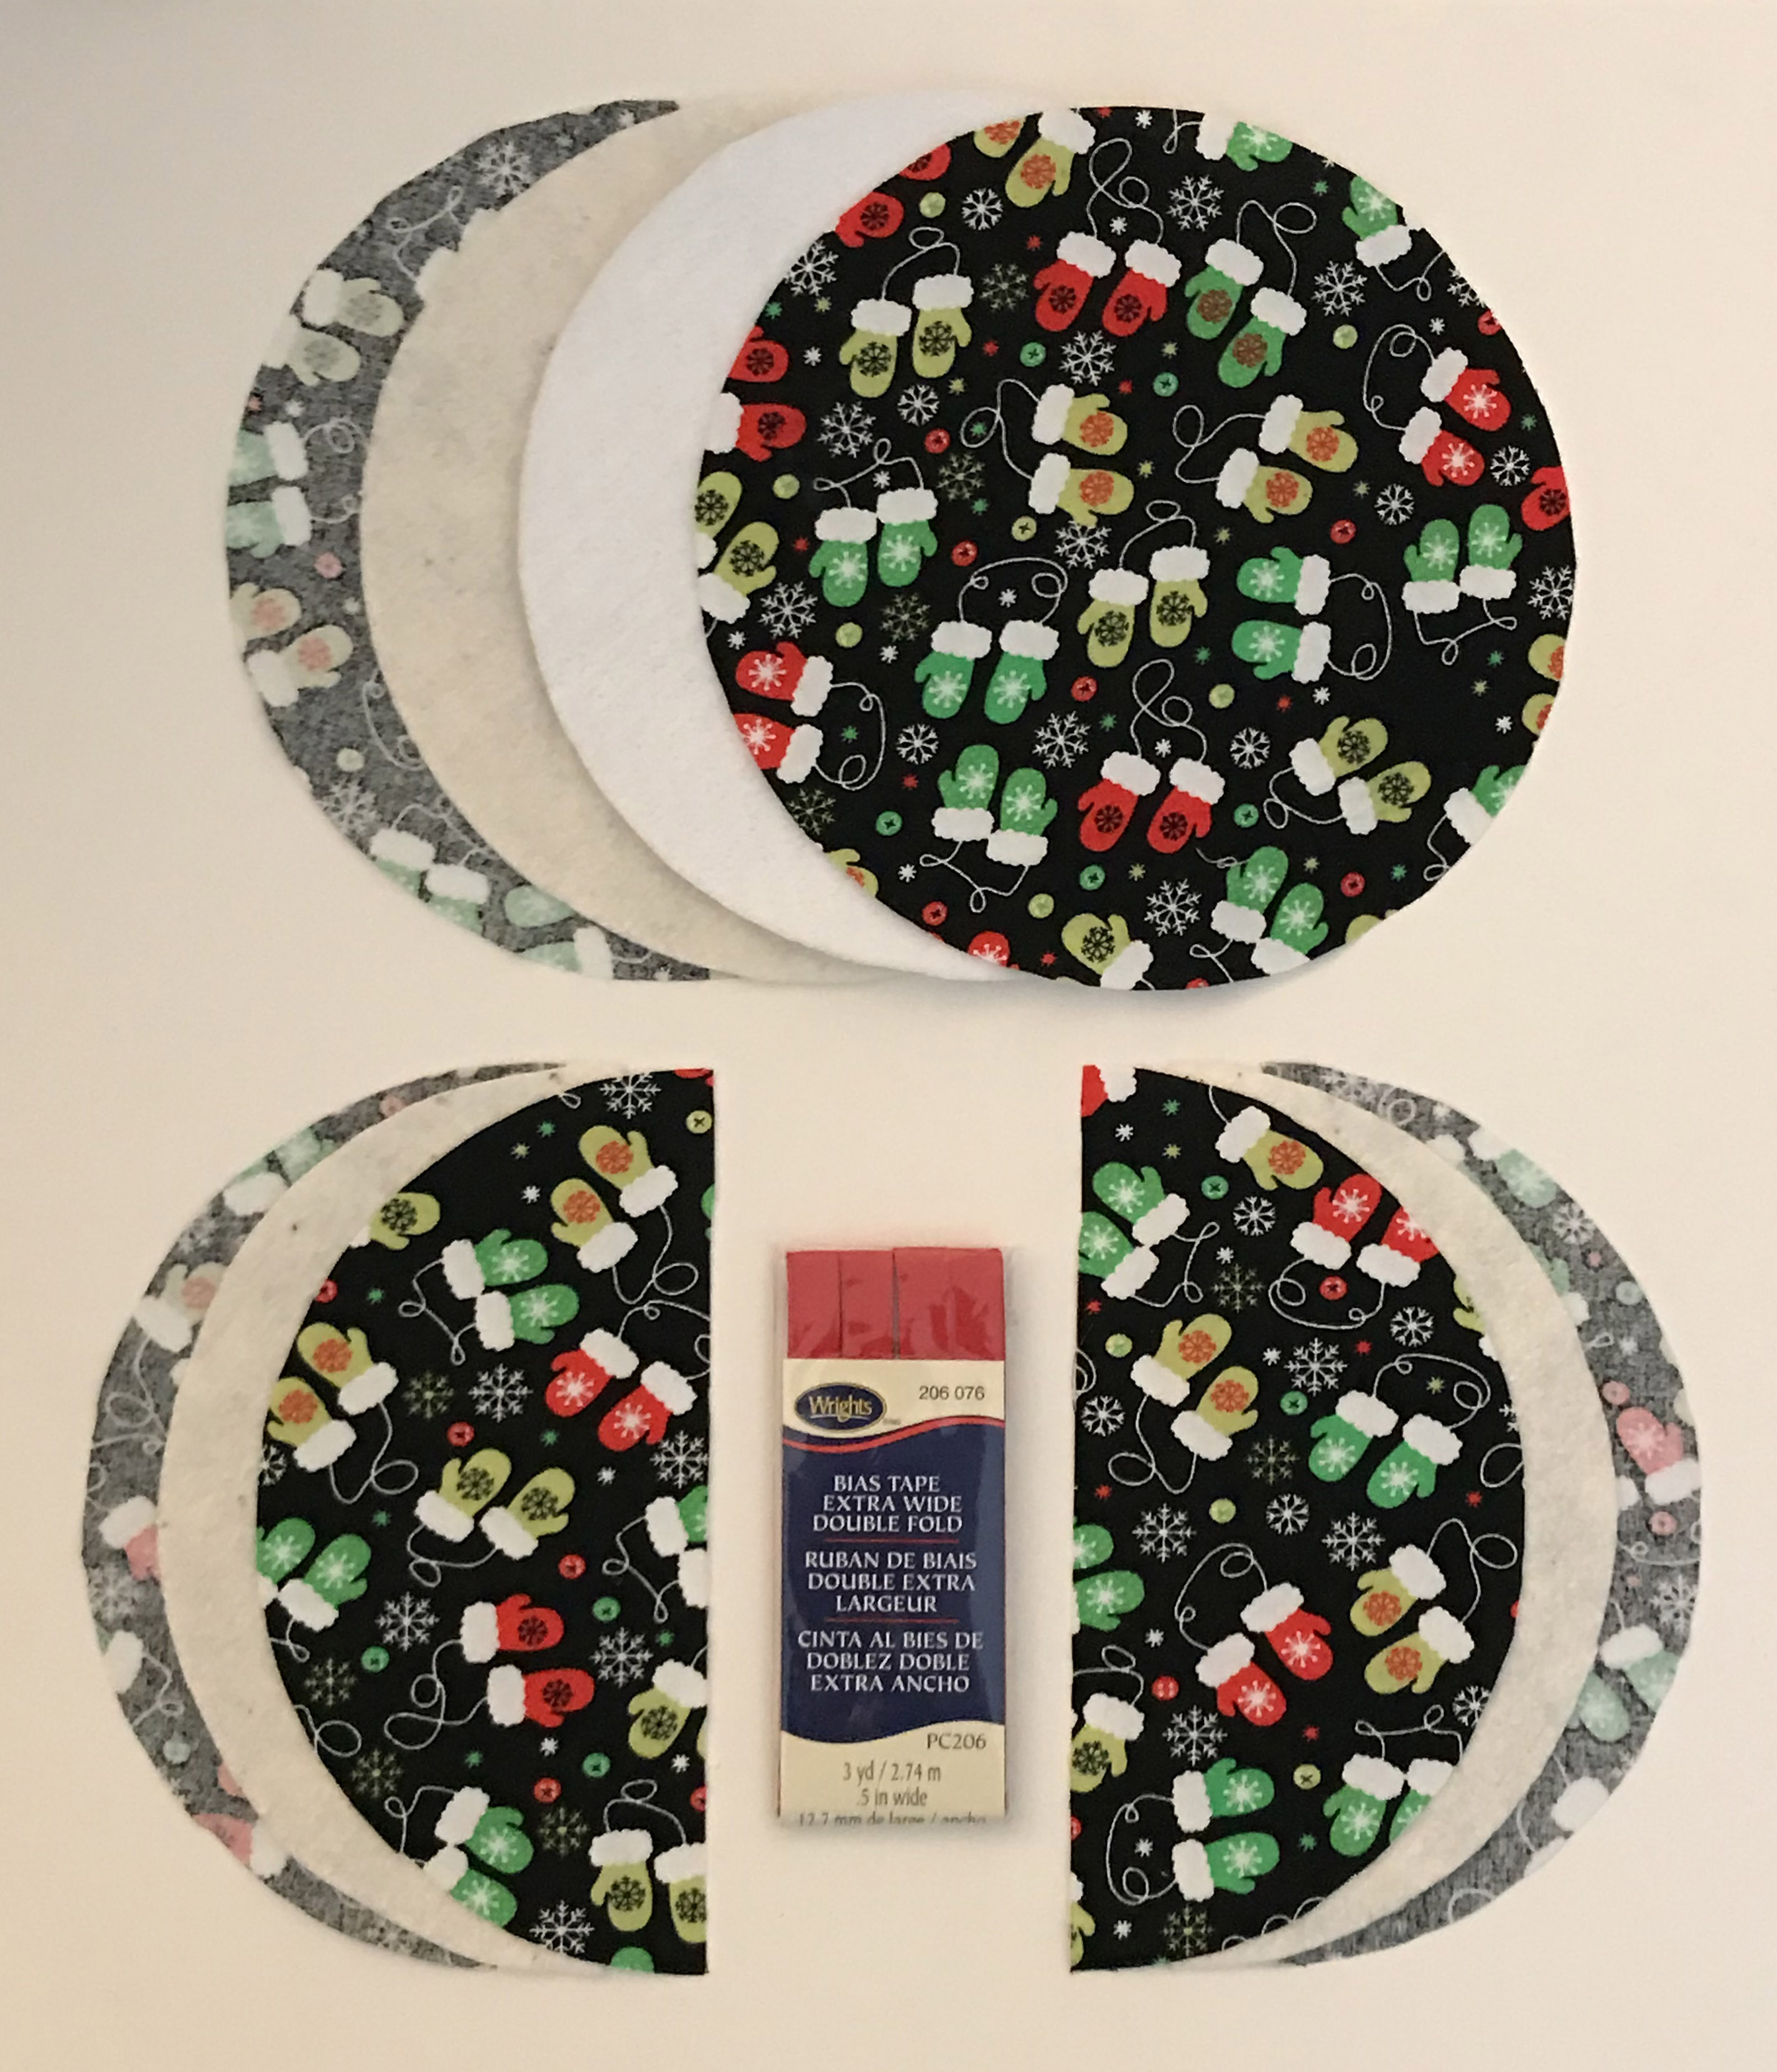
Materials:
- 1/4 yard cotton fabric
- 1/4 yard cotton batting
- 1/4 yard Insul-Bright Polyester Fabric
- One package 1/2-inch-wide double-fold bias tape
Assemble the pattern
1. Prepare the pieces. Print the downloadable Pot Holder PDF pattern (click the View PDF link at the bottom) at full size, without scaling the image. Use the 1-inch square on the pattern as a guide to ensure the printed size is correct. Then use p. 1 of the pattern to cut the pot holder base pieces: two cotton, one batting, and one Insul-Bright. Use p. 2 of the pattern to cut pot holder side pieces: four cotton and two batting. Transfer the pattern line markings to one cotton base and two cotton side pieces to use as a quilting guide.
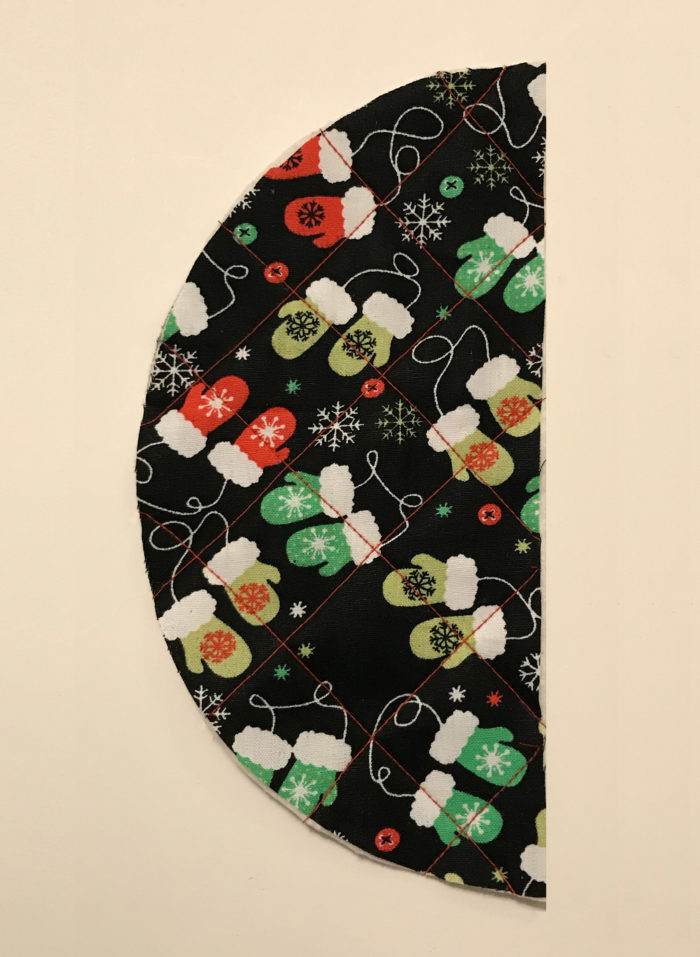
2. Layer and quilt. Layer the fabrics in the order shown above. Begin with the unmarked cotton base on the bottom (wrong side up), followed by one batting base, one Insul-Bright base, and the marked cotton base (right side up). Make sure all edges align, and pin the fabric in a few places to keep the layers together. Layer the side pieces in the same order, omitting the Insul-Bright. Stitch along the marked lines through all layers to create the quilted design. (Feel free to increase your stitch length slightly to quilt the layers.)
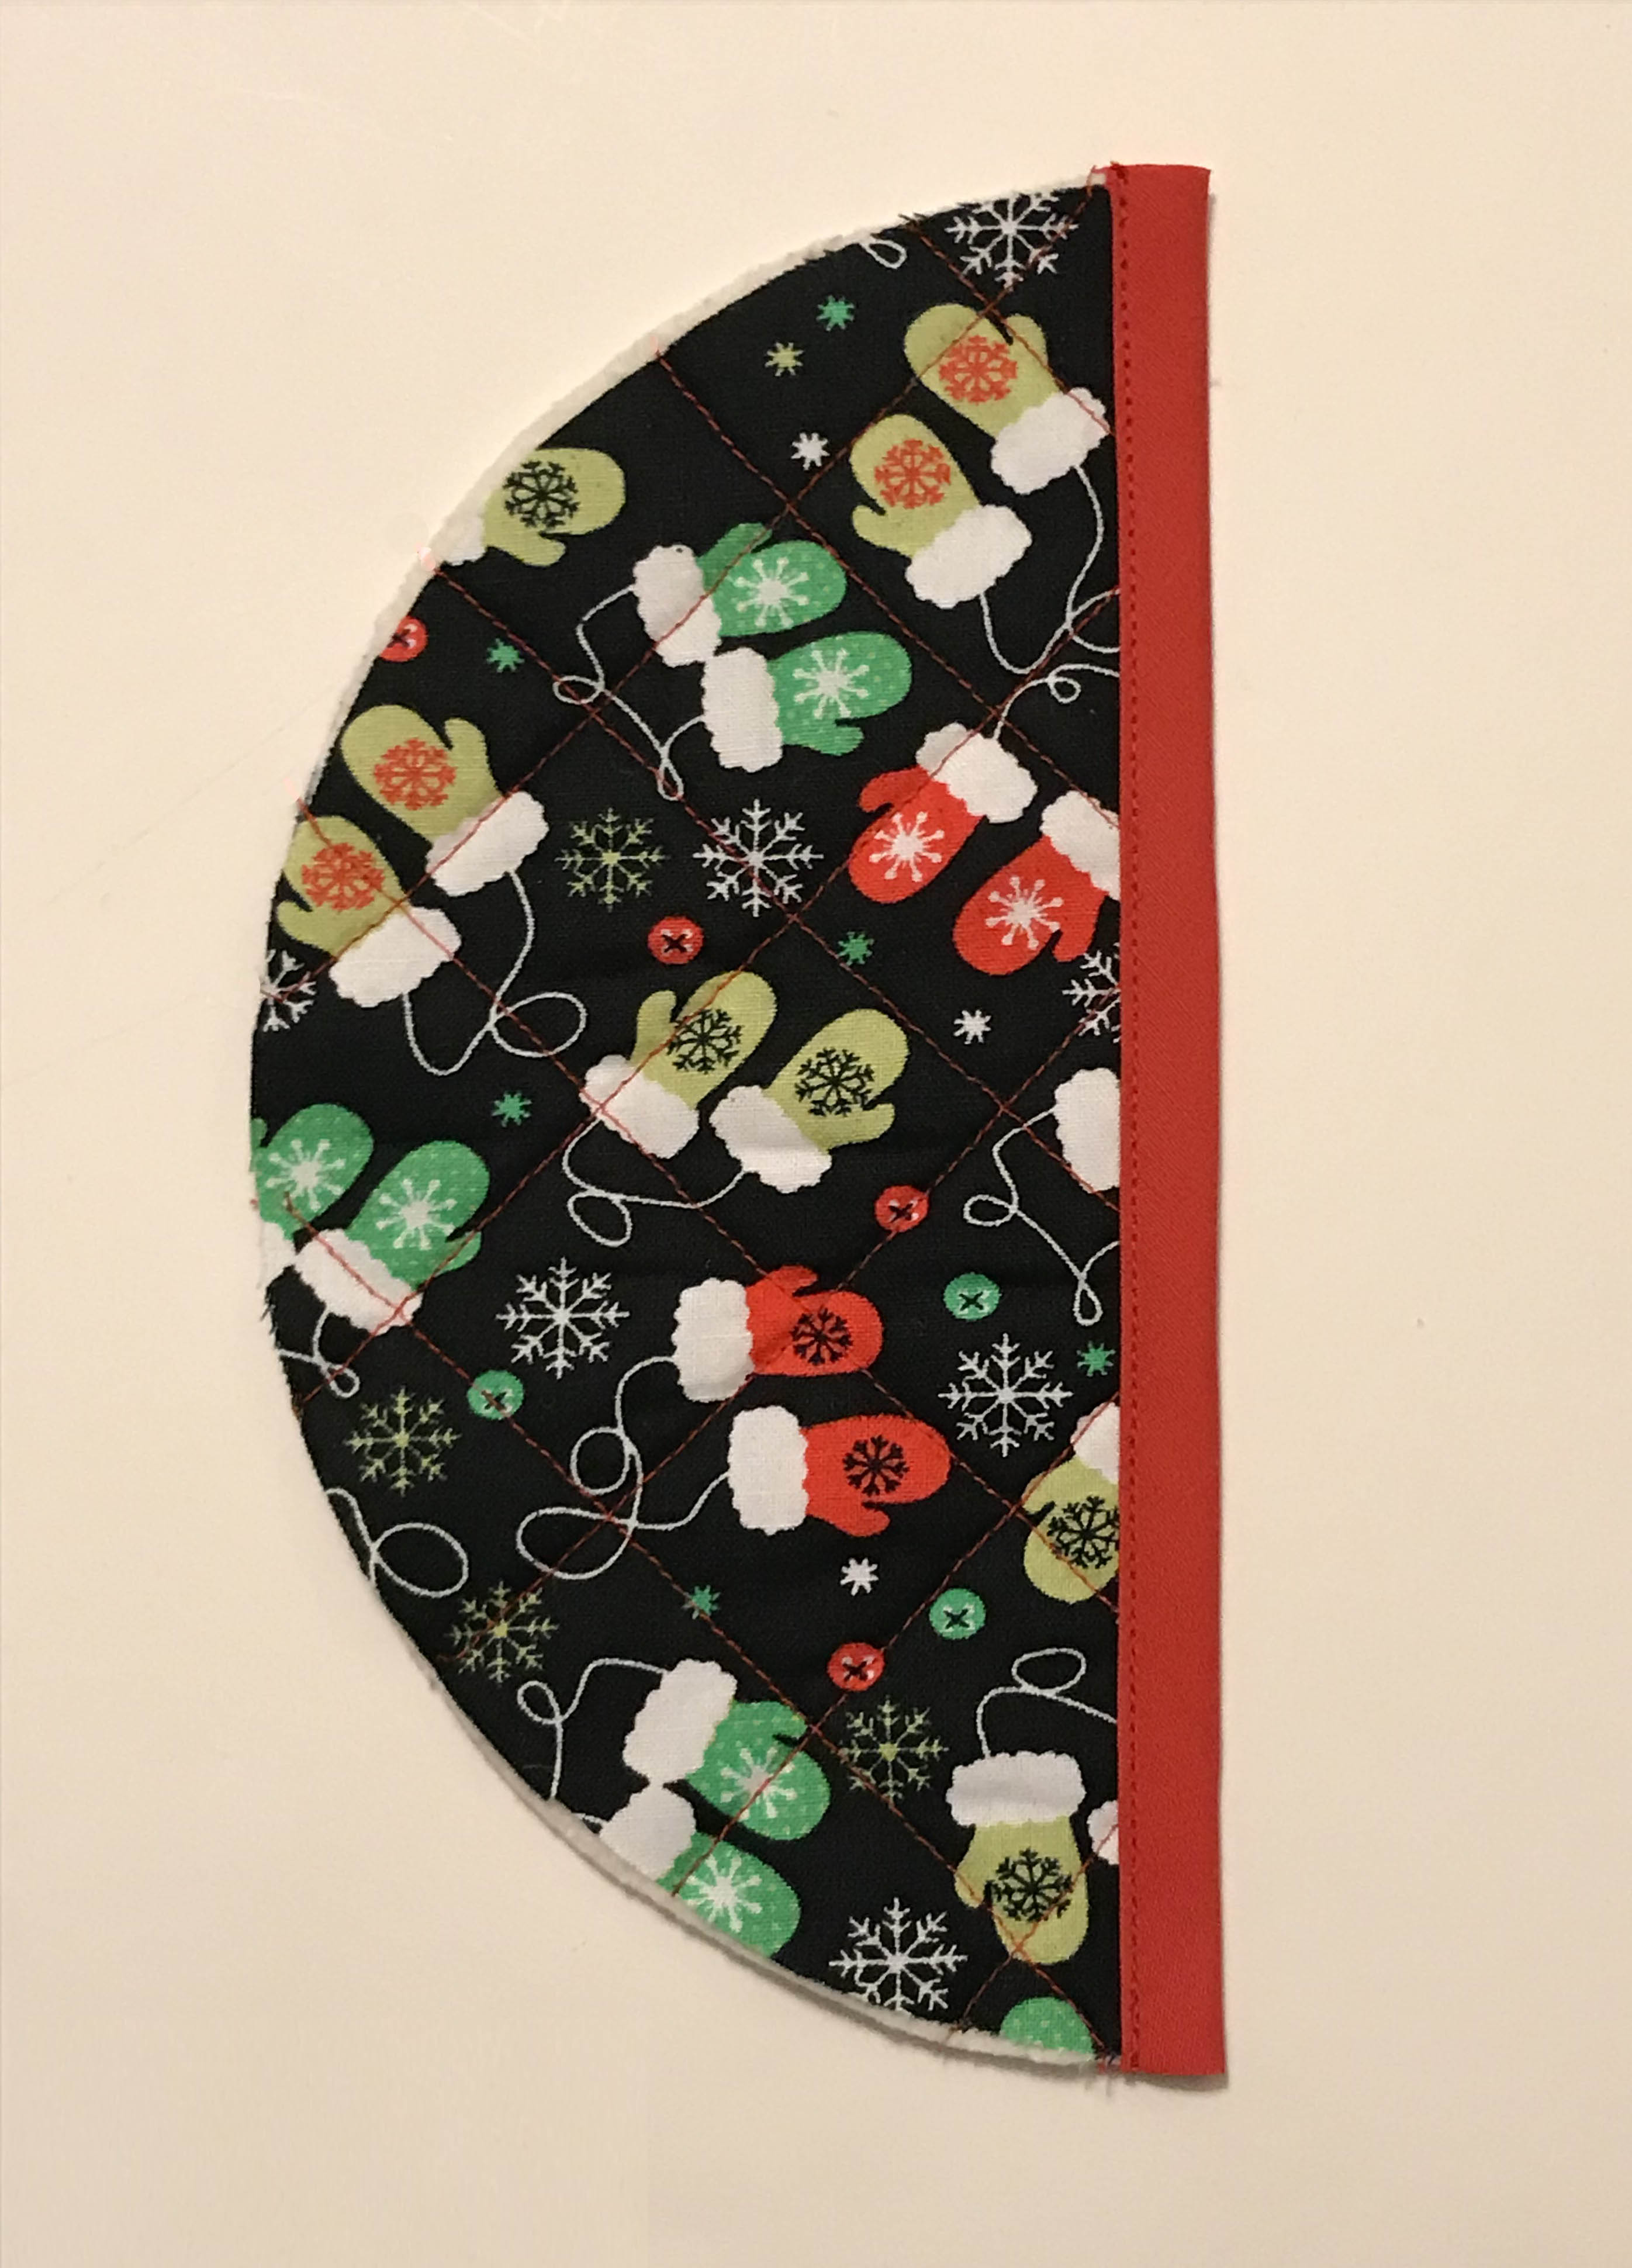
3. Attach the binding. Cut one 8 1/4-inch-wide strip of double-fold bias tape. Open out one side and, with right sides together, pin the tape along one straight pot holder side edge. Stitch through the crease.
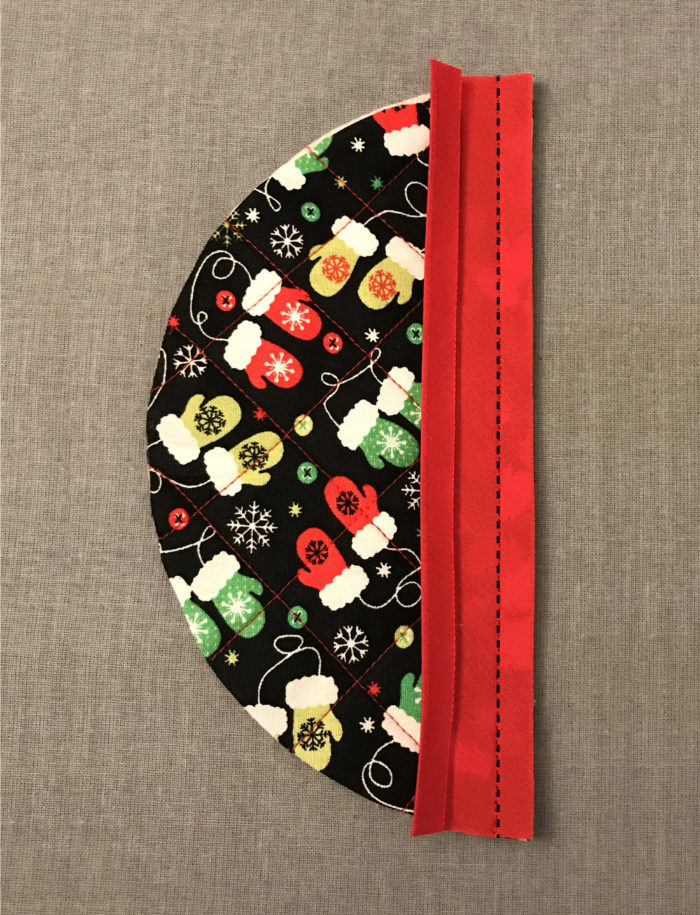
4. Fold and stitch. Wrap the tape around the seam allowance to the wrong side, encasing the raw edge. Pin the tape in place and edgestitch along the inside edge, making sure to catch the underside fold as you sew. Repeat steps 3 and 4 on the second pot holder side.
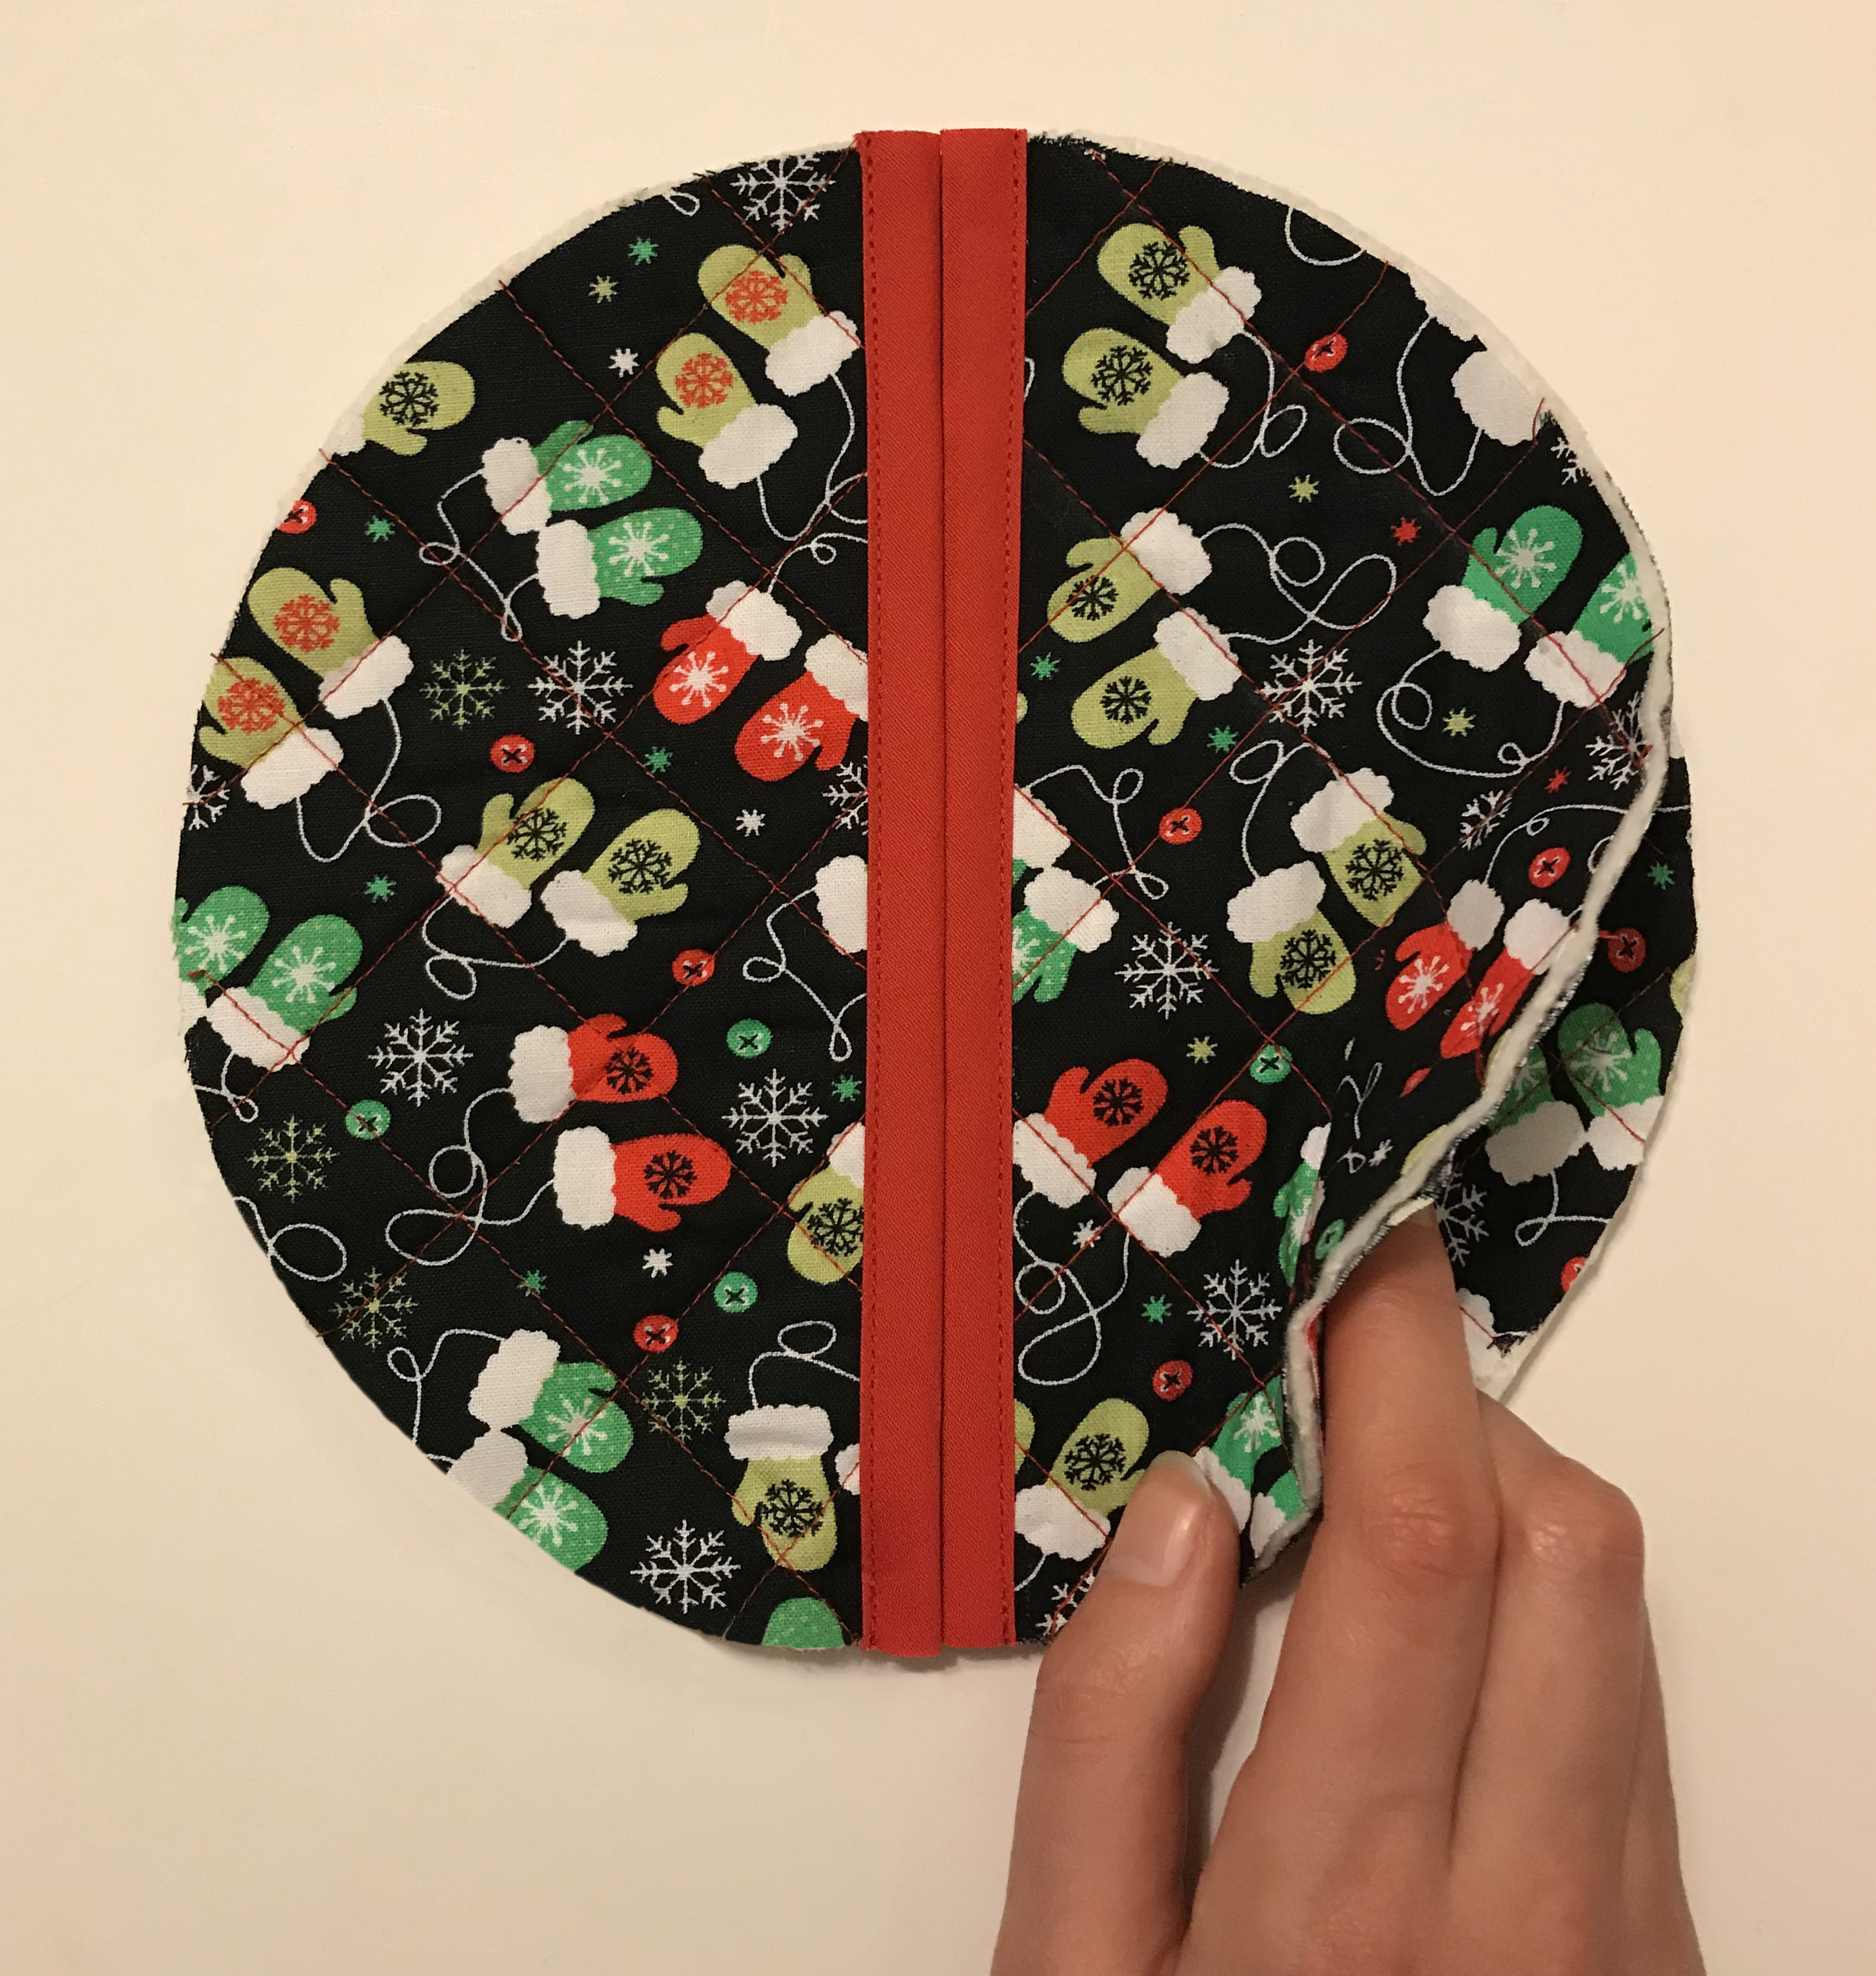
5. Form the holder. Place the right and left pot holder sides atop the quilted pot holder base so the bindings abut at the center. Pin in place, without getting too close to the edges.
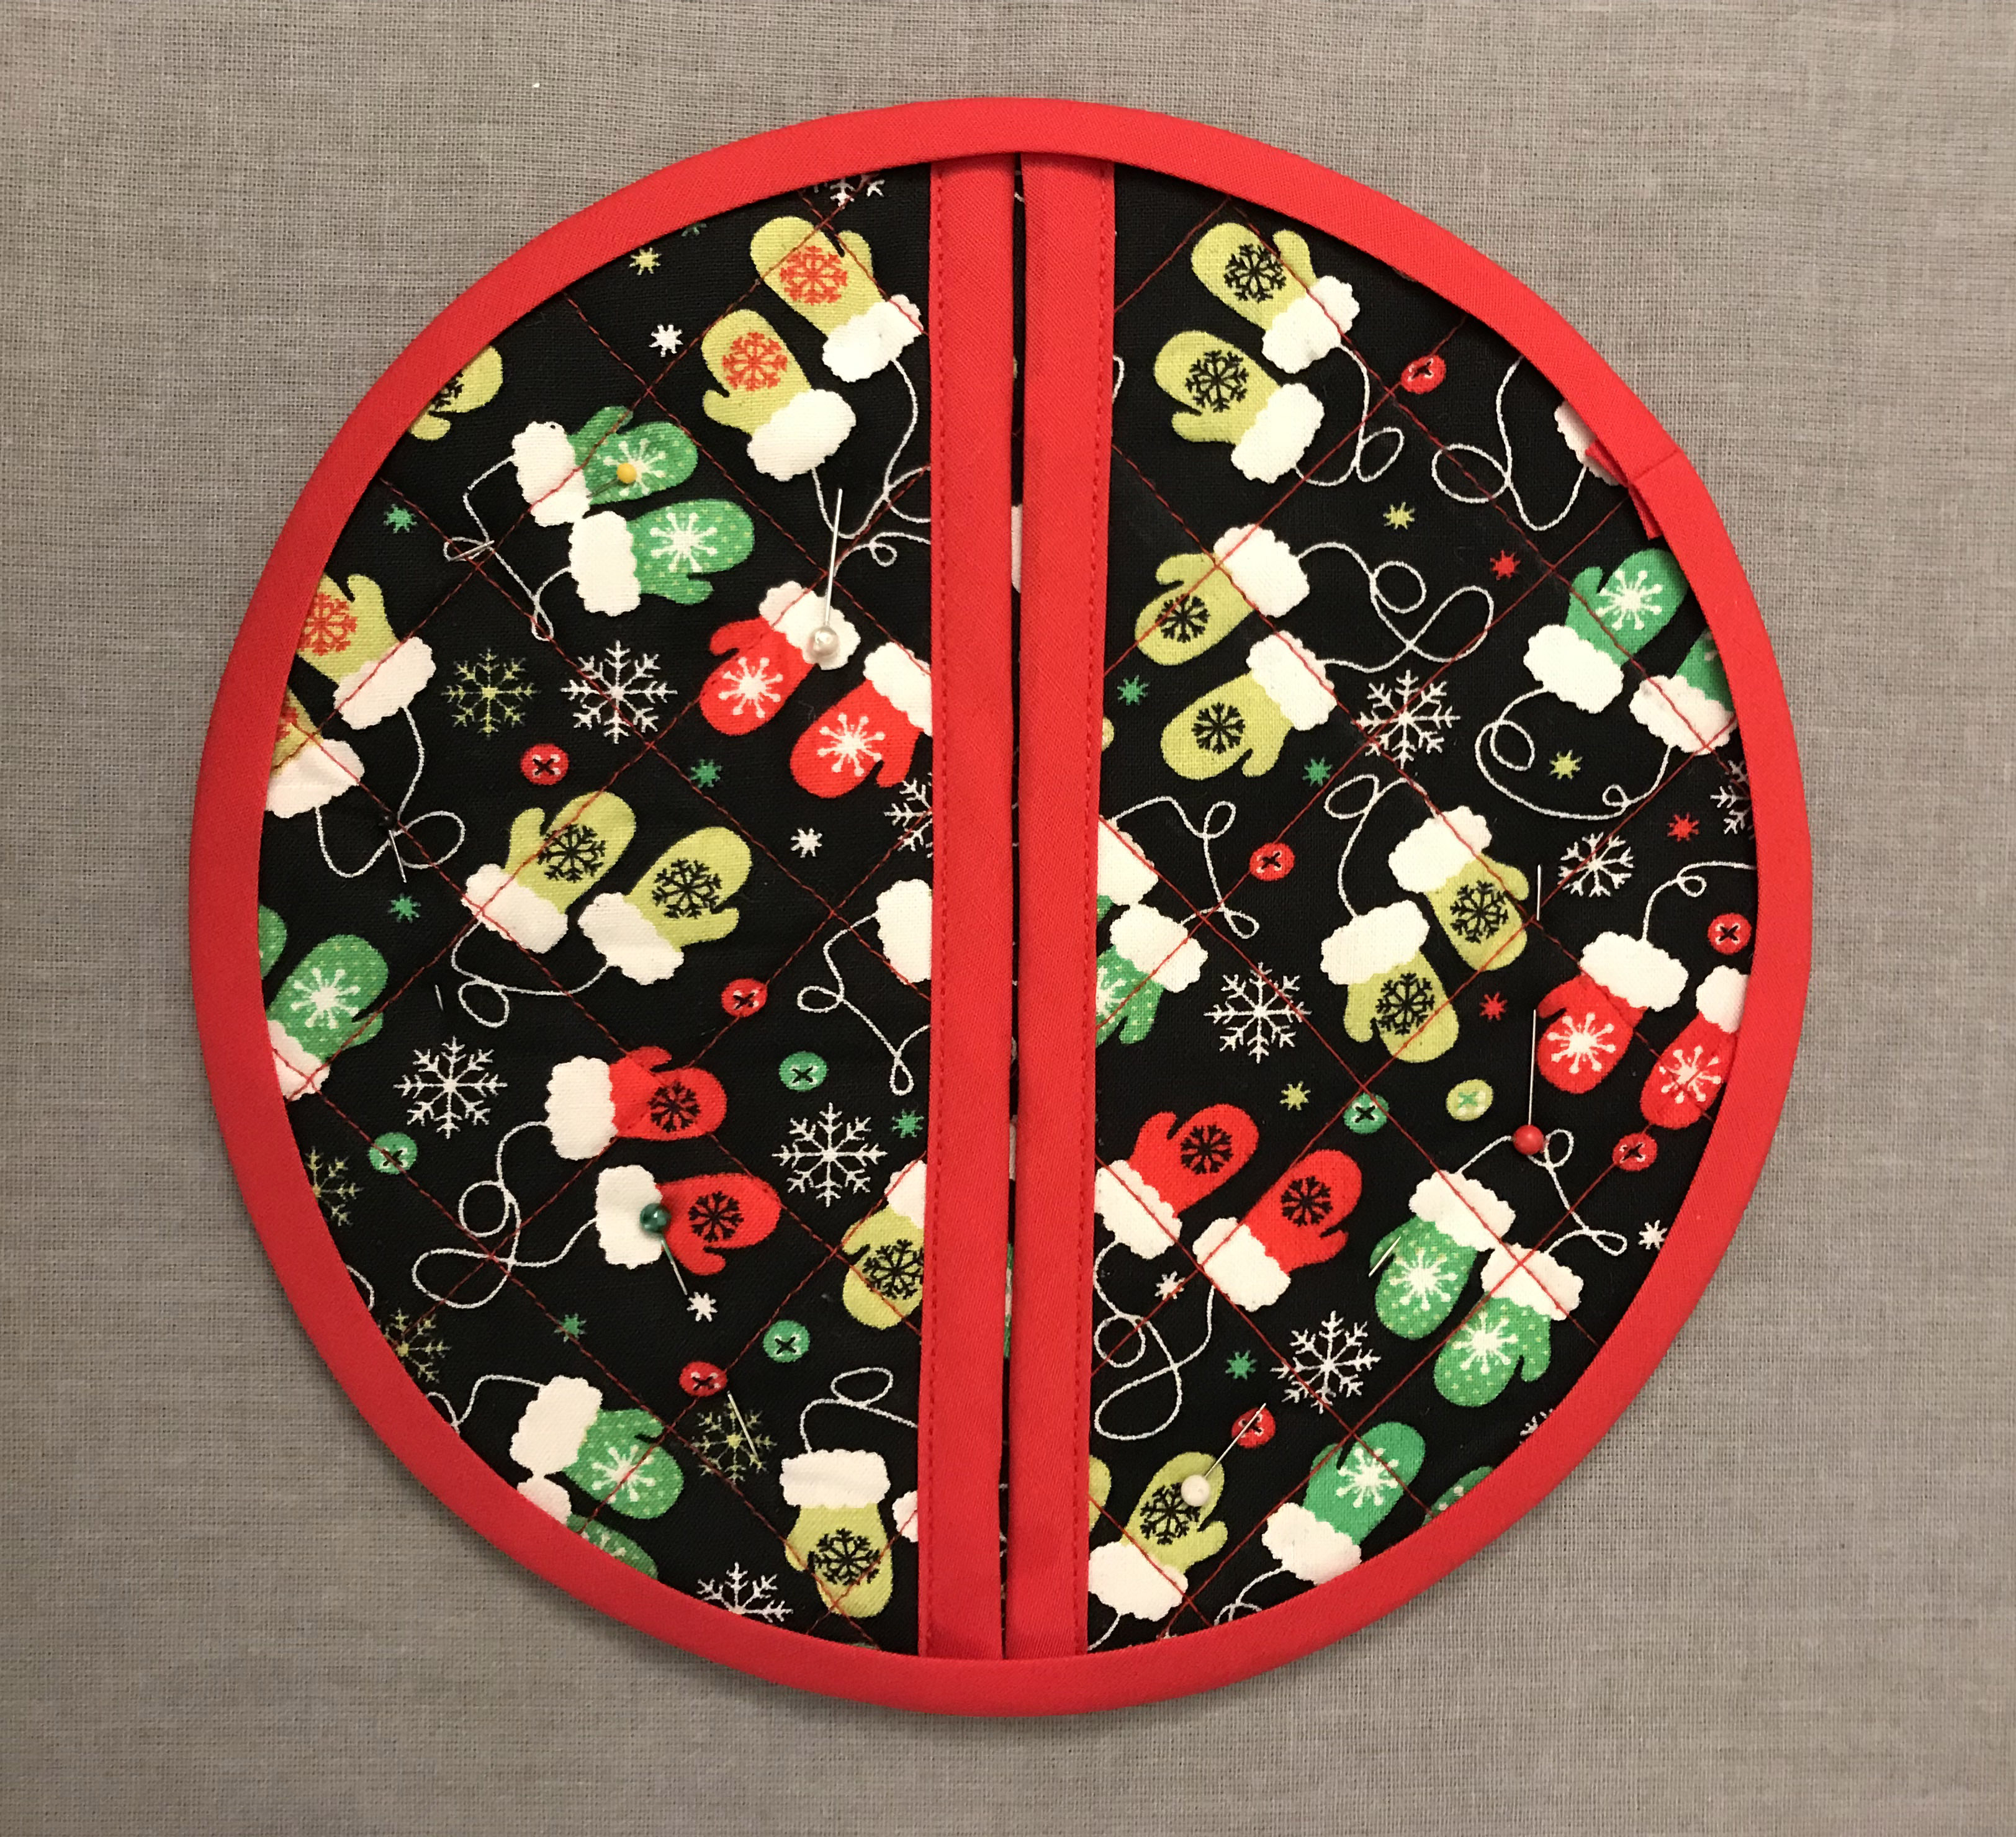
6. Encase the circumference. Open out one side of double-fold bias tape, as you did in step 3. With right sides together, pin the tape along the pot holder’s circumference through the side and base layers. Be sure to create a clean bias tape join. Stitch through the crease. Next, wrap the tape around the seam allowance to the wrong side to encase the raw edge. Pin or clip the tape in place, if desired, and set aside.
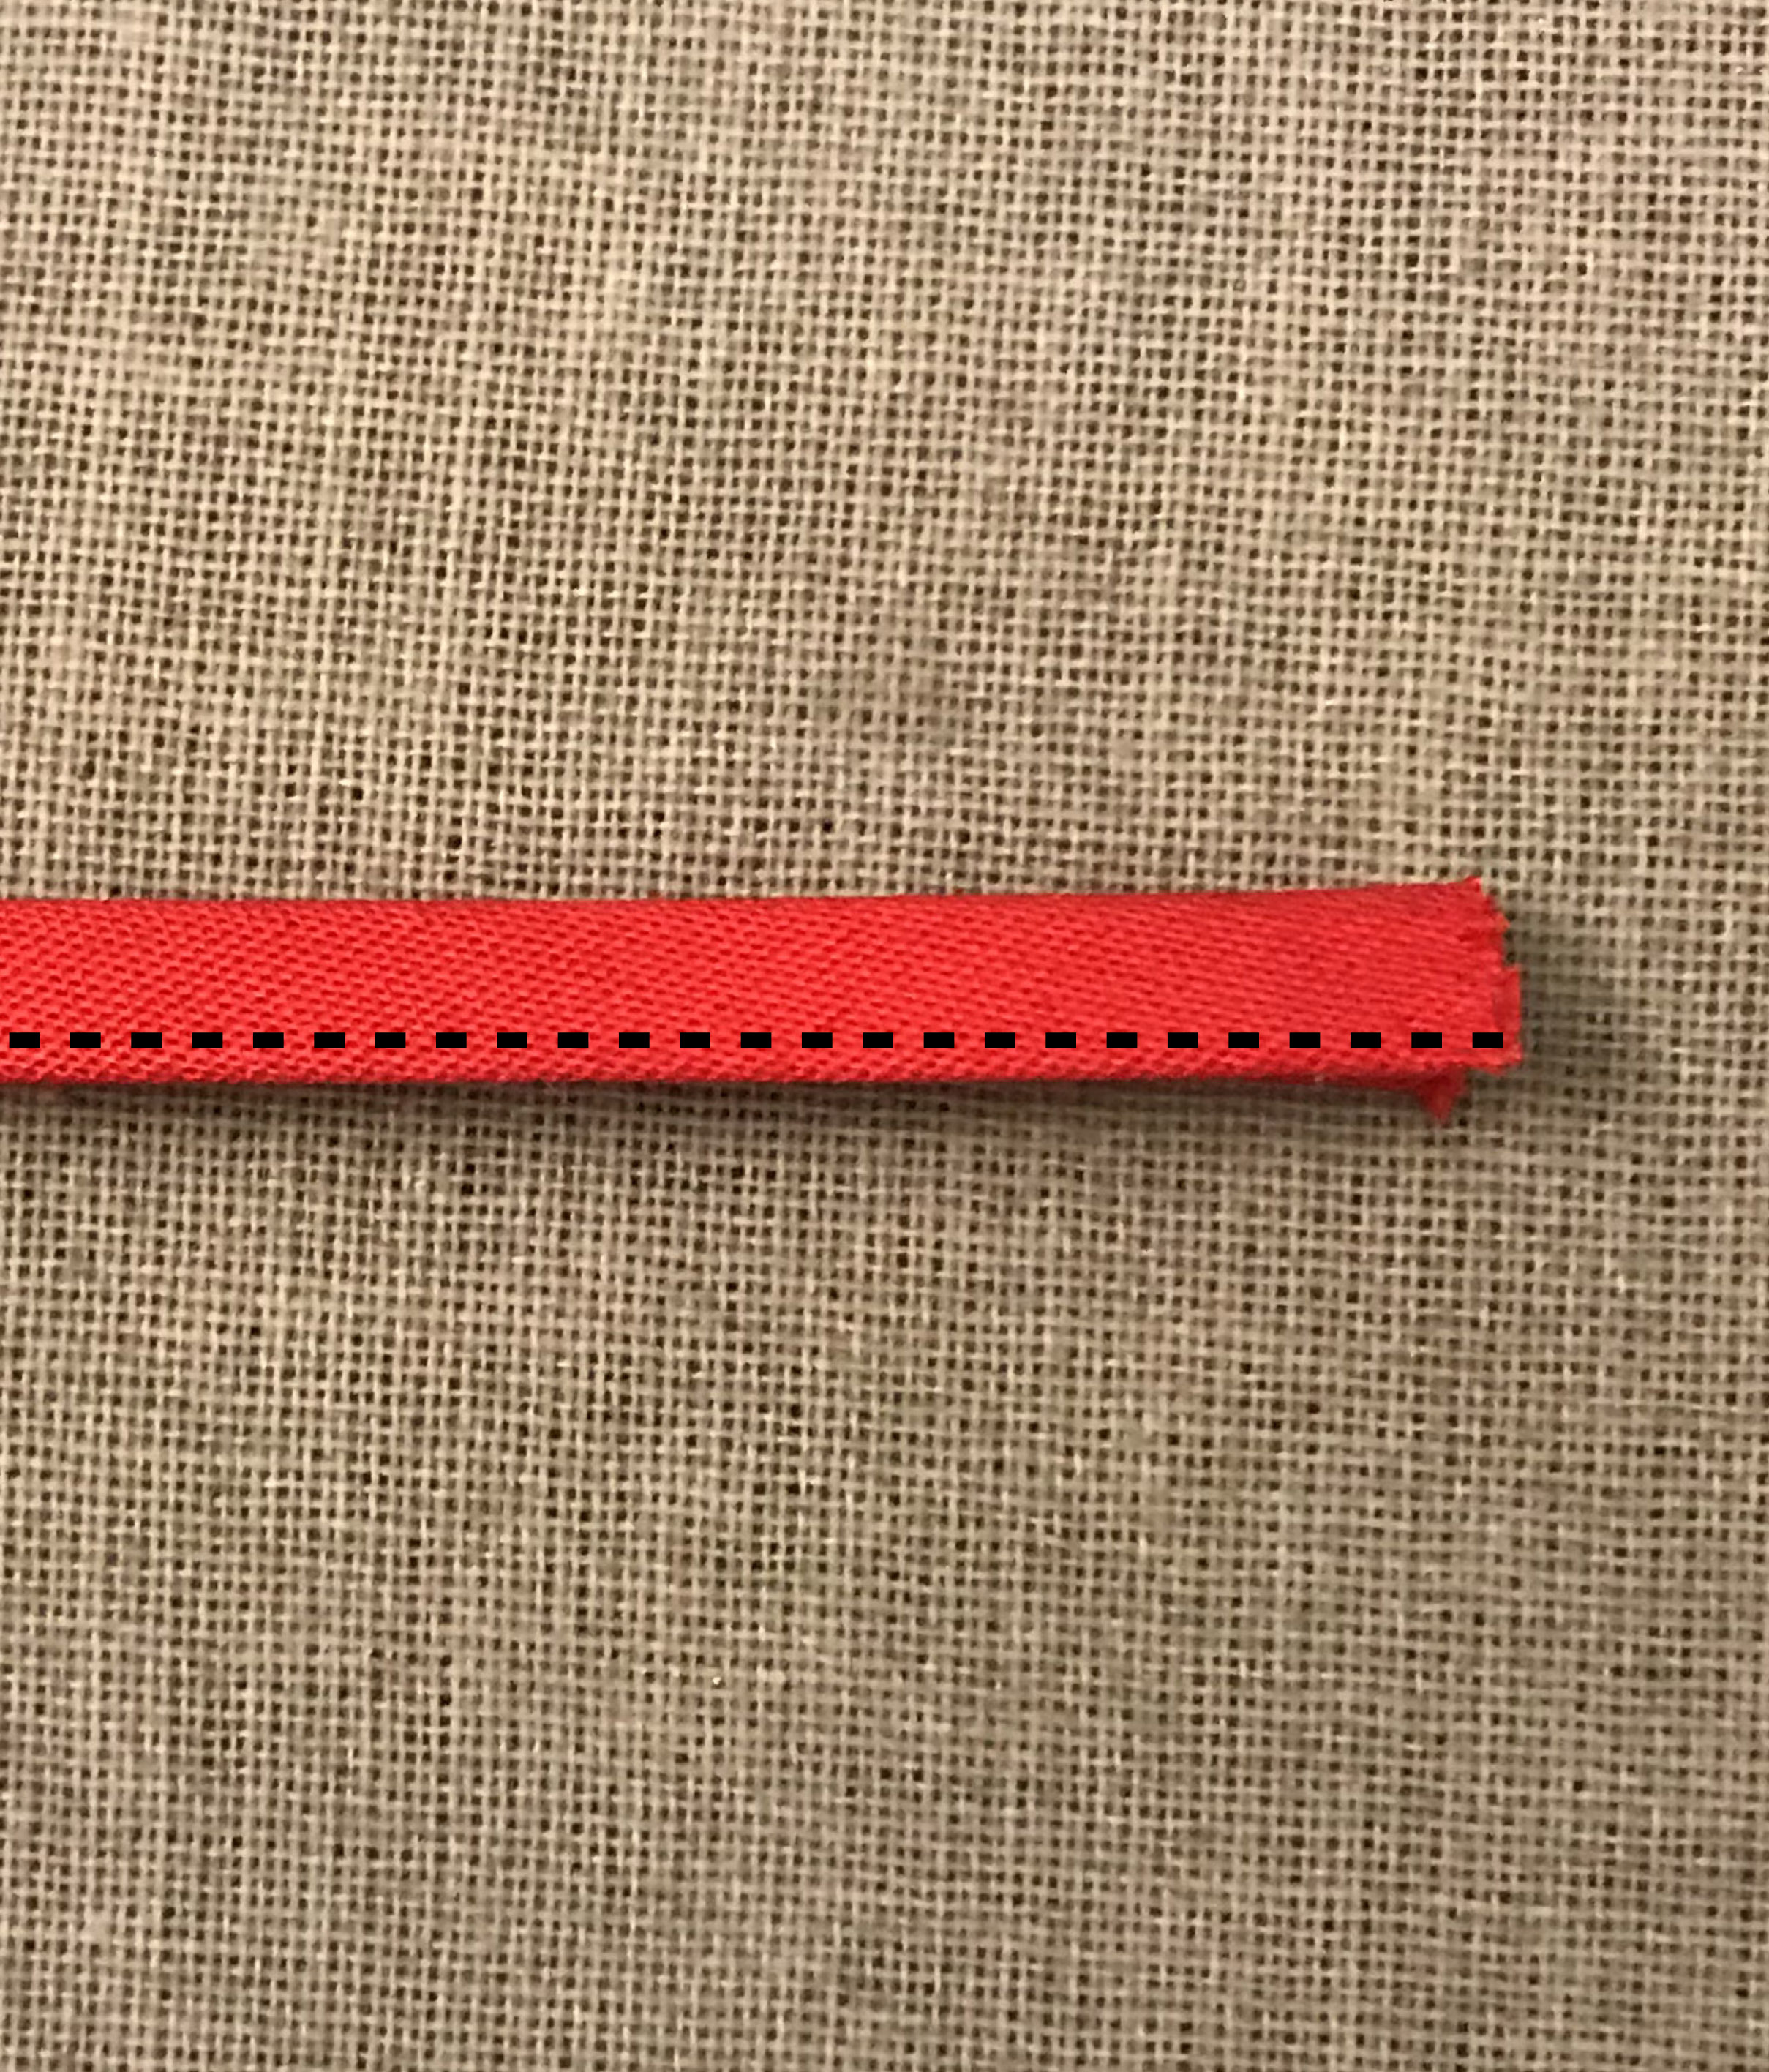
7. Create the loop. Cut one 5-inch-long piece of double-fold bias tape. Unfold the tape along the center fold. Then fold both long edges in about 1/4 inch until they meet the center crease and press.
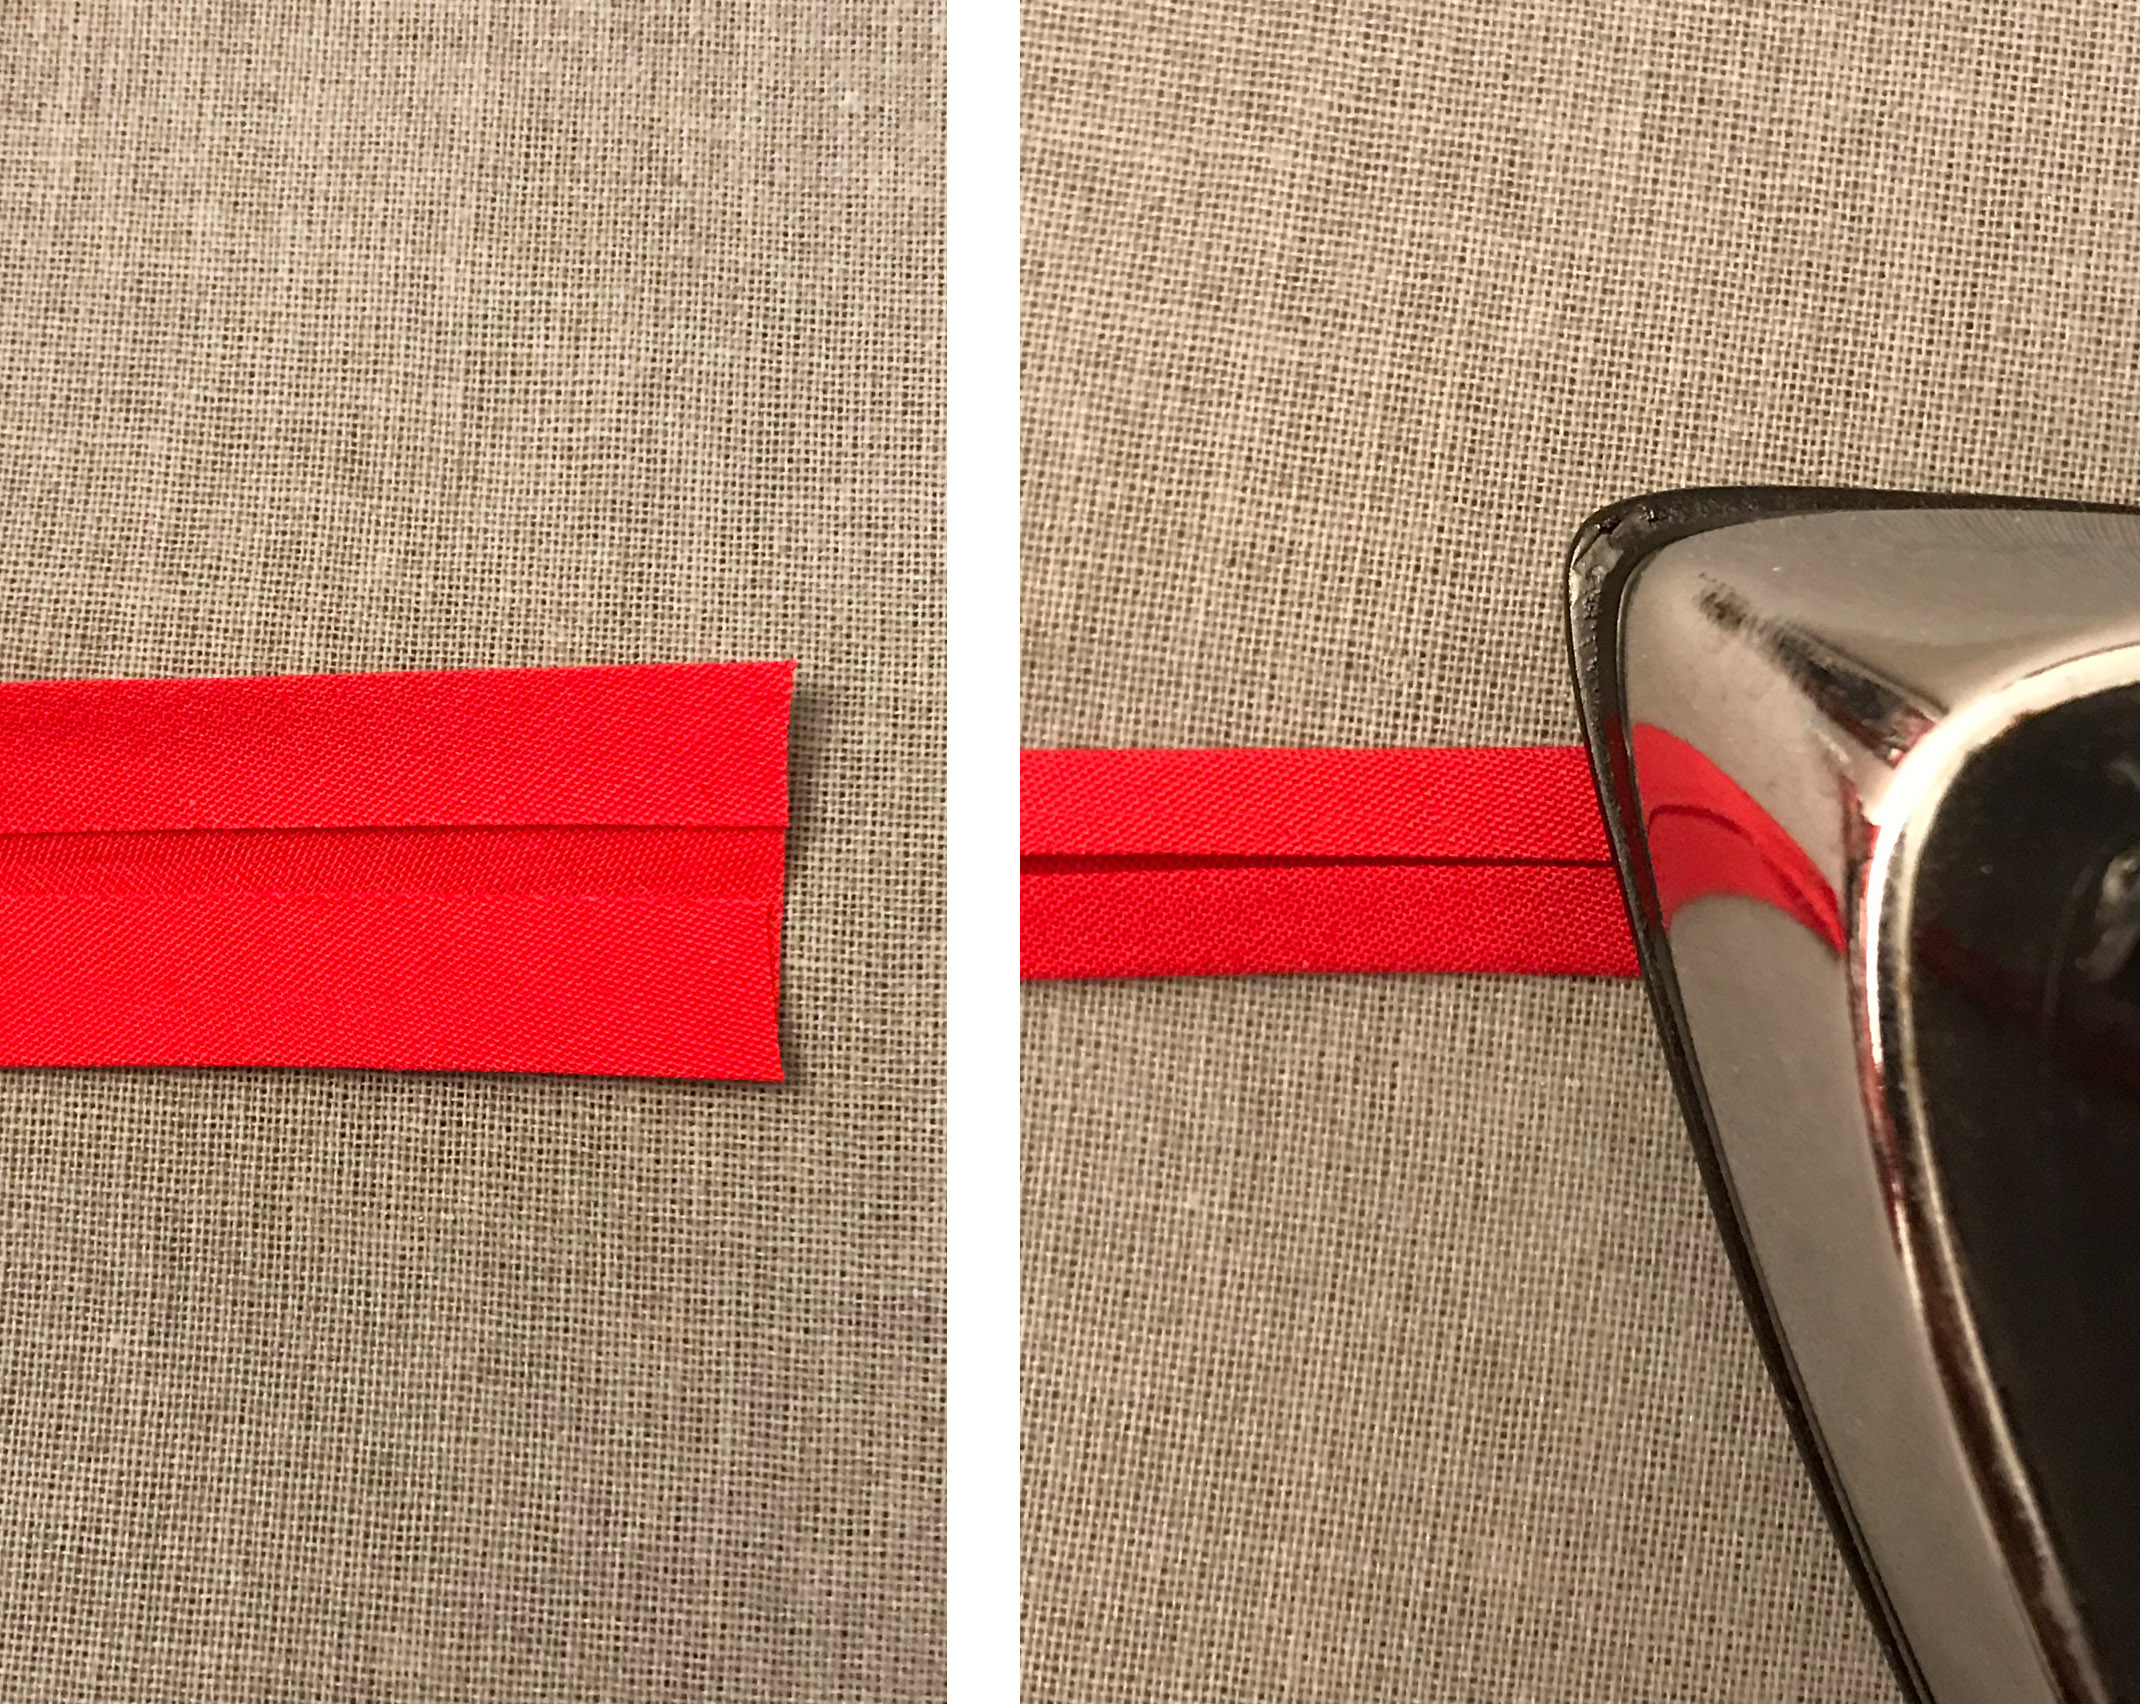
8. Sew the strip. Fold the entire piece in half lengthwise and press to create a 1/4-inch-wide strip. Edgestitch along the open edge.
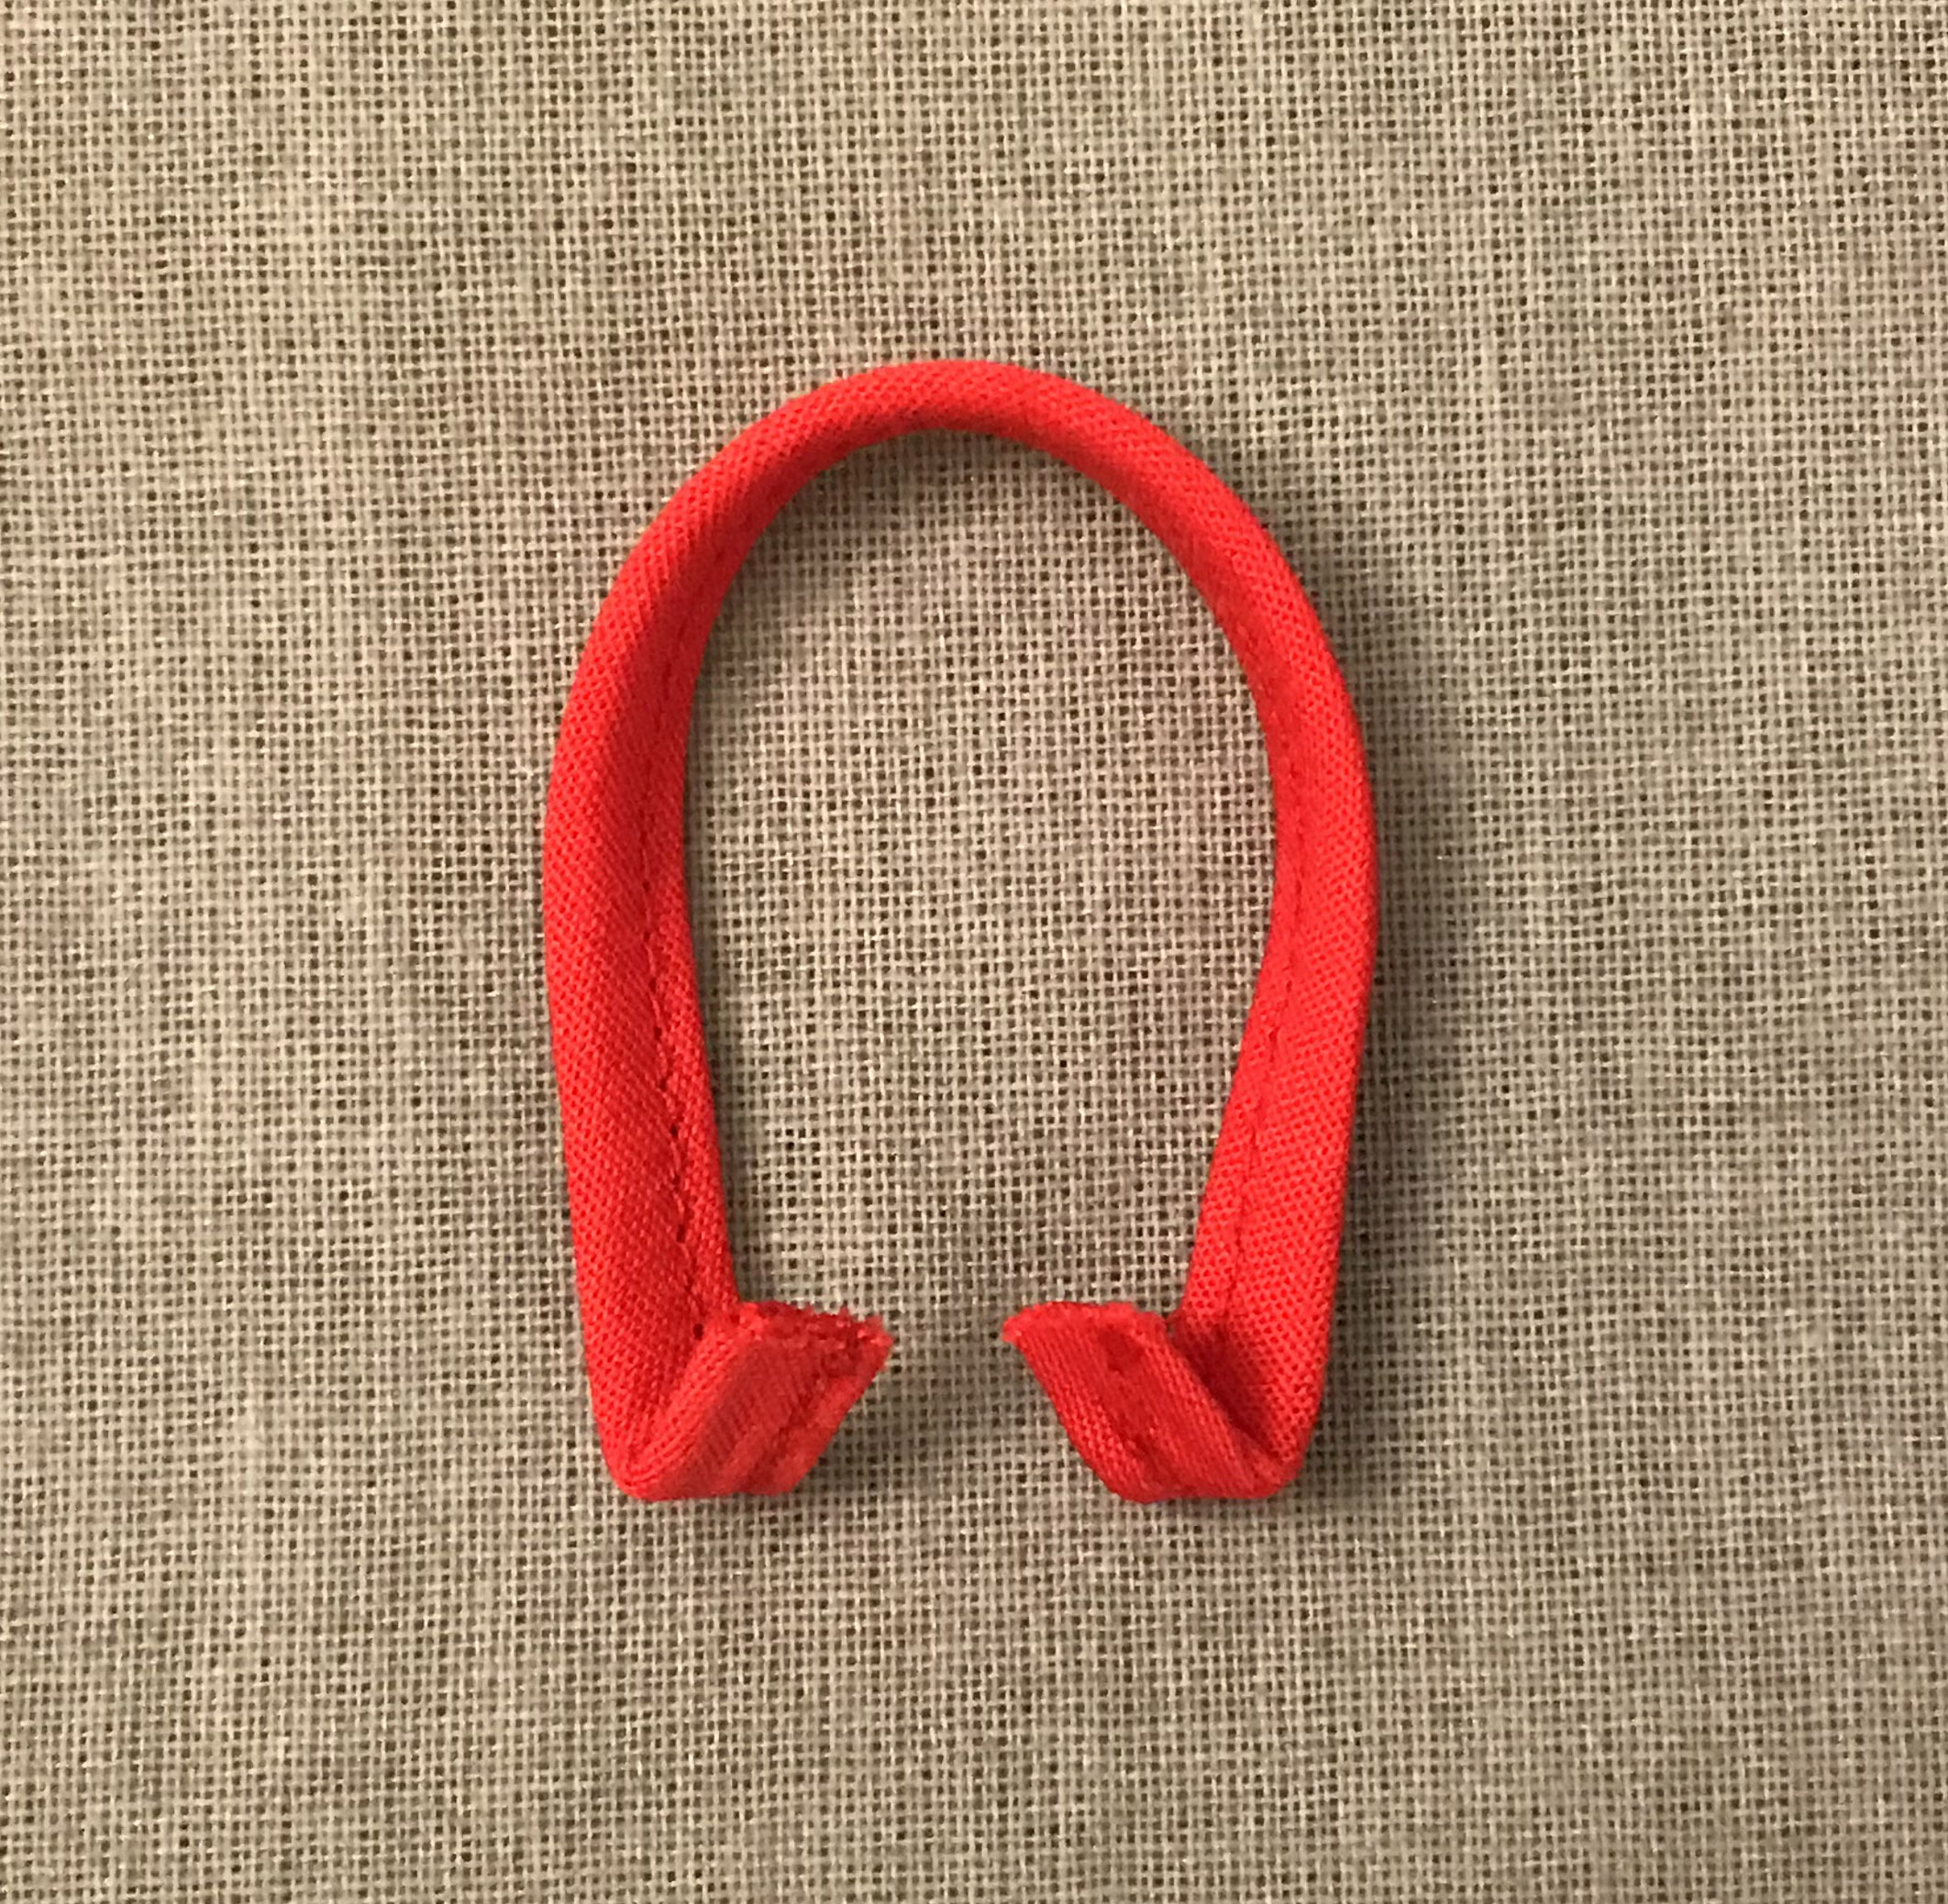
9. Finish the ends. Curve the strip into a loop shape and press up the ends 1/4 inch so they can be secured beneath the binding.
10. Secure the loop. With the pot holder wrong side up, anchor the loop ends beneath one section of the binding and pin.
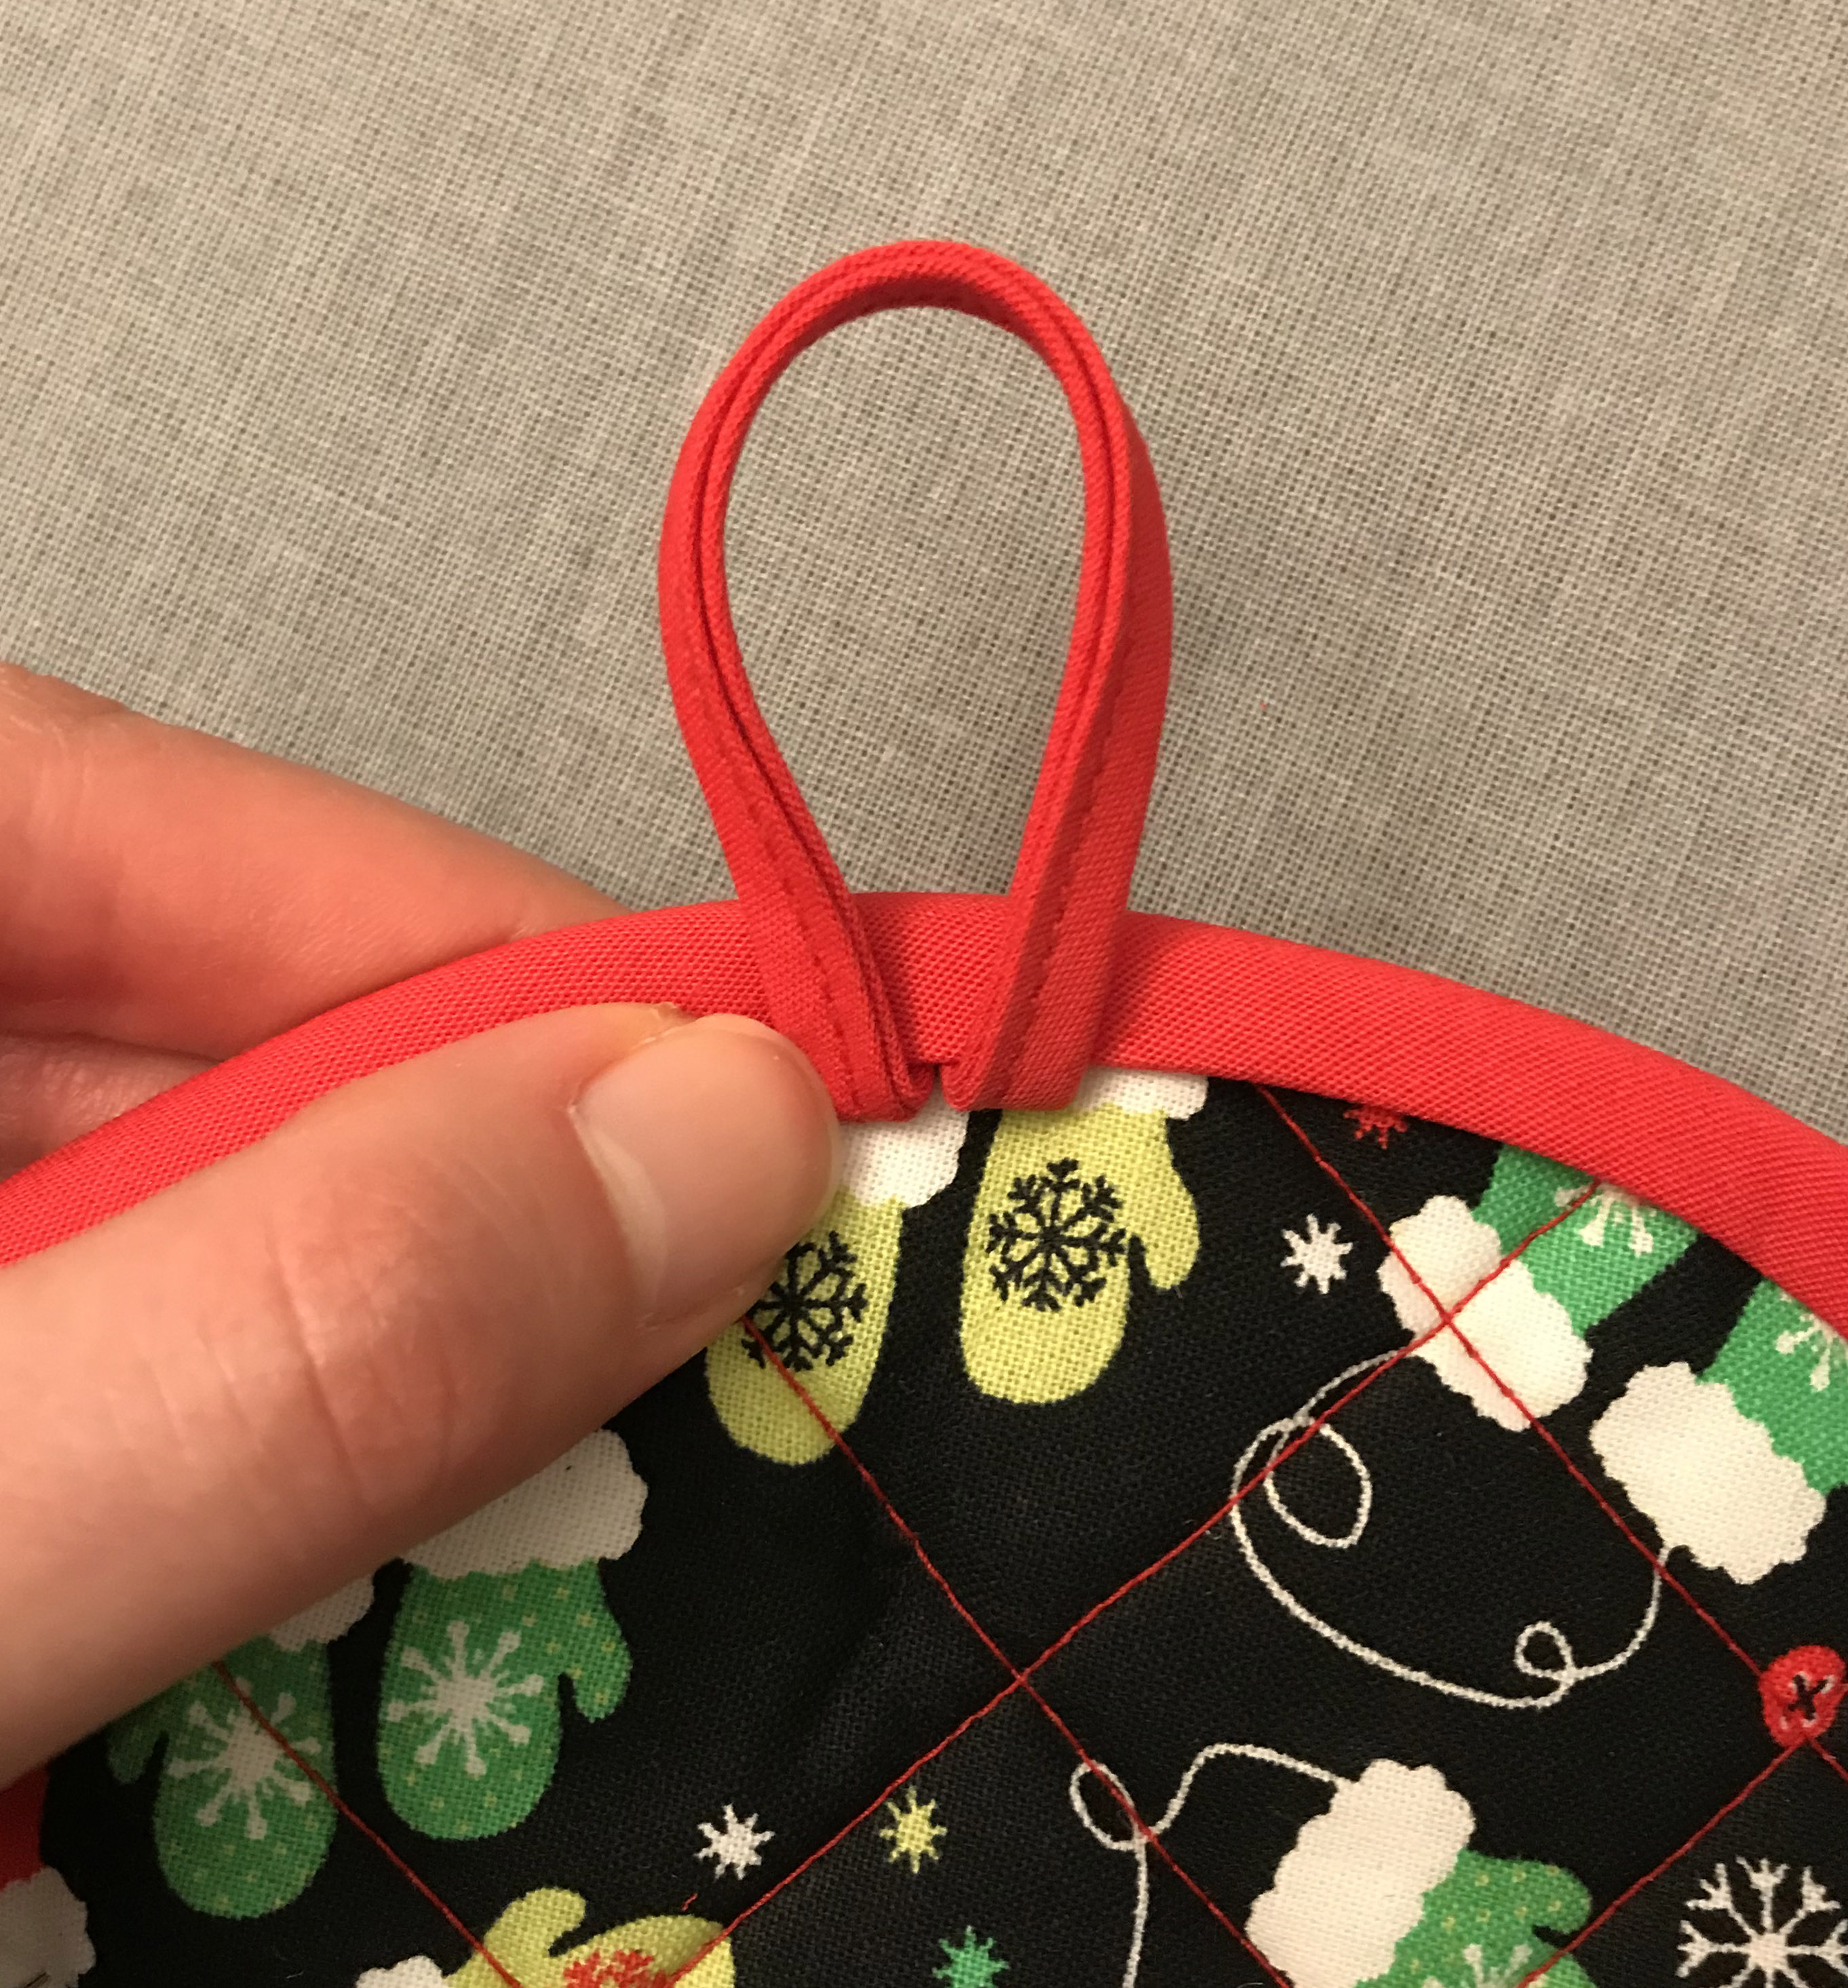
11. Sew the binding. With the pot holder right side up, carefully edgestitch around the circumference along the inside binding edge. Make sure to catch the underside fold and the loop ends as you sew. The pot holder is now complete.
Do you have the perfect fabric print for a pot holder? Who in your life would most appreciate this gift? Please share your comments below.
View PDF


amazing