
How to Drape the Hip Detail from a 1940s Gown
Figure out how to create this gorgeous, yet enigmatic, dress detail
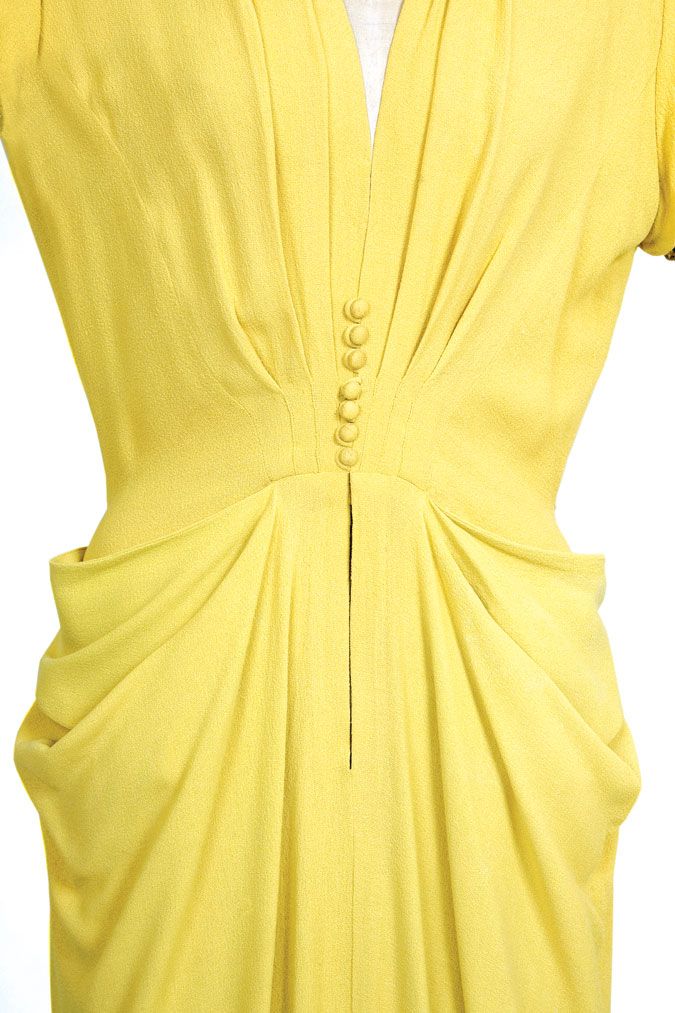
Of all the details on this 1940s gown, the draped hip stands out the most. Reminiscent of chiseled stone gowns of classic Roman sculpture, this shape is mysteriously achieved to fool the eye with architectural fabric engineering—also know as pattern manipulation. See how it’s done from this article from Threads #155.
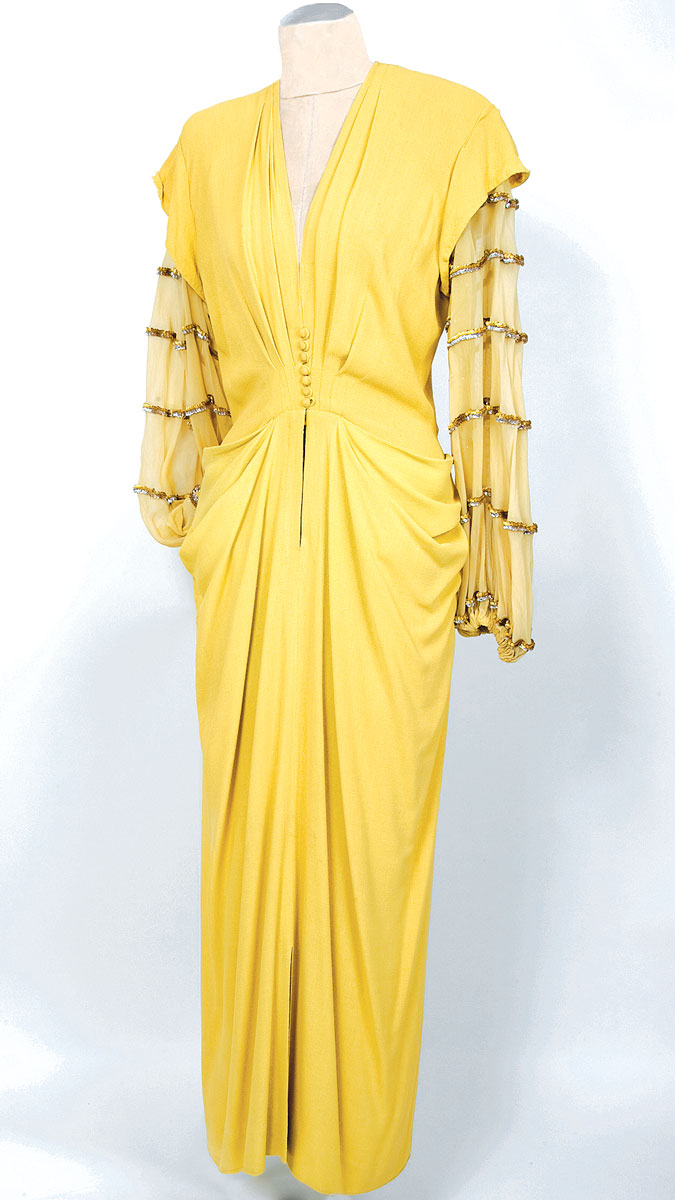
It’s always a joy to solve the puzzle of how a beautiful detail goes together. The vintage draped-hip gown shown on the back cover is a particular challenge. Try your skills at resolving the mystery by covering the right page, and play along as we sleuth out how this fabulous hip drape was made.
What’s known
 The front and back bodice construction can use any pattern with a center front-opening style. A full back bodice pattern is used, but you’ll remove the front bodice sides to accommodate bodice side panels, which are extensions of the skirt. The goal is to duplicate the hip drape; we are not including the bodice pattern in these directions.

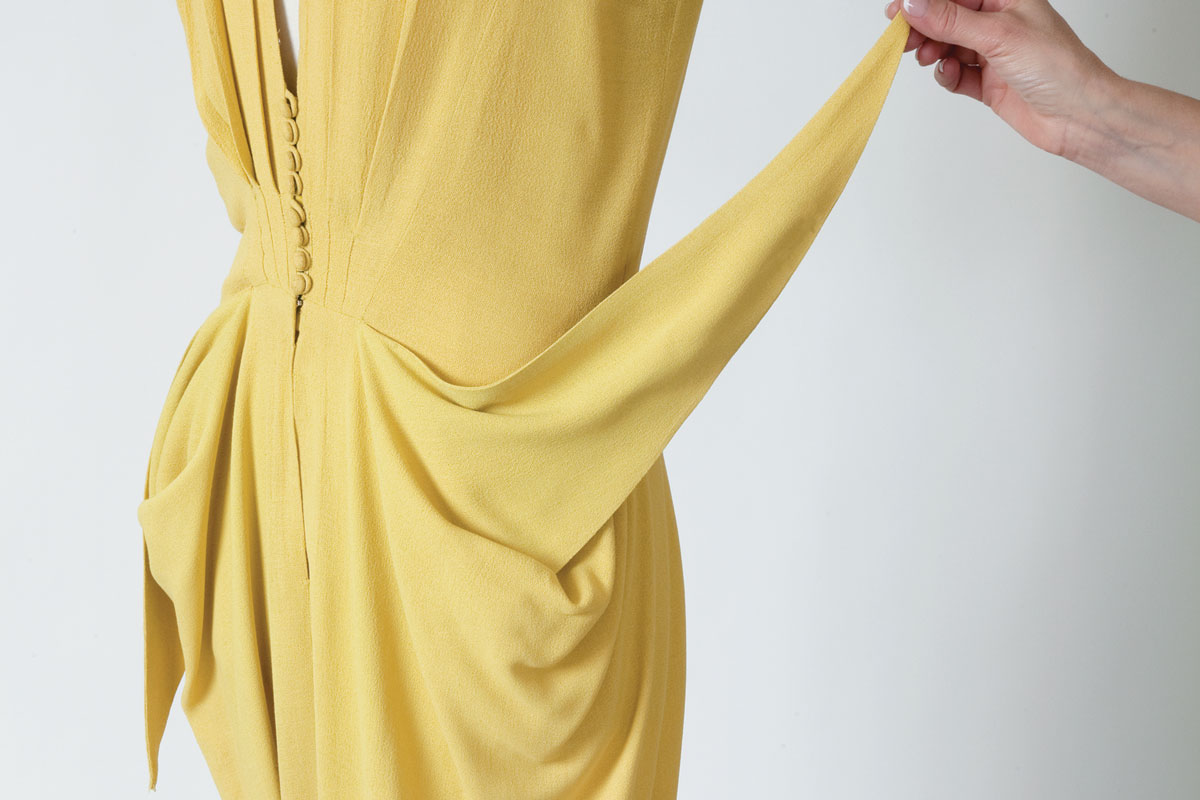
A cone-shaped projection wraps around the dress. The two cone points hook together at the center back. The cone forms the first two folds in the drape. Notice that the cowl draping at the hip doesn’t continue on the back.

The cone is the length of the bodice. The cone’s center-facing edge is on-grain.

What to do with what you know
All the information you need to solve this puzzle is there. Like any solution, it seems simple when it’s done.
1. Put lines in place. Mark the center front and waist on your dress form.

2. Mark 4.5 cm away from the center front on the waist seam. Then mark a diagonal line from that point to about two-thirds below the shoulder point on the armscye.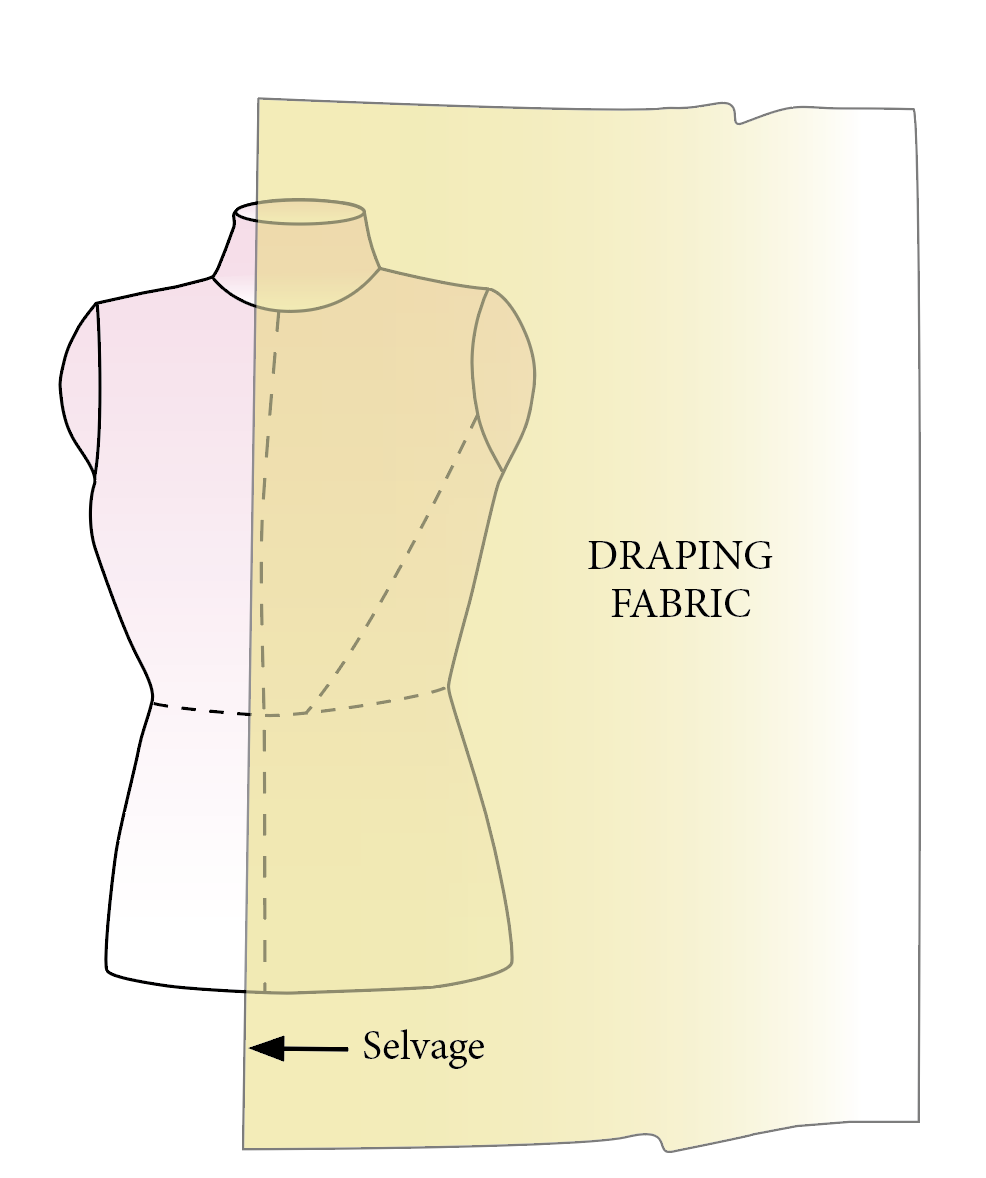
3. Position the draping…
Start your 14-day FREE trial to access this story.
Start your FREE trial today and get instant access to this article plus access to all Threads Insider content.
Start Your Free TrialAlready an Insider? Log in


Log in or become a member to post a comment.
Sign up Log in