

My first step in the men’s suit repurposing challenge was to locate and purchase a suit. After poking around a few local thrift stores and being disappointed with the selection and relatively high prices, I headed to eBay. This online marketplace had much more to choose from. I wanted a striped wool, and wool flannel rather than worsted, as the former is easier to tailor.
The selected men’s suit

The suit I purchased—for less than $30, shipping included—is a gray flannel pinstripe manufactured by the renowned American brand Southwick. The design of its union label suggests that the suit was created in the late 1990s.

The size was a 44 Regular and the pleated pants were 36 inches by 30 inches, so it was worn by someone relatively short and portly. I chose a large size so I’d have more fabric to work with after dismantling the suit.


My intention was to use the Southwick suit to create a Forties-style, World War II-era women’s suit. Due to fabric rationing during the Second World War (wool, in particular, was needed for uniforms), wives were encouraged to remake their husband’s suits into suits for themselves. Instructions could be found in Make Do and Mend-type pamphlets, as well as some sewing patterns of the era. A pattern envelope might even specify what size men’s suit would be needed to create a women’s suit of a particular size.
I used vintage Advance pattern 4229 as my base pattern, but I made design changes to the jacket and the skirt.


The first step was to disassemble the Southwick suit. I needed large sections of fabric unbroken by pocket openings or darts. The largest pieces of fabric I harvested were from the pants and the back and sleeves of the jacket.

Laying out the pattern
I used the back of the men’s suit for the back of the new suit, and the sleeves of the men’s suit for the sleeves of the new suit. All the other pieces were drawn, randomly, from other parts of the original suit.


Altering the pattern’s design
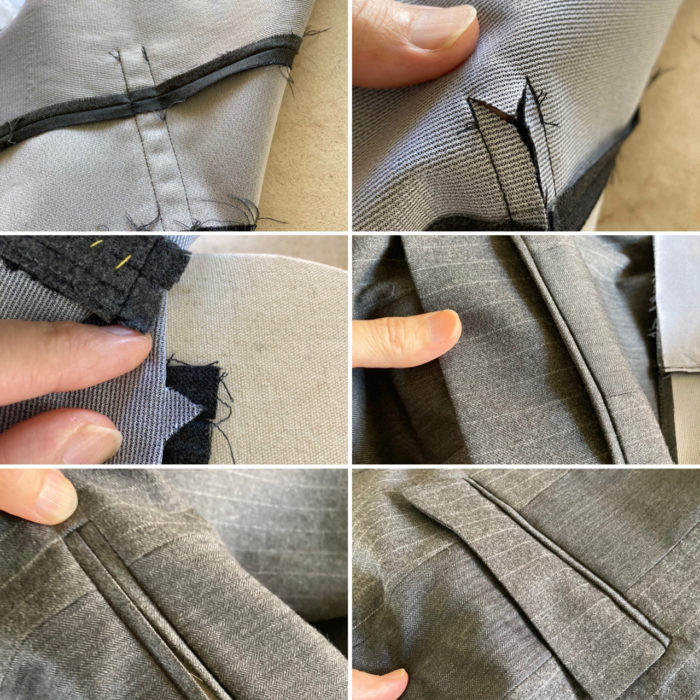
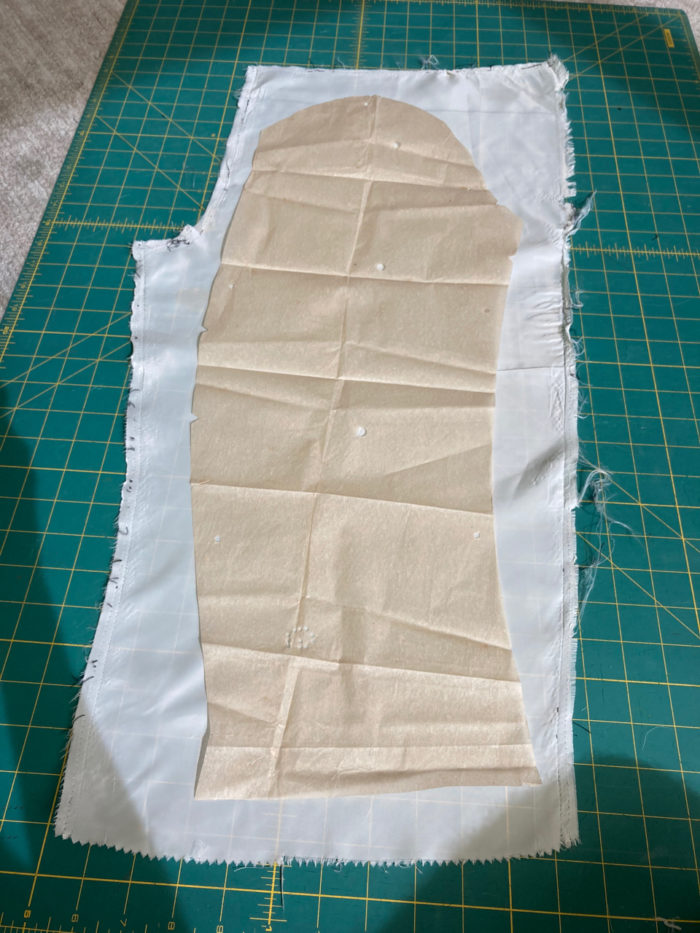
I redesigned the jacket by shifting the dart placement using the slash-and-spread method. As drafted, the jacket front was entirely one pattern piece (below), with one shaping dart at the neck, another running from the hem to just below the bust, and a third originating under at the armhole and ending at the waistline pocket, in the place where a side-panel seam might be located. This is a non-printed pattern, so these darts are marked on the pattern with perforations. If you examine the original pattern envelope, these shaping darts are easy to see.

First, I lengthened the long, wide dart that started at the hem and ended at the bust. I extended the dart beyond the bust all the way up to the armhole, creating a full princess seam that includes the shaping of the original dart.
Next, I closed the neck dart, shifting the dart to the side.

I continued to slice across the new dart past the center-front line to create a horizontal seamline dividing the front piece into an upper piece and a lower piece. Finally, I turned the second long dart, which originally started at the armhole and extended to the waistline, into a separate side back piece. Where needed, I added seam allowances.
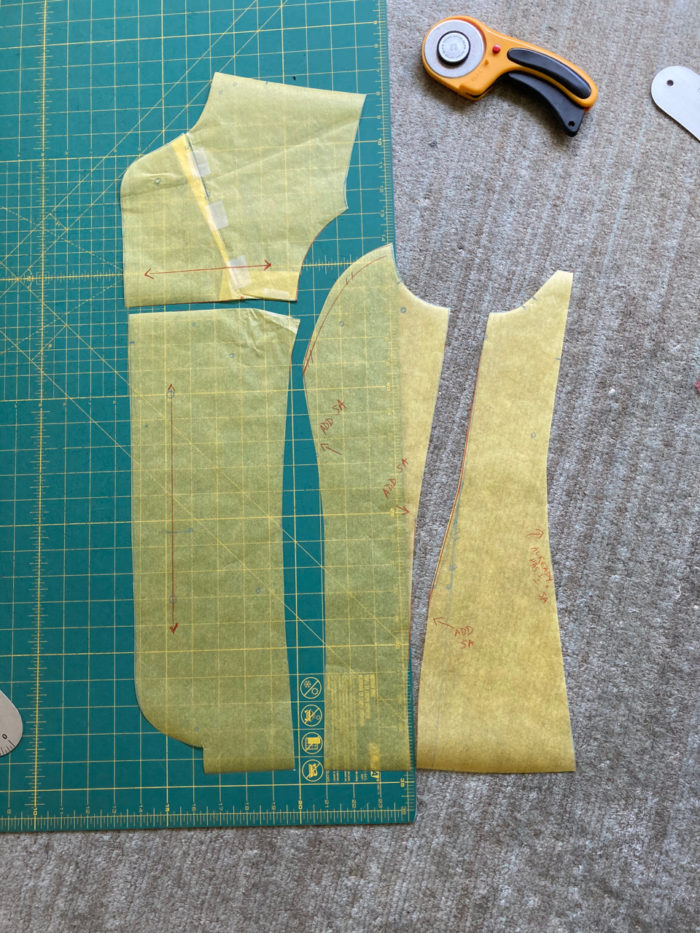
I wanted the stripes on my jacket front to run vertically and horizontally. The smaller pattern pieces allowed me to play with this placement. I was inspired by 1940s menswear-inspired striped women’s suits designed by Hollywood costume designers like Edith Head and Robert Kalloch, as well as vintage patterns like the Vogue reproduction below (V2199).

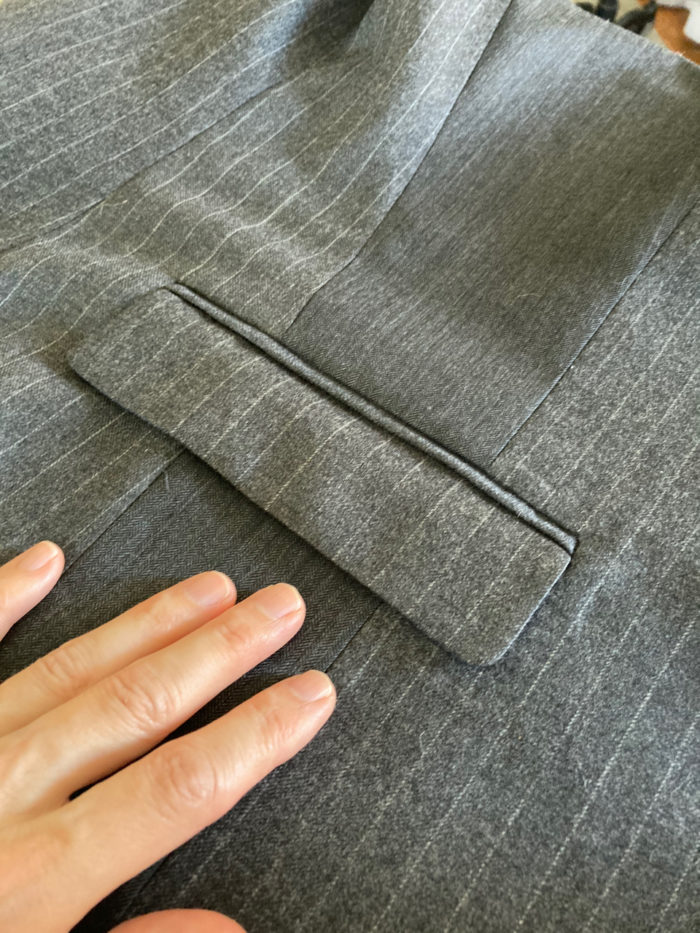
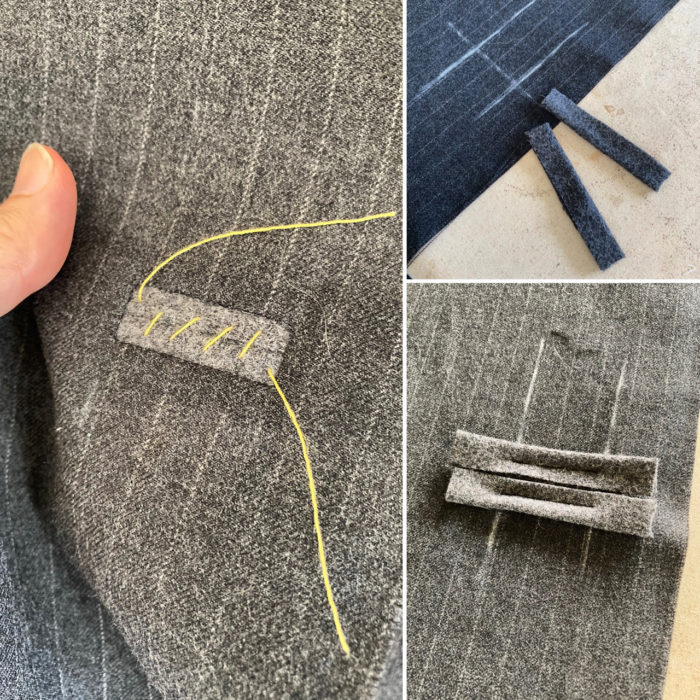
Keeping the original suit’s welt pocket flaps
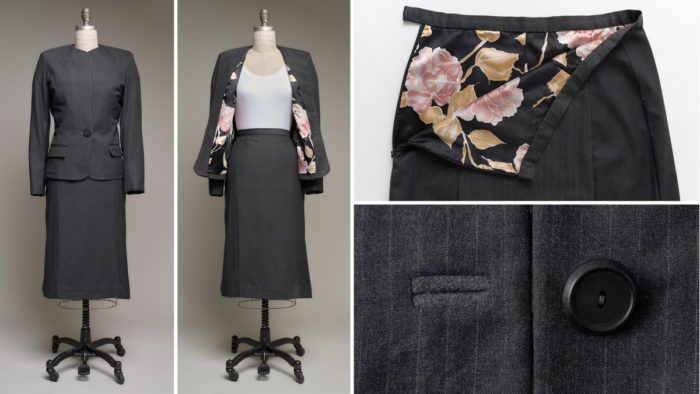
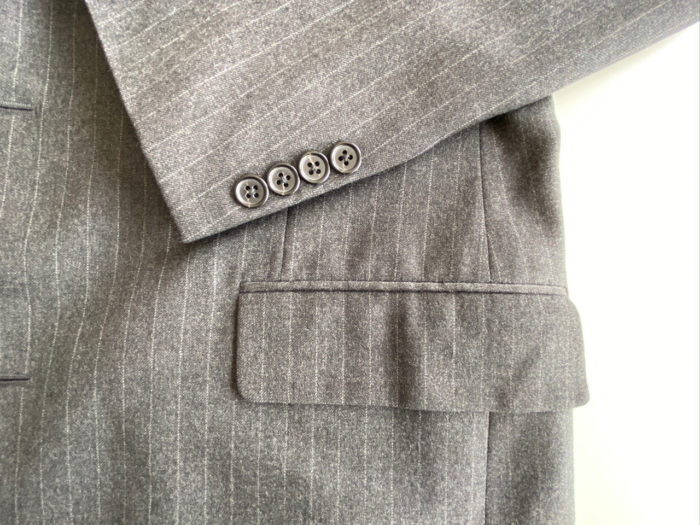
I tried to incorporate a few of the original suit elements. I created double-welt pockets and inserted the original pocket flaps.
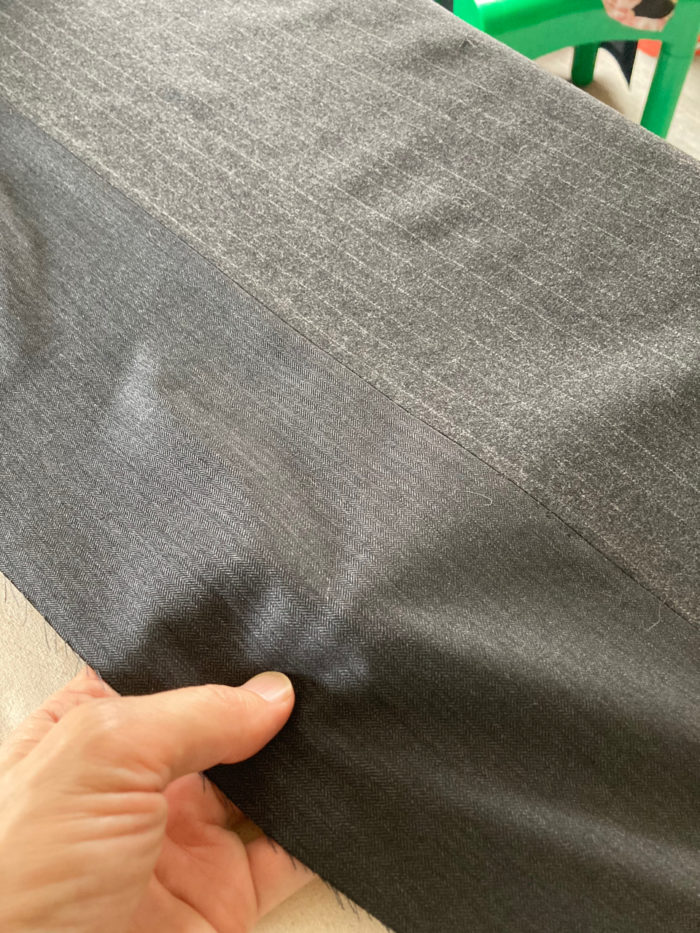
Solving the fabric shortage
Due to the large number of darts and exterior pockets on the Southwick suit jacket, I wasn’t able to harvest enough fabric for the entire 1940s suit. Therefore, for the side-front and side-back pieces of the jacket and the skirt, I used a dark gray wool from my stash. It’s close in color but with a twill weave.

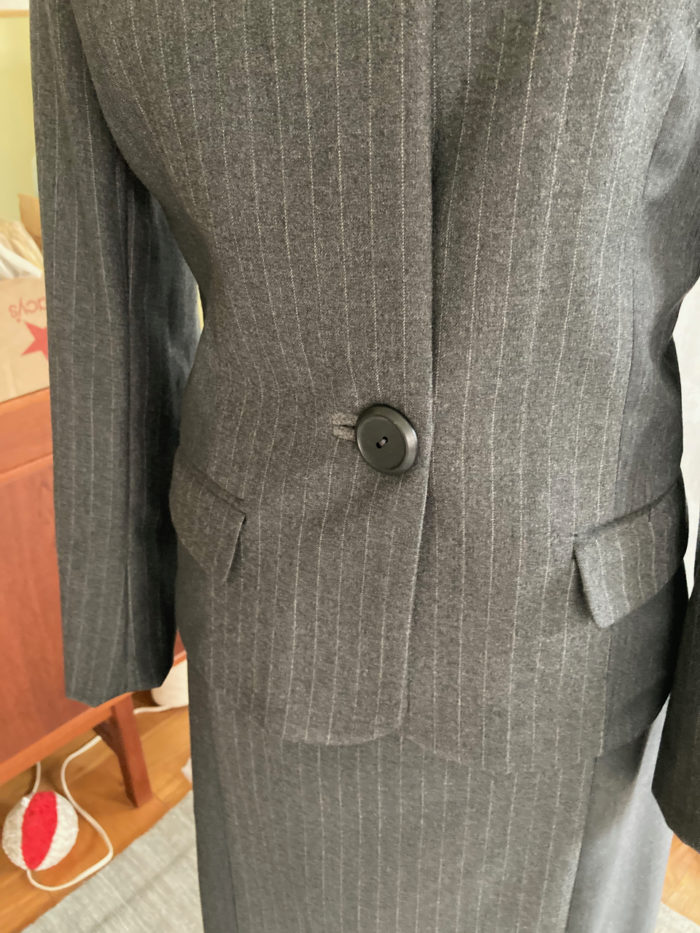
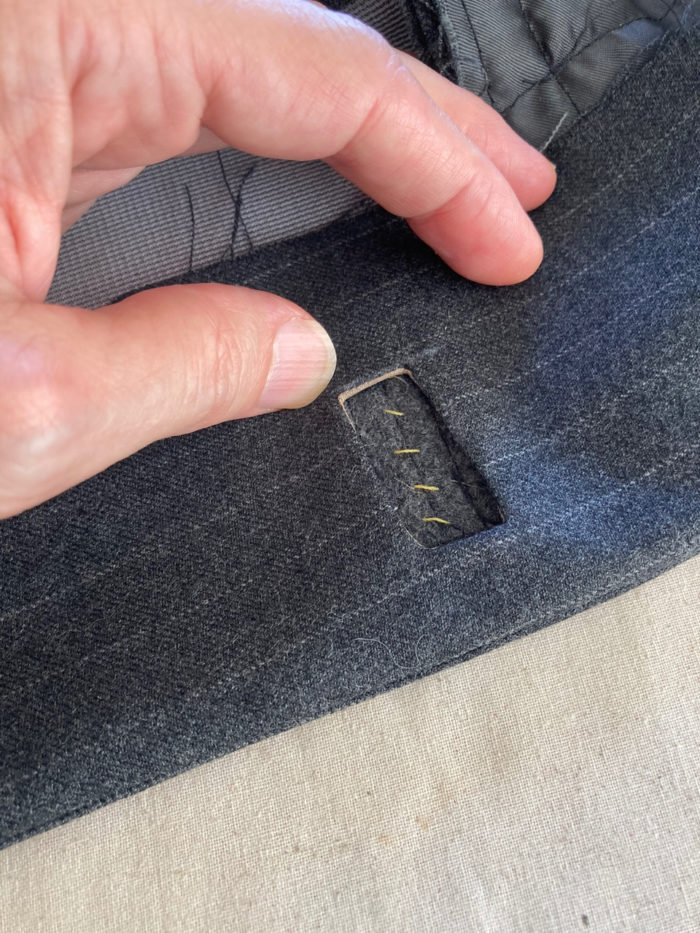
Creating a front closure
The front closure of the jacket is a single button and a bound buttonhole, which I made in a paler gray wool for added contrast.


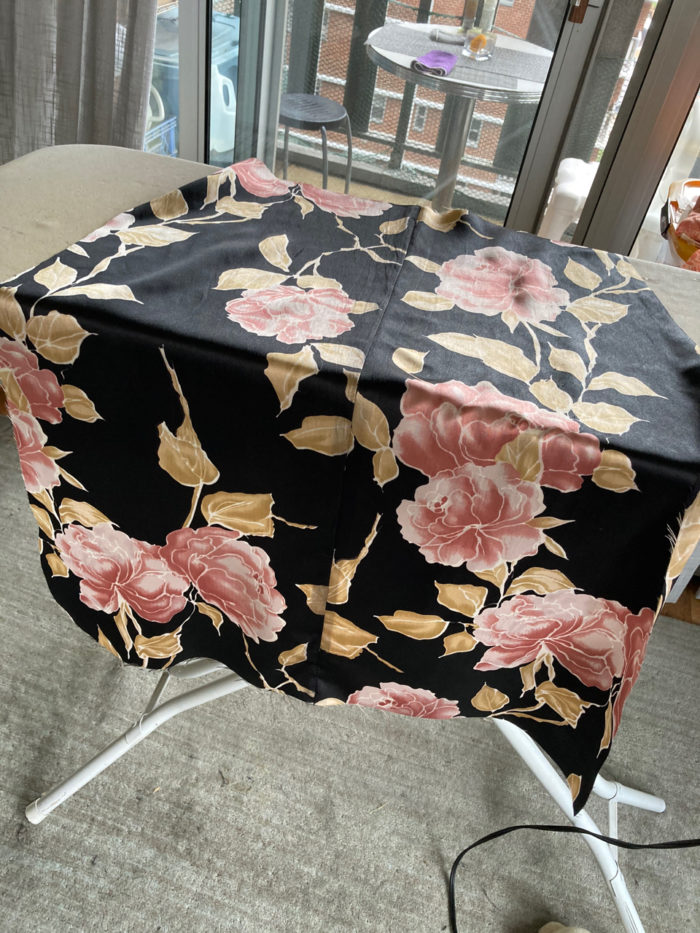
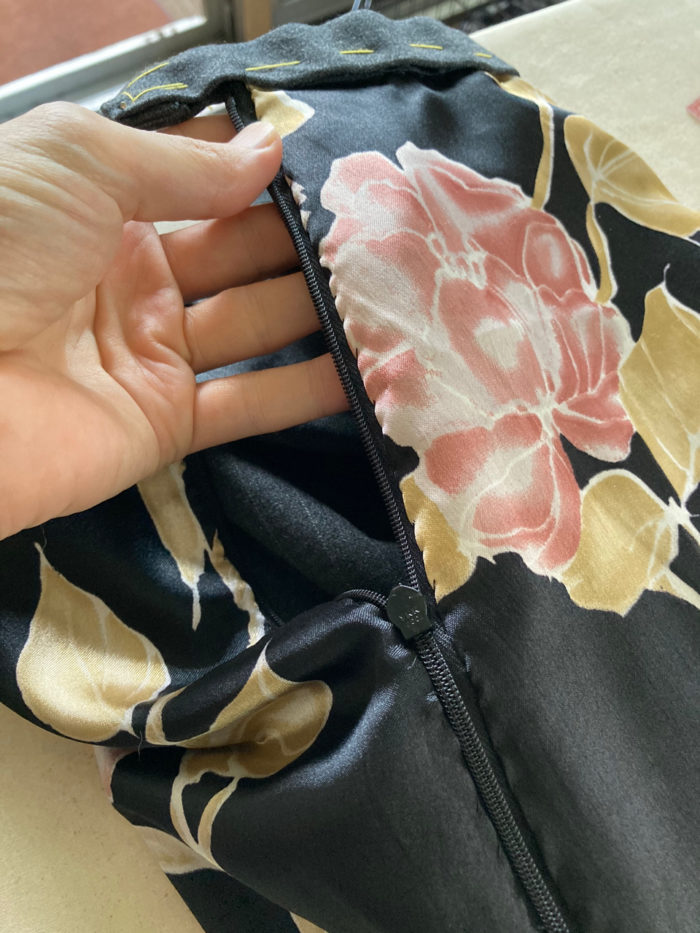
Choosing and sewing in a lining
The lining for the jacket and skirt is a bold floral polyester charmeuse I purchased long ago at the Chelsea flea market in Manhattan. I used the original suit lining to line the sleeves.
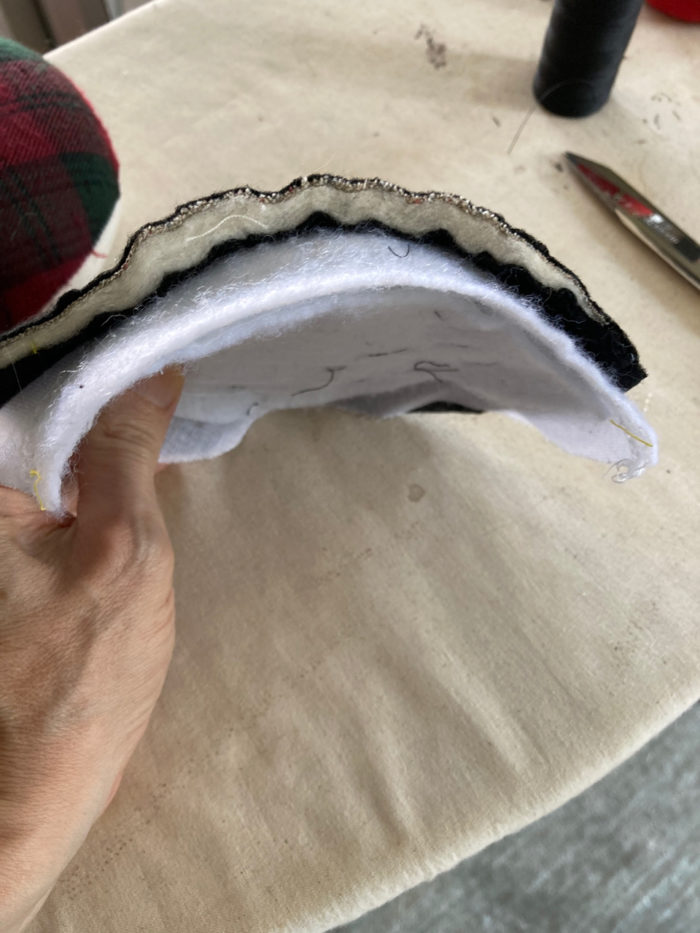
I also used the original shoulder pads, and I doubled their size by adding another pair I purchased in New York’s Garment District.
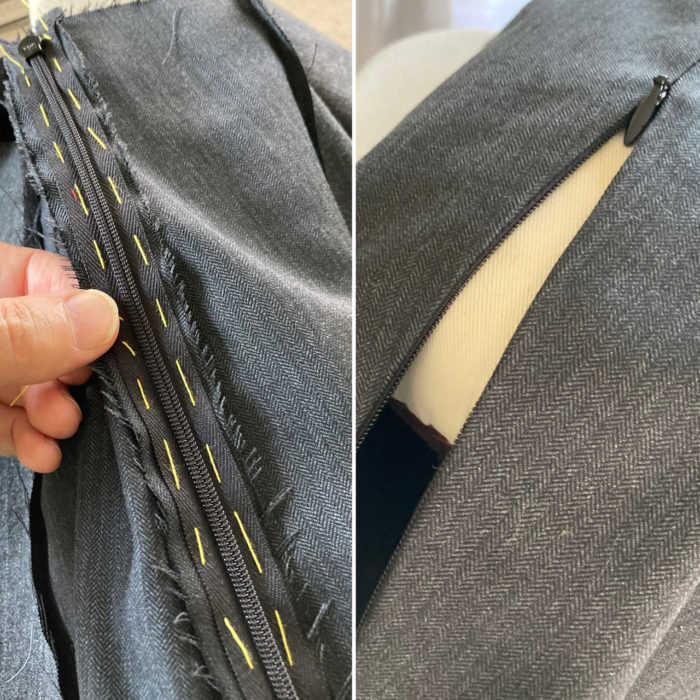
I followed Kenneth D. King’s excellent tutorial (available on YouTube) to insert the invisible zipper in the skirt. Then I attached the lining by hand.


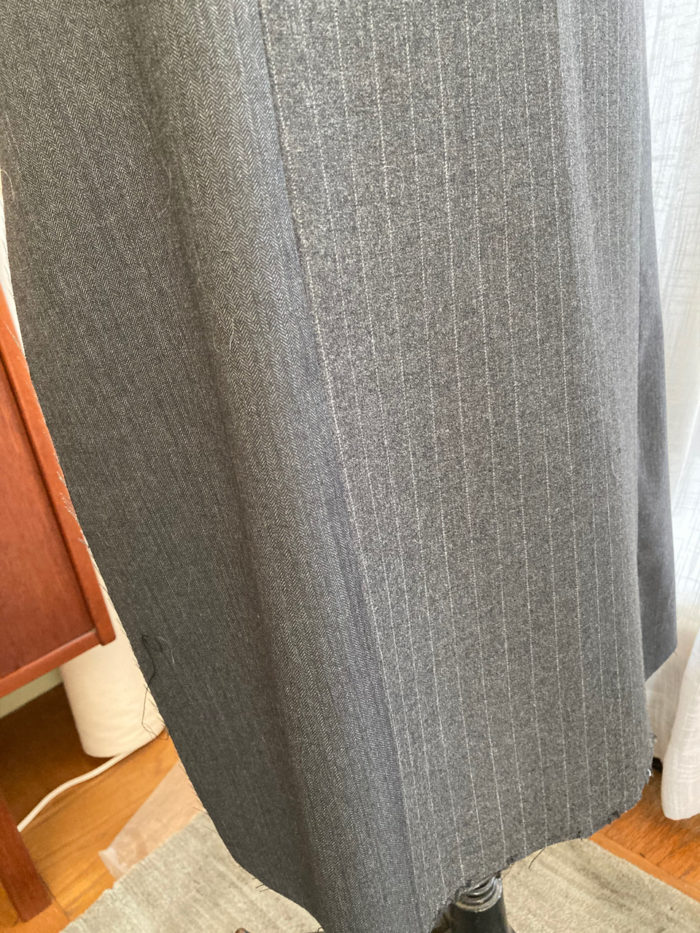
The completed skirt has six panels: the center-front panel and center-back panel are cut from the striped flannel, and the front and back side panels are cut from the solid gray twill. The slightly darker gray creates a slimming look to the silhouette, an unexpected benefit.
Fusible interfacing lesson
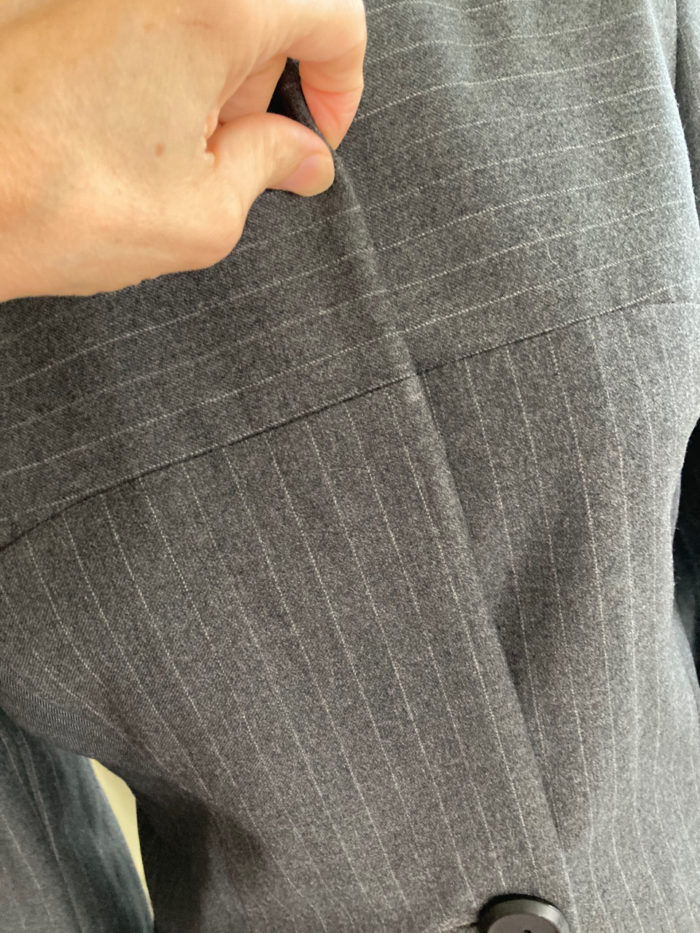
Overall, I am happy with the result. I wish I had used tailoring canvas for the center-most front panel as the fusible interfacing I opted for (to get a crisp result) didn’t adhere as well as I’d hoped. Why? Perhaps the the fabric had been dry-cleaned in the past and there was some chemical residue. As a result, the jacket needs to be touched up with a hot iron to restore its crisp look more than it otherwise would. Live and learn.

My friend Melinda graciously agreed to model the new suit for me. She wears it well and captures the period, with the help of a wonderful hat.
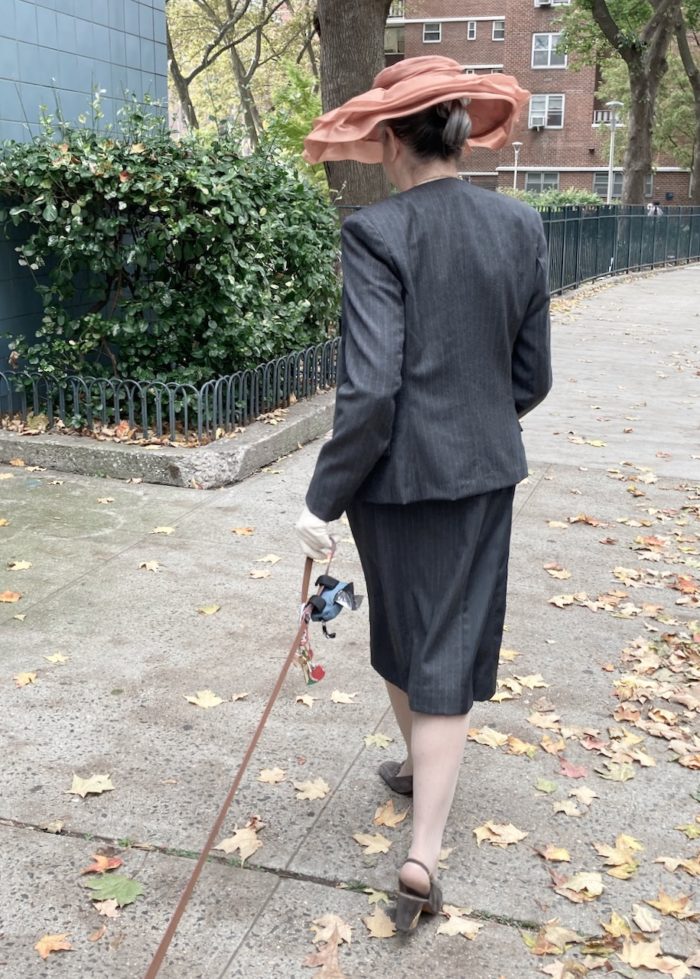
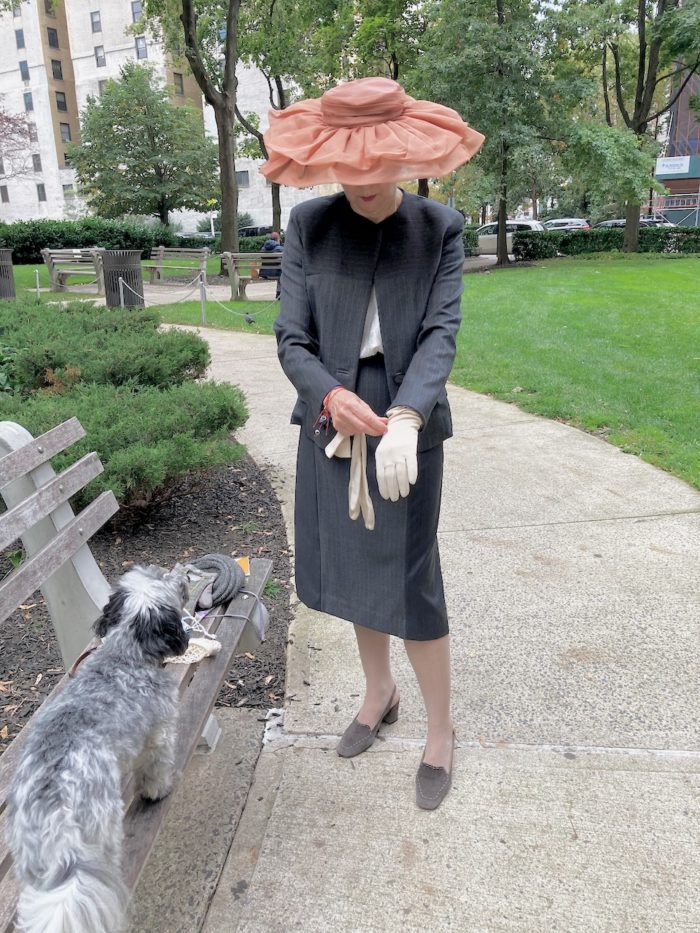
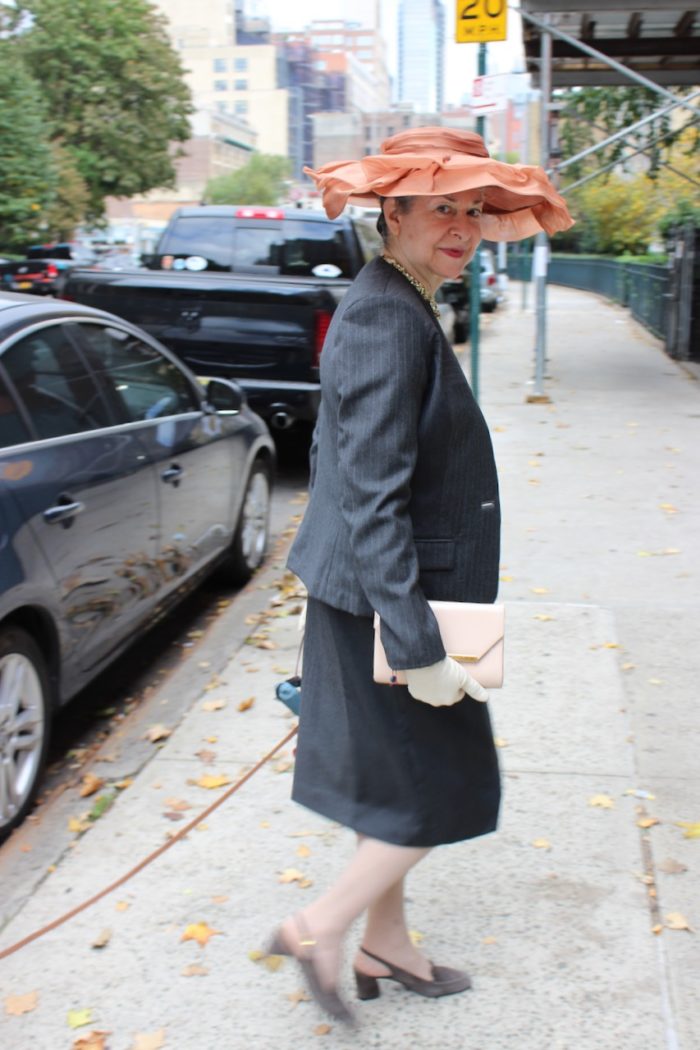
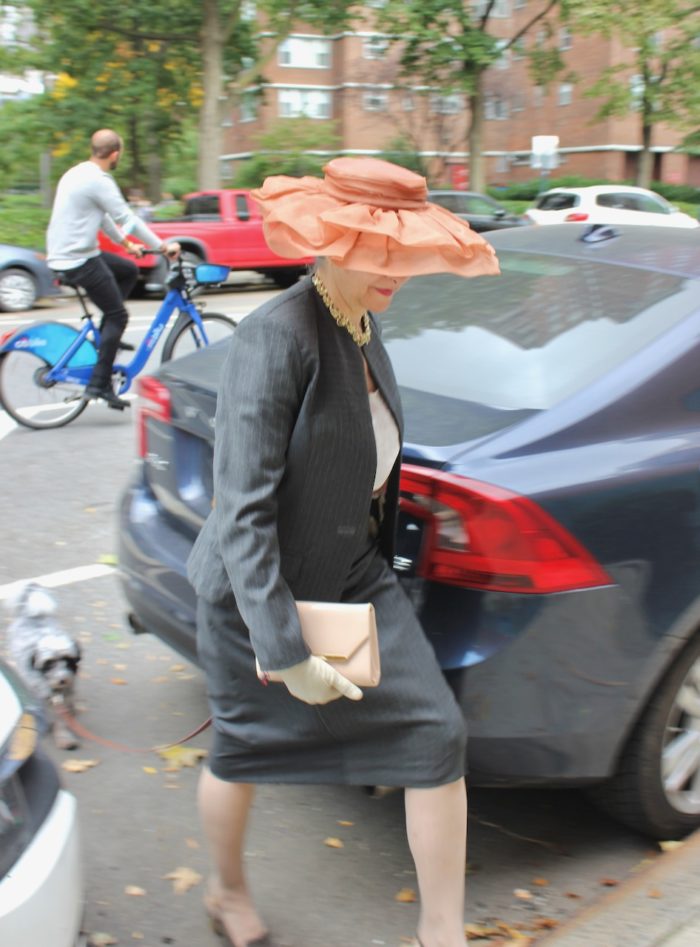
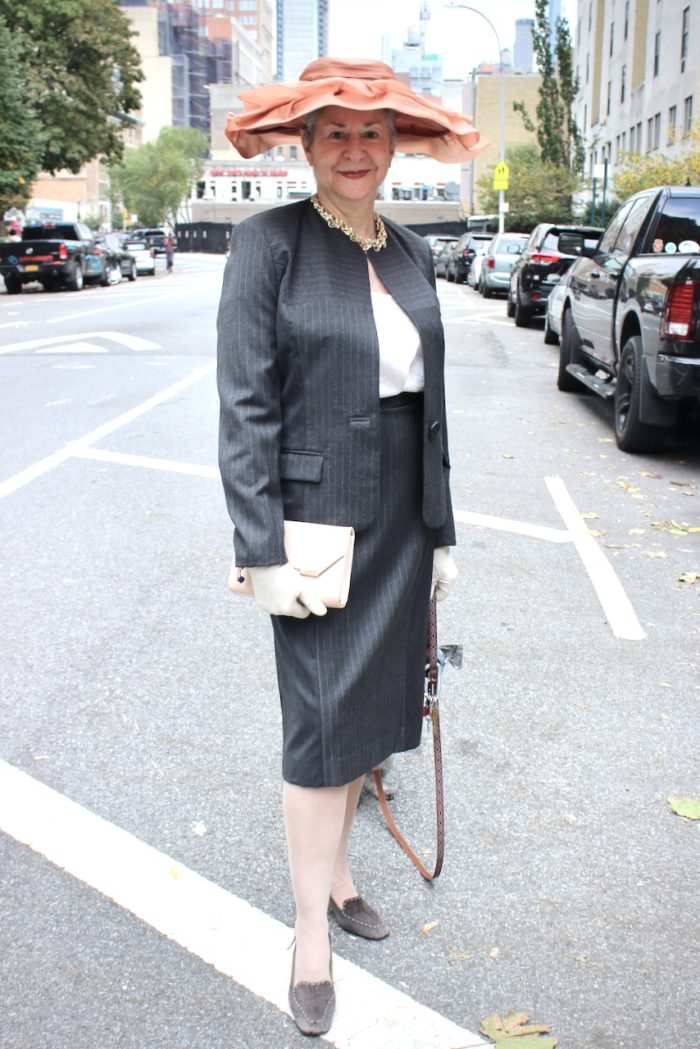
And that’s how I created my World War II-era women’s wool suit. It was a creative challenge and a fun dive into traditional ladies tailoring techniques.
See two more men’s suit transformations from Threads digital ambassadors:
Becky Fulgoni created business overalls with a complementary jacket for herself;
Pamela Howard created a complex, multipiece ensemble using a large men’s suit as the basis.
Which of the three men’s upcycled suits is your favorite?
Photos courtesy of Peter Lappin, except where noted.


Hi Peter, I wanted to congratulate you on your beautiful Upcycle Challenge garments!
Best wishes,
Pam Howard
Thanks so much, Pam -- this was a fun challenge and it's great to see what you and Becky created as well -- hope we get to do this again in the future!
What a wonderful upcycle! You have made something that would have been gorgeous on a Hollywood star of the 40s - or on my mom. Elegant, flattering, and timeless. I would have preferred a slightly smaller hat, perhaps one of those that my mom favored which looked sort of like a soldier's cap (I won't use the slang term.) with a feather in it. Keep up the great work.
Thank you!