
Update Your Clothes: Add a Feather Boa Trim
Tips for attaching this embellishment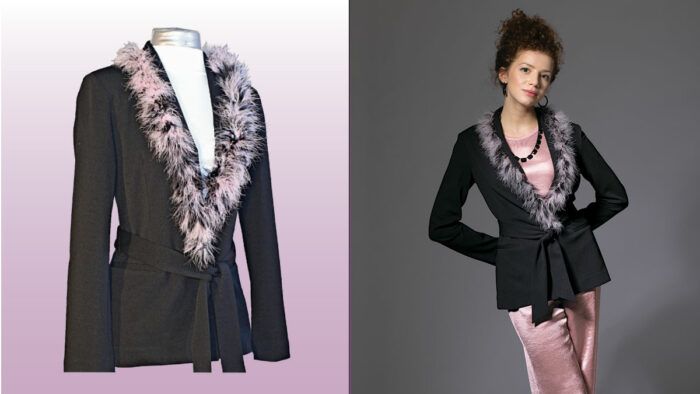
Feathers can add flamboyance to a hem, emphasis to a shoulder, and excitement to a neckline. That’s why feathers are the embellishment showing up on fashion runways for fall.
Wispy, weighty, soft, spiky, fluffy, stiff, short, long, sleek, downy: All these adjectives describe feathers. Additionally, feathers can be dyed, trimmed, curled, or beaded, creating a huge array of choices for the designer.
One of the easiest ways to incorporate feathery fun into your wardrobe is with premade feather boas. I’ll show you how attaching a boa to a jacket’s lapel can add movement, sophistication, elegance, and a touch of whimsy.
Pick Your Plumage
 From individual feathers to the fluffiest boas, you have options for adornment.
Feather structure
All birds have several kinds of feathers, each with different characteristics and different purposes: Some are downy; others, like the tail and flight feathers, are less pliable. Birds are shaped differently and move in different ways, and so their feathers vary, too: long, sleek, and stiff, or short, fuzzy, and soft.
There are four types of feathers:
- Down feathers to trap air for insulation.
- Body feathers that cover the down feathers, for waterproofing, coloration, and contouring.
- Wing feathers for flying.
- Tail feathers for balance, steering in flight, and mating displays.
All feathers have the same parts. The shaft, or rachis, is the spine. Branching off the spine are the barbs, and branching off the barbs are the barbules. Together, the barbs and barbules make up what we think of as the feathery part. At the bottom of the feather are fluffy flues. Collectively, the barbules, barbs, and flues form the vane. The hollow part of the rachis, where no flues or barbs grow, and where the feather attaches to the bird, is the quill.
Boa varieties
To make a boa, feathers are sewn, braided, or glued to a cotton cord, making a fluffy scarf. Each cord is a “ply.” Multi-ply boas have multiple cords of feathers twisted together.
There are many characteristics to consider when selecting boas: the kind of feathers, their quality, the quantity of feathers used (indicated by the number of plies), the boa’s diameter and/or weight, and the finished length. You’ll find boas in a full gamut of natural and dyed hues.
The number of plies can vary from one to 18. The marabou boa used in the jacket on the facing page is a one-ply, 2-1⁄2-inch diameter version, but marabou boas are available with up to six plies, and a 10-inch diameter.
Depending on the feather source, size, and boa style, boas can cost less than $10 to more than $75. Generally, the fluffier the boa, the more it costs. Full boas typically weigh more than those with narrow diameters.
Boas are often made from rooster and turkey feathers, which offer a wide variety of textures and lengths. These are the most affordable options. Ostrich-feather boas are much costlier, and they may be too big to work as trim on a garment.
Boa selection
It’s easy to fall in love with the look of a certain boa, but it’s important to choose one that will work with the garment you’re embellishing. I tested two options.
This white-and-black-tipped chandelle boa is 2 yards long, 6 inches to 8 inches in diameter, and weighs 2.8 ounces. Fluffy chandelle boas are made from small turkey feathers called flats, which are shredded to add volume. This boa overwhelms the jacket’s narrow lapel.

This medium-weight marabou feather boa is 2 yards long and 2-1⁄2 inches in diameter. Its feathers are small, downy fluffs, named for their original source, the marabou stork, but today sourced from roosters and turkeys. This boa complements the lapel.
Wrangle the Feather Trim
It’s not difficult to turn a boa into trim. Managing the fluff can be fiddly, but that same fluff hides your stitches.
Handle with care
Minimize shedding. As soon as you take a feather boa out of the bag, it sheds. Shake the boa in a large bag or outside, to minimize the loose feathers floating around your workspace.
Fluff with steam. Steam the boa to reshape any barbs that were crushed or bent in shipping. The steam also returns the feathers to their fluffiest, shiniest state.
Tease the feathers. Look for any sparse spots along the boa. With a straight pin, tease out the barbules (the fluffy parts) that have been caught in the cord’s braid to fill in those spots.
Locate the cord. The more plies a boa has, the harder it is to find the cords in the center. Slicking back the feathers with a little water on your fingertips helps.
Skip straight pins. Use safety pins or quilt clips to hold the boa in place; straight pins get lost in the feathers.
Observe the nap. Just as with a napped fabric, you want the boa’s nap to go in the same direction along both sides of the jacket’s lapel. You’ll need to piece the trim at the center back to achieve this.

Prepare the boa

1. Measure the garment. Decide where you want the boa to end on the jacket front: at the break point of the lapel, at the waist where the belt is positioned, or at the hem. In this example, the boa will end at the waist where the belt is positioned. Measure the total length of the lapel placement line, and note the half-measurement, from center back to the lower end point.
2. Measure the boa. Not counting the unfeathered bit of the base cord, measure the boa to the half-measurement length plus 1⁄2 inch. Mark this location with a safety pin. Measure along the boa to the remaining lapel length plus 1⁄2 inch, and mark with a safety pin.
3. Prepare to cut and piece the boa. Before you can cut the boa to the desired length, you need to stitch the cord to prevent it from raveling. At each safety pin near the center back, separate the feathers to expose the cord. Dampen your fingers to do so if necessary. Place a piece of tear-away stabilizer or two layers of tissue paper under the boa at the pin; this prevents the feathers from getting into the bobbin area when you sew.
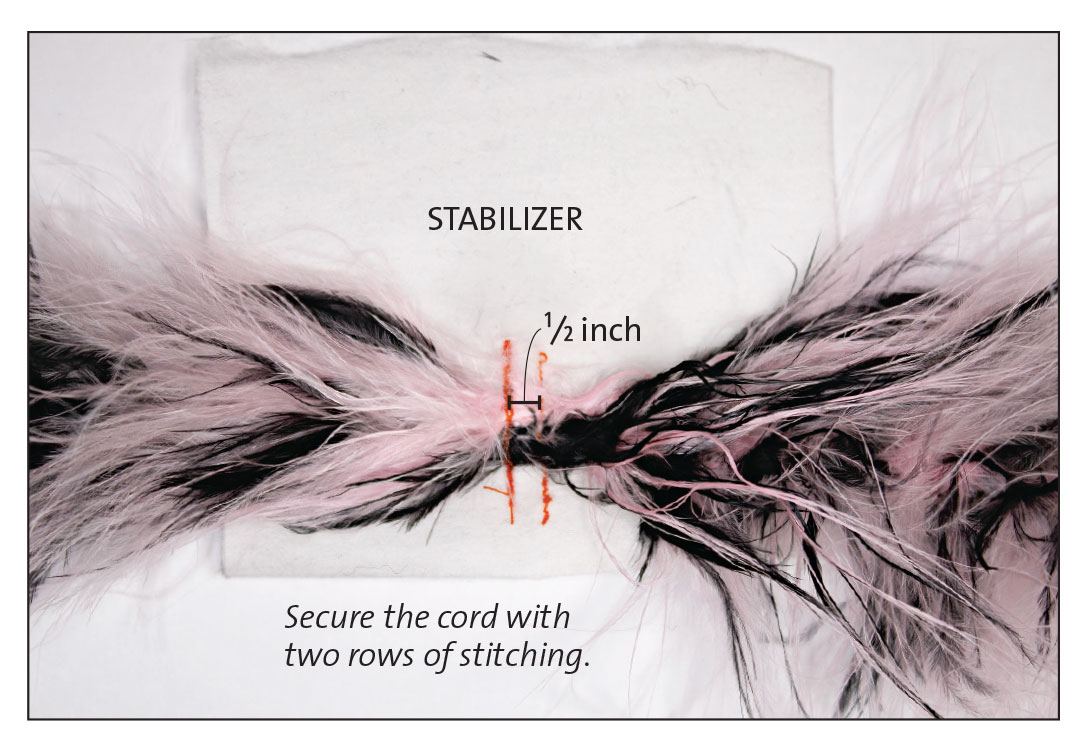
4. Stitch across the cord. Place the boa and stabilizer under the presser foot, remove the safety pin, and sew two parallel rows of small machine stitches across the cord, about 1⁄2 inch apart. Repeat at the remaining safety pin location.
5. Prepare to piece. Cut the boa’s cord between the stitched rows. Set aside the end that’s left beyond the measured sections. Turn the middle section in the opposite direction, and place it end to end with the first section; this meeting point will be at center back. These two sections should, together, equal the total lapel length you measured, and the nap should run in opposite directions in each side.
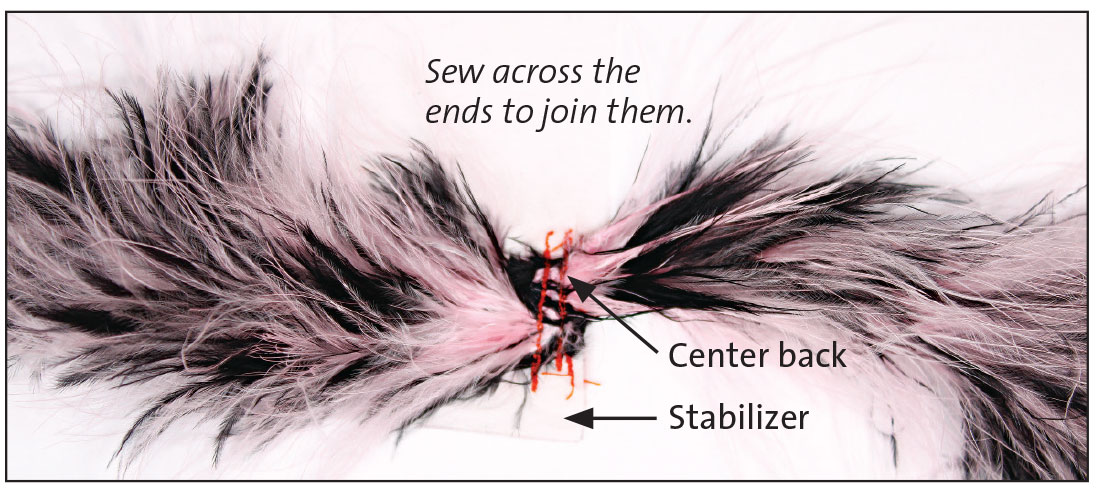
6. Join the ends at center back. Remove the stabilizer from one of the adjoining ends. Place this end behind the end that’s attached to stabilizer, tucking the ends as tightly as possible. Sew the join with short stitches; as you stitch, the presser foot pushes the loose boa end against the stabilized end.

7. Trim the stabilizer. Cut close to the stitches, leaving the section between the stitches in place.
Attach the trim

1. Pin or clip the boa to the collar/lapel edge. Use safety pins or quilt clips, and start by aligning the join at the center back. Work from the back to the boa ends. Align the cord along the wrong side of the lapel edge. If the boa is too long, shorten it as in “Prepare the Boa.”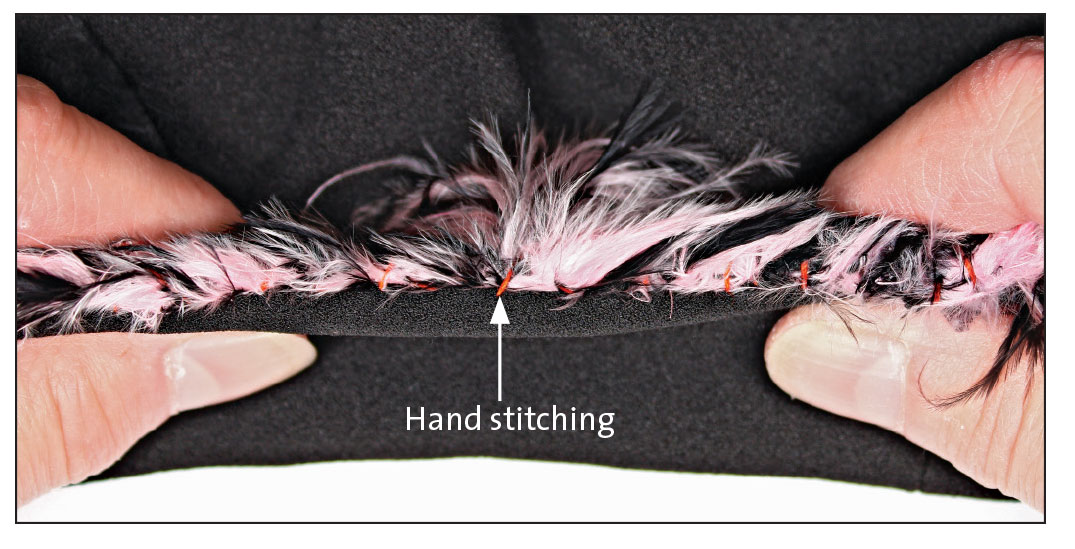
2. Hand-sew the cord to the lapel. Work with a double strand of thread that matches the feathers (contrasting thread was used below for visibility). Begin at the center back. If the stabilized join is tall, fold it in half and stitch it to itself before attaching it to the back collar. Guide the needle and thread through the feathers, sewing through or around the cord.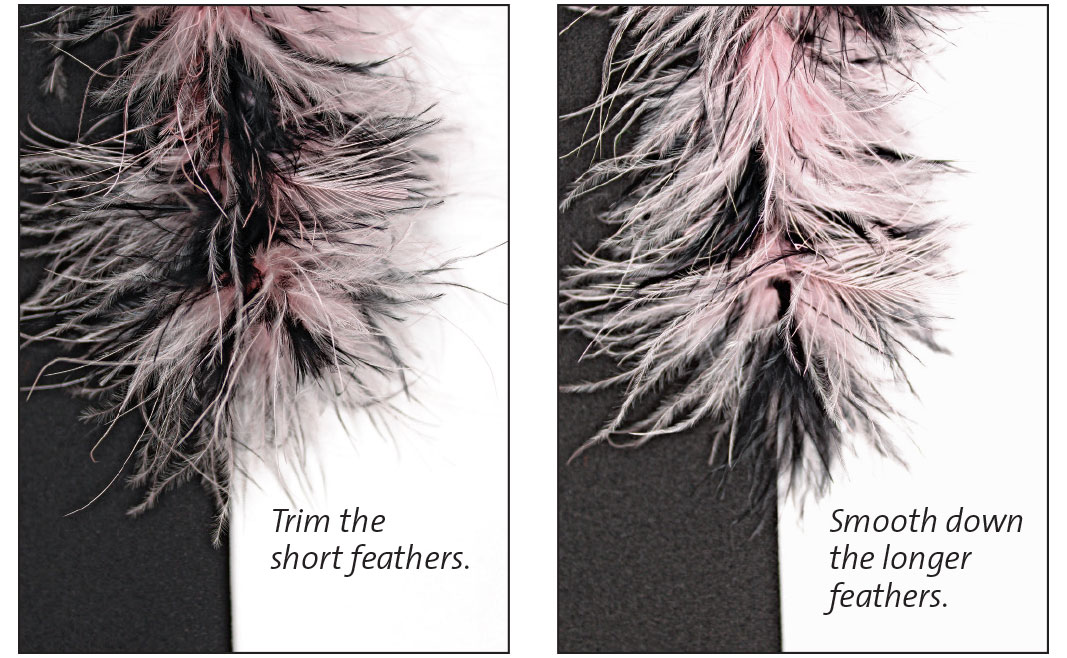 3. Trim the ends. At the boa’s tips, there are some short feathers in the center. Carefully trim away the short feathers and smooth down the longer ones.
 Ellen W. Miller is the author of Creating Couture Embellishment (Laurence King Publishing, 2017). CreatingEmbellishment.com
Photos, except where noted: Ellen W. Miller
For more photos and details, click on the “View PDF” button below.
From Threads #223
View PDF


Log in or create an account to post a comment.
Sign up Log in