
You Can Grow a Dye Garden
Plant, harvest, and prepare natural colors for fabrics
While visiting a nursery one early spring day, fashion student Libby Muth began collecting the many colorful blossoms that had fallen to the plant center’s floor. Could I do something with these beautiful spent flowers, she wondered? The question eventually led her to experiment with flowers and plants to create natural dyes for fabrics. Her effort included harvesting from a natural dye garden at her school.
You, too, can grow plants in your back yard or in a container garden to harvest and produce dyes for natural fabrics and garments. Whether you dabble in this practice or become a full-fledged devotee like Muth, you will need a few basic supplies plus some time and patience to watch the garden grow and then create the dyes.
Why cultivate living color?
Many natural dyers prefer the subtle, harmonious colors they extract from plants to those produced by synthetic dyes. They enjoy gardening and their connection to the earth. Some also use plant dyes in response to repeated warnings from environmentalists and findings from such institutions as the United Nations Environment Programme about how chemically made textile dyes continue to pollute water sources and the land, and, ultimately, to affect humans.
Whether it’s curiosity, creativity, or concern for the environment and themselves, natural dye gardeners are growing in numbers. Some plant and seed providers have taken the guesswork out of choosing plants that thrive in your region by offering seed kits or selections specifically for dyeing. For examples, check out Grand Prismatic Seed, Hudson Valley Seed Company, Strictly Medicinal Seeds, and The Woolery.
Benefits to extracting and using dyes
Once you grow and harvest the dye plants, it’s time to extract the dye and color your fabric. This part of the process is more of an art than a science, and the results may be unexpected. Because there are many variables to dyeing and ways you can shift the colors, you want to be open to the possibilities.
“It’s so much fun to just be free in this process,” says Muth, now a design coordinator at J. Crew. “Once you experiment a little bit, it’s great to read up on what mordants, what florals, what plants (to use), what’s easy to grow in what season and (in) what climate. That’s when you can get momentum and really teach yourself.”
How to Plant
Hudson Valley Seed Company in Accord, New York, offers some basic dye garden advice.
For beginners
Grow a few to several of the same plant. Try easy-to-grow marigolds or cosmos sulphureus, for example. A 4-by-4-foot plot would be enough for 4 to 10 plants. Alternatively, you can grow dye plants in raised beds or containers and flower pots. Note: Containers are always hotter and drier than the earth, so choose varieties that do well in hot and dry locations, such as yarrow and cosmos.

Planting considerations
Follow the spacing and directions listed on the seed packs of your chosen plants. Overcrowding plants can lead to disease, mildew and scraggly plants, so make sure you are giving them the spacing they require.
Every plant has unique requirements, so group together plants with similar needs.
Poor soil equals poor plants. However, compost cures most soil ills. It adds nutrients and texture and will help the soil hold water, or if your soil is too dense helps to amend that. If using a fertilizer, make sure you do not use a high nitrogen fertilizer for any flowering plants, as the nitrogen can inhibit flower growth. If growing a foliage plant such as Japanese Indigo where you are using the leafy growth and not a flower, a high nitrogen fertilizer would be ideal.
You can grow almost any plant anywhere. In hotter regions the planting season may be skewed, but most varieties can still be planted, says Crimson Krier-Glading of Hudson Valley Seed Company. “In New York, we plant out our marigolds in May. In Florida, they plant out in January or September.”

What to Plant
Among the endless dye plant options, these are often recommended. For more, see the Herb Society of America Dye Garden Plant List. Be aware that some plants may be noxious or invasive in certain regions and should not be grown. You can double-check with the National Invasive Species Information Center or the U.S. Department of Agriculture Invasive/Noxious plant database.
|
|||||||||
|
Plant |
What to Harvest |
When to Harvest |
Dye Colors |
||||||
|
Marigold (Tagetes spp.) |
petals, flower heads |
all growing season |
yellows and oranges |
||||||
|
Yellow Onion (Allium cepa) |
dried outer skins |
autumn |
yellows and browns |
||||||
|
Sulphur Cosmos |
flower heads |
when blooming |
yellows and oranges |
||||||
|
Tickseed/Dyer’s Coreopsis (Coreopsis tinctoria) |
petals, flower heads |
when blooming |
yellows and browns |
||||||
|
Hopi Black Dye Sunflower (Helianthus annuus macrocarpus) |
seeds |
autumn |
browns, purples, grays |
||||||
|
Pincushion/Black |
flower heads |
just after blooming |
purples, grays, greens |
||||||
|
Japanese Indigo |
leaves |
just before the flowers bloom |
blues and greens |
||||||
|
Dyer’s Woad (Isatis tinctoria) |
leaves |
when leaves are 6-plus inches long |
blues |
||||||
|
Madder (Rubia tinctorum) |
dried roots, 3 to 5 years after planting |
autumn |
reds and pinks |
||||||
|
Red Amaranth |
flower bracts, leaves, stems |
after color forms on the spikes |
reds and pinks |
||||||


Harvesting
Look for “juicy” flowers for fabric dyeing, Professor Sonia Roy tells the students in her textiles class at Marist College in Poughkeepsie, New York.
If she gets a lot of color from pinching a bloom, she knows it’s a good choice for the dye pot and for growing in the future, she explains.
Plant material from your garden can be dried and/or frozen until you have enough to create dye for a project. Students in the textiles class mix into their dyebaths just-picked plant material with flowers that were harvested earlier and then dried and frozen. While they see no significant difference in using dried dyestuffs, other natural dyers say they get subtler results from dried materials.

Extract the Dye
Now you can use your harvested plants to create natural dye.
Required amounts
You’ll need plenty of flower petals or cut-up flower heads and/or leaves and other plant material; figure on at least a 1-to-1 ratio of weighed plant dyestuffs to fabric. Then soak the plant matter overnight in a large pot before you heat, simmer, and steep it. Leaves need to soak for a few days to draw out the color before heating.

Dyeing with marigold (steps)
1. Add marigold petals to a large covered pot containing three times as much water as plant material. Bring it to a boil. Turn down the heat and let the pot’s contents simmer for one hour. Remove from the heat. Alternatively, add marigold petals to a pot and pour boiling water over them. Cover the pot, but do not heat or simmer.

2. Let the petals steep. Leave them in the water for at least one hour and preferably overnight.
3. Strain the mixture over a bowl or another large pot to separate the petals from the liquid. Compost or discard the plant matter. The dyebath is now ready for your scoured and mordanted fabric (see “Fabric Types and Scouring”).
Supplies
Dust mask
Gloves, waterproof and heat-resistant
Heat source
Measuring cups and spoons, nonreactive
Notebook
pH-neutral soap or gentle biodegradable dishwashing soap
pH strips
Pots and bowls, nonreactive stainless steel or glass in various sizes
Scale, to measure ounces, grams, and pounds
Strainer, stainless steel
Thermometer
Tongs, stainless steel
Water

Some Dyeing TermsColorfast, lightfast, or washfast—having a color that does not fade or run due to time, exposure to light, or washing Dyebath—solution containing dye Dyestuffs—flowers, leaves, skins, stems, roots, and other materials from which color is extracted Modifiers—ingredients that can shift a dye color. Examples: cream of tartar, white vinegar, baking soda, and chalk Mordants—metal- or plant-based, they are used to help fix or bind the dye to the fabric and create longer-lasting color. Examples: alum, iron, symplocos Tannins—categorized as clear, yellow, or dark, these substances help plant-based fabrics accept mordants and improve lightfastness. |
Safety First
Keep tools and supplies for natural dyeing out of the reach of children and pets, and do not use any of them for food preparation.
Wear heat-resistant, waterproof gloves and a dust mask throughout the process to protect yourself from the dyes, mordants, modifiers, and heat.
Work outdoors or in a well-ventilated area indoors.
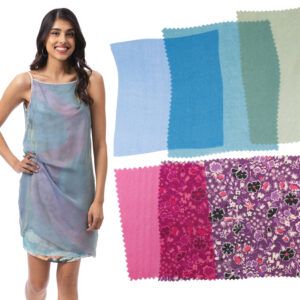
Create Naturally Dyed Fabric
Dyeing methods include hot- or cool-water dyeing, solar dyeing, and eco-printing. Each produces different results, including different colors from the same plant material. Before fabric is dyed, it must be carefully washed/scoured. It also is then treated through the process of mordanting, to make it more dye-absorbent.
Dyeing options
In her book, Natural Color (Watson-Guptill, 2016), dye expert Sasha Duerr says that “most plants and dye processes are immensely improved with heat.”
Try hot-water dyeing in a large pot. Another option is small-batch dyeing in one-liter mason jars, for when you want to create multiple colors at once: Several jars containing different dye colors are placed in a large (20-quart) pot of water over heat and fabric is dyed in each jar.
No matter which dyeing method you choose, you must first select and prepare the fabric to accept the dye.
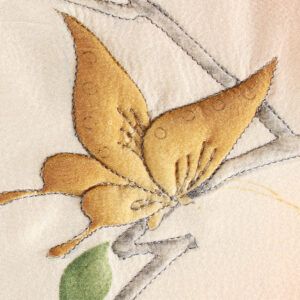
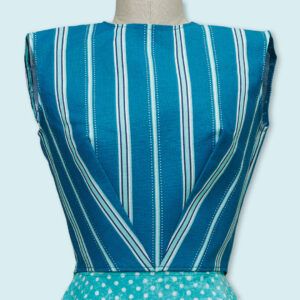
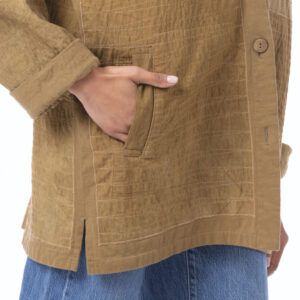
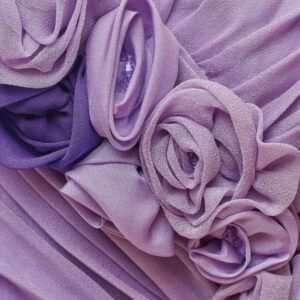
 |
 |
| Photos: Mike Yamin | |
Fabric Types and Scouring
Two types of fabric can be naturally dyed but require slightly different formulas for scouring.
Fabrics
There are protein- or animal-based fabrics, such as alpaca, cashmere, silk, and wool; and cellulose- or plant-based fabrics, such as cotton, hemp, linen, and ramie. All types must be scoured to remove wax, oils, and manufacturing finishes. The process may need to be repeated if the rinse water is not clear. First, weigh the dry fabric, then wet it thoroughly. Set it aside.
Scouring formulas
Prepare the scouring solution using the following ratio for every 4 ounces of dry fiber or fabric, according to BotanicalColors.com.
Plant-based fabrics:
1/2 teaspoon soda ash (washing soda) dissolved in hot or boiling water.
1 teaspoon pH-neutral soap (Synthrapol or unscented dishwashing detergent)
Animal-based fabrics—silks:
1/4 teaspoon soda ash, dissolved in hot or boiling water
1/4 teaspoon pH-neutral soap, dissolved in separate water
Animal-based fabrics—wools:
1/5 teaspoon pH-neutral detergent (Eucalan or Orvus WA paste), dissolved in boiling water
Add the ingredients to a large, nonreactive pot filled with enough room-temperature water to cover the fabric. Stir. Submerge the wet fabric into the pot. Heat the pot slowly, bringing the temperature to 160°F (71°C) for silk or to 180°F (82°C) for wool and plant-based fabrics, rotating the fabric gently. Hold at the temperature for 30 minutes. Remove and rinse the fabric until the water runs clear.

Mordant the fabric
Mordanting helps make the dye more colorfast and lightfast. For the best results, it is done before the fabric is dyed.
Formula
Roy recommends her students use this formula, per 4 ounces of dry fiber:
1-3/4 teaspoons alum dissolved in boiling water
1-1/2 teaspoons cream of tartar, dissolved in boiling water, for
brighter colors
Add the separately dissolved alum and cream of tartar to a large pot of cool water (at least 4 gallons for every pound of fabric). Stir well. Submerge the wet, scoured fabric in the pot and heat slowly to the simmering point (185°F is a slow simmer).
Simmer for one hour. Stir gently periodically, while keeping the fabric submerged. Turn off the heat and keep the submerged fabric in the pot for at least two hours and preferably overnight. Remove the fabric and rinse it thoroughly in cool water. For silk, remove the pot from the heat as soon as it reaches the simmering point, then keep the fabric submerged for 12 hours.
After the overnight soak, remove the fabric from the pot and add it to the dye pot, or air-dry it and store the fabric until you are ready to dye it.
Note on using tannins
Treating plant-based fabrics with a tannin solution before mordanting helps it better accept the mordant and, ultimately, improves dyed fabrics’ colorfastness and lightfastness. Examples of natural tannins are acorns, oak galls, sumac, and tara powder. For more information on creating and using a tannin bath, consult any of the books in the “Resources” below.

Color the treated fabric with extracted dye
Submerge the scoured and mordanted fabric into the natural dyebath (see “Extract the Dye” above). Heat the pot to simmering, not boiling, and hold the temperature at a simmer for 60 minutes. Turn off the heat and remove the fabric from the dyebath to cool, or leave it to cool in the dyebath overnight.
Then rinse out the excess dye, and air-dry the fabric outdoors away from the direct sun.

Tips
Test your water pH. The pH and minerals in your water influence the colors you can achieve, says Sara Larson Buscaglia, in her book, Farm and Folk Quilt Alchemy (Abrams, 2023). A pH of 7 is neutral. If it is high, or basic (8 to 14), you can lower it with vinegar. If it is low (0 to 6), or acidic, you can raise it with washing soda/soda ash. You can use rainwater or distilled water for greater control.
Take detailed notes every step of the way. Write down when you planted and harvested, how much water and plant material you used, the dye temperatures and lengths of time to simmer and steep, mordants and modifiers used, etc.

Avoid shocking the fabric with temperature extremes. Let the solutions containing the fabric heat and cool slowly.
For more even dyeing, always wet the fabric thoroughly in water before scouring, mordanting, or dyeing it. Also give the fabric plenty of space to move around the pot. Buscaglia says in her blog at FarmAndFolk.com that a 3-gallon (12-quart) stainless steel pot “is a nice size vessel for dyeing one-yard lengths of fabric at a time.”
Supplement: How to Care for Naturally Dyed Fabrics and Garments
Plant-based (cellulose) fabrics are more likely to fade than those that are animal-based (protein). However, natural dye experts point out that proper fabric prep before dyeing, dye plant selection, and dyeing technique all play a role in textiles retaining a dye color. The following practices also help.
Wash only when necessary, and keep wash water at or below 86°F (30°C).
Use only a small amount of gentle, pH-neutral detergent such as Synthrapol, Ecover Bio laundry detergent, Dr. Bronner’s Unscented Pure-Castile Liquid Soap, or dish soap.
Avoid washing with a heavy-duty or scented detergent, and do not use bleach. Also, do not apply stain removers directly to the fabric.
Air- or line-dry the washed fabric out of the sunlight. Alternatively, place in the dryer on a low-heat setting.
The following articles offer more detailed information about caring for naturally dyed fabrics and garments:
“Caring for Botanically Dyed Textiles” from Rowan Lane Fibres
“FAQ: Washing and Caring for Plant-Dyed Clothing” by Rebecca Desnos, published February 25, 2020
“Washing and Caring for Plant-Dyed Clothing,” by Kathryn Davey, published March 14, 2023
Resources
Online
“Grow Your Own Color: Best Plants For Natural Dyes” by Mari Stuart, Mother Earth News, published February 8, 2021″Planting your Natural Dye Garden for a Full Palette of Natural Colours” from Joybilee Farm
“List of Dye Yielding Plants for the Natural Dyer” from Textile Indie
Natural Dyes for tutorials, from Maiwa Handprints, Ltd.
RebeccaDesnos.com for classes, books, blog, free resources, etc.
SashaDuerr.com for books, workshops, plant palettes, etc.
Anna Carolyn Meier, natural dye artist and teacher
Botanical Colors, natural dye supplier, also offers workshops
The following were shared by Libby Muth, the fashion student who experimented with natural dyes for her senior collection:
Books
Farm & Folk Quilt Alchemy by Sara Larson Buscaglia (Abrams, 2023)
![]()
A Garden to Dye For by Chris McLaughlin (St. Lynn’s Press, 2014)
Grow Your Own Colour by Rebecca Desnos (2023)
Journeys in Natural Dyeing by Kristine Vejar and Adrienne Rodriguez with Sarah Ollikkala Jones (Abrams, 2020)
Natural Color by Sasha Duerr (Watson-Guptill, 2016)
![]()
Natural Dyeing by Jackie Crook (Lark Books, 2007)
![]()
Natural Dyeing with Plants by Franziska Ebner and Roman Hasenöhrl (Schiffer, 2018)
Jeannine Clegg is Threads’ managing editor, production.


Log in or create an account to post a comment.
Sign up Log in