
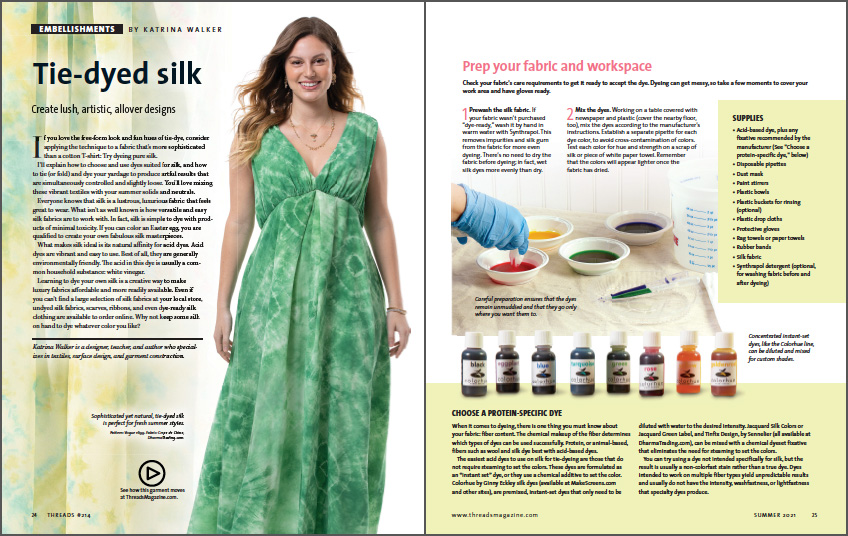
Tie-dye Silk to Create Artistic, All-over Designs
Create lush, artistic all-over designs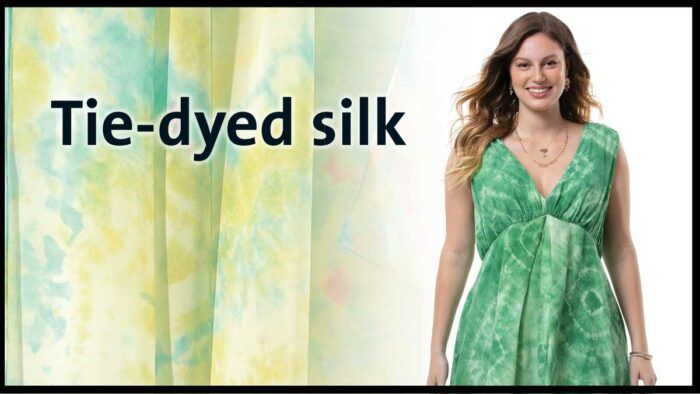
If you love the free-form look and fun hues of tie-dye, consider applying the technique to a fabric that’s more sophisticated than a cotton T-shirt: Try dyeing pure silk.
I’ll explain how to choose and use dyes suited for silk, and how to tie (or fold) and dye your yardage to produce artful results that are simultaneously controlled and slightly loose. You’ll love mixing these vibrant textiles with your summer solids and neutrals.
Everyone knows that silk is a lustrous, luxurious fabric that feels great to wear. What isn’t as well known is how versatile and easy silk fabrics are to work with. In fact, silk is simple to dye with products of minimal toxicity. If you can color an Easter egg, you are qualified to create your own fabulous silk masterpieces.
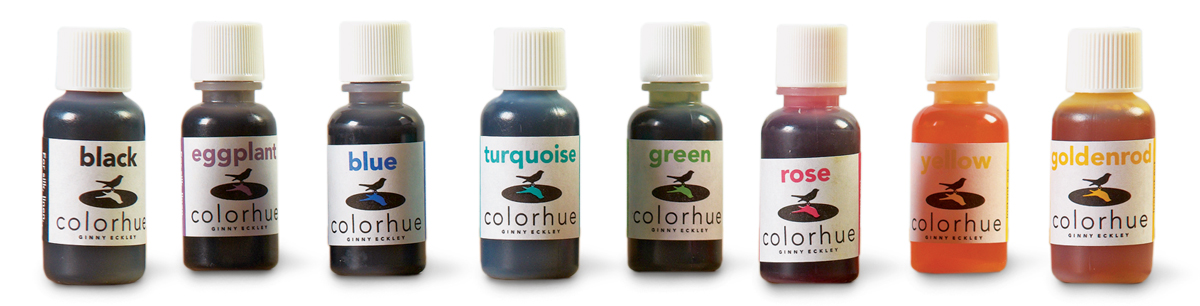
What makes silk ideal is its natural affinity for acid dyes. Acid dyes are vibrant and easy to use. Best of all, they are generally environmentally friendly. The acid in this dye is usually a common household substance: white vinegar.
Learning to dye your own silk is a creative way to make luxury fabrics affordable and more readily available. Even if you can’t find a large selection of silk fabrics at your local store, undyed silk fabrics, scarves, ribbons, and even dye-ready silk clothing are available to order online. Why not keep some silk on hand to dye whatever color you like?
Prep your fabric and workspace
Check your fabric’s care requirements to get it ready to accept the dye. Dyeing can get messy, so take a few moments to cover your work area and have gloves ready.
for custom shades.
Supplies
- Acid-based dye, plus any fixative recommended by the manufacturer (See “Choose a protein-specific dye,” below)
- Disposable pipettes
- Dust mask
- Paint stirrers
- Plastic bowls
- Plastic buckets for rinsing (optional)
- Plastic drop cloths
- Protective gloves
- Rag towels or paper towels
- Rubber bands
- Silk fabric
- Synthrapol detergent (optional, for washing fabric before and after dyeing)
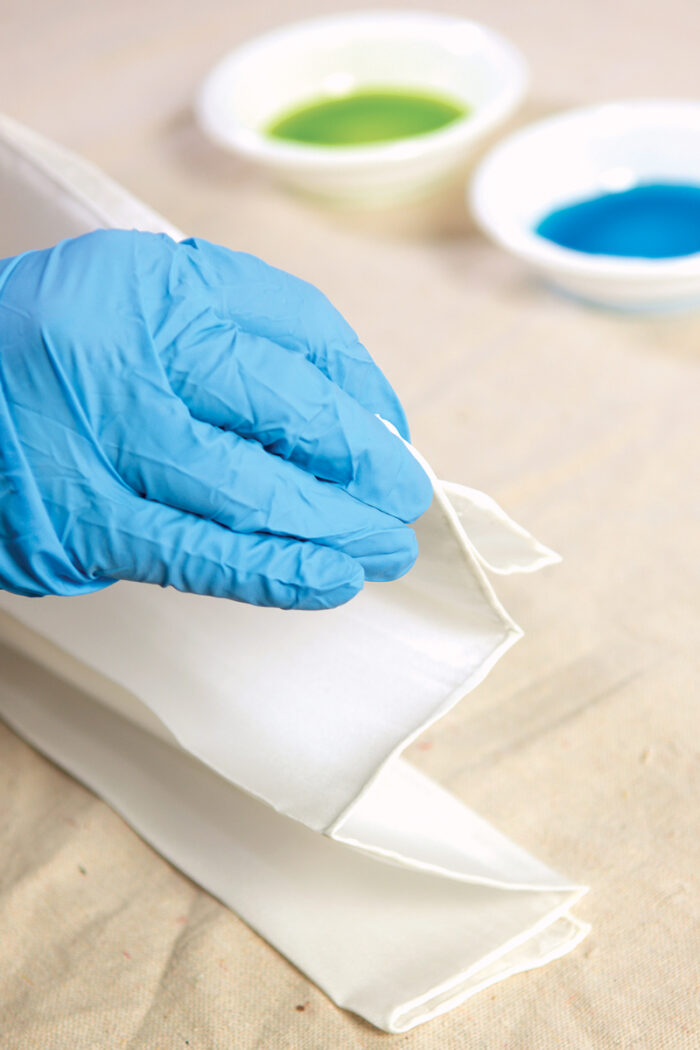
1. Prewash the silk fabric. If your fabric wasn’t purchased “dye-ready,” wash it by hand in warm water with Synthrapol. This removes impurities and silk gum from the fabric for more even dyeing. There’s no need to dry the fabric before dyeing; in fact, wet silk dyes more evenly than dry.
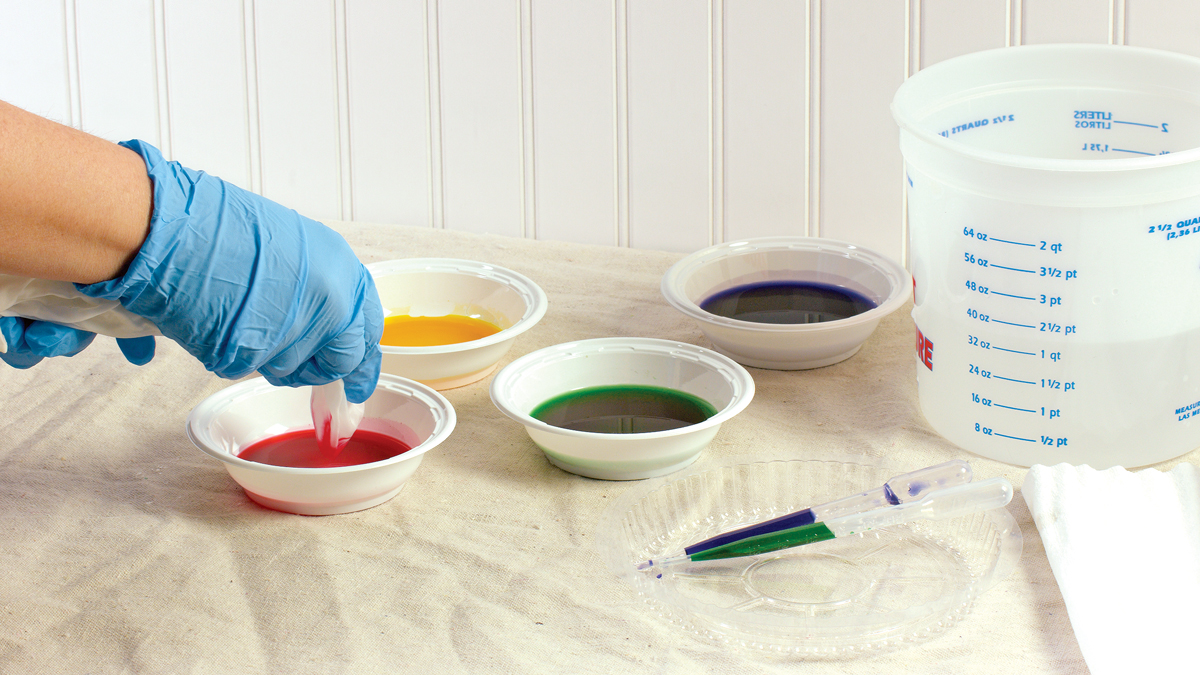
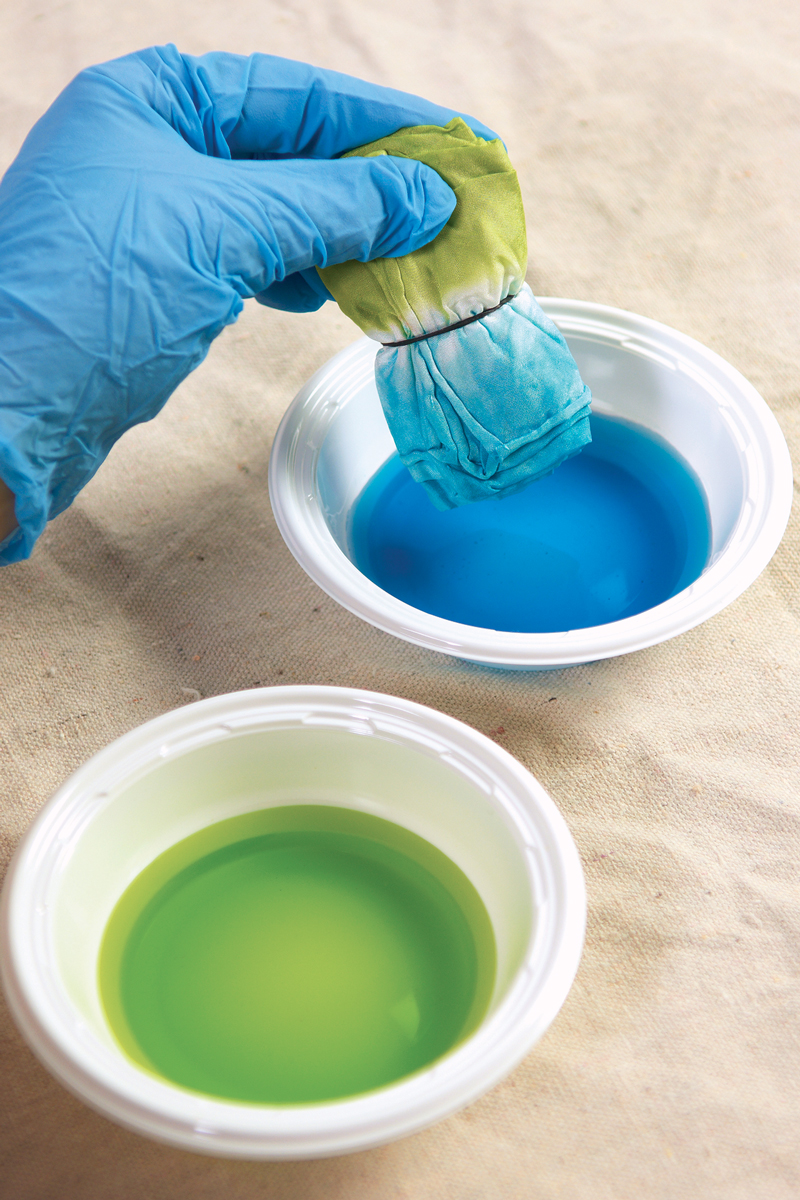
2. Mix the dyes. Working on a table covered with newspaper and plastic (cover the nearby floor, too), mix the dyes according to the manufacturer’s instructions. Establish a separate pipette for each dye color, to avoid cross-contamination of colors. Test each color for hue and strength on a scrap of silk or piece of white paper towel. Remember that the colors will appear lighter once the fabric has dried.
Dye distinct patterns
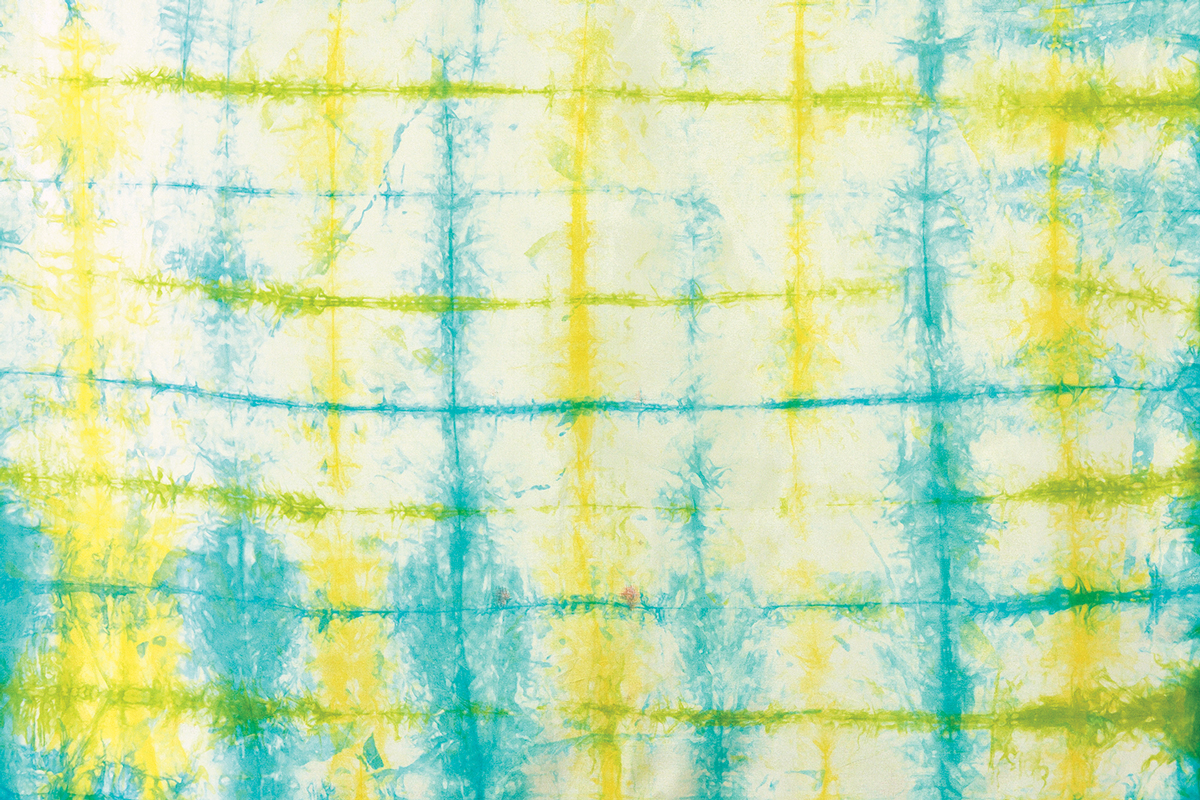
Plaids
1. Accordion-pleat the fabric to form a narrow rectangle. Then roll the rectangle with the folds at each edge, and bind with a rubber band or bands to secure.
2. Dip each edge into a bowl of dye. Gently squeeze out the excess dye into the bowl after dipping. This creates a series of stripes, along the folds you made.
3. Blot the roll with a towel, unbind, and unfold it. Accordion-pleat the fabric perpendicular to your original pleats, and repeat the dipping process.
 |
|

4. Blot the roll, unbind it, and unfold the fabric. Let the fabric dry or fix the dye, following the dye instructions.
Spirals
1. Lay the fabric flat on the worksurface. Working with a pencil eraser or blunt fork (try both to see which grips the fabric better), begin twisting the silk in a circular direction.
 |
 |
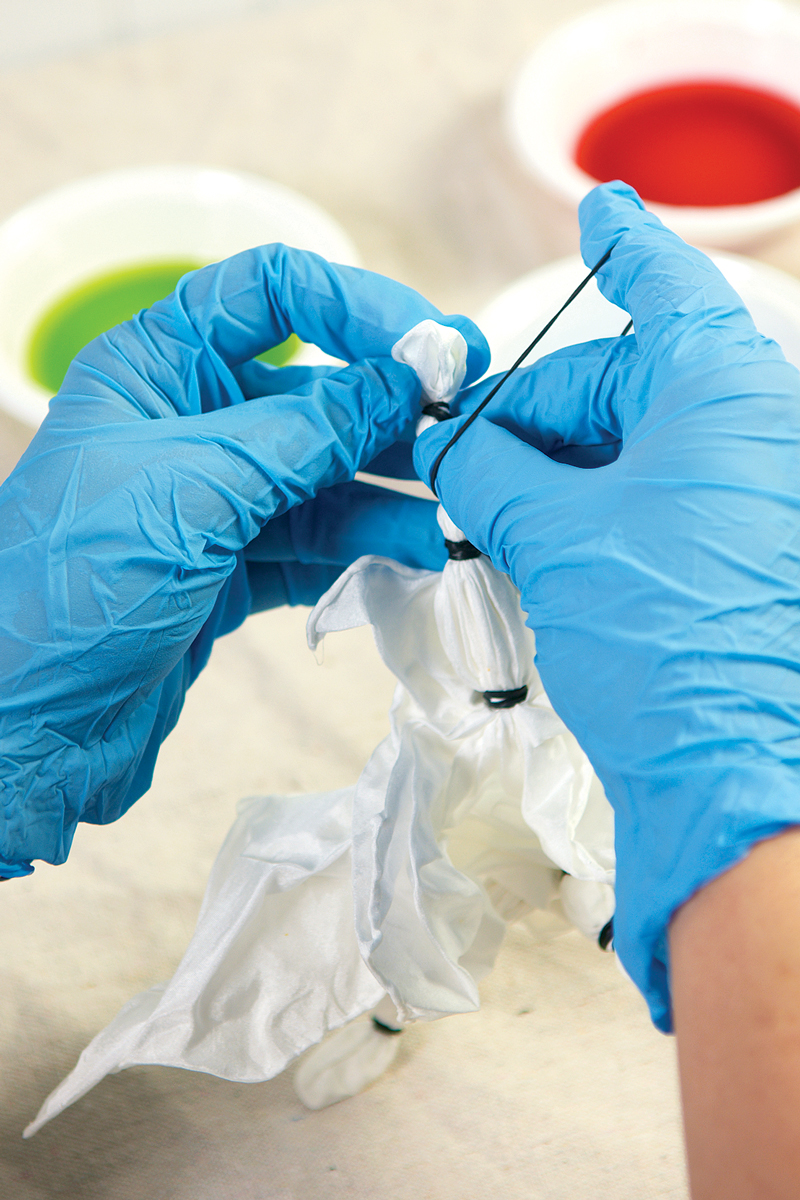
2. Continue to twist, adjusting the pleats that form around the center, until the spiral is as large as you wish. Bind the twisted fabric rosette with rubber bands arranged along the diameter of the circle, dividing the fabric into wedges.
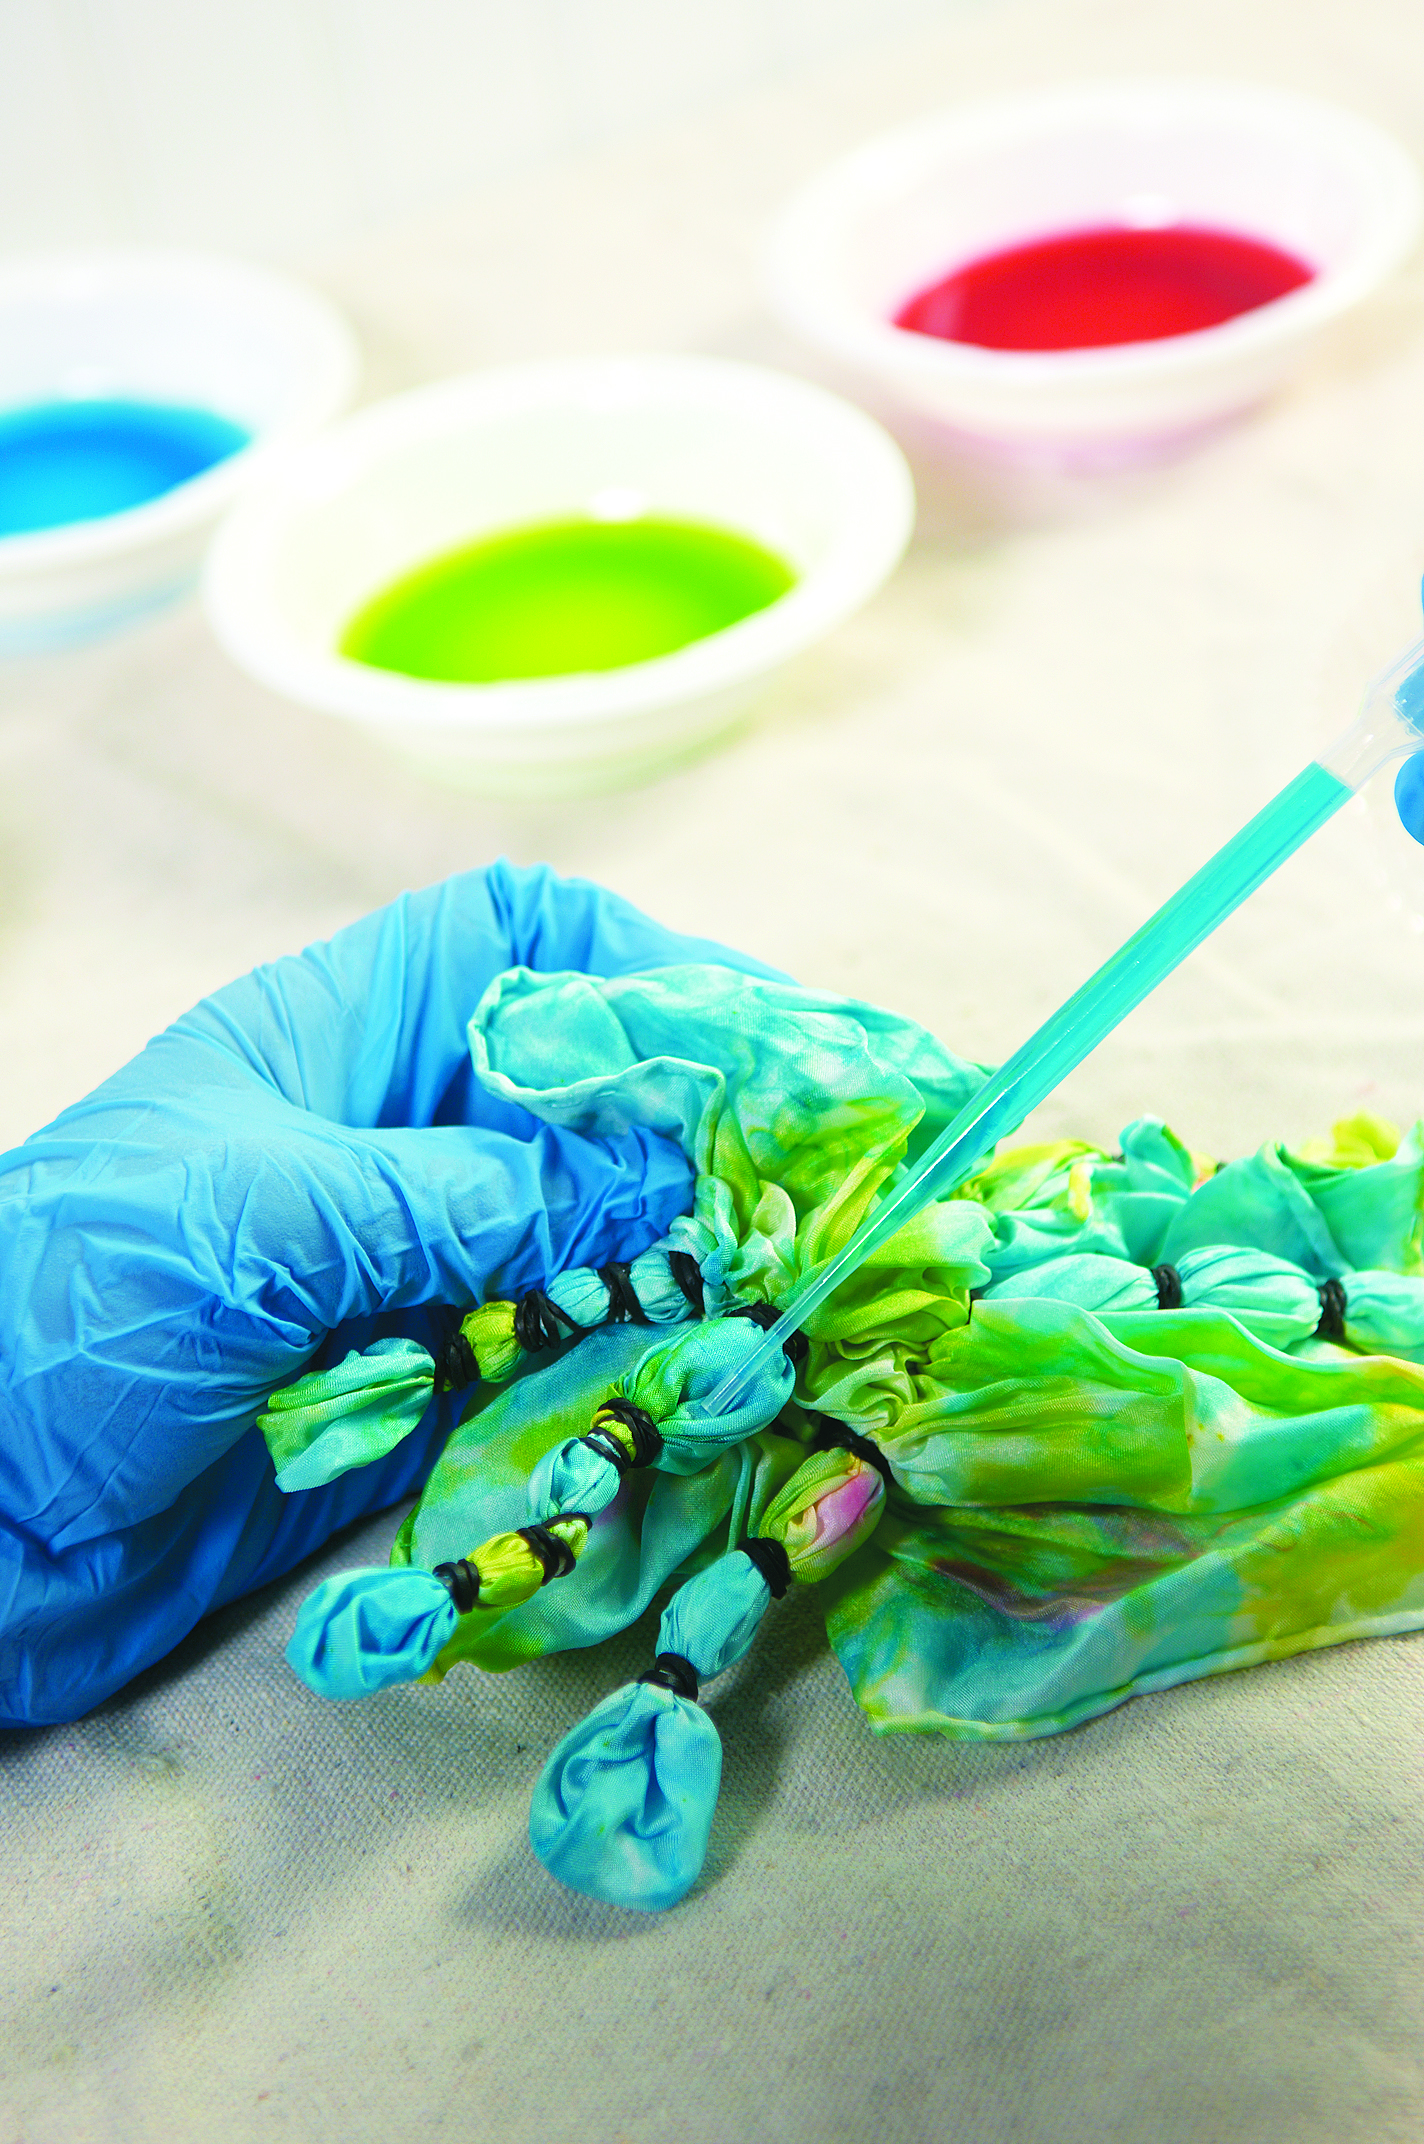
3. Apply dye to the wedges with an eyedropper or pipette. Blot as needed. Unwrap the bands, and leave the fabric to dry or fix the dye according to the manufacturer’s instructions.
 |
|

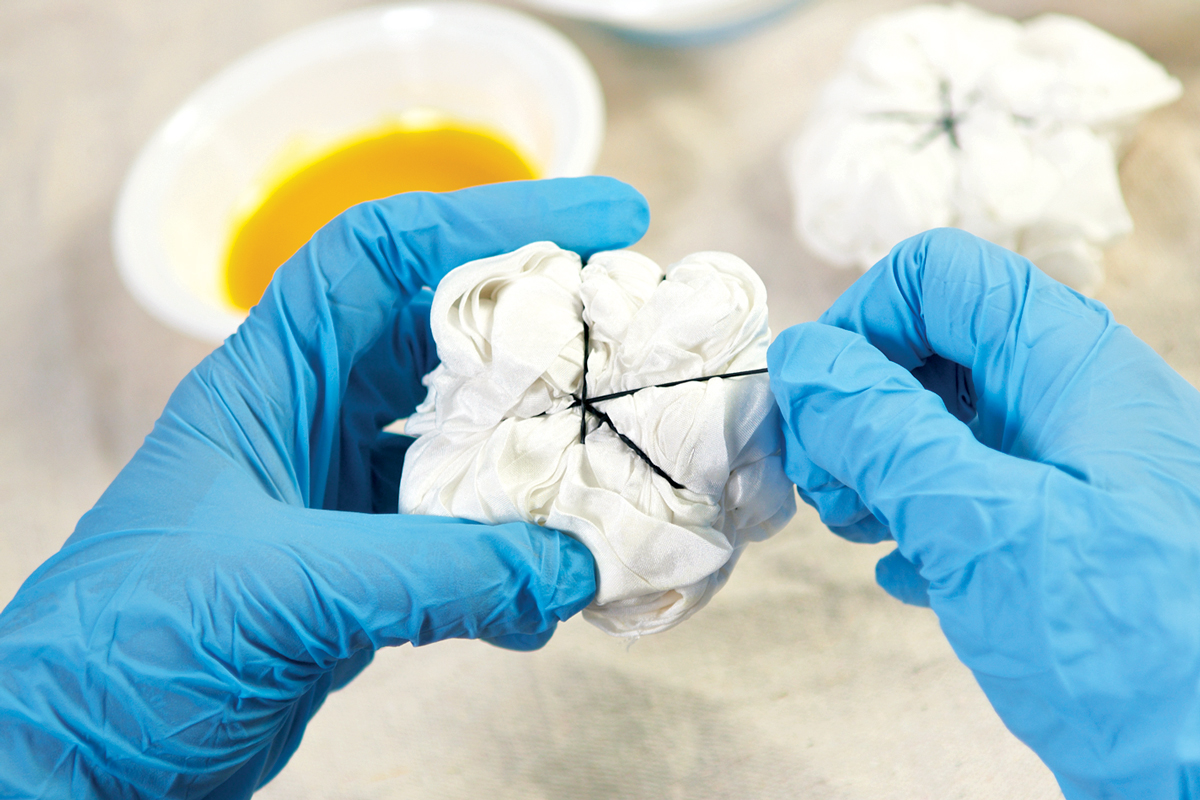
Concentric rings
1. Lay the fabric flat on the worksurface. Pinch a bit of silk and pull it up, without twisting, to form a peak. The higher the peak, the larger the radius of the resulting circles.
2. Wrap rubber bands around the peak. The tighter the bands, the less dye can seep into the fabric, creating white circles. Space the bands as desired, or experiment with overlapping some of the bands for interlocking circles.
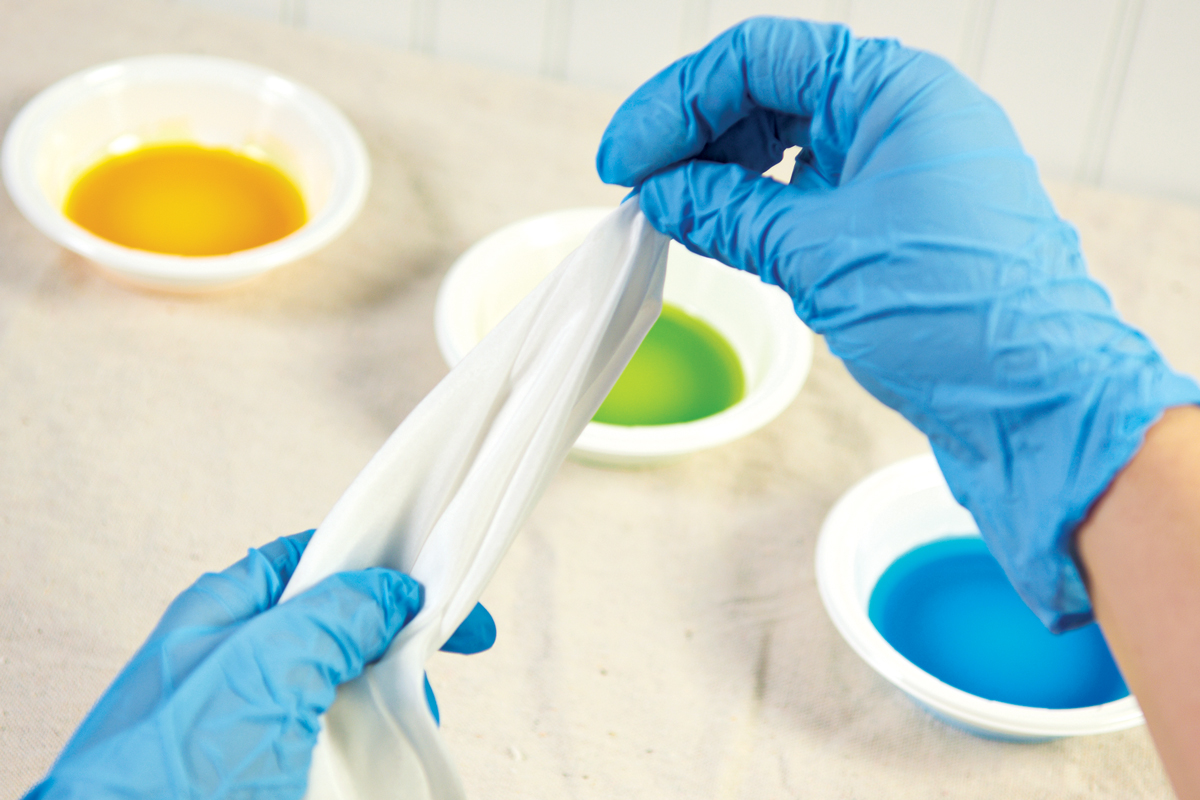
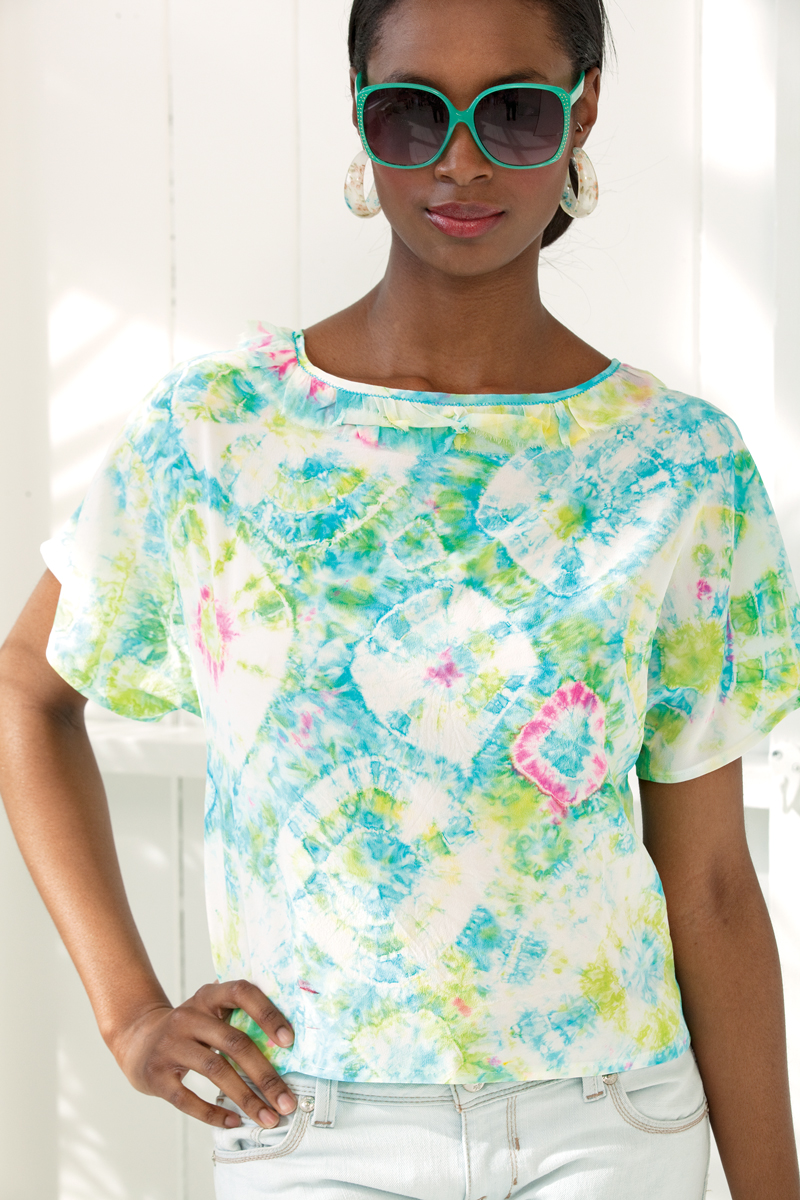
3. For a multi-colored effect, apply dye section by section with pipettes. For a single-color result, as on the dress, p. 24, dip the fabric in dye. Blot the fabric, remove the bands, and allow to dry, or fix the dye following the dye manufacturer’s instructions.
A Word About Dye Safety
All dyes, whether natural or synthetic in origin—and even if they’re labeled nontoxic—present a safety hazard. Always wear waterproof gloves when working with dyes, to prevent skin discoloration and irritation. Nitrile gloves are especially chemical resistant and wear longer than latex with fewer allergy issues (ESafetySupplies.com.) Never reuse any dyeing tools for food preparation.
A paper dust mask is also strongly recommended to protect your lungs and nasal passages when you’re mixing powdered dyes, as the dye particles are tiny and can easily be inhaled. Even strong vinegar fumes, inhaled for an extended period of time, can cause bronchitis, so cover up as needed, and provide sufficient ventilation in your workspace.
Katrina Walker is a designer, teacher, and author who specializes in textiles, surface design, and garment construction.
View the full article by clicking View PDF below:
View PDF


Log in or create an account to post a comment.
Sign up Log in