
Hi All. I’m new to the forum. I’m thankful that resources like this exist and I’ll be happy with any help you can give.
I’m a beginning sewer (about 1 year) and am interested in making tops. I’m very top heavy for a small person and have found that it’s difficult to adjust the pattern to fit my size. Has anyone else had this problem and if so, what method worked best for you? I understand that it may not be right for me, but I’m open to considering all ideas.
Thanks much,
Lynnelle


Replies
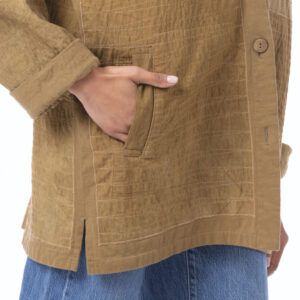
I am a 34 D and my daughter is a 32 D, so I am experienced at bust adjustments! Get a copy of Fit for Real People. It is a great resouce Generally I look for multiple seams in a jacket, such as princess from the armskye. If you are using knits, you need to add length as well as width, but only in the front. You can add darts to return the front to the originall length. I also usually use my upper bust measurement instead of full bust to pick pattern size.
nancy
Thanks for the reply. I recently purchased a copy of Fit for Real People. I'll try to use some of their advice. I'm finding it difficult to learn fitting techniques because I don't have a fit partner. So, now I'm looking to make a dress form. Again, thanks much for the help. -Lynnelle
Busts are a challenge. Understanding where your bust sits on your body is critical. After sewing for over 30 years, I was given a kit to draft my own patterns-and suddenly I knew how to do it logically instead of following my instincts. I'm sorry I don't remember the name, but if anyone needs to know I will dig it out of storage.
Basicly, you need to find where the point of your bust is on your body & transfer that to your pattern. There a good set of basic instructions online http://www.taunton.com/threads/pages/t00150.asp
There are a few changes that I would recommend. Print off the 'Measurement Chart' and the 'Marking reference points' and follow along - a picture is worth a thousand words.
These two measurements are the most important for making sure that your bust darts are pointing to the right spot.
If you have a larger bust you will need a deeper dart. There is a formula that I use, I'll have to dig it out if you need it, I just do it instinctively now.
I've done this all from memory - not even at home, so I hope this helps. Let me know if you need more info.
Have fun!
Jondré
PS After sleeping on it I realized I should add this:
If you don't know what size dart you should have, check your ready to wear and measure the dart of a nicely fitting blouse or dress. Be aware that the design ease will also affect the size of the dart, it helps if the style is similar. However much extra that you add/subtract to get the right size dart, the total side seam length needs to stay the same as the original pattern, unless you have altered the length. On the front, measure from the hem to the bottom of the dart and from the top of the dart to the armseye. On the back, measure from the hem to the armseye. These 2 measurements need to be the same, since you will be sewing them together after the dart is in. Sounds obvious, I know... the voice of experience here, I've probably made every mistake in the book and then some.
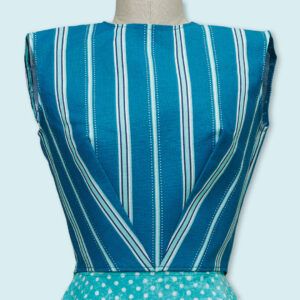
If the dart appears to be too large, make 2 darts. Divide the depth of the dart in half and reposition them so that they draw the eye up and down. They can both be angled up toward the apex if you prefer, or you could place one in the armseye. This is how the princess seams started out.
If you don't know how to move the darts to another position, here is an easy way:
Play with it. Have fun with it, this is part of the design process and soon you will feel very comfortable redrafting your patterns to fit your ideals. Before long you will be designing your own outfits.
Knowledge is power, Enjoy the process!
Edited 4/20/2005 12:43 pm ET by stitchwiz
Edited 4/25/2005 6:16 pm ET by stitchwiz
stitchwiz: Wow What a great explanation. I know this is a very old thread but I did a search on fitting bust darts and yours is one that came up. thanks for the detail. Scrubble4
Two years later, I say thank you for all the valuable information that you have provided.
THANK YOU! So glad to know it helped.
I've not been following the website or heard from anyone else so I had forgotten all about it. We're in the middle of major house renos - even my computer has been out of action while we worked! With a new grandbaby due in our house any day now sewing has been down on my list - but not for long. I expect to be making a baptism gown or tux for the new baby as soon as it's born. Just waiting to take the first measurements!
Keep it up and enjoy the process!
I am a 34D but petite (5'2" with high chest 31 1/2") so I know what you mean! In addition to Fit for Real People, I also recommend Fitting Finesse by Nancy Zieman. The sketches are a bit outdated but the information is relevant.
I use the recommendations by Fit for Real People for garments with darts and I use Fitting Finesse for garments without darts and they both have worked for me.
However, I have found that sometimes using the technique proposed by Fit for Real People you end up with a giant dart. This giant dart is difficult to keep 1 to 1 1/4 inches away from the apex as suggested and also results in a little bubble at the end of the dart. If anyone knows how to deal with this problem, please let me know!
I have found that simply adding to the sides works as well, especially with sleeveless styles. If you add to the side and the garment has sleeves, remember to add to the sleeve as well, starting at the top of the sleeve and tapering as you go down toward the end of the sleeve.
I hope the above helps!
Maybe add to the sides a bit and then do the usual full bust adjustment and the add some darts up from the waist so that you dont have that drop which falls from the bust point down the front and gives us the profile of a house!!!Actually there was a great artcle in Threads a while ago about contouring darts and the Princess line to nip in under the breast and this works very well for me . Its far more flattering than the afforementioned look.
I have found it better to divide the dart in 2 or more depending on style you want. Sandra Betzina comments that large darts can't be fit without a bubble. Of course I read this after I had trouble!
Nancy
What Nancy said. I had a heck of a time fitting a tailored vest on a very large busted gal last fall. The one dart was enormous....about 8" or more across at the waist. I'm currently making a new version with a princess seam from the shoulder for her and the fitting is so much easier with the excess divided between two darts, as it were. No pointy boob either ;-)
I'm glad you mentioned that Sandra Betzina said large darts cannot be fit without a bubble! I thought I was doing something wrong and try as I may, couldn't figure it out. At least now I have some peace of mind! Thank you.
I will follow your suggestions as well as everyone else's very helpful tips.
Thanks everyone!!!! :)
Multople darts work, but on a large bust it is much easier to fit a princess seam. The more seams you have for adjustment the easier it is.
Nancy
Hi Lynnelle.. I have also struggled with this. After making several practice shell tops and playing for weeks with different darts I discovered that bust darts that start 1-2 inches away from the bust point and go down to end at the side seam, below the armscye (instead of into the armscye) are better fitted. Then the whole front of the top isn't huge, for us well-endowed women.
Also, you can break up the dart into 2 darts; one that ends in the armscye, and one that ends in the side seam below the armscye.
I actually make my second dart up into the neckline, because my chest front is narrow above my bust, and without it the fabric balloons out.
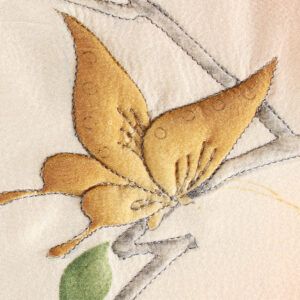
I suppose you could actually make 3 darts if you needed to! Also, it looks very nice to stitch over the top of the dart, in thread to match the fabric- after you're sure you won't change it! Katherine
Thank you for your input. I am now in the process of making a dressform for myself so that I can see the exact location of my problem areas.
Do you have a dress form? If so, was it homemade or purchased?
Lynnelle
I have a home made one from duct tape. I lost a ton of weight a couple of years ago and my husband and I made several as I lost weight. It is invaluable. I still try on the garment but it saves a lot of time.
Nancy
These are all great suggestions for full-bust adjustments; I'd like to add one more, especially for those of us with lower, full busts on relatively small frames: make sure to use a pattern sized for your high bust and adjust the width of the shoulders so that you don't end up with too much fabric above your bustline.
Many of my earlier attempts to adjust for a D cup resulted in huge, very unflattering necklines and sleeves--shirts that resembled giant boxes. Now, I make the top 1/3 of any bodice (from armholes upward) two full sizes smaller than the lower 2/3, and the necklines and sleeves fit nicely, while the bustline has ample ease--much more flattering! Since my larger bustline is also lower than the standard on patterns, I also have to drop darts a full inch, but that also helps, as the full bust adjustment doesn't have to interfere with the sleeve fit in any way.
Yes, I lower my bust point too and I cut according to my high bust too.
nancy
Hi Teaf
I would like to know more about how you combine sizes. I think we have simular
fitting problems.
ALCLEDMU
I'll try to explain a recent, very successful multi-size fit, using the new Threads Simplicity 4586 blouse pattern (great instructions and lots of useful hints for even this experience sewer!) plus a RTW petite large blouse that fits well. I fit the blouse in thirds--neck/shoulder area, bust area, and lower torso area.
Although I'm 5/8", all my height is in my legs, so a size 14 petite RTW blouse fits with a little extra ease, so I use it to check the pattern;on this pattern, I needed to use between 14-16 for the top third, 18 for the middle, and 16 for the lower part.
Starting from the center back neck, I draw my own line between the 14 & 16 lines on the pattern around the neck, across the shoulder, and down the armhole to the side seam, where I continue to the size18 side seam, tapering in toward the 16 at the waistline, finishing at the hem at size 16. While this may seem to distort the line, it doesn't when the finished garment drapes over my torso.
On the bodice front, starting at the neckline, I needed size 18 across the shoulder, size 16 around the front armhole, and size 18 tapering to 16 down the side. Since I am also flat and narrow through the shoulders, I folded out a 3/4" dart (about 7" long) from the shoulder seam near the neckline on both front and back. The bodice lies flat across my upper chest,neck & shoulders, but there is plenty of fabric across the bust. I mark the facings, sleeves, and collar to reflect the changes I made in the bodice;for the sleeve, I use size 18 back underarm seam, size 16 over the curves, and size 18-20 in the front.
I hope that makes some sense--obviously, try it in a cheap fabric first!
I don't have a dressform; I wish I did.
I tried making one out of duct tape according to the directions in an article in Threads a few years ago. It was funny to make, but caved in and wouldn't keep it's shape long enough to fill and mount it. I probably didn't stay in the duct tape long enough for my helpers to put enough layers on. It's fun at first, then rapidly becomes excruciatingly uncomfortable.
I have considered buying a dress form, but because my size changes up and down by several sizes from season to season and when I work to lose weight, I thought it wouldn't be worth it.
Does anyone know of a dress form that changes that much, goes into the "queen sizes", and is easily adjustable?
Katherine
I made a dressform out of butchers tape, basically strips of kraft paper backed with a wetable glue. I used Barbara Deckert's book Sewing for Plus sizes as my reference - see pages 38-39. (I'm sure I saw the same method in a back issue of THreads - from the early/mid 90's if I remember correctly) Anyway, It worked like a charm - basically you have a friend paper mache you with the strips and then cut you out of the dressform after it dries. You end up with a rigid duplicate of your self. I use it all the time, although I feel uncomfortable sometimes stabbing my double with pins. (Am I worried about voodoo or something?)
The advice that I'd give is that I wish I'd been more careful in doing around my neck. In the illustrations they show eneding with a jewel neckline. I'd go up my neck like a turtleneck. Also I'd be more careful about marking the shoulder line. Maybe go over the shoulder like a cap sleeve, although it may cause a little problem getting it off. An added benefit is that it is slightly larger than your actual measurements so when you drape or pin fit it gives you a little extra ease and keeps you from over fitting.
The hardest part was sourcing the butcher's tape (Just so you know butcher's didn't know what I was talking about!) I eventually found it at an art supply store. (apparently watercolourists use it to hold their paper onto their easels. Who knew?)
The best thing is the dress form ended up costing me about $10.
Pamela
If I remember correctly the article showed the woman using a hair dryer to speed up the dry time. Do you need to stuff this? Also, what did you use to cut it apart, ie, kind of scissors. I would like to make one this way as I find that the duct tape while good is a pain to stuff and keep accurate.
Nancy
THe beauty of this is that there is no need to stuff it. Once it's dry, (A hair dryer really does speed this up), it's rigid enough to stand on it's own. I have mine on a "T" made from PVC pipe put onto a office chair base that I got at the as-is section at Ikea. We just cut it up the back with regular scissors and then used a little more tape to glue it shut again. I also painted it and drew on my center front, side seams etc.
I also made on out of duct tape - inspired by the recent article in Threads to make a duct tape skirt. I cut it apart and used it to make a really good fitting sloper.
my next goal is to do the same thing to make a sleeve. However I've got to give my friends a rest. They're getting tired of wrapping me in tape!
Pamela
I made a form from gummed tape way back in 1984 in a class based on Quebec couturier Angelina DiBello's techniques. It was done on a base of light cotton knit and included a smallish cap over the shoulders and a neck. We inserted a piece of light aluminum about 1 1/2" wide up centre back to make it easier to cut the person out of the shell. Afterwards, we used the gummed tape to build up the shell from the inside, paying special attention to the waist which can be a bit weak - after all, who wants the whole thing to collapse? When all was dry, the outside received a very thin layer of quilt batting, the raw edges overlapped a bit in the back and basted together. Then we made an outside over of draped swimsuit fabric, pin marked, removed and sewn together on the machine. I've never gotten around to mounting my double on a stand, but she was most useful sitting on a stool for many years. She sits on a cabinet top now, wearing an outlandish outfit that changes from time to time, and reminding me of what a good figure I once had ;-)
HI Sandy,
Glad to hear your dummy story. Funny you should mention Angelina DiBello. I just got back from Victoria where I found a book by her "The Fitting Book" published in the early 70's, and was quite impressed. It has a hand out of templates and rulars in full and half scale that I really like - hope to get around to putting them to use soon. Small world eh?
Pamela
I have had trouble getting a dress form to match my body type, this is my method...
My dress form has been altered extensively. I have the forms rib cage dimension matching mine and then I have padded my shoulder width and back shape to match me. I have then encased it in a lycra bodysuit...and then dressed the form with one of my old bras incl stuffing the cups to suit. As it has the correct bra strap adjustment it actually does a good immitation of me. This way I can tell if the neckline is too low, or the shoulder to narrow or the bust dart too low (I'm 5'2"). It gives a more reallistic body shape that just leaving it to the moulded "Barbie" version. (Just remember to drape the form when you leave it in the window or have guests afterall it is wearing your underwear!)
Also I've been planning to make a pants form using the paper tape method. I am going to fill it with what we call Gorrilla foam to make sure it doesn't cave in. Gorrilla foam is an expanding foam that is used in the building industry to fill in air spaces between say window jambs and the framing timber adjacent. It basically tripples in size and is able to be trimmed with a craft knife if it overflows.
Hi JennyNZ,
Just a caution about the Gorilla foam. I know I'm stating the obvious, BUT remember that the foam EXPANDS!
It may just explode your tape body form. I'd hate to see you have to redo it. I know it only costs about $10, but the time it takes for you and a sewing buddy to make one is significant.
My husband & I used this type of foam around the door in a building which we built ourselves. We were shocked at how much it expanded. It distorted a metal door frame and oozed out in amazing quantities making all kinds of weird and wonderful caricatures. Thank goodness we were able to remove the frame, scrape it off and start over. If it had been wood, it could have cracked the framing and we would have had to replace the entire frame. We were able to have a good laugh at the pictures later.
There is another foam which we ended up using that doesn't expand as much. Perhaps you could do a partial fill in the body form, wait 'til it sets and finish it off with the second type of foam which would just fill the remaining spaces.
Good Luck!
I Really need to make a pants form too! My experience with the paper tape method is that you really don't need to fill it. Once its fully dry its ridgid enough to stand on its own and you can pin into it without too much effort.
Sorry not to post back to you sooner - my life has been a little hairy this past month.
thanks,
Pamela
I remember seeing an article about this too- thanks for the advice. I believe it would end up much lighter than the duct tape, also. Katherine
What is an armcyce?
The armscye is the arm hole opening, into which one would fit the sleeve. Why it's called that I have no clue.
Meg
Thanks.
This post is archived.