

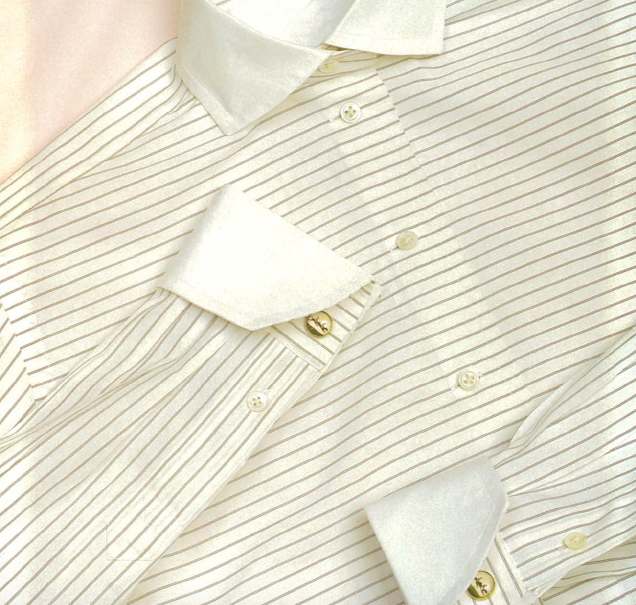
When I decided I wanted to make top-quality dress shirts, I was surprised to find no information on shirtmaking beyond basic pattern instructions. So after combing the libraries, magazines, and bookstores for answers, I developed my own techniques for making a shirt at home that’s as good as the best shirts available in the world. Many of the skills required to make a shirt are the same as those needed for any professional-looking garment.
Here are two of those skills: The first enables you to match garment sections without a bump or jog at the seam. The second, easing curves into flat pieces of fabric with machine stitching, is great for shaping a collar band to the neck, without ripples on the inside of the band. If these skills are new to you, the best way to thoroughly understand and master them is by practicing. All you need is a Y2 -yd. remnant of inexpensive 100 percent cotton shirt-weight fabric.
Perfectly matched parts The technique shown in the sequence of drawings on p. 32 ensures that the ends of collar bands and cuffs match the respective edges of front bands and plackets, while completely reducing the bulk of the combined seam allowances. l owe the idea for this technique entirely to a fascinating book called Sewing Magic (unfortunately out of print) by Barbara Hellyer. Here’s how the technique works, in brief, on a cuff: You will attach just the top cuff to the sleeve, with right sides together, then attach the undercuff to the first one. This allows you to finish off the ends exact where the sleeve ends. The seam allowance can be almost completely trimmed. Let’s do a sample.
You’ll need a rectangle (sleeve) of scrap cotton. I suggest you try rolling and hemming the two long edges to give yourself a definite edge, like the edge of the sleeve placket or shirt front. Then cut two “cuffs” about 3 in. by whatever width will give you %-in. seam allowances at each end (step 1); you can add curves if you’d like. Lay one cuff piece against an end of the “sleeve” piece and stitch the seam, starting and ending it exactly at the outside of the rolled edges on the sleeve (step 2). Next open the two pieces up and press the seams toward the sleeve (step 3). Then lay the undercuff down on the sewn top cuff, with right sides together, matching edges.
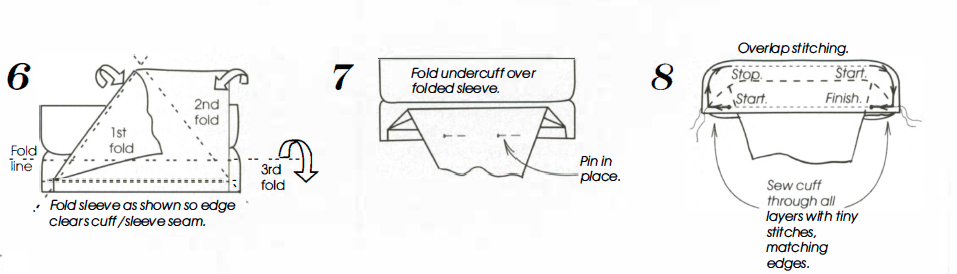
This next step adds some ease so the cuff curls. Starting at the top edge of the cuff, stitch in about 1 in. and stop, with the needle down. Now offset the ends of the cuff piece so the “undercuff” extends about % in., and stretch the layers. In this case, the larger piece is on the bottom, so the wrinkles described on p. 33 will be underneath, too; you should be able to see them from the side. Stitch to the opposite end of the top edge. The undercuff will relax when released, shortening in the process and cupping the cuff. Trim the undercuff to match the top cuff, and fold this seam open (step 5). Next look at steps 6 and 7 to see how to arrange the sleeve inside the cuff. Most important is that the folds clear the ends of the cuff/sleeve seam by at least 2 in. on each side.
Fold the undercuff over the sleeve and turn the cuff over so you can see the seam from step 2. Sew the two cuff pieces together. Starting at the base of the cuff, about 2 in. from the outer edge, stitch with very short stitches, exactly over the seam as shown. Continue smoothly around the curve, blending it carefully with the previous seam by three to four stitches. Stop. Start agai n three to four stitches from the start of the second curve and finish the other side of the cuff base.
Feel through the layers to make sure you haven’t caught any of the sleeve edge you’ve folded out of the way. Trim and grade the seam allowances, as shown in step 9; I like to trim curved seams to Y1 6 in., but grade the sleeve/cuff seam so it isn’t weakened. Press open the cuff seam allowances (stretching if necessary) and turn the ends out of the cuff. ‘f he ends of the sleeve should be held firmly enough so that you can pull on them to turn the cuff corners completely. Press under the remaining loose seam allowance of the undercuff (step 10) so it just covers the sleeve/cuff seamline. Now edgestitch the cuff to close it up. Topstitching from the right side would finish the cuff.
With one exception, the instructions for attaching the collar band to the shirt are the same. A collar band is much narrower than a cuff, and a shirt front is much larger than a sleeve, all of which makes getting one inside the other a bit tricky. Instead of folding up the fronts, you’ll need to roll the part that attaches to the band out of the way, as shown in the lower righthand drawing on p. 32. Even if you’ve glue-basted interfacing in place, you can still stretch shape into the band the same way you practiced with an eased seam.
Making perfectly matched cuff seams
Unlike typical pattern instructions, this technique leaves no doubt whether the sleeve width matches the cuff. For a practice sample, just cut the fabric scraps in the dimensions shown.
 |
 |
 |
 |
Shaping flat fabric with eased seams
An eased seam is one in which a long edge is attached to a slightly shorter one. One way to do this is to purposely stretch one edge while attaching it to another unstretched edge. When finished, the stretched edge relaxes and shortens, pulling the seam into a curve. Applying this technique to collars, neckbands, and cuffs is the best way I know of to build shape into the curved parts of a shirt.
Stitching and Stretching
To practice sewing an eased seam, you’ll need two 2- by 1 2-in. fabric rectangles. Fold the rectangles in half lengthwise so that they’re 2 by 6 in. and mark the fold. Unfold them and follow the instructions at right. You should see a distinct curve develop into the two layers.
An alternate and more precise way to sew an eased seam is to trim the bottom piece a little short (% to % in. on each end) before matching the midpoint. After sewing the first % in. from the midpoint, align the short edges and pull both pieces until the longer top piece lies flat and taut against the bottom piece, which has been stretched to meet it. This way you can control the amount you stretch the fabric, and make sure you do each end the same amount.
When you iron this collarlike sample after turning it right side out, you should notice several things: the stretched piece (thiS would be the inner layer of a cuff or collar) lies smooth, while the other layer is loose and even wrinkled; the short seams at the ends tend to pull under toward the inner layer; and, even under heavy pressing, the inward curve remains. All these effects occur because the stretched piece refuses to stay stretched and relaxes instead. Had you measured the pieces before sewing them together, you would have also noticed that the finished length is now slightly less than the original measured length of the untrimmed piece. ‘fo compensate on a real collar and cuff, add between % in. and % in. to your final pattern, depending on your fabric, and how much you ease out. This built-in shaping is the first step toward making a beautiful, customshaped collar. -D. P. G.
 |
 |
 |


Log in or create an account to post a comment.
Sign up Log in