
Embellish Heirloom Buttons with a Creative Twist
Try these clever and attractive variations and embellishments to enhance your hand-made heirloom buttons.
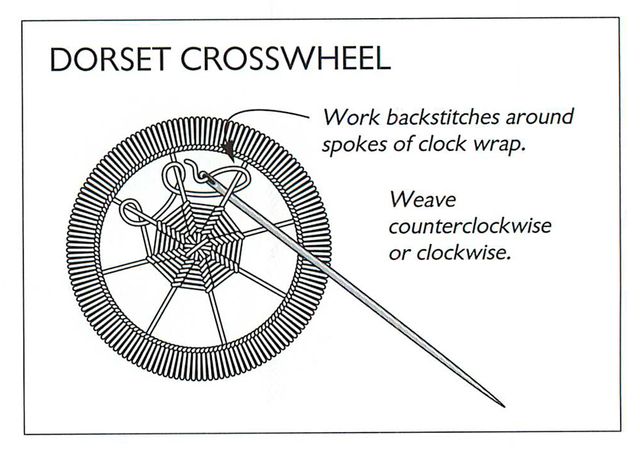
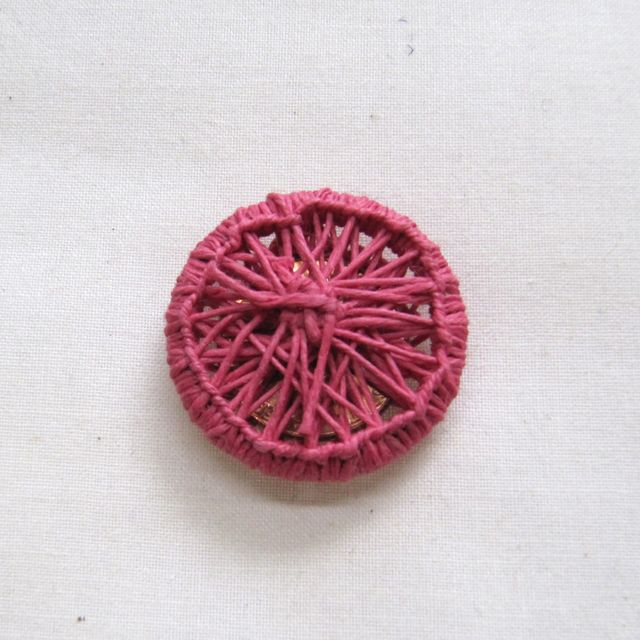
Instead of completing the woven pattern in a Dorset crosswheel button, add beads while wrapping the spoke threads.
Here are some beautiful variations and embellishments you can use to enhance traditional heirloom button styles, such as adding embroidery, beads, and even an embedded penny!
Endless variations for Dorset crosswheel buttons:
Combine different threads or change the pattern–
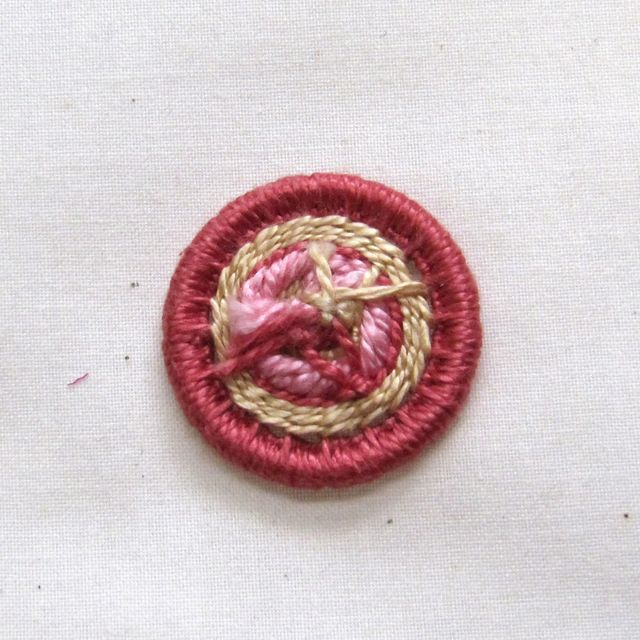
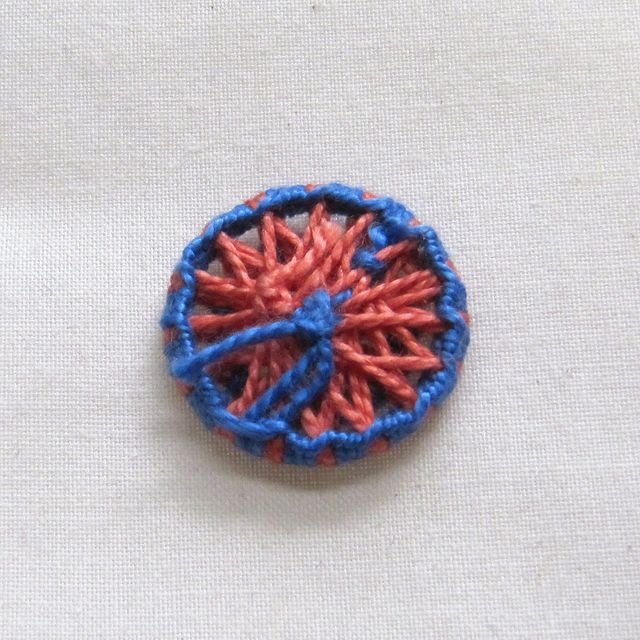
You can use a variety of threads and yarns to weave them and mix several threads together in a single button (see the two-toned-pink and beige button).
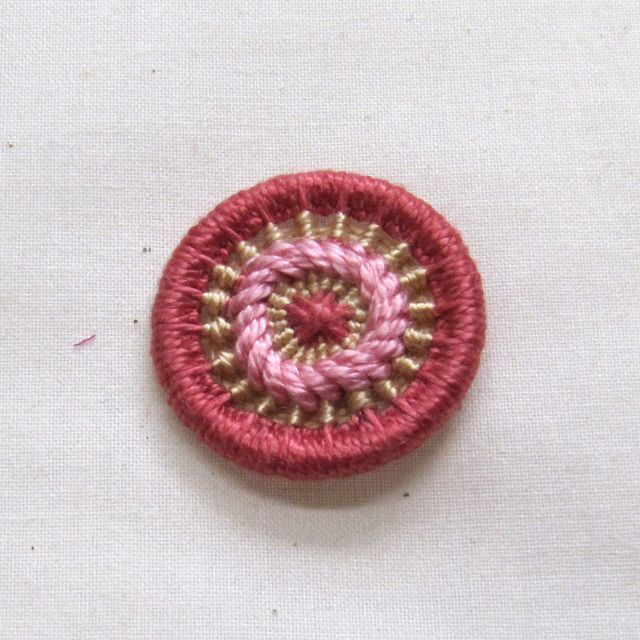
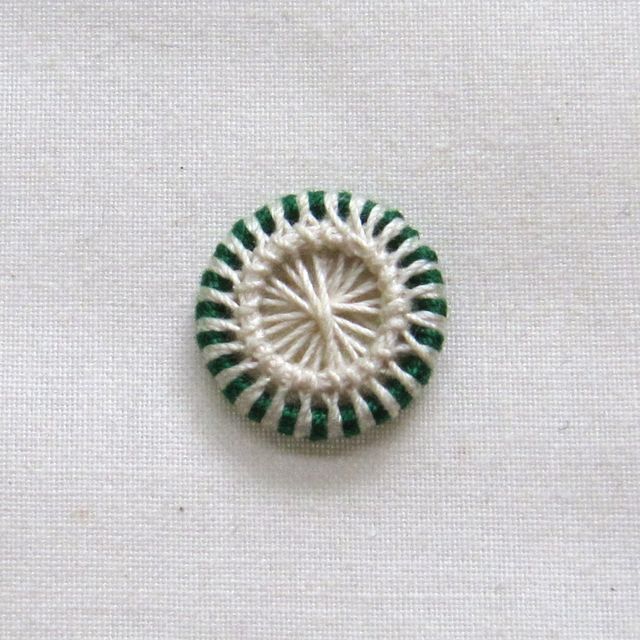
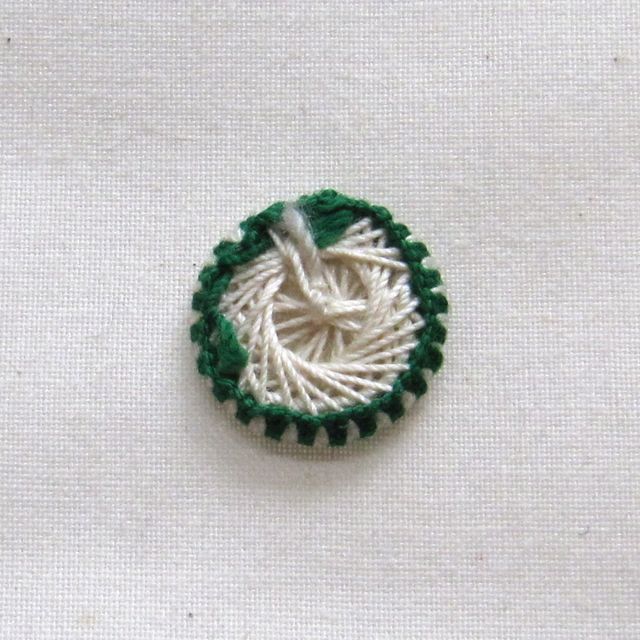
Change the pattern as you weave the button’s threads; for example, vary the number of spokes, make the spokes asymmetrical, or lengthen or shorten the backstitches to enlarge or decrease the spiraling thread pattern. Leave an open border between the button’s wrapped ring and the spiraling backstitches (see the ivory button).
Add embroidery–
You can sew embroidery stitches, such as stem stitch or chain stitch, over the spokes (see again the two-toned-pink and beige button), or sew a simple under-over weave instead of backstitching.
Embellish with beads–
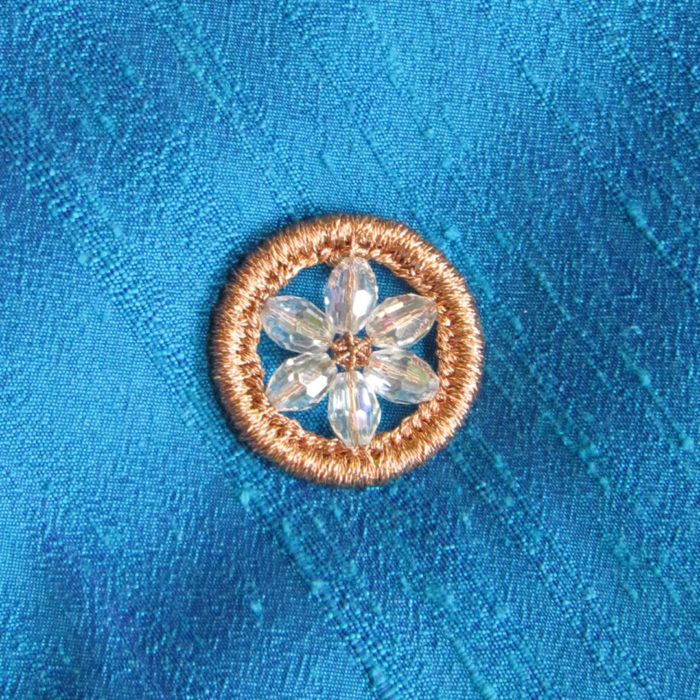
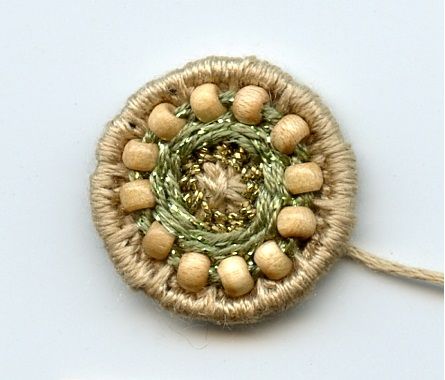
You can even add beads to the button by stringing the beads onto the spokes as you wrap the button’s body and omitting the backstitches (see the copper-thread and clear-beaded button); or add beads to the backstitches as you weave them onto the spokes or onto embroidery stitches (see the tan and green wood-beaded button).
Dorset Diagram 1 Dorset Diagram 2 
 Dorset two-tone-pink and beige (front)(back)
 Dorset Crystal Dorset Wood Bead

Simple lace shirtwaist button enhancements:
Combine different threads–
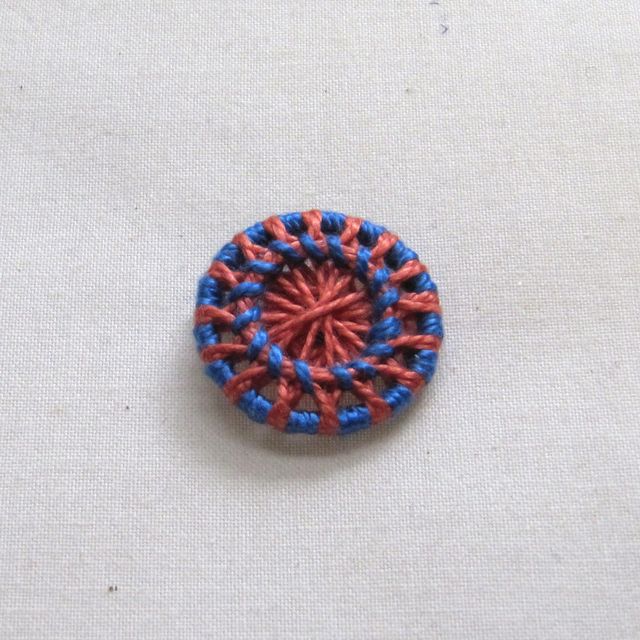
Unlike the Dorset crosswheel’s pattern, the lace shirtwaist button’s pattern can’t be changed. Design variations are limited to the thread’s size and color, [size and weight are nearly the same in thread-it’s a matter of thickness more than anything]. You can switch to a different-sized, -colored, or –weight thread after wrapping the spokes and angles, or after overcasting the angle threads. (See the pink and blue button and the green and white button)
Embed round objects in the “window”–
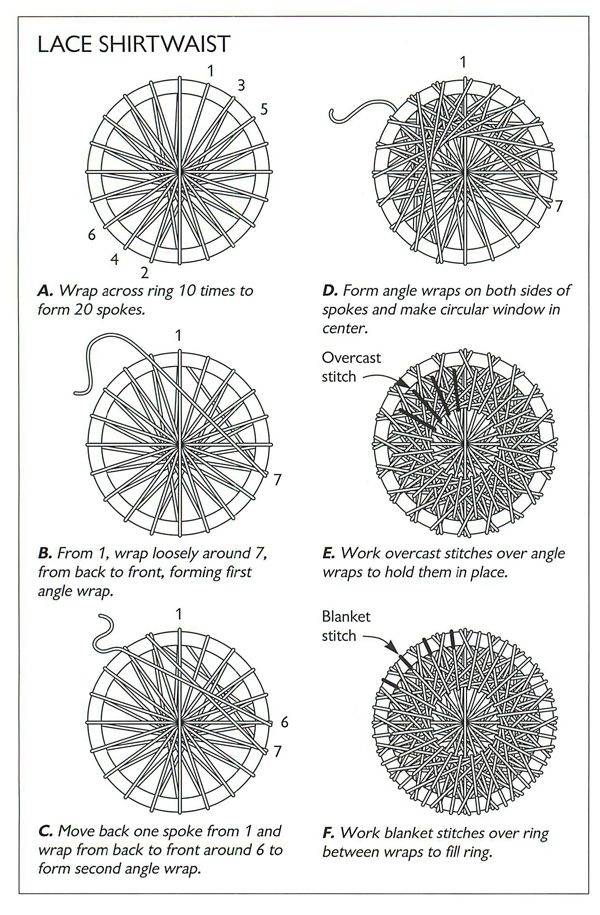
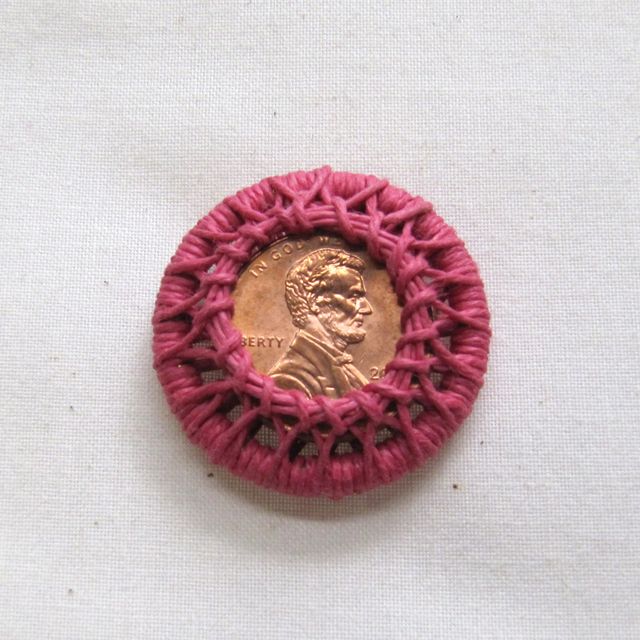
You can add elements to a lace shirtwaist button by embedding thin, flat, disk-shaped objects – such as a coin or a piece of fabric – in the center of the button (it’s “window”). Simply center the object on the button’s surface spokes and then make the angled wraps over the object’s edges. The object should be at least 1/4-in. smaller than the button’s ring to enable you work the finishing buttonhole stitches. (See the pink button with embedded penny)
How to make a standard lace shirtwaist button Shirtwaist Pink and Blue (front)(back)
 Shirtwaist Green and white (front)(back)
 Shirtwaist Embedded Penny (front)(back)

TIP: Choose rings for needle-lace buttons wisely. Avoid using metal rings that have a slit – like jump rings – because the thread pulls through the slit, and the button will unravel. Look for seamless plastic or brass rings in your fabric store’s drapery notions section. Thin brass rings appropriate for needle-lace buttons are also sold through shops that supply historical costumers, such as Burnley & Trowbridge and Wm. Booth Draper. Plastic drapery rings, which come in a variety of sizes and thicknesses, create a thicker “frame” at the button’s edge. You may need to sand a plastic ring’s outer edge so the thread “grabs” and doesn’t continually slip off.
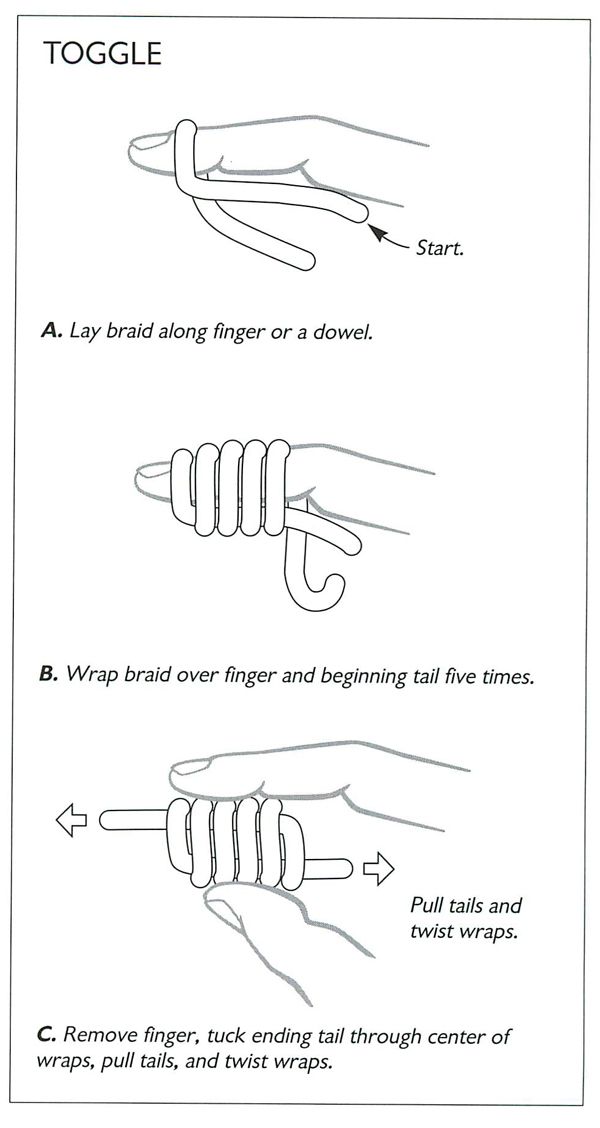
Cord toggle size variations:
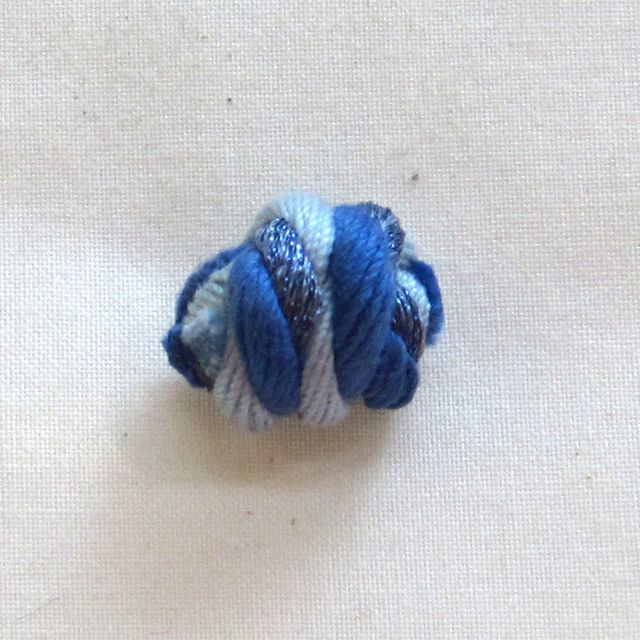
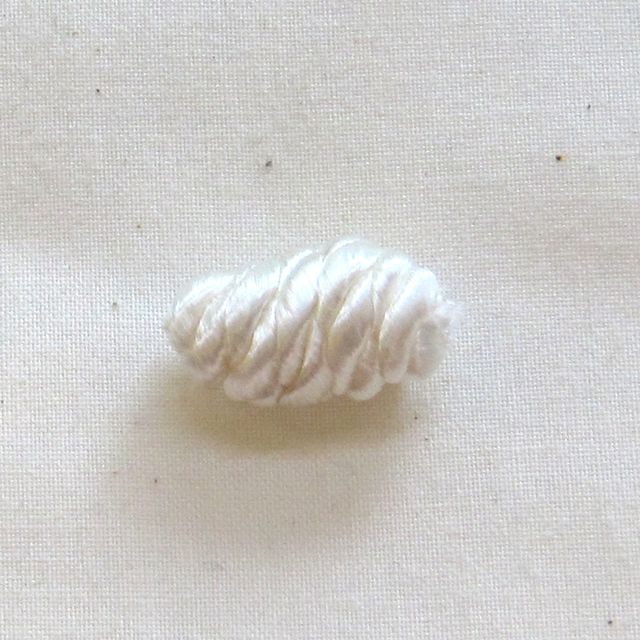
The width of a cord toggle is determined by the diameter of the cord, but the length is determined by the number of times you wrap the cord. Three wraps produce a ball button (see the tri-colored blue toggle), five wraps create an average-sized toggle (see the white toggle); more than five wraps produce a longer toggle (see the blue and yellow toggle).
You can wrap two different cords together to create one toggle, as well; use cords with different textures or of different colors, but the same diameter (see the blue and yellow and tri-color blue toggles).
For toggles that match a garment, use the garment fabric to create a fabric-covered cord.
How to make a basic toggle Toggle Triple BlueToggle White
 Toggle Blue and Yellow
Cord monkey’s fist size and shape variations:
Variations in the monkey’s fist are limited to size and shape. Size and shape are determined by the number of wraps made in each direction, while the cord’s diameter only affects the knot’s size. Size can also be increased by using a bead in the button’s center.
To make a more rectangular monkey’s fist, rather than the traditional round button, wrap the cord twice as many times in the very last step than in the previous two steps (see the rectangular brown and blue buttons).
For a large button relative to the size of the cord, use a bead in the center and increase the number of wraps in each direction to cover the bead.
How to make a mokey’s fist Monkey’s Fist Blue Monkey’s Fist Brown

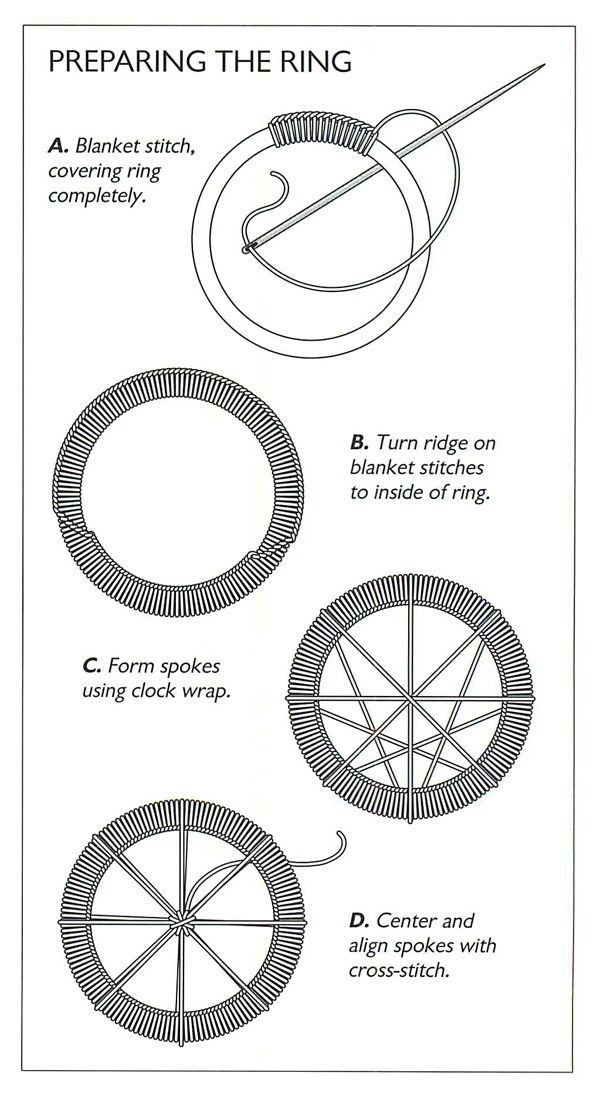
Read about the basic processes for making traditional versions of four heirloom button styles—Dorset crosswheel, the lace shirtwaist, the cord toggle—in “Make Your Own Heirloom Buttons”, Threads #169, written by Nancy Nehring.
Don’t miss other helpful techniques like this by ordering a subscription of Threads magazine.
Or become a Threads Insider member to receive special digital access to in-depth articles and videos, including entire digital versions of magazines and archived editions.
Do you plan on making heirloom buttons with the techniques outlined in this post? Have you made any buttons not mentioned above? Please comment below and let us know.


I greatly appreciate the craftsmanship and the artistry, but I cannot commit that much time to an article that will become obsolete as soon as the garment. Of course, one can save the buttons before retiring the garment, but then, what does one do with them?
rhodeanie--you miss the point entirely! making these buttons are not just the garment--they MAKE the garment! and when that garment is 'done', remove the buttons and put them on a quilt made out of parts of that garment, along with other pieces of favorite garments! that's the stuff of heirlooms... --janal, san antonio, tejas
Thank you so much, I have several ideas for your creations.
I comb thrift shops for clothing that has seen its time and may have buttons, lace or other unique features that I can harvest and use in other clothing or home decor. I can see using these custom buttons (after the garment has lost its appeal) on a large linen pillow or on the top closure of my duvet.
Consignment/thrift stores are wonderful places to purchase unique fabrics and notions. I purchased a beautiful Christian Dior nightgown years ago for the lace. I ended up wearing it for a short time and then used the lovely lace for trim and the satin fabric for a short-sleeved blouse. As a garment sewer, I always pay attention to the button and zipper details of a garment. They can make or break the garment. I am fortunate in choices b/c so many people will comment on my buttons on what would otherwise be a plain piece of clothing. You are putting a lot of work into constructing a garment so don't minimize the last touch---the buttons. Try several buttons on the garment. Step away and look closely. You will see what works best. Think of the details of a garment as they think of location in real estate---details, details, details.
I recently altered a mens T shirt to make it more feminine. In addition to cutting out the high ribbrd neck and making it a rounded scoop, I also re- used the neck ribbing. To do this, I separated it from the fabric, ironed it open, then cut it in half lengthwise. This gave me a piece of ribbing in exactly the same color as the T and long enough to finish the new scoopneckline with. It produced a lovely narrow ribbed band that gave the T a nice light professional look.
I am very fortunate to have a pretty large collection of antique buttons passed down from my grandmother through my mother to me. I absolutely love them and wonder what will become of them when I am gone (I am almost 72). I wish I could take them with me. I wonder how many of them may have come down further back from the two generations I mentioned above. I wish my grandmother had lived long enough for me to have known her so I could have received more information on the "family button collection". I use many of the buttons for embellishment but cannot stand to pass them to people outside of the family who would have no emotional connection. to them. Thanks so much for adding this wonderful article to your terrific magazine.
I love the idea of "harvesting" off of thrift store buys. I've done this many times, but didn't think of it as harvesting! We "sew" what we reap?
Love Love Love these Buttons. Buttons Enhance the Garment from Run of the Mill to Exqusite. Thank You
Somewhere amongst my "as yet not unpacked" books I have a 1980's British book on making Dorset Buttons. Have to locate it and find out who wrote it.
As for re-cycling buttons; some thrifts have a "end of season $5 a garbage bag full" of clothes. I have taken advantage of this to acquire garments to re-cycle as buttons, zips, trim, and fabric.
Sadly my mother "lost" her family button box, luckily some treasures had already ended up in my hands. So I have the black Jet Buttons, on their button-stand, off my Great Grandmother's "Best" Dress; must date to @ 1900 or earlier. Also the green bakelite buttons off my mothers green tweed "Costume"; skirt and jacket that she had the year of the current Queen of England's Grandfather and Grandmother's Silver Jubilee; late 1920's I think. Also Brown buttons from a winter coat from my childhood; coat made of handwoven rusty brown tweed; my Great Aunt gathered the wool while walking her dogs on the Devonshire Moors, dyed it, spun it, wove it. That was when fabrics were still wartime rationed so a gift like that "rationing stamps free" was much appreciated.
Buttons are also a great play thing for children; a big enough one can be threaded onto a string or ribbon; through two holes on one button then tied together using a 36 " or so string. Slip the end loops over first finger at each end then twirl the button so it is wound up then pull the loops apart and the button will unwind and re-wind; all you have to do is keep gently pulling the ends apart and relaxing them. You can even take two cardboard circles and draw black and white spirals, thread this over the button and make yourself very queasy!
Liz
I made a few matching Dorset buttons with French knots instead of beads around the centre. Hadn't got a use for 2, not enough matching yarn for a third one, so I glued them to earring backs and have worn them quite frequently.
I like this idea of adding beads and will have a go at that next.
I like it. button gives the elegant look for your garments