


by Blossom Jenab and Kate Rittenhouse
From Threads #92, pp. 48-52
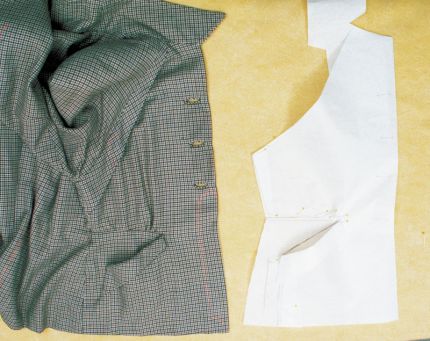
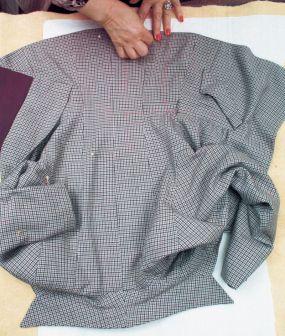
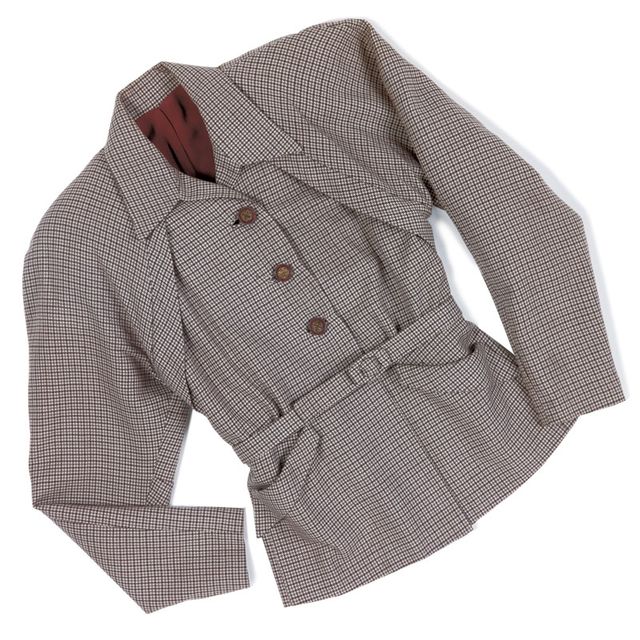
In an earlier article (Threads #88, pp. 36-39), we described making a pattern from a favorite pair of pants, and promised to return with directions for a more complicated copying project. The1940s jacket shown below is just such a project. It features many details—gathers, shaped pockets, sleeve darts, and assorted flaps—that would appear to make copying it a challenge. Nonetheless, with care and common sense, even a complex garment can be coaxed into giving up its secrets.
![]()
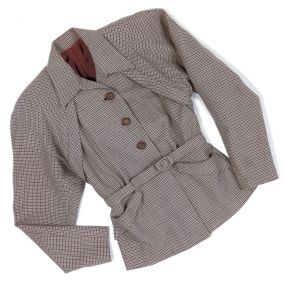 A 1940s wool herringbone jacket, rich in detail, is a challenging garment to copy. In the photos that follow, Blossom will go step-by-step through copying this jacket, which should also reveal how to tackle any similarly complicated garment, since the basic strategy will be the same.
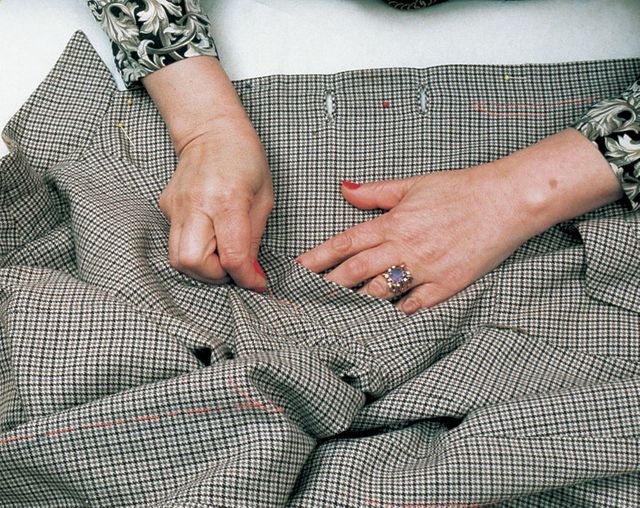
In a nutshell, the copying process involves pinning garment sections flat to a paper-covered padded surface, and tracing each seam by poking through the seam and the paper beneath with a needle, or next to it with a pencil if it’s on an edge, leaving a row of holes in the paper. Then simply connect the holes to create the pattern outline, true things up, add seam allowances, and test with a muslin.
A copying recap
No unusual tools are needed for copying a garment. Besides a large, flat workspace, a folded blanket or something similar to serve as the padded surface (it’s not necessary to secure the padding to the work surface), and a few large sheets of paper or nonwoven interfacing for the pattern itself, you will need a pencil, an embroidery needle (or some other heavy, not too sharp needle), paper scissors, a straightedge, some pins, and a tape measure. We suggest a soft, nonwoven interfacing as an alternative to paper, because you’ll be folding and manipulating it to test each pattern piece as you work, so the sturdier and more flexible the pattern material is, the better. Flimsy tissues or tracing papers that are too crisp are not ideal.
![]()
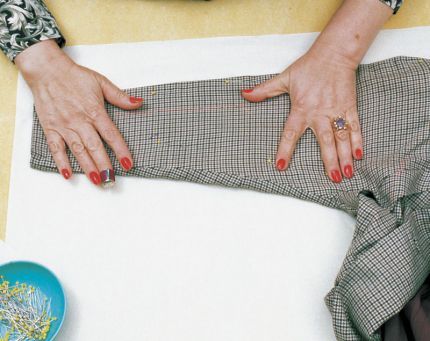
 1. Arrange the piece on your pattern material with the grainline parallel to an edge. Before you start pinning down each garment section, begin by thread-tracing with a contrasting color the straight-grain line and the waistline cross-grain line on all of the garment’s major pieces, so you have an unequivocal reference line at all times, as shown in photo 1 at right. If you can’t see the grain easily, and can’t pull a thread inconspicuously to locate it, use a low-power magnifying glass to make the grain more obvious. If your garment is precious, test the tracing thread (again, in an inconspicuous place) to be sure it doesn’t leave a mark when pulled out. Make sure you trace these grainlines on each piece.
Always start a copying project by thread-tracing the straight-grain and cross-grain lines at the waistline on each major garment piece.

![]()

![]()

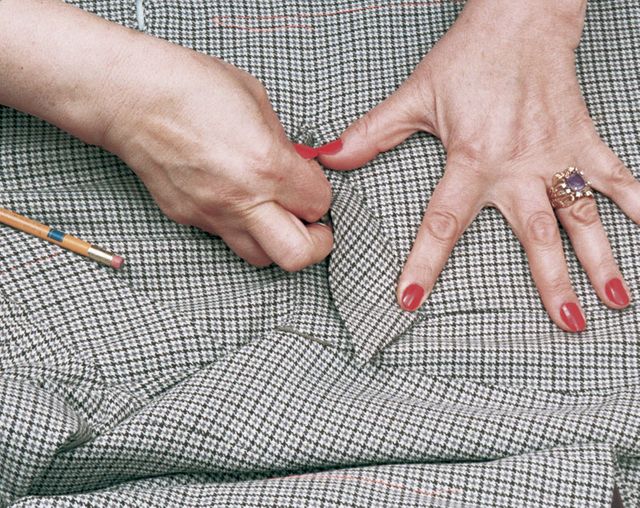
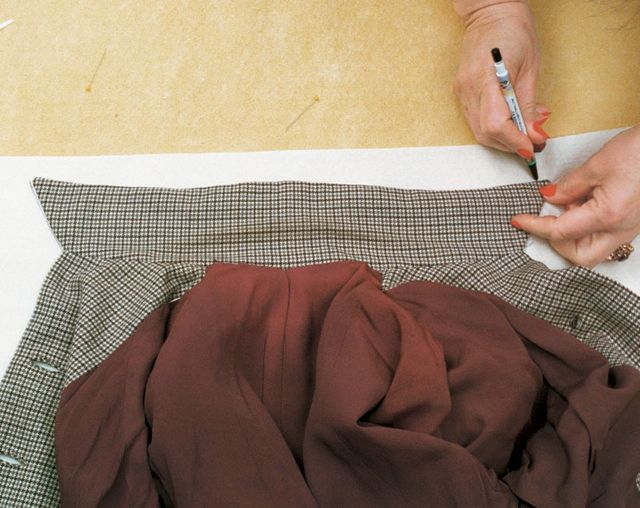
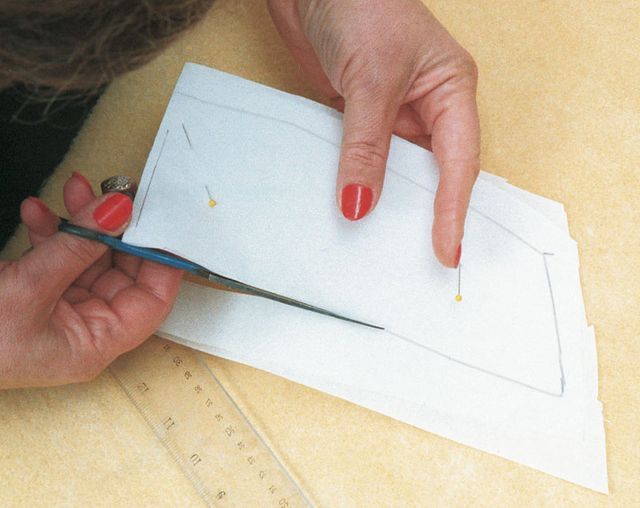
![]() 2. Trace free edges with a pencil, after pinning the garment as flat as possible without distorting it. Push the pencil point through the pattern material every few inches to make a hole. 3. Trace interior seams with a heavy needle, pushing through the seamline to make more holes. If the seam is hidden, feel for it with your fingers. 4. Finger-press shaped pieces as flat as possible without stretching them. Copy flaps and other add-on details later.
2. Trace free edges with a pencil, after pinning the garment as flat as possible without distorting it. Push the pencil point through the pattern material every few inches to make a hole. 3. Trace interior seams with a heavy needle, pushing through the seamline to make more holes. If the seam is hidden, feel for it with your fingers. 4. Finger-press shaped pieces as flat as possible without stretching them. Copy flaps and other add-on details later. ![]()
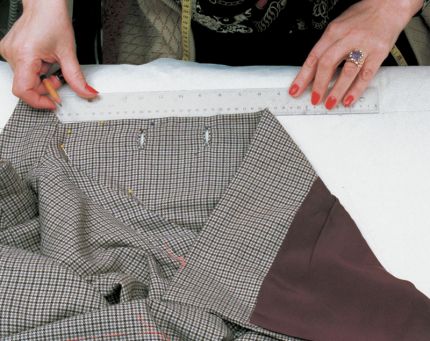


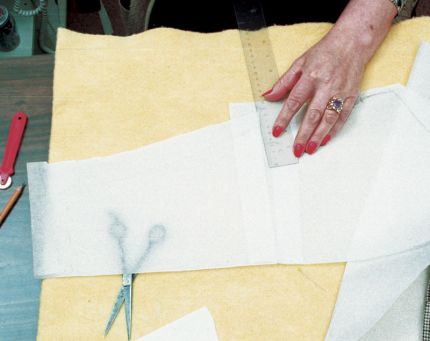
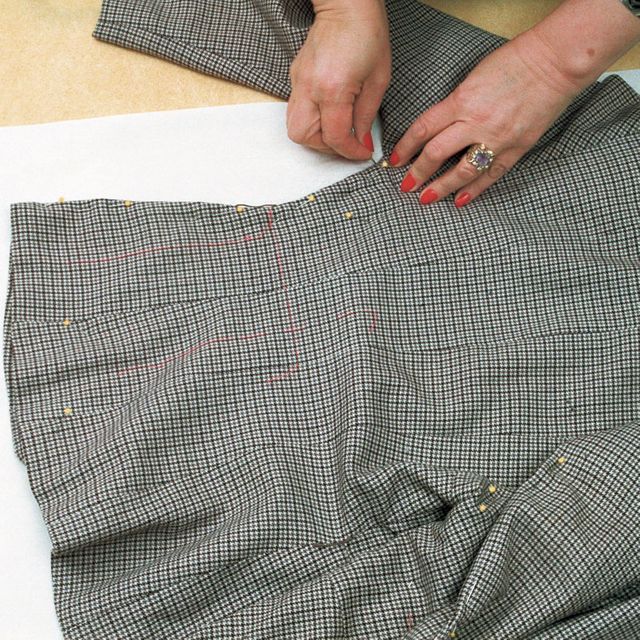
5. Use a ruler to true seam marks on seams that you know to be straight.
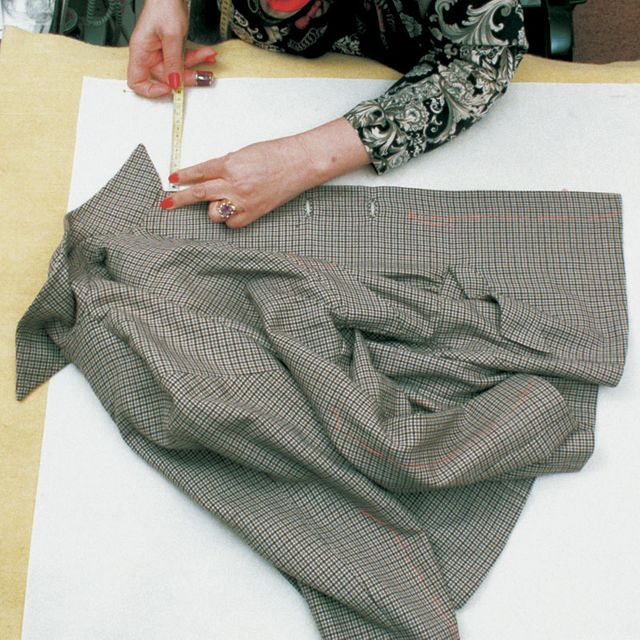
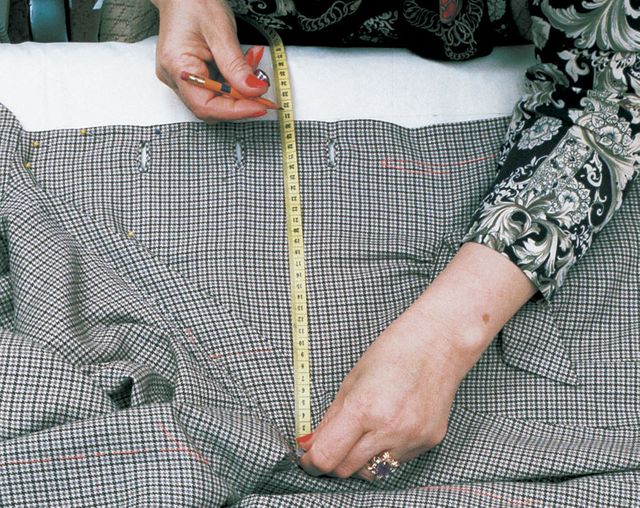
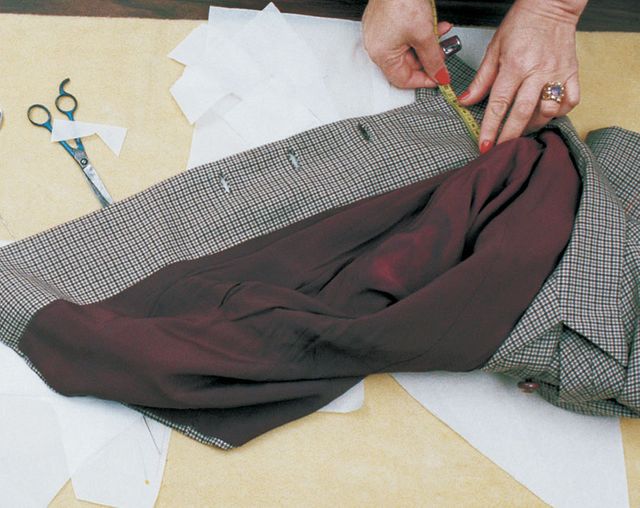
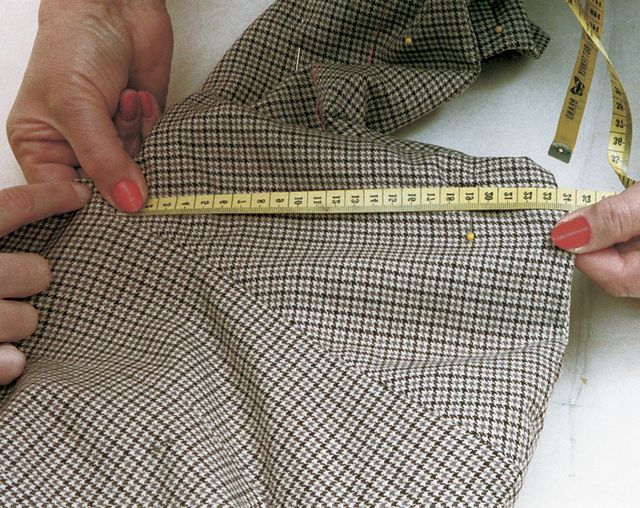
6. Always check traced outlines by measuring them against the garment on the straight- and cross-grains. Measure gathers when gathered and when pulled open as close to the seam as possible.
7. Always check your traced pattern pieces by pinning them together to compare them to the originals, particularly when shaping, ease, or gathers are involved.
![]()

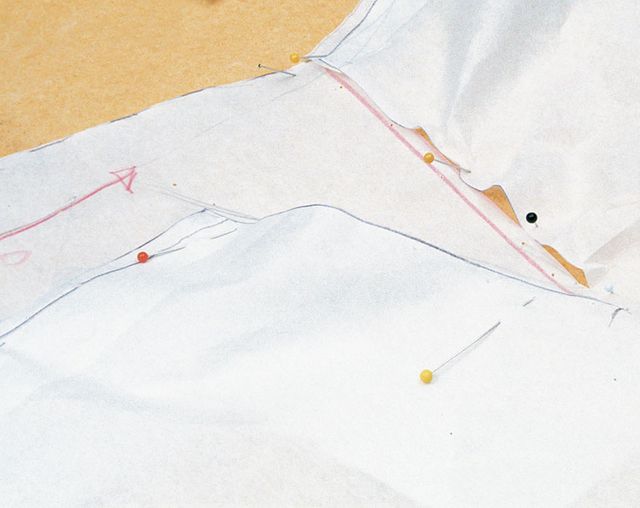
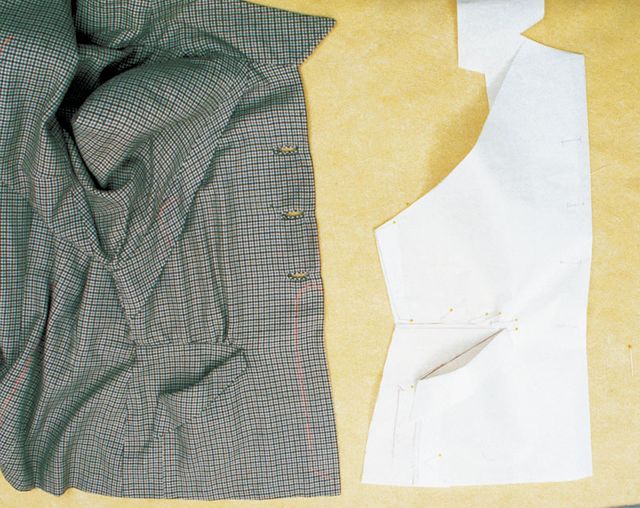
8. Simple facings can be measured without needing to be traced. Copy their more complex sections from the outer pieces they attach to.
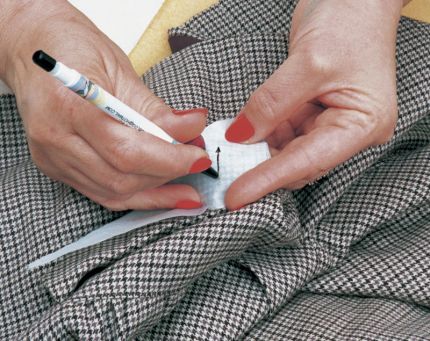
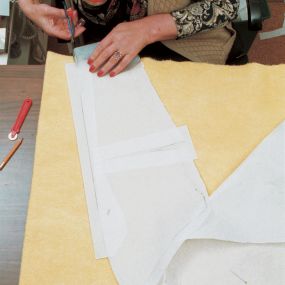
9. Trace flaps and other small details with the pattern material on top, not underneath. Be sure to transfer the grainline.
10. Continue to check your pattern pieces as you progress. In this shot, the upper portion of the facing is left uncut until more of the jacket has been copied.
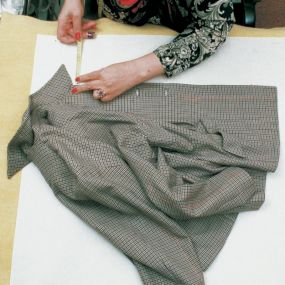
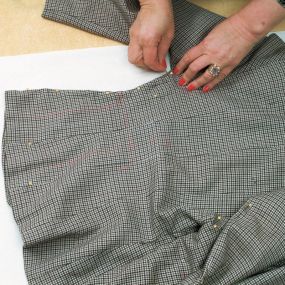
![]() Next, position and pin the first garment section you plan to copy, so that its grain is parallel to a nearby edge of your pattern material as a further reference point against which to check angles, and so on. The copying order is not critical, but as a rule, we start with the front, sleeves, and back, then move to the collar and other details. Arrange as much as possible of each piece so that all of its seams and edges are visible while it lies as flat as possible without distorting the grain. If you are unable to see every seam, fold the piece to reveal as much of it as possible—try to fold away the straightest and simplest seams so you can trace the more complex ones directly—and trace what you can see, including the outline of the nearest fold. Then measure the distance from the fold to the hidden seam, and add this to your tracing. That process is how Blossom will make the pattern for the wider, back piece of the sleeve that she’s pinned flat in photo 11 in the copying process, after tracing the fully visible front piece.
Next, position and pin the first garment section you plan to copy, so that its grain is parallel to a nearby edge of your pattern material as a further reference point against which to check angles, and so on. The copying order is not critical, but as a rule, we start with the front, sleeves, and back, then move to the collar and other details. Arrange as much as possible of each piece so that all of its seams and edges are visible while it lies as flat as possible without distorting the grain. If you are unable to see every seam, fold the piece to reveal as much of it as possible—try to fold away the straightest and simplest seams so you can trace the more complex ones directly—and trace what you can see, including the outline of the nearest fold. Then measure the distance from the fold to the hidden seam, and add this to your tracing. That process is how Blossom will make the pattern for the wider, back piece of the sleeve that she’s pinned flat in photo 11 in the copying process, after tracing the fully visible front piece.
![]()

![]()
11. Pin sleeves together as flat as possible before pinning them to the pattern material with the grainline parallel to an edge.
12. After tracing each half of the sleeve, measure it on straight- and cross-grains, and correct your tracing if necessary.
13. Slash across the sleeve pattern if there’s an elbow dart. Measure the dart width by feeling through the garment layers, then spread the slash by that amount, filling in with more pattern material underneath.
![]()
 14. Straighten the opposite edge of a spread sleeve by filling in with more material and redrawing it with a ruler or a curve. 15. Always reposition and repin the garment to trace each section separately, even if you can see several sections at once. This ensures that the grain is straight on each section.
![]() In a similar fashion, pleats and darts can be copied with a combination of tracing for position and measuring for depth, as shown in detail in our earlier article. Photo 13 shows how Blossom needed to slash the jacket’s rear sleeve pattern to recreate the shape it had before its dart was closed. If you can’t see the inside of a dart, just feel through the fabric to measure it. In this way you can also outline pocket bags and facings, shoulder pads, and any other hidden or interior details that you’d prefer to duplicate, rather than redraft or replace.
In a similar fashion, pleats and darts can be copied with a combination of tracing for position and measuring for depth, as shown in detail in our earlier article. Photo 13 shows how Blossom needed to slash the jacket’s rear sleeve pattern to recreate the shape it had before its dart was closed. If you can’t see the inside of a dart, just feel through the fabric to measure it. In this way you can also outline pocket bags and facings, shoulder pads, and any other hidden or interior details that you’d prefer to duplicate, rather than redraft or replace.

![]()

![]()

16. Complete the shaping of the facing when all the related outer sections are finished.
17. Trace both halves of large symmetrical details if the garment is old enough to have stretched (left). After tracing, fold the pattern in half and refine the outline to taste, perhaps using what you prefer from each side of the tracing (right).
![]()
As you see in the slideshow, it’s important to check each pattern piece against those they will be joined to. This is especially true wherever the construction involves ease or shaping, as in the jacket front shown in photo 10, whether it’s obvious by observation or guessed at by inference. Eased or not, you will usually find it easiest to check and to true all seams by comparing the partially cut-out pattern pieces you’re creating, both as you make each one, and when you’ve finished tracing all of them.
Add linings, seam allowances, and test!
Of course, the pattern you create with this process is without linings, or allowances for seams and hems. For jacket linings, you can simply subtract the facings from the basic pattern pieces to make the lining pattern, adding a 1-1/2-in. pleat from neck to hem at center back for wearing ease. Tack the pleat at top, hem, and waist on the final garment.
As you’re copying each section of the garment, it’s a good idea to feel through the garment and note the existing depths of each seam and hem allowance. But whether you plan to use the same allowances or not, we recommend cutting out your test garment with generous allowances, and basting it together before attempting anything more permanent. In fact, this is really the final necessary step in copying any garment, because it allows you to fine-tune both the pattern and the construction steps required to get a copy you will be happy with.
Blossom Jenab teaches couture sewing, patternmaking, and tailoring in Vancouver, British Columbia, Canada. Kate Rittenhouse, a film and theater costumer, is one of Blossom Jenab’s many students.
Jacket photo: Sloan Howard; other photos: David Page Coffin


I thought there was a chance that I could understand the instructions in this article, until I reached this point:
...begin by thread-tracing with a contrasting color the straight-grain line and the waistline cross-grain line on all of the garment’s major pieces...make sure you trace these grainlines on each piece. Always start a copying project by thread-tracing the straight-grain and cross-grain lines at the waistline on each major garment piece.
Whaa???
The author is asking you to thread trace the lengthwise and crosswise grain on each piece of the garment. That way they will be easier to transfer to the pattern pieces. Does this answer your question?
Hi,
Nice topic ! Could you give me a link about the pants topic (Threads #88, pp. 36-39), I didn't find it on the site.
Thx,
Charles.