


In Threads magazine #137 and #138, Kathleen Cheetham shows how to take a sloper (a set of customized basic patterns) and make a shirt pattern to match the unique size, shape, and personal fitting preferences of the intended wearer. She demonstrated step by step how to add the fitting and design ease in the bodice. Then she walked the reader through designing the sleeves, cuffs and collar. Here, we show how to design a two-piece collar with a stand for a blouse made from your sloper. The two-piece collar with stand extends all the way to the button extension.
Draw the neckline
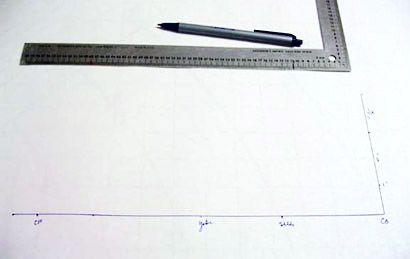
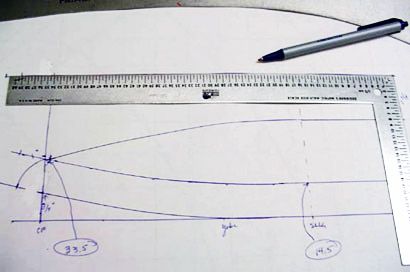
Measure from the center back to the button extension and draw a line that length.
Measure the neckline and mark the positions of the CB (center back), shdr. (shoulder), yoke, CF (center front), and extension on the line.
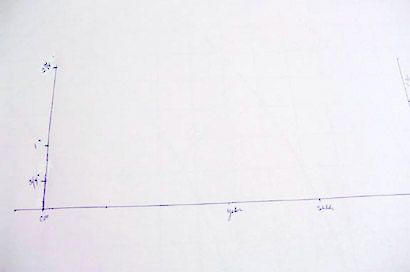
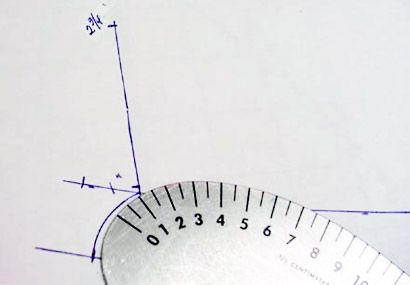
At CB, square up 4-1/2 inches (11.5 cm) and mark the following increments:
• 1 inch (2.5 cm) for the stand
• 2 inches (5 cm) for a gap
• 1-1/2 inches (4 cm) for the collar

At CF, square up a 4-1/2-inch (11.5-cm) line and mark the following increments:
• 3/4 inch (2 cm) for the curve of the stand
• 1 inch (2.5 cm) for the stand
• 2-3/4 inches (7 cm) for the collar

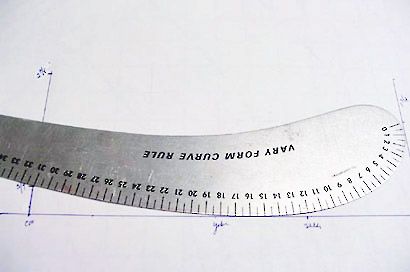
Draw the stand
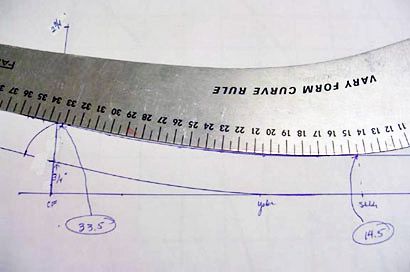
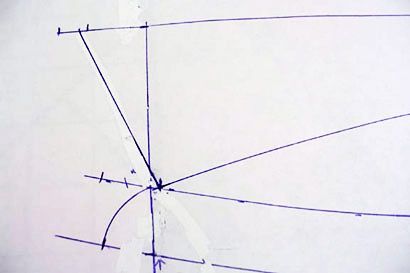
Lay a hip curve or French curve on or near the yoke and shoulder points, curving up to touch the 3/4 inch (2 cm) point on the CF line. Follow the curve to draw a line continuing past the CF the distance of the front extension.

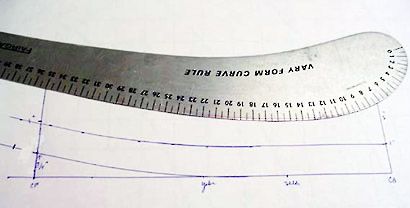
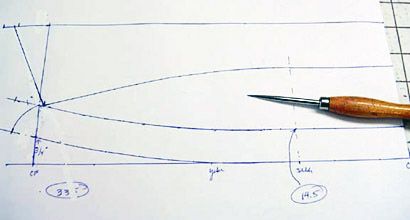
Measure up from the line and mark 1 inch evenly across the full length.

Draw a smooth curve between the two lines from the CF to the front extension.

Draw the two-piece collar
On the stand, measure in 1/8 inch (3 mm) from the CF.

On the CB line at the 2 inch (5 cm) mark, square a line the length of CB to shoulder.

Position your curve to match the stand line from the shoulder to the CF and write down the measurement points at the shoulder and CF. (Shown here in cm.)

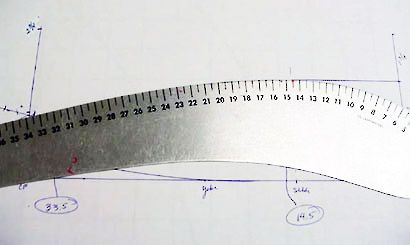
Turn the curve over and match the numbers to the same points to replicate the exact line along the collar to just short of the CF line at the 1/8-inch (3-mm) mark.


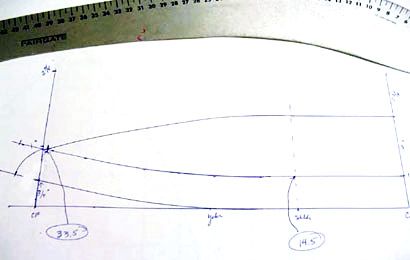
On the CF line at the 2-3/4-inch (7-cm) mark, square out a 1-1/2-inch (4-cm) line for the collar point.

Draw a straight line to connect the new line above with the CB line.

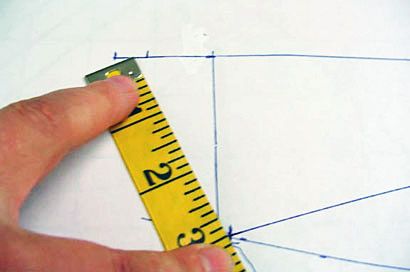
From the 1/8-inch point on the collar stand, lay a rule or measuring tape and pivot until you get a 3 inch (7.5 cm) line to the collar edge and draw a line.


Complete the collar
Fold the pattern paper along the center back line. Use an awl to punch key points and outline.

Unfold the pattern paper. Connect the dots to complete the collar and stand outlines. Mark notches at center back, shoulder and center front. (Yoke notch is optional.)

Separate the collar and stand before adding the seam allowance.
On the collar, follow the CB line to draw the straight of grain. You can also cut it on the bias.
On the stand make the straight of grain line perpendicular to the CB line.
Assemble your custom collar and stand as usual.
Kathleen Cheetham specializes in plus-size patterns. Visit PetitePlusPatterns.com.
an Online Extra to Threads #138, pp. 53-57


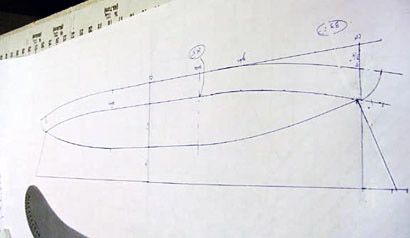


Is it just me, or all of these photographs out of focus? I'm surprised because I always expect and see superior illustrations/photography with Threads and Threads Contributor articles (whether they're online or in the magazine hardcopy). I wish I could read the photos' information better!
It is difficult to read which is CB or CF.