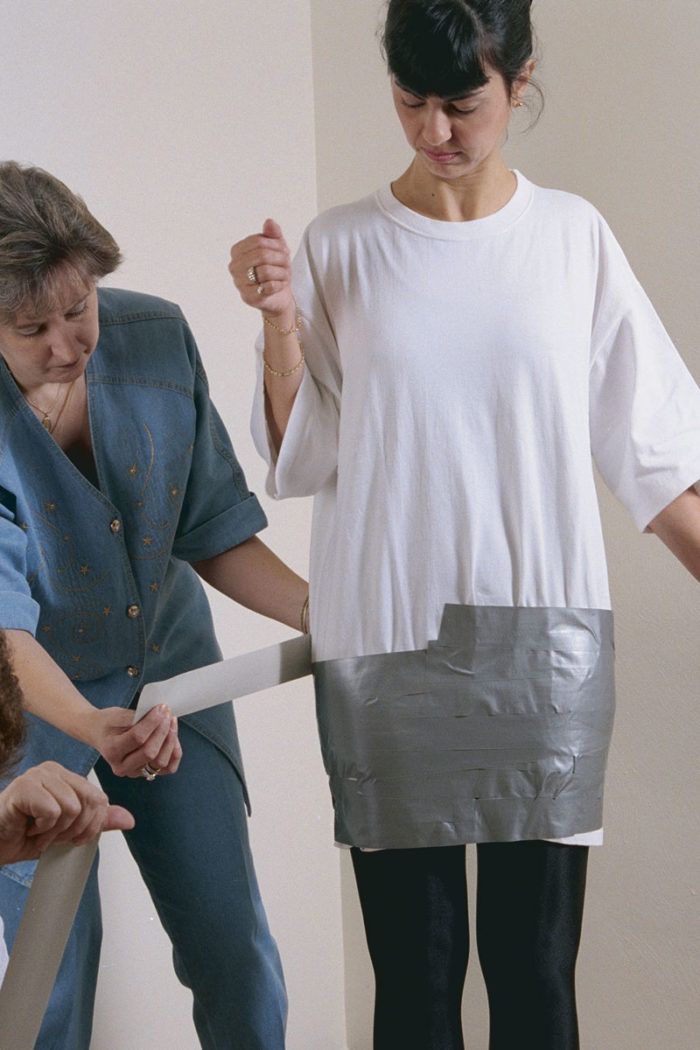
Joyce Perhac, a teacher and sewing-show organizer from Monroeville, Pennsylvania, has perfected a quick method of form making that uses ordinary duct tape as both the body-casting material and the final form. She’s written a booklet describing the entire process (“Make Your Own Body Form,” available for $10 from her at www.sewingevents.com), but we’ll cover the highlights here. (Pure Whimsy no longer carries the booklet.) Get more dress form ideas like this one by ordering a subscription of Threads magazine. Print subscriptions come with FREE access to our tablet editions.
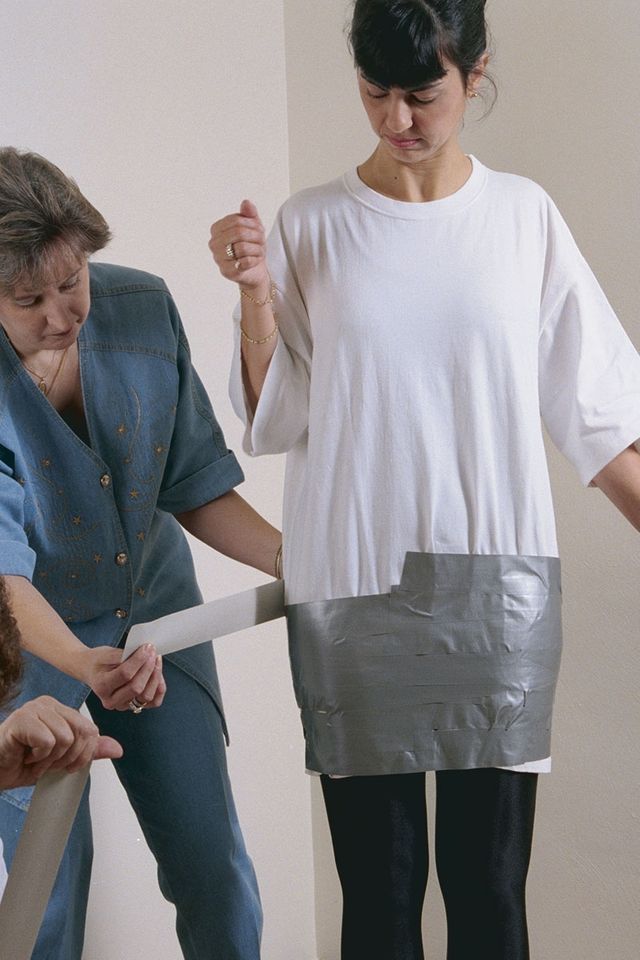
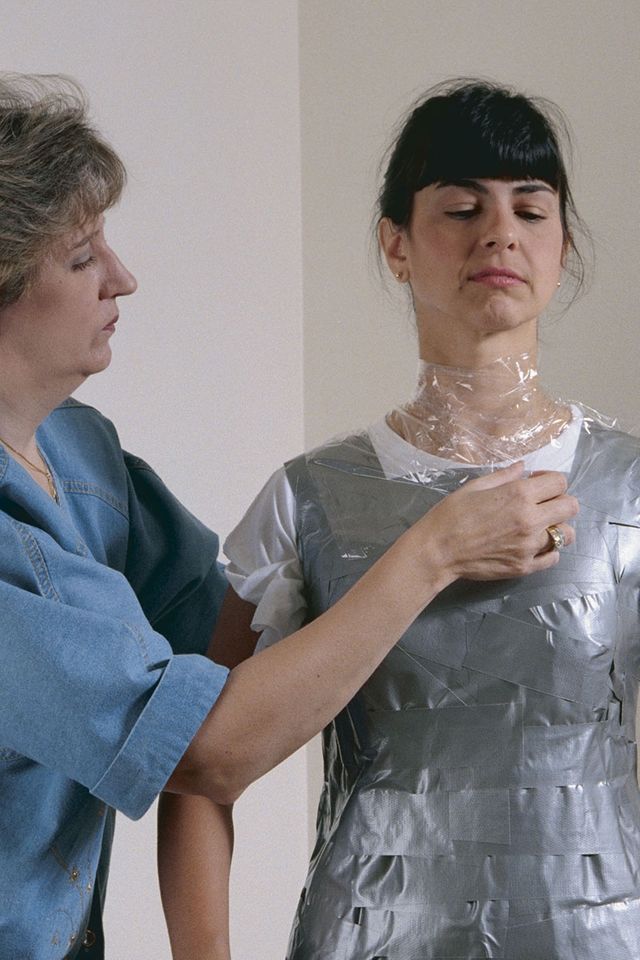
Start with your “victim” wearing well-fitted undergarments of her usual type under a long T-shirt, which needn’t be too tight. Begin by wrapping the tape horizontally at the bottom, mid-thigh, ideally with a tape-cutting helper (use old scissors, as the tape gets gummy; a size-10 figure requires 1 to 1-1/2 60-yd. rolls of tape). Wrap snugly, but not so tight as to rearrange or compress the body. At the waist, wrap a little more loosely on the first layer, allowing folds to form as you follow the contour, if necessary.


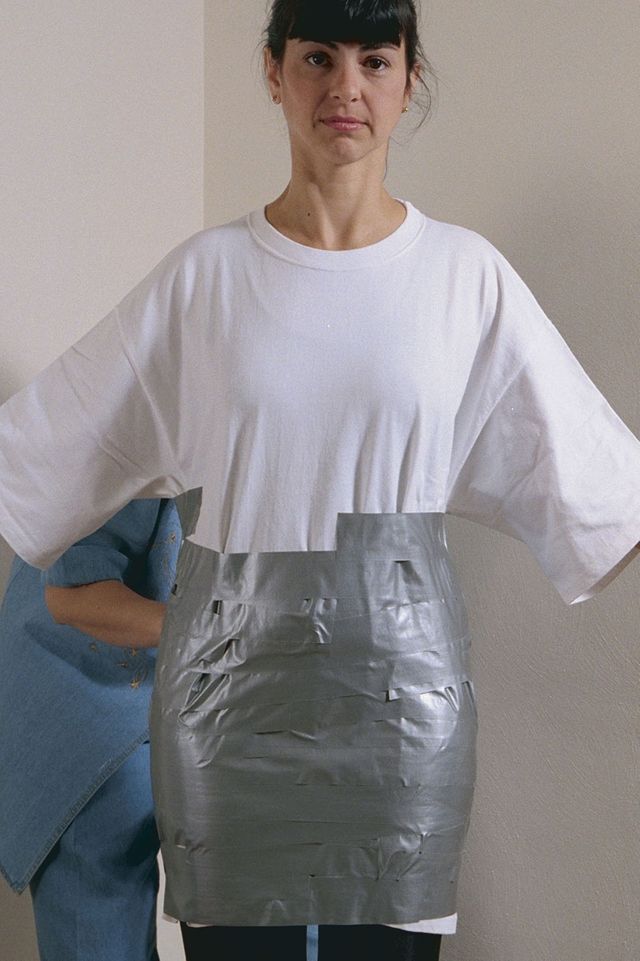
Three layers of duct tape make the form. Wrapping horizontally, start at the thighs and work up.
Wrap snugly around the thighs and hips, a little looser at the waist.
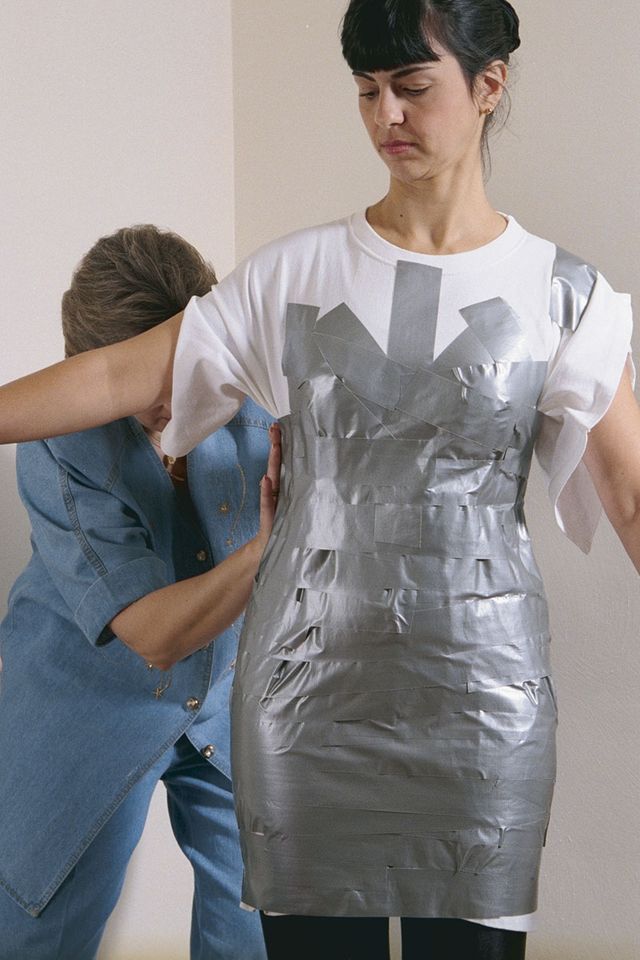
At the bust and underarm, cut the T-shirt sleeves if needed to allow the tape to follow the figure, and use shorter pieces arranged radially over the bust. Protect the neck area with plastic wrap, then wrap to form edges at the neckline and armholes similar to those you’d want on a fitted bodice.


In the bust area, use shorter tape and change direction. Short pieces of tape capture the contours of the bust better. Arrange them so they radiate out from the center of the bust area.
Protect the neck area with plastic wrap; wrap to form edges at the neckline and armholes similar to those you’d want on a fitted bodice.
When the first layer is complete, wrap twice more, first vertically, then again horizontally, further compressing the waistline to fit each layer more closely, and smoothing over wrinkles this causes with more tape.
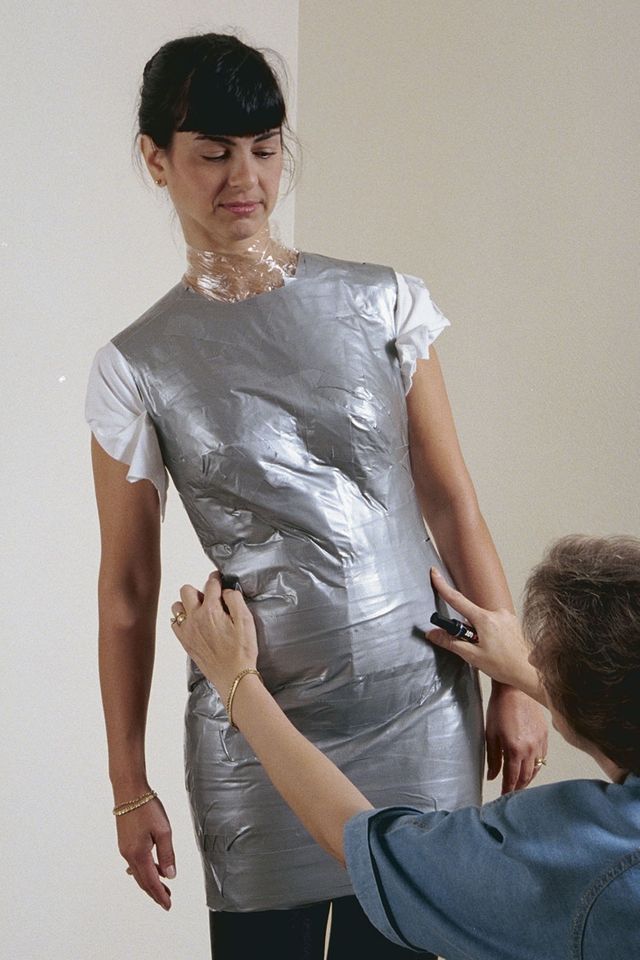
When finished, have the “wrappee” bend slightly to reveal her waistline, and mark it (and any other points you want identified) with marker or later with colored tape.


Mark the waist. Bending slightly will reveal your wrappee’s natural waist. Mark all around with a permanent marker.
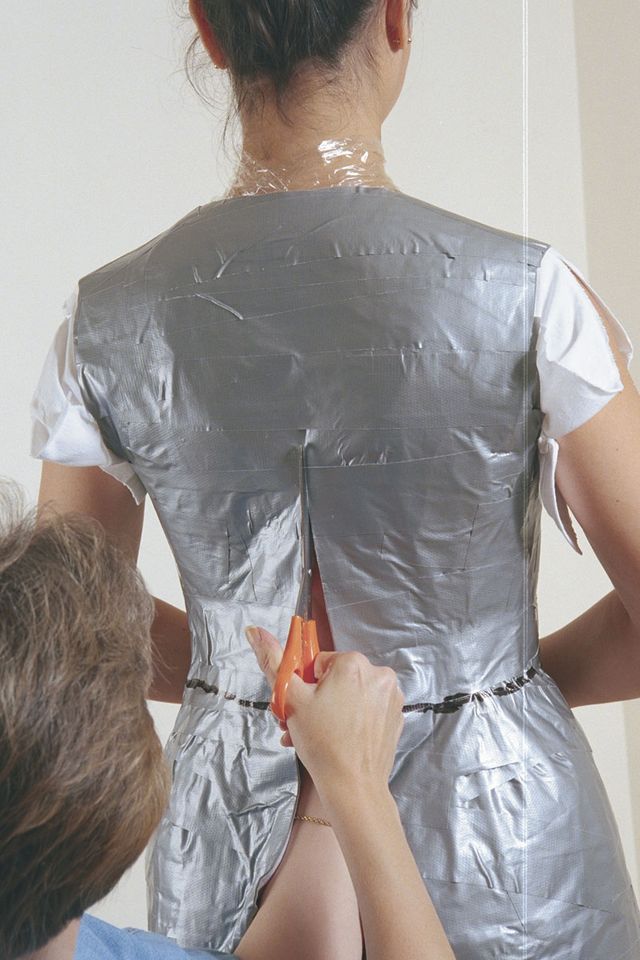
Cut carefully up the back. Keep your hand between the tee shirt and the wrappee’s body to avoid cutting undergarments or flesh.
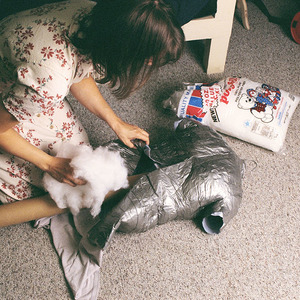
Cut off the form and T-shirt layer at center back with your other hand between scissors and body to avoid cutting undergarments (or the wrappee!). Then close the form with additional tape, stuff it with poly batting, and place it on a stand (read on for stand ideas). Joyce’s finished form has a polished look, similar to an industrial dress form.
by David Coffin
from Threads #75, p. 38
More dress forms:
Introduction
Close-Fit Duct-Tape Dress Form
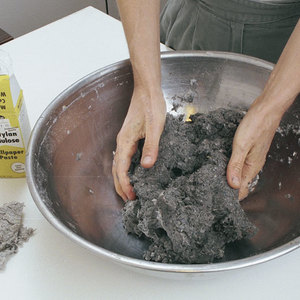
Molded Papier-Mâché Form
Paper-Tape Dress Form





I teach young children to sew, I need to finish a pheasant blouse/nightgown patters. I have a neck piece, a botton nightgown piece, and 2 flat side sleeve pieces.Should I have a nother piece for the sleeve? It looks wrong. Help. teacher in progress. Kreativelady.
The pattern you are using should have a list of the pieces you need for the garment you're making, identified with numbers or letters. Check just above the cutting layout. I would think a PEASANT blouse would have just three pieces: front, back, and sleeve.
I also posted this in Dress Form #2:
rkr4cds1 writes: I TOTALLY agree with DARKSSYDE about using the expanding type of insulating foam; however I partially filled the center with crushed & balled up newspapers first. The foam had room to expand inwards into the paper and outwards into the shell.
Suchpae brings out the MOST valid point as well, that one must be conscious of the depth and width of the form: just making up the complete circumference in inches isn't the same as replicating a body's exact shape as the true dress forms do.
I made a second foam-filled form, and using the dowel idea, pushed the marked-depth-dowels through my duct tape form from front to back in the exact spot that they needed to be for my body, leaving approx 1" on the outside and then taped them in place, before stuffing in the newspaper (they helped hold the balls in place!) and before squirting in the expanding foam.
After the foam had cured I sawed off the ends that projected outside the form and sealed the spots over with duct tape. Now it truly is an exact replica of my body, with NO distortion from just stuffing it with polyester batting.
Thanks for your input & tips, Ladies!!
rkr4cds
Do you think the papper packing tape which dosen't need water to active has the same result?
I used this idea once. Then I moved on to a better alternative! $85 is a GREAT price to spend on something that will last forever: http://mannequinhub.com/Dress-Form-Black-Female-Pinnable-Sewing/M/B00301ZJ4I.htm It looks so beautiful in my sewing corner <3
I used this idea once. Then I moved on to a better alternative! $85 is a GREAT price to spend on something that will last forever: http://mannequinhub.com/Dress-Form-Black-Female-Pinnable-Sewing/M/B00301ZJ4I.htm It looks so beautiful in my sewing corner <3
I found that cutting all of the tape prior to starting really helped. I was doing a form for my not too patient teenager. I cut and hung the tape on every surface I could in my sewing room. That way I just had to grab the dress and wrap. It really went quick. Also, when you pull the tape from the roll it stretches a bit. Hanging it allowed it to return to its original size. I.e. no issues with the form being too tight as I wrapped.
my mother and i each made one of these and after not a long time (a few months,) the tape started to come undone. i had to trash mine since it completely lost it's stick and shape. we used regular duct tape. any suggestions on how to get this to last longer?
i made a stand for my form out of PVC tubes and joins from a regular hardware store. it pivots and adjusts just like a real form stand. you can find all the instructions on how to make it here http://lulushion.blogspot.com/2011/06/making-of-form-part-3-stand.html and the best part is that is very inexpensive. Enjoy! :)
Hi everyone!
These articles on Threads were very helpful to me! I created my own dress form out of paper tape. I found it very successful- I'm sure it will aid my future fitting endeavours greatly!
I created my own tutorial that goes into a bit more detail about the process, and blogged about it here:
http://makingitwell.blogspot.co.nz/2012/03/i-made-my-own-dress-form.html
Please do visit, I'd love this to help someone! I'll do my best to answer any questions too :)
Good fitting luck everyone! :)
I try that thank you so much :)