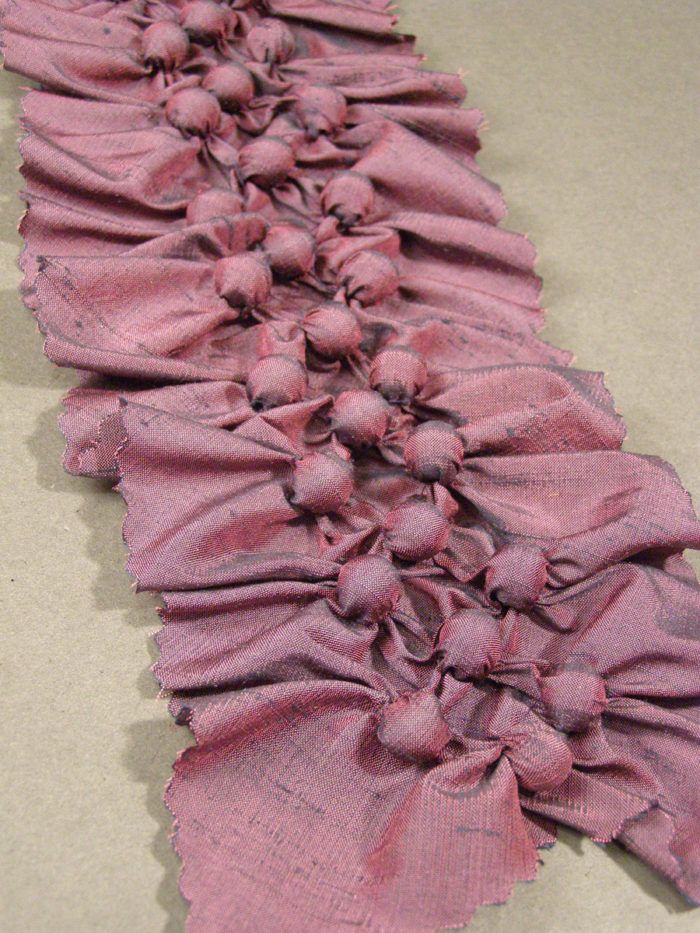
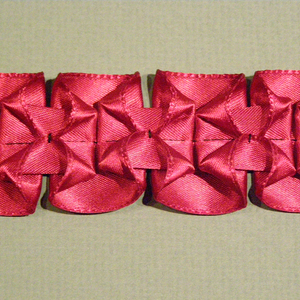
I found a vintage jacket at the thrift shop recently with this great trim, and decided that I wanted to figure out how to duplicate it. The trim itself was made by hand, and each “bubble” was filled with a little ball of cotton. Rolling all of these little balls of cotton, as well as the yards of hand-stitching, made my head hurt, so I figured out an easier way.
You’ll need a stiff fabric, such as a dupione, a duchess satin, or a taffeta for this work. The stiffer fabrics give a better result. Also, you’ll need a number of 10mm round beads to fill the “bubbles”-plastic is best because they weigh less than glass, and are also less expensive.
Know that when planning for this trim, you lose 50% of the length of the fabric, so cut double the length you need. You lose 25% of the width, so add extra for the width too.
The pattern:
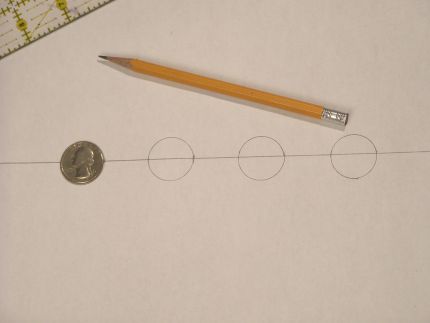
We will draft and make a pounce pattern to mark the wrong side of the fabric. On a sheet of stiff paper, draw a line down the center. Use a quarter (you know, money) draft circles along the line. The spacing between the circles is one quarter’s diameter.
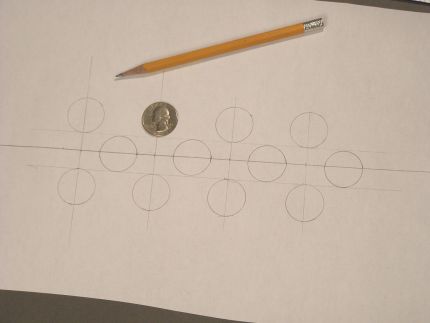
Mark midpoints along the line between the circles, and draft perpendicular lines.
After this, draft circles centered on these perpendicular lines, one row of circles on either side of the first row of circles, as shown.
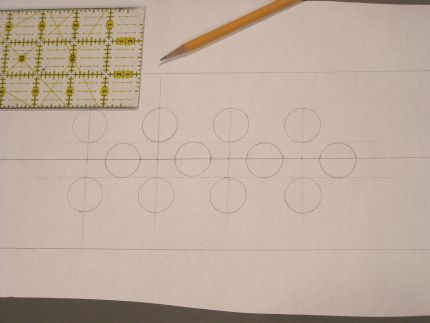
Draft the outside edge lines, 1-inch away from the circles. These are the finished edges of the trim.
Start your 14-day FREE trial to access this story.
Start your FREE trial today and get instant access to this article plus access to all Threads Insider content.
Start Your Free TrialAlready an Insider? Log in


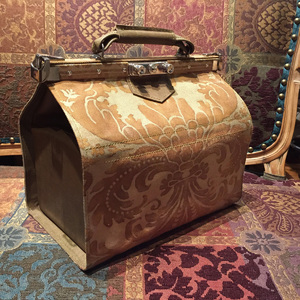
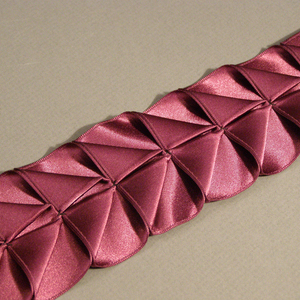


Great tutorial, can see many applications for this trim. not only on clothing, but accessories and jewellery also.
marjie
That's very interesting! I'd like to see it used in a project, whether a garment or home dec.
Under stitching, does it mean to say, "drop the feed dogs and install your darning plate (not foot)" because the photos look like a free motion foot?
I love this trim; thanks for the clear instructions. I guess the 10 mm beads would have to be as light as possible to avoid the build up of weight and sagging. Maybe plastic jewelry-making beads?
Looks like fun. But I had to look up "pounce bag" on the interweb. All the descriptions for "pounce bag" say to use charcoal for the marking powder but since we only have a gas grill, I will have to use kid's sidewalk chalk.
Where would one typically put this on a garment? On cuffs, neckline, down the front? And what's the best way to attach it? I assume fine handstitching on the back, which is fine, and then the whole garment would be handwashable, which is also ok, but not if this stuff had to be removed before cleaning each time. Life is too short for that!
Kenneth, I noticed this is cut on the bias. You didn't mention if this has to be on the bias or if it's just way better, kinda like using butter instead of margarine.
Thx Sue
To answer some questions:
Regarding machine settings: On my Bernina, the foot shown is a darning foot, which I use as a free-motion foot. You can drop the feed dogs or not, as you're moving everything by hand. If you have a specific plate and foot for free-motion stitching on your machine, then you might use this.
As for the beads, yes--inexpensive plastic, cork, or wood are best, as they are lighter. I do like the weight a glass bead gives this trim, though.
As for uses: The jacket I found had this applied like a Chanel jacket trim. The jacket was a classic cardigan style, the trim on the edges and pockets.
Cutting the strip on the bias seems to work better, but I've tried it on the straight grain and it seemed to work OK as well. The only difference, is the edges of the strip--they get a little ragged-looking when cut on the straight grain, whereas on the bias they fray nicely.
And as for attaching: Yes, you'll hand-stitch it from behind, or hide the stitches in the folds of the fabric.
For some, removing a trim before cleaning is a headache, so I don't recommend this trim for those people. I, however, am willing to go through all manner of effort to look fabulous. Just funny that way.
I would have to see this on a project to see if it was worth ALL THAT WORK!! Laying there, I just don't see the time and effort being put into this trim as time well spent. It is BEAUTIFUL, don't get me wrong. I just would love to see it on a piece of clothing. Always ready to try something new. I can see this in a see through lace with colored thread and beads. THat would be that one of a kind item no one could copy.
Fabulous! So many things to try!
This is a wonderful application technique for a garment, even though it's time consumming, I think it's worth it if you want to make an garment that is unique. Thanks for the tutorial
I have a discarded t-shirt from my daughter that used this technique for the neckline treatment with a cluster at the shoulder. Been planning to get some beads to try something similar on some knit...
Twenty years or so a friend gave me a deep red velvet pillow embelished all over with the above design. I had never seen anything like it before. She said it belonged to an very elderly friend of her and she gave it to her. She wanted me to repair it...........wish I had the above tutorial at the time. How about enclosing the edges in a seam instead of setting them free.LJ
I would also like to see it used, as I a'm a visual person. And would you make the pounce bag? I used to play pool and would take a sock and cut off the end and fill it with baby powder and tie it off, then would pat my hands with it to make the shaft slick, I imagine you could do the same thing could you not?
yes--you can easily make the pounce bag, just as you say!
Senor King,
Another stupendous tutorial!
Dear Mr. King, once again you make me smile!!! I really love to see all your tuttorials!!! because your explanations are just perfect!!! Thank you, thank you so much for your talents and for sharing them with us!! It will be an honor if you visit me at: Adriana Orozco Couture in facebook. My respects to you, and my best wishes too, all the way from the rainforest!!!
It will be such fun to do this.!
Is there some way to get rid of that sign that keeps blocking the copy? >>>>Now Available On Google Play for Android Devices!
besides leaving Threads the web site?
Awesome! I can see trying that in a soft leather.
This technique is better in synthetic fiber and glass marbles to shape it then you boil it to make the bubbles permanent.