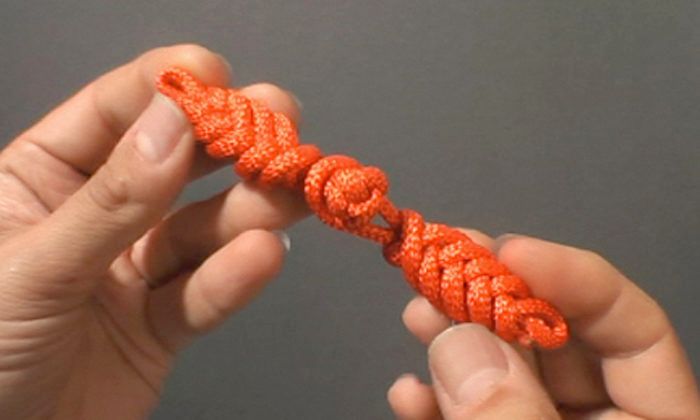
For an upcoming project in Threads #166, I decided to make a vest to showcase a special embellishment technique and added this frog closure. Knowing some of you might want to know how to make this frog, I’ve decided to post the method here. We’ll share photos of the vest as it gets closer to the issue it appears in.
I’m using a “shoelace” cord to demonstrate the technique, and recommend this, or another smooth round cord to practice with. After you’re proficient, you can branch out to other, more decorative cords.
The photos used in this blog post are excerpted from a class I teach on Patternreview.com demonstrating Frogs and Closures. You may want to take this class sometime.
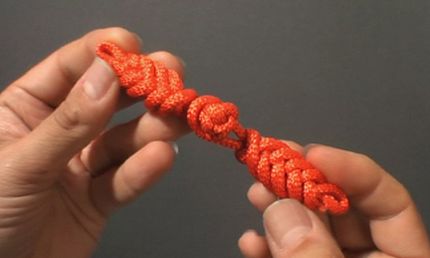
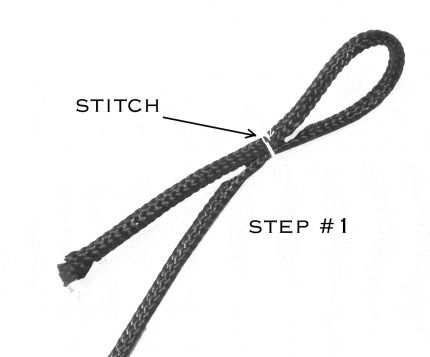
Step 1: To begin, whether you have a loop or knot at the end, stitch about 2″ up from the cut cord end.
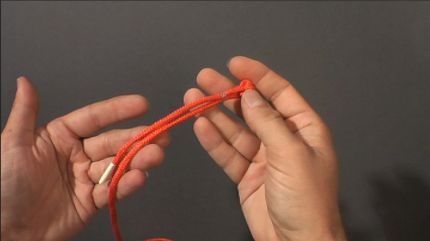
The success of working this frog comes from two things: work the frog horizontally instead of vertically, and pass the frog from hand to hand for each loop. Also, don’t hold onto it too tightly–a light touch makes your work easier.
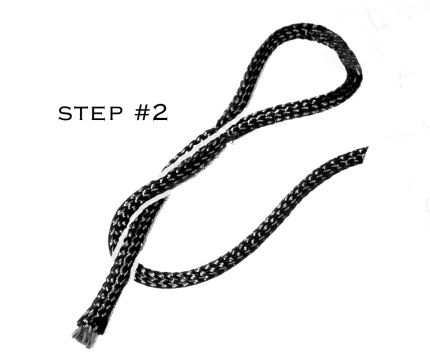
Step 2: Hold the work in your right hand. Pass the long end of the cord over the tail end to the left, away from you.
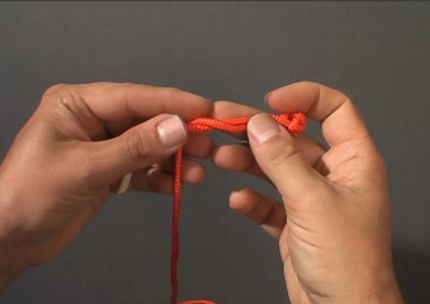
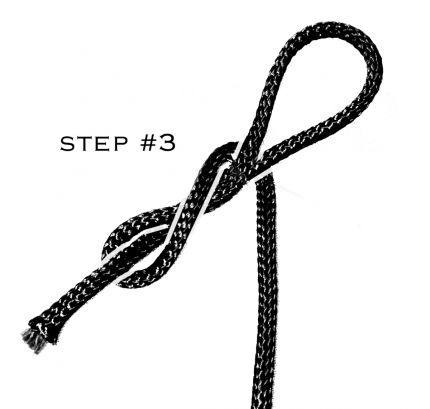
Step 3: Change the frog to the left hand, use your right hand to pass the cord up and over the loop end.
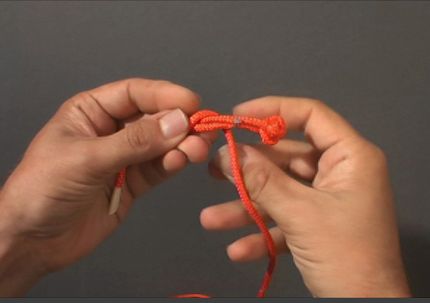
Wrap the cord around the loop.
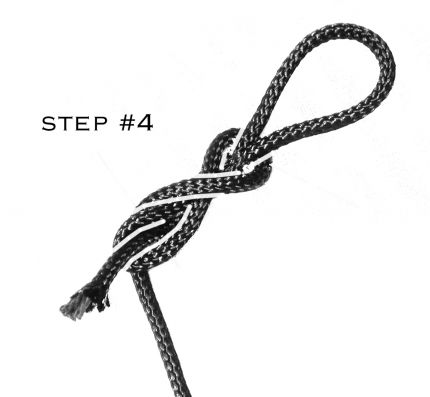
Step 4: Change the frog to the right hand, use the left hand to pass the cord over, and behind the loop of the previous loop on the tail end.
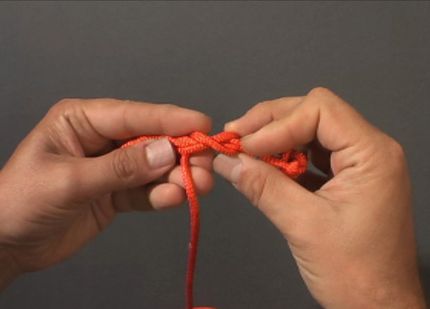
Wrap the cord around the frog.
Start your 14-day FREE trial to access this story.
Start your FREE trial today and get instant access to this article plus access to all Threads Insider content.
Start Your Free TrialAlready an Insider? Log in





Don't you have to sew or apply sealer to the "rope"?
Senor King,
Another tutorial, and never a retread of something pedestrian.
Thank you for this and all of the innovative techniques you have shared with us.
To Wezi:
You want to stitch the intersections of the frog after you work it, but no, you can skip the sealer. The ends will be hidden inside and underneath. But--if you want to, you can go in and use a little fray check.
unfortunately I can't find this mentioned class on patternreview. Possibly you will help?
Kerstin
Love the closure, I can see me using this for decorative boxes also. Can you tell me how to add the knot to one end as I can't see how you did this?
Many thanks.
Brenda
The class runs periodically--if you email Deepika through the site, she'll schedule it.
Brenda, the knot is a simple Chinese knot (also called a monkey fist knot). It's been published in the magazine a couple or three times.
Here's a link for the Chinese knot....
http://www.youtube.com/watch?v=LceeI0Lw4P8&feature=related
I love these frog closures. Inherited an encyclopedia of knot tying when my father-in-law passed away a few years back and last year, out of boredom, discovered how to make i-cord shoe strings out of #10 crochet cotton and a size 0 or 1 double point knitting needles. I'm beginning to see a plan coming together!
Kenneth, I really appreciate your articles each month. I like your designs and love the embellishments. Thanks for all your inspiration!
I have seen the frog closure in your piece on curved tucks in the latest Threads magazine May 2013. Can you tell me how you prepared the fabric for the frog closure- is it cord you have covered and how di you finish it off. I would like to use this closure for a cloak I am making for a textile art exhibition here in Australia.
The vest is beautiful.
Thanks Janet
Hello!
This cord is just filled cord, made in the usual way with the tubing turner and bias strips, pulling the filling into the cord when turning the bias tube right side out.
The ends of the cord are hidden under the frog--stitched in place, and then just cut off, as is shown in the lesson. No fancy finishing for the ends, because they aren't going to show.
Best of luck in the exhibit!
I wish it mentioned the length of cord needed!
Wezi, you can usually burn the ends of synthetic fabrics. I made a lot of braided paracord gear for my equine endeavors and I've found a simple wood burning tool, about $10 at your local craft store, to be indispensable. It will give you a much cleaner finish than the old burn and pinch approach.