

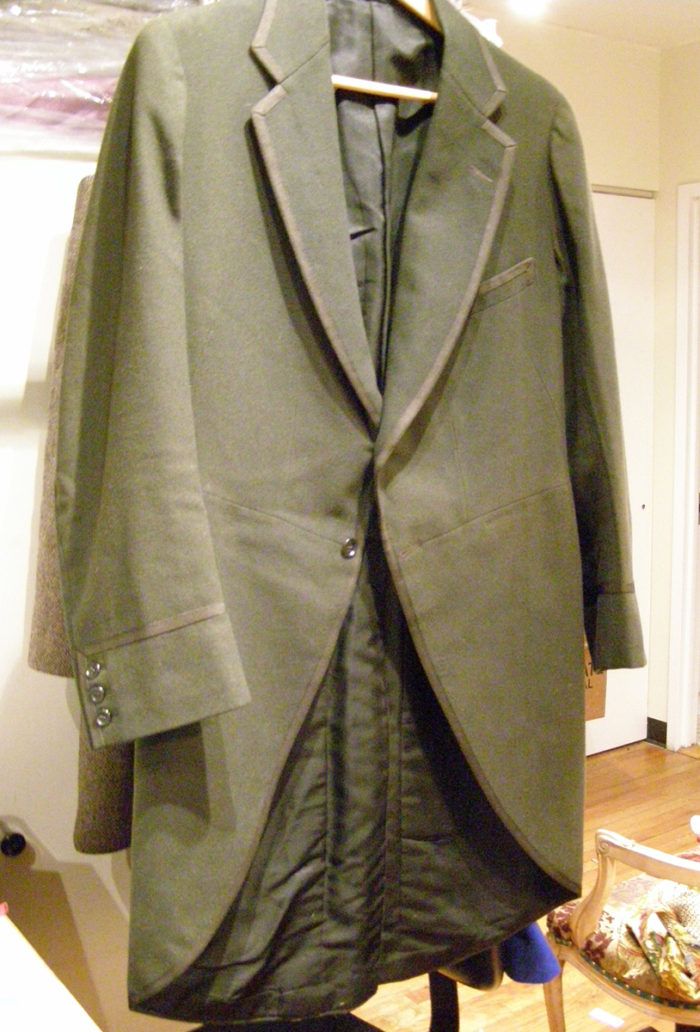
I found this morning coat at the Salvation Army recently. The hand-applied braid caught my eye, along with the $12 price tag.
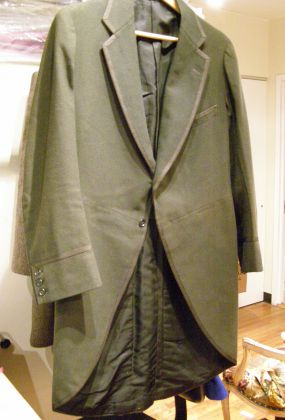
Front view
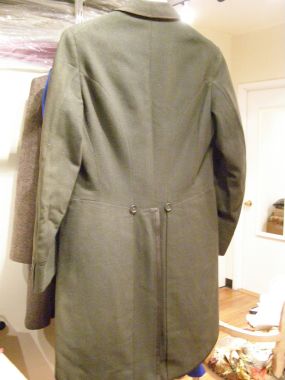
Back view
Whatever the original color, the dye has oxidized, and it’s now a strange dark green color and not evenly colored across the piece.
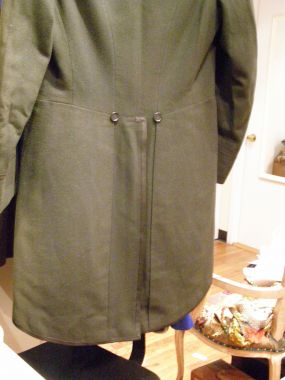
I love the tail detail. All the trim is hand-applied with pickstitching, but the stitches are really invisible.
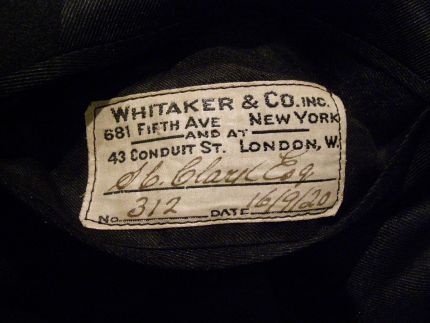
Rooting around inside the jacket, I found the label: September 16, 1920, for S.C.Clark, Esq. It has a history now!
The cuff detail is also swell – the buttonholes are hand-worked, and operable.
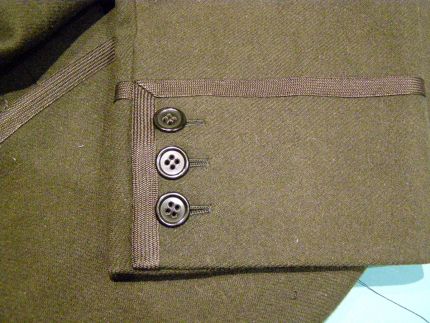
The braid is hand-applied, and the stitches are undetectable.
Sadly, the silk lining in the sleeves was shattering – I could put my finger through it easily, so it needed to be replaced.

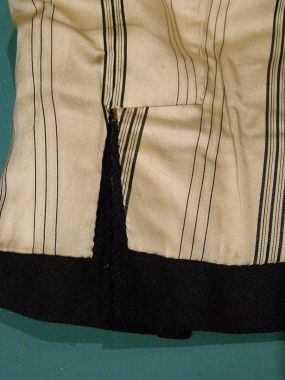
The lining had been put in by hand with tiny fell stitches. This shows where the sleeve lining joins the inside of the jacket. The sleeve lining is a traditional white with black stripe, and the body lining is a lightweight black faille.
Here’s the lining applied to the cuff. I took these photos as an aid to memory, because I wanted to reinstall it as it was originally constructed.
Here’s the cuff opened. The buttons popped off when I unbuttoned the cuff, as the thread holding them had deteriorated.
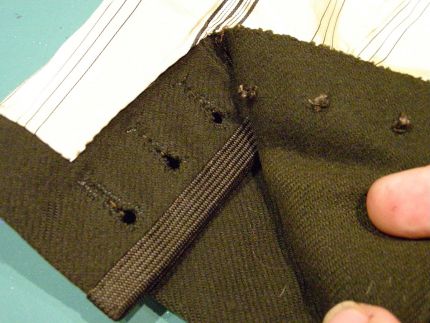
Notice that the vertical underlap seam that finishes the cuff hem facing (the part in my hand) wasn’t turned and stitched as expected, but it was hand-overcast along the fabric’s cut edge. This creates a flatter edge under the cuff.
I assume the overlap edge was sewn the same way and then bound with the braid since it’s similarly flat.
I needed to pick out all the hand stitching to get the lining out…
Start your 14-day FREE trial to access this story.
Start your FREE trial today and get instant access to this article plus access to all Threads Insider content.
Start Your Free TrialAlready an Insider? Log in


"a bit fruity"??? c'mon. It is more than "a bit"! I love to pick up old items and take them apart for the lessons learned. If I had found this coat, I might have considered re-dying it olive drab (loden green) and perhaps replaced the lining with something more suit-able, like an olive or grey stripe or subtle plaid. I am all for flowers but your choice here was not at all appealing. But thanks for the wonderful pictures and the lesson - I always enjoy your advice.
Nice Salvation Army find! You must live in a fancier-dressed community than I do - ha!. I'm not bothered by the flowered sleeve lining; it's a nice surprise when opening up the coat. I once made a denim tailcoat for a friend who was in the backup band for Joe Walsh. I lined the whole thing with a bright fabric pattered with Maxfield Parrish images and top stitched it in dark yellow like a Levi's jacket. He wore it both onstage and off and it looked great when he flipped the tails up to sit down at the piano.
I got a Linton jacket for $5 at the Goodwill. It apparently had been a manufacturer's rep's sample because there were large numbers written in indelible marker on the lining. Otherwise, the jacket felt new, fit beautifully, and was very usable. I did just what Kenneth King recommends. I photographed the existing lining before removing all of it. Then I took it apart, cut new pieces, then reassembled them and inserted them into the jacket just like the original. There were no obstacles. It was easy!
Where is your Salvation Army, Mr. King? You always seem to come up with great pieces worth restoring to use, or maybe you have more patience to sift through the racks on a regular basis. Really enjoy seeing and learning from you!
I love it, fruity, flowery and all. Thanks for the great pictures of your process.
The Salvation Army I shop at is in New York--there are several and they yield quite a number of cool things. The trick, however, is to keep going back--this piece just appeared one day, and would have been gone if I hadn't snared it.
I love wearing it!
What a great find, excellent tuition, photos, etc. and fabulous choice for the lining Professor! Thank you for sharing. Just wish our Op shops here in Australia harboured such wonderful treasures!
To user-681854: I just got back from a wedding over the holidays, held in Hawaii because the groom's family lives in Australia. What a fun group of people they were. I'd love to go teach there, and scour your Op shops!
I loved the jacket and the exquisite detail pictured. Loved that Mr. King took pics. What I didn't love was the modern day fabric on a piece of museum quality. It made the value of this coat go down the tubes. I do appreciate Mr. King's ability. It's just that sometimes, his artistic persona takes presidence over his ability to acknowledge the value of his finds. Even tho I think he dropped the ball on this one, I will still read about his projects and admire his capabilities. I would have found a fabric that closely matched the original, replaced the lining then donated it to a museum - which is where it should be.(Without trying to manipulate the color of the coat). It is what it is - and it is fabulous !
To oopsgramma: This jacket isn't irreversibly damaged by the addition of the fruity lining--if someone wanted to they could still replace it with a period-appropriate lining--they could repeat the process outlined here, with the appropriate lining choice. So saying that the value of the coat went down the tubes, is a bit of an exaggeration.
The piece, while wonderful, isn't museum quality condition because of the fading and the few small moth holes (as one museum curator I know advised me--I had thought about donating). That's why I didn't feel compelled to match the lining to the original. And, besides, since I'm wearing it and not donating, I wanted to have some fun!
Hello Mr. King,
Could you tell what type of hand sewing needle you are using and also in general, what is a good hand sewing needle(s) to own? I am hoping to move away from so much machine sewing with some of my garments but there are so many needles and choices, a bit overwhelming since I am only beginning with hand sewing!
Thank you and love the jacket and the lining you chose!
To user-2255285: Hand sewing needles are somewhat a matter of personal preference. I prefer the Bohin brand from France--I like sewing with the #10 milliners needles. These are sharp, thin, and slightly longer than the standard hand sewing needles. Since I use beading needles in embellishment quite a bit, my hand wants a longer needle.
Bohin is a good brand, as is Milward (hard to find), and Richard Hemming and Son. Also Clover needles are good. Keep in mind--as in the materials of sewing ( such as good thread), a good-quality needle makes work much faster and more even.
Would love to see a picture of you modelling the coat! It looks like a great find!
I replaced the entire lining in my son's leather coat that I had bought him for high school graduation (age 18). It wasn't vintage, but it was a challenge. The original lining was a thin poly with a light fleece backing. It had three leather bound welt pockets, including one with a zipper. I replaced it with flannel backed satin in a silver grey and re-made all the pockets with a scrap of leather from my local Tandy Leather shop. The original lining was in bad shape, so I had to guess at some of the shapes. And yes, un-sewing was the longest step. He is still wearing the coat at age 27.
Lovin' that wonderful find--wish I was so lucky! AND lovin' that label. What serendipity! You did a great job, Kenneth. Fun.
Ivislief - I was reading this article because I need to do EXACTLY that - replace the lining of a leather jacket I bought him when he was 18. He is now 26. The jacket is fantastic looking. The lining is shredded. Any suggestions? I was going to gentle pull it out, use the lining as a pattern and go from there. The hard part is re-attaching the lining to the leather? Hints?
to motherofsons : You can do a hybrid of machine and hand sewing on the leather. I just recently changed a lining in my beloved leather coat, and this is how I proceeded.
After taking the lining out, and using it as the pattern for the new lining, you'll sew the entire lining--body and sleeves--as one unit. Then:
Machine sew the lining to the facing, by putting the pieces right sides together--the lining will be outside the coat, wrong side visible, when you do this. You can pin in the seam allowances all around the facing, to position the lining. Then, machine the lining to the facing from hem, all around the facing, to the opposite hem.
Turn the jacket and lining right side out. Slip the lining sleeves into the jacket sleeves.
To finish the sleeve cuffs and lining hem, I used the existing holes of the machine stitching, and with needle and thread, hand slip-stitched the lining cuff, and hem, to the original stitching. This way, you don't have to force the hand sewing needle through the leather--let the existing holes of the stitching do the job.
Let me know if this is clear?
Hi Kenneth! I was wondering what kind of fabric you used for the lining. I take it the jacket is wool ...
Now RE: choice of the lining fabric's color and pattern, it reminds me of a walking through a field after a week of rain. Jacket's all green and mossy and then - flowers! I suppose if I had any objection to it, it would be in the white background since the tail of the coat would always show the lining, I find the white a bit too strong of a contrast. On the other hand, there's a kid inside of me that spent her childhood in black tights, saddle shoes and dark plaid uniforms who is just giggling at the prospect of someone walking by wearing this - contrast and all!
;-D
To Cyd88: I agree that the white would be too start to line the entire coat, but the sleeves were all I lined. The original sleeve lining being white with a black stripe was where I took my cue. The sleeves generally were lined with a fabric such as this for two reasons--the initial one, being that the shirt sleeves were generally white as well, so the lining wouldn't "read" when the jacket was worn.
Also, it was assumed that the sleeve linings would wear out faster than the body, so a different fabric would be used anyway for the replacement.