
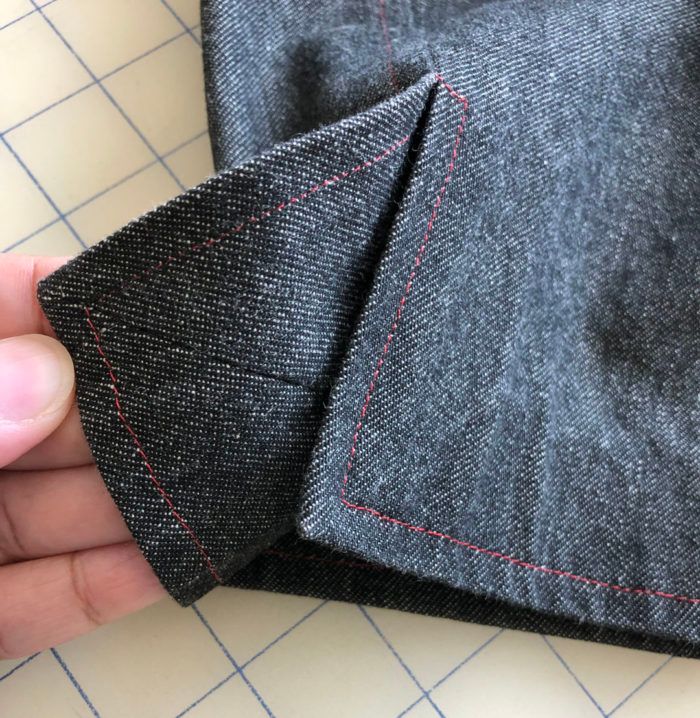
The Easiest Mitering Technique
Use this expert method to finish corners of garment hems and home décor items
In the early 1980s, I had the good fortune of working in a couple of menswear shops doing alterations. One sold made-to-measure custom suits (made in Hong Kong), the other sold off-the-rack suits and sportswear. We had to be able to work well and quickly to meet deadlines. At that time, I’d learned to shorten suit jacket sleeves in about 30 minutes from start to finish. That included removing buttons, releasing the lining, shortening the sleeves, replacing the miter, and resewing the buttons and lining. Lengthening a sleeve took a bit longer. Either way, the sleeves had to be restored to the exact finished look they had from the factory.
That’s where I learned this mitering technique. As you will see, this method works, whether or not the vent and hem widths are equal.
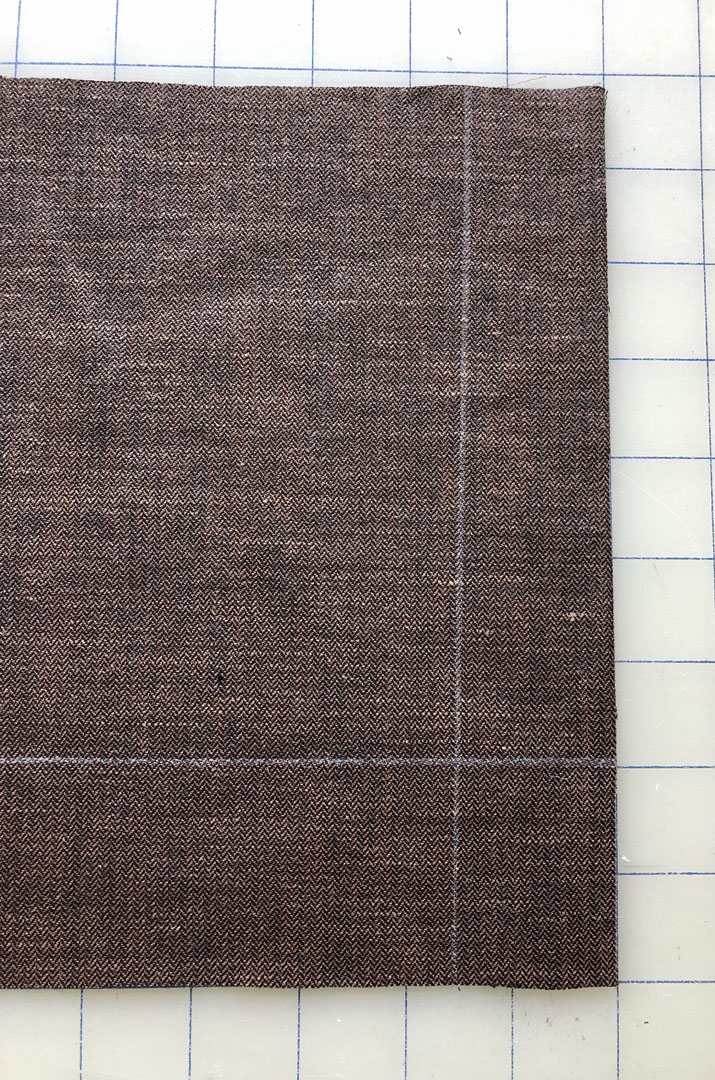
Mark and press
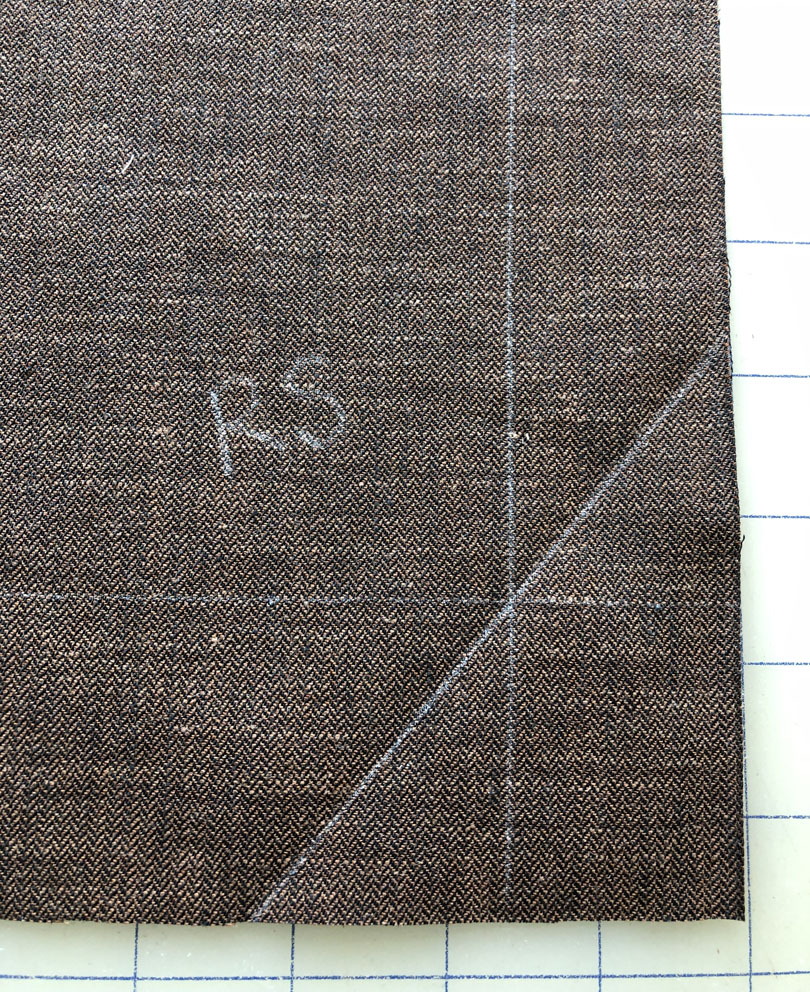
1. Establish the vertical and horizontal hem widths, and mark them with chalk. If your chalk or marks tend to fade, you can thread-baste on these lines.
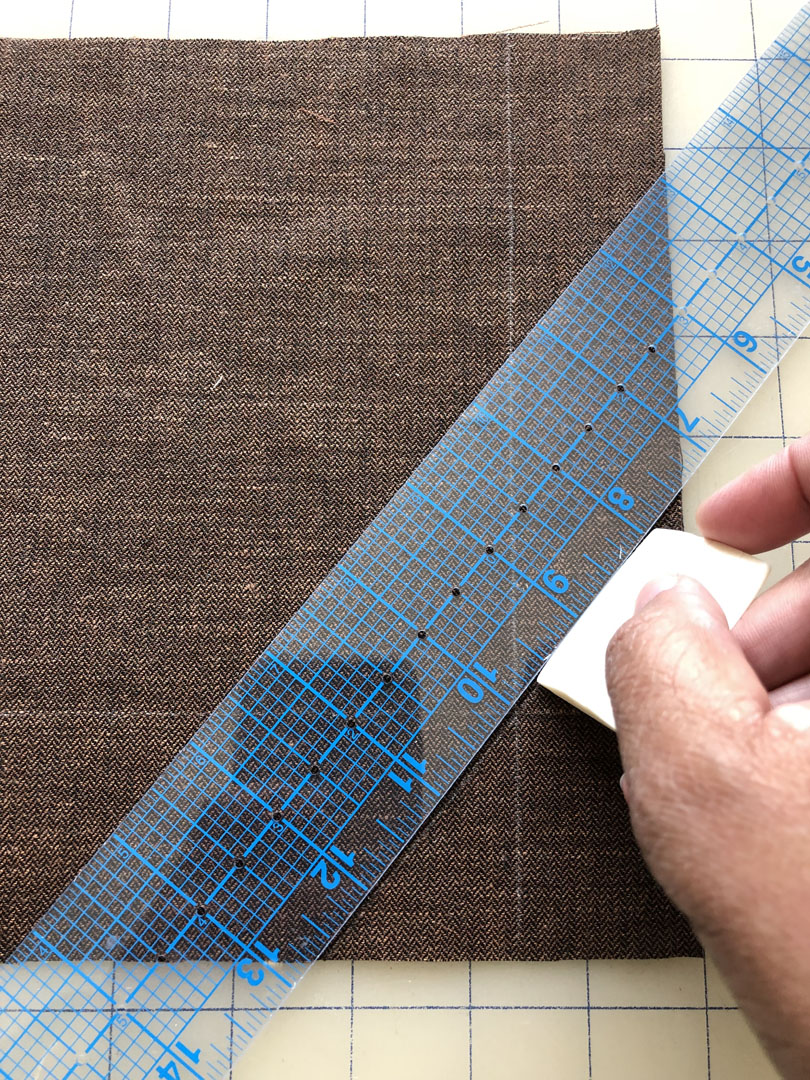
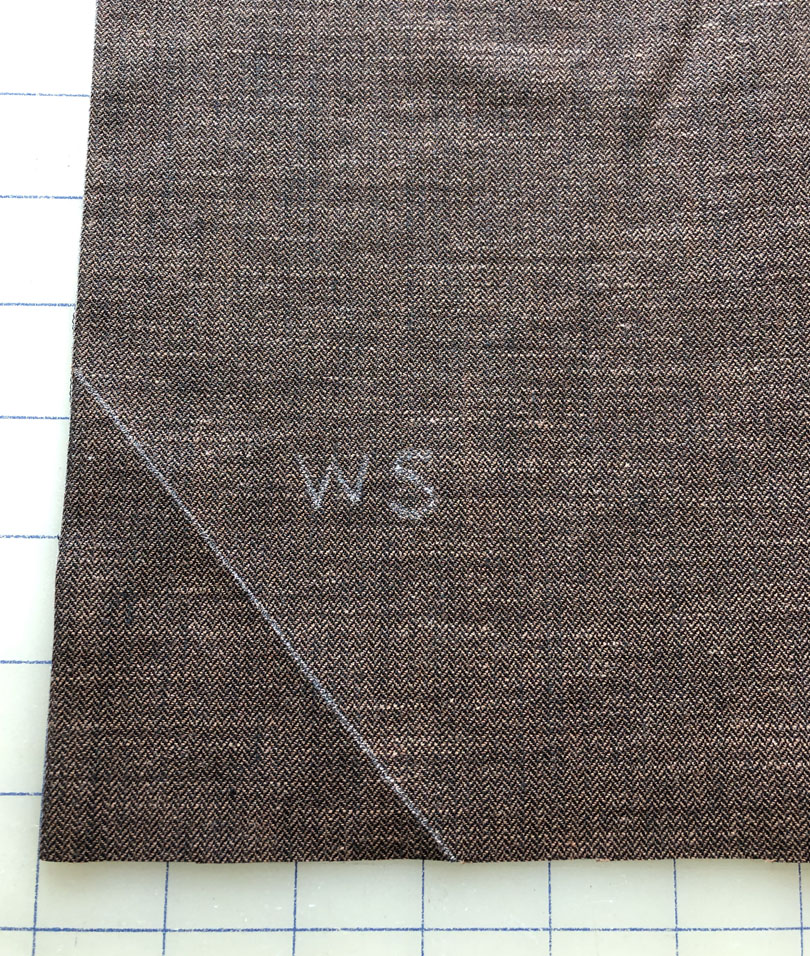
2. Draw a diagonal line at the intersection of the vertical/horizontal lines, as shown. After drawing the line on the fabric’s right side, flip the corner up and draw a line against the ruler’s edge on the fabric’s wrong side.
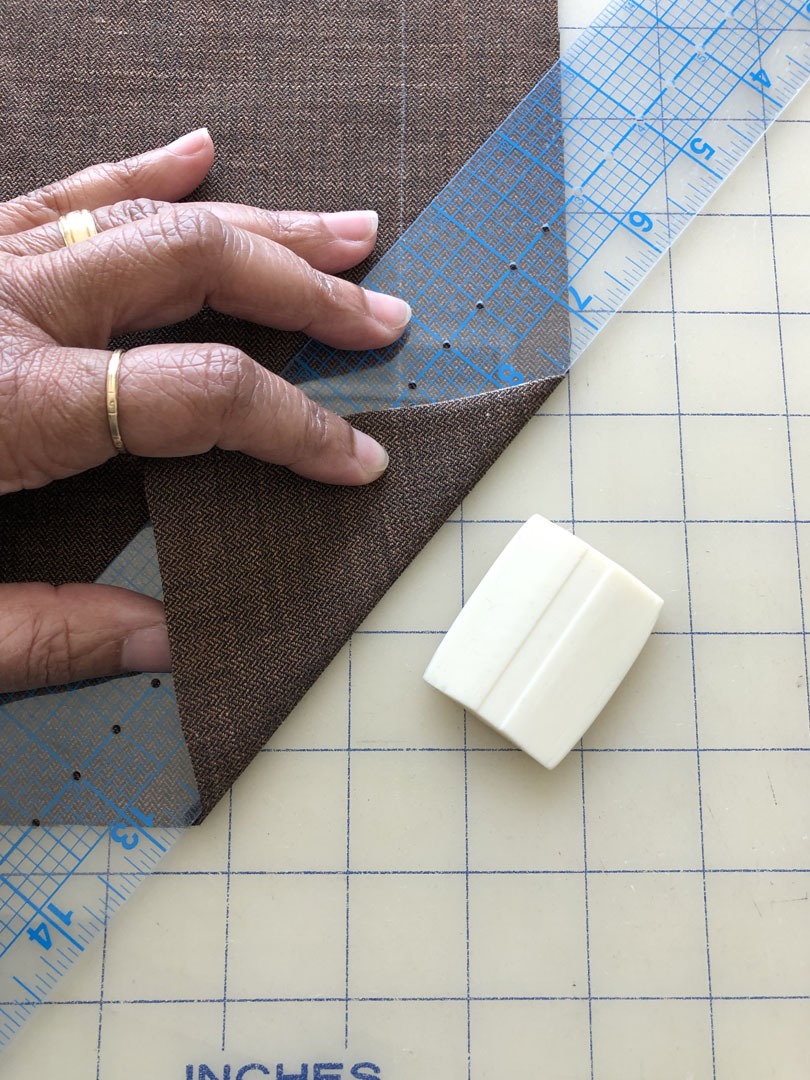
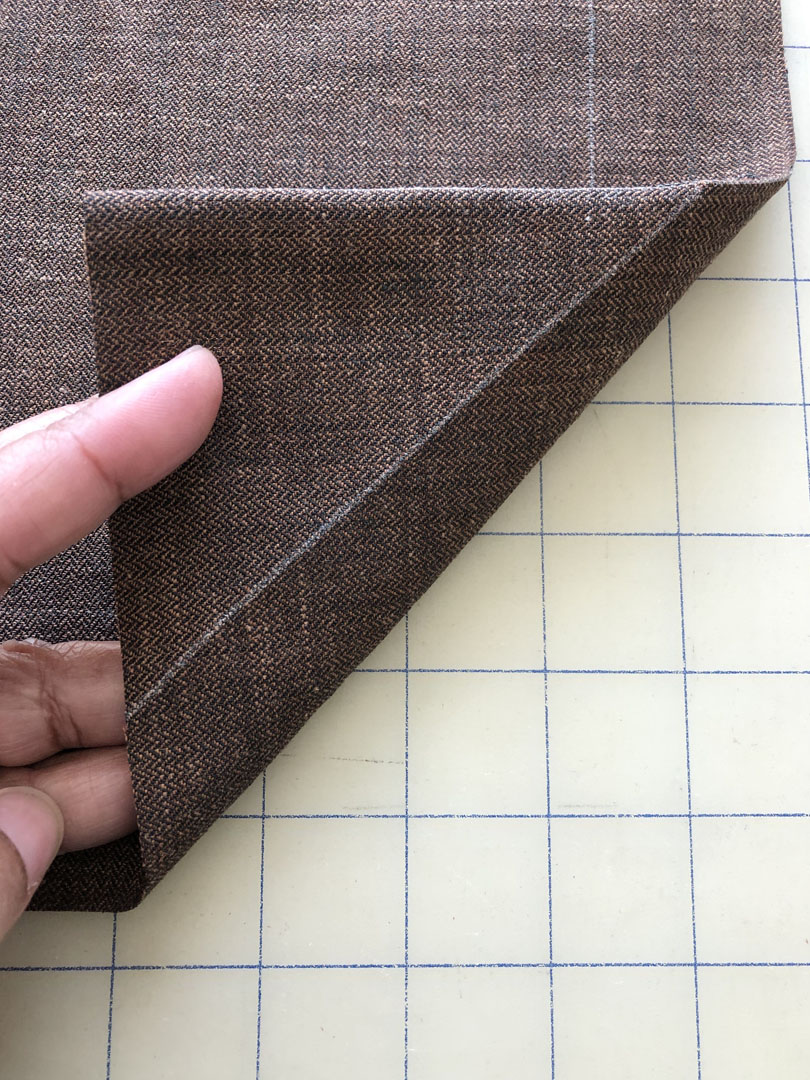
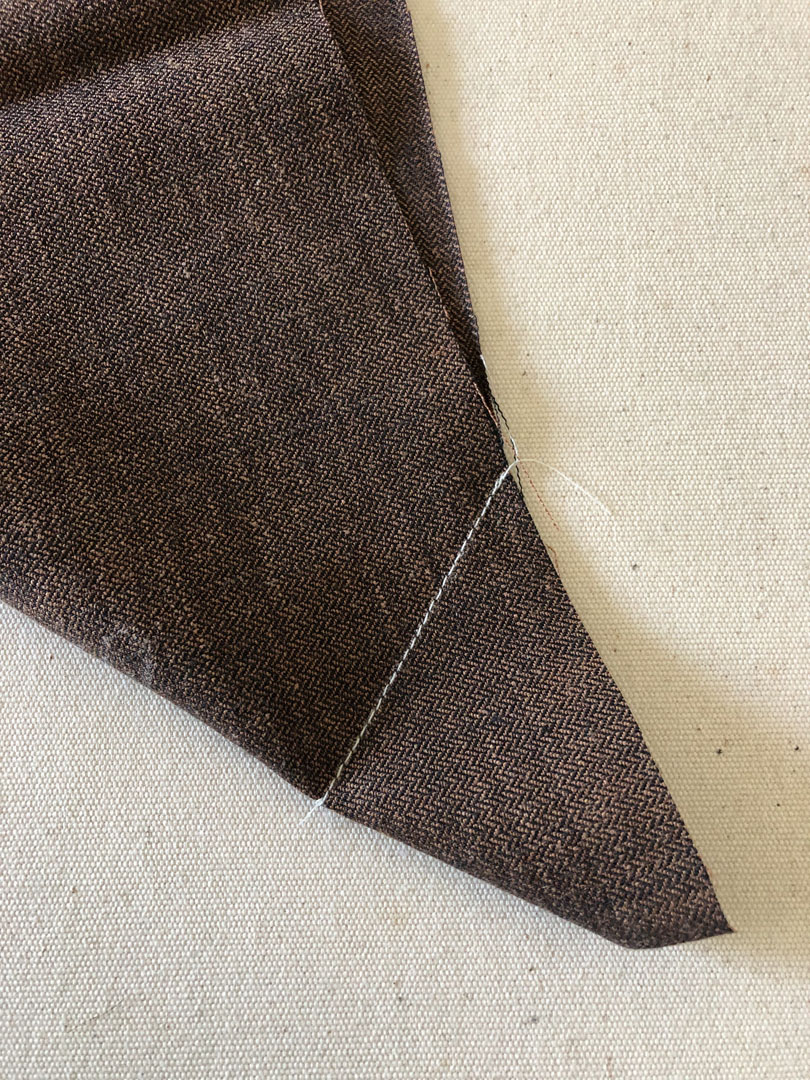
3. Next, make a mark at the intersection point of all lines. With right sides together, fold from the bottom up, making sure to match the diagonal line onto itself to form the miter’s corner point.


Sew, turn, and press
1. Pin perpendicular to the line to hold the corner in place.
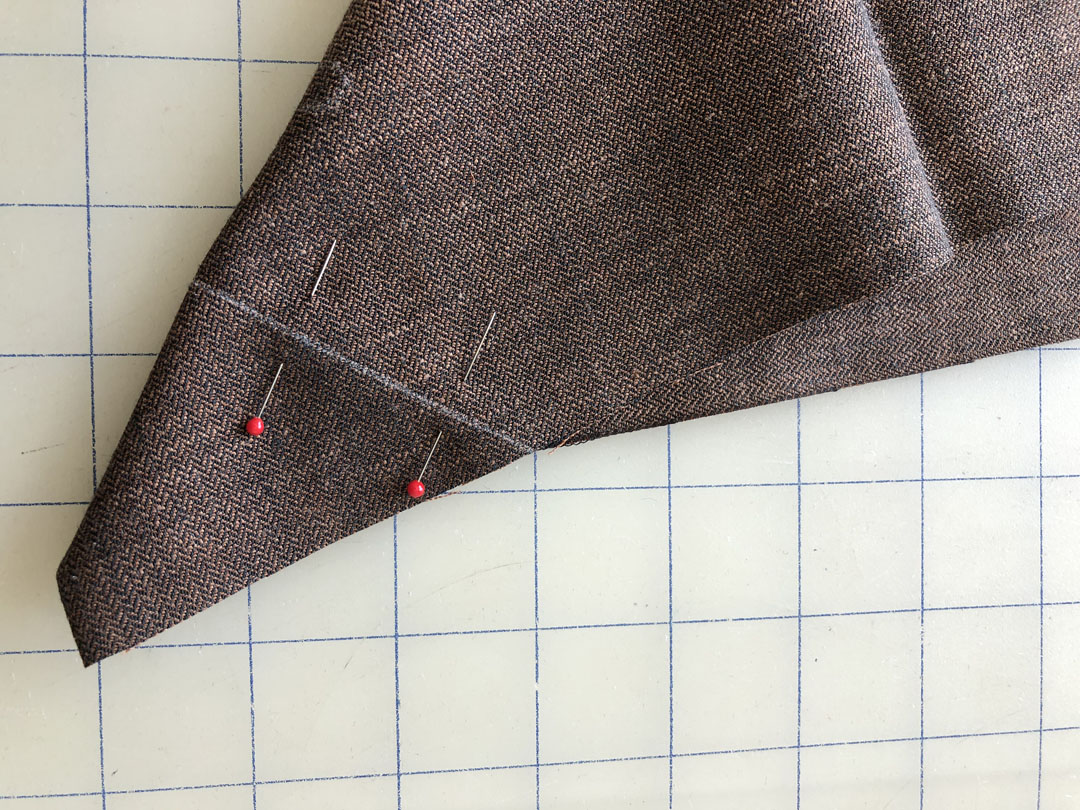
Sew across onto the chalk line and backstitch to secure.
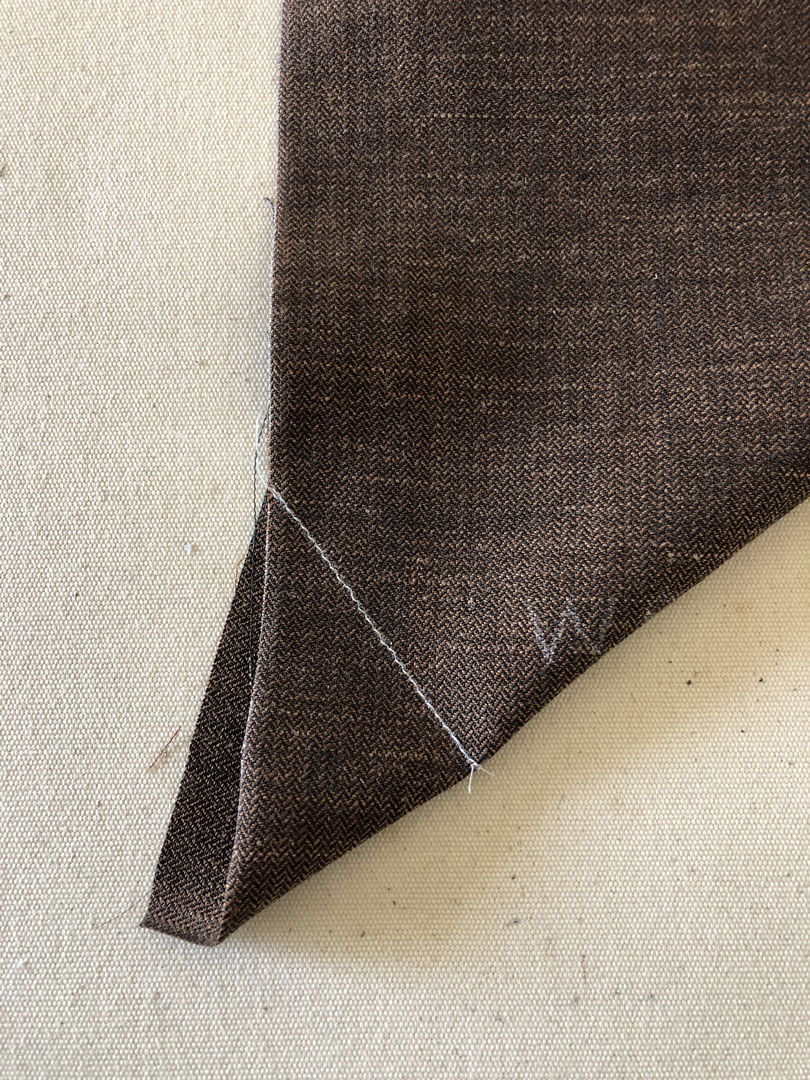
2. Next, place your pinkie finger into the point so you can turn the mitered corner right side out. In my example, I have opted to keep the excess fabric that…
Start your 14-day FREE trial to access this story.
Start your FREE trial today and get instant access to this article plus access to all Threads Insider content.
Start Your Free TrialAlready an Insider? Log in


Thanks for all the details. That was very helpful!
You're very welcome! I hope that you'll give it a
try :-)
Pamela Howard, thank you so much for posting.
Thank you so much! This really works!
That is wonderful, straight forward and it'll be great!
Thank you all!
Only one thing I'm missing: what determines the angle of the diagonal line? Or does it work regardless of exact angle? Thanks!
Hi! Yes, it works regardless of the exact angle. Also, this method works even if the corner to be mitered is not the same width on the side and hem edges as shown in the samples. You just want to make sure that the line drawn intersects both the vertical and horizontal lines, and that the raw edges meet when you fold on the diagonal line to sew the miter.
Thanks,
Pam
Thank you!
MJZ