
A 1920s Fantasy Bridal Dress Combines Delicacy and Structure
The pannier-supported silhouette keeps coming back
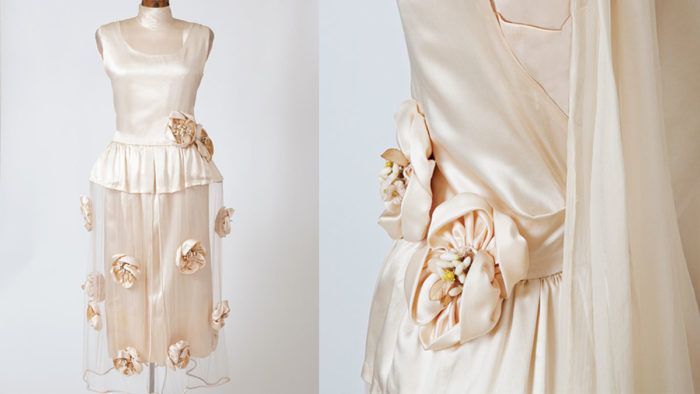
A fantasy bridal dress from the 1920s reimagines centuries-old styles for its trip to the altar. Working with silk charmeuse and tulle, the designer created an ethereal ensemble complete with appliquéd tulle train and veil. This minimalist version borrows a striking element—the pannier—from the 18th-century Georgian silhouette, to add weightless fullness at the skirt’s sides. The blush silk blossoms and the inventive combination of pannier and peplum make this gown equally stylish in the post-millennium era. To make this look from Threads #161, read on.
A pannier provides structure
Popular in the 18th century, the pannier, a cage-like structure made of fabric and boning, was fashionably used under a skirt to extend its hipline at the sides while staying in at the front and back. A streamlined version of the look is staging a comeback on today’s runways. The 20th-century wedding dress shown on the back cover borrows the silhouette without heavy layers of fabric and boned scaffolding.
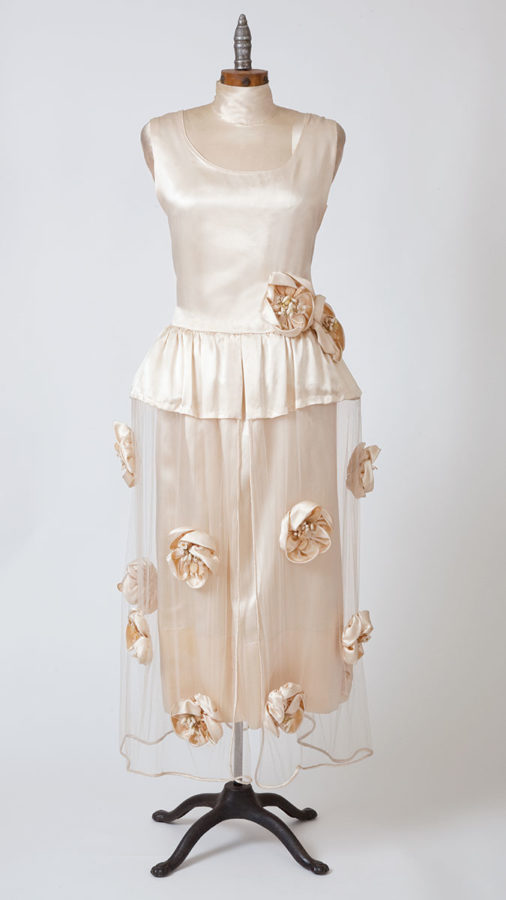
The slip-like, silk charmeuse dress is covered with a gathered tulle overskirt, which supports a charmeuse peplum with a simple hidden pannier.
How to add a pannier
The steps for achieving this silhouette are surprisingly uncomplicated.
1. Sew a horizontal tuck around the hipline on the flat tulle overskirt. This tuck eventually will align with the peplum hemline. The overskirt is a gathered rectangle one and a half to two times the hip circumference, and opening in the front. The tuck serves as the casing to hold the fabric-covered plastic boning. The boning cover keeps it from moving inside the casing. Add the tuck and boning before shaping the overskirt at the waistline. Cut the boning a suitable length to center on the back, close to the body; extend equally on each side; and curve back in…
Start your 14-day FREE trial to access this story.
Start your FREE trial today and get instant access to this article plus access to all Threads Insider content.
Start Your Free TrialAlready an Insider? Log in


Log in or become a member to post a comment.
Sign up Log in