
Apply Tucks, Darts, and Curved Seams for a Shapely Fit on Finished Garments
Add tucks, darts, or curved seams to refine the fit
Just like all of you, I love to make clothes. Choosing a pattern and making a garment are exciting, and during the process, I have a mental picture of what the finished garment will look like on me. It’s going to be just as flattering on me as that sample shown on the pattern envelope.
 |
|

Sometimes, however, the finished garment’s shape just doesn’t suit me. It may be the correct size, but not flatter my proportions. If this has happened to you, here are some design solutions and techniques to help you achieve a customized fit—after the garment has been made. The use of fitting devices such as darts, tucks, and seam contouring can also be applied to garments you’ve purchased. These simple alterations can subtly change the shape to complement a curvier figure. Keep in mind that darts, tucks, seam contouring, or adding seams can be used alone or in combination to achieve the look you want. It’s time to give those garments that you thought were unwearable a second look. These fitting adjustments can give them new life.
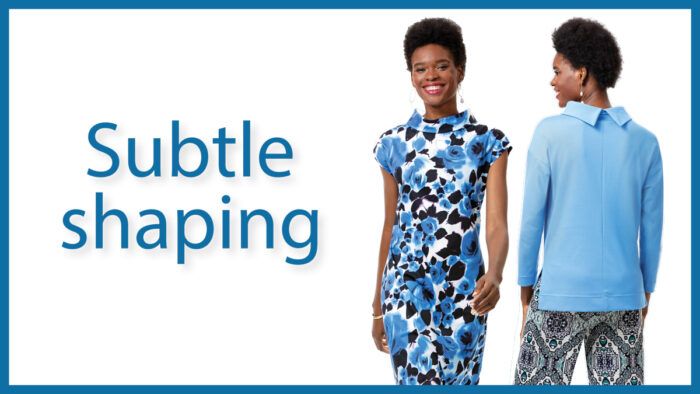
Create a center-back contouring seam
A simple seam, or a long, vertical dart at center back can enhance the fit of a garment over the shoulder blades and down the back. It’s important to contour the pinned-out value from nothing at the neckline to the necessary amount at the waistline and, if needed, through the hem. Work on a dress form or enlist the help of a friend to pin-baste the garment while you wear it.
1. Fold the garment, right side out, along the center back. Mark the center back from below the neckline or collar through to the hem with a temporary marking method. Tailor’s tacks are my preferred choice.
2. Pin-baste to reduce the circumference at waist level. Then pinch a tiny amount below the neckline or collar. Gradually pin the fabric along the center back, following the body’s contours until you meet the pin at the waist. Do not pin out so much fabric that the side seams are pulled toward the back of the garment.

3. Pin-baste to shape the back at the hip area. From the level of the hips’ greatest circumference to the hem, pin in the garment at a consistent distance from the center-back fold. The pin basting should be at a nearly vertical line as you pin toward the hem. If the garment is already hemmed and you need to pin the seam through the hem allowance, remove the hem stitching. You can restore the hem after the new center-back shaping seam has been sewn.

4. Turn the garment inside out, and mark along the pin basting. Mark each side of the pin basting, then turn the garment right side out and remove the pins.
5. Turn the garment inside out again and fold along the center back. Align the new markings and pin perpendicular to them, then stitch along the new markings. Once the shaping seam has been sewn, press the seam to one side. If the fabric is bulky, cut the seam open as far as you safely can and press the allowances open. Finish the raw fabric edges as desired.
Sew in fish-eye darts
A technique I sometimes use when altering clothes for my clients is to add fish-eye darts on either side of the center back or the center front. This technique gives the garment a balanced look as well as shape. You can’t tell they weren’t part of the garment from the start. This technique is described for the back of a garment, but the method works just as well on the front.
1. With the garment right side out, mark the center back. Use thread tracing, tailor’s tacks, or any temporary marking medium.

2. Pin darts. Start at the waist level and, on each side, equidistant from the center back, pinch out the needed amount of fabric. Balance the amount pinned out in each dart.

3. Shape the dart as you pin-baste, and watch the side seams to make sure they stay at the sides. Taper the darts to nothing at the top and bottom. Try the garment on to make sure it is not too tight. Visually checking the darts’ placement and length is usually sufficient, but if you are concerned about symmetry, pin the left or right side only, then take off the garment and fold it to copy the pinning location to the other side of the garment. Try it on again to check your results.

4. When you are happy with the fit, turn the garment inside out and mark the fabric along the pin basting. After marking, turn the garment right side out and remove the pins. Turn the work inside out again and fold the darts with right sides together. Stitch the darts and press the dart values toward the center back. Repeat the technique for the front of the garment too, if desired.
Tip: Pin in moderation. As you pin, make sure you’re not using so many pins that the fabric contracts and wrinkles.
Tuck extra fabric
Similar to darts, tucks can be used to capture excess fabric and create a better fit. They can be used as a decorative design element, too. These details look better in groupings of odd numbers, so I applied three on each side for the sample top.

1. Identify the garment’s center back and/or center front. Mark it with a temporary marking medium or thread tracing.
2. Plan a center tuck location on each side of the center front or center back. Pinch out and pin-baste a small amount of fabric for the tuck. Then pinch out a tuck on each side of it.
3. Try the garment on to check the waist tuck placement and that the pinned areas are as even as you can get them. Don’t stress, as they don’t need to be perfect.
4. Tucks are meant to be sewn a couple of inches and then they release the fabric above and below the sewn lines. Since tucks appear different from the right and wrong sides of fabric, you can choose which side you like (tucks out or in).
 |
 |
5. Mark the areas to be stitched with your preferred marking method. Sew the tucks, then lightly steam them or press flat if you wish.
Contour existing seams
Seam contouring reshapes tops, dresses, pants, skirts, and jackets. The goal is to move seams in for a custom fit since most people don’t have the same shape as a manufactured garment or a pattern.
1. Start pinning at the waist level of each side seam. Set the pins in a slightly curved line, working your way up the torso to almost nothing at the armhole (as far as you can go). Repeat the same pin placement on the opposite side.
2. Keep pinning each side below the waist to the hip area. You can also continue down to the hemline if needed. Avoid sharp curves
or bends in the shaping seams; you always want smooth lines. Pin
just enough to shape the garment and avoid making it too tight.
Once you’ve tried the dress on and achieved a better fit, turn the pinned dress inside out.
3. Transfer all markings to the fabric’s wrong side at each pin location. Remove the pins and place the fabric with right sides together to sew the newly contoured seam. Restore the hemline if your shaping went through it. Turn the garment right side out.
|
|
|


Tip: Trim or not to trim. To reduce bulk, trim and finish the contoured seam allowances to match the regular seam allowances. If you want to keep the option of letting the garment out again, keep the contoured seam allowances whole and press them toward the back of the garment.
Adjust the lining, too
If a minimal amount of fabric has been taken in, the lining can remain the same, without alteration. The reason is that lining fabrics don’t have as much give as fashion fabrics, and altering them can cause the garment to feel tight. If you’ve created fish-eye darts, you should take the lining in about half the amount, if at all. If you’re unsure, you can always machine-baste the area and try on the garment to see what works best for you.
 Pamela Howard is a Threads Digital Ambassador, tailor, and pattern designer. PamelasClosetInc.com
View the full article by clicking View PDF below:
View PDF


Wonderful article; thanks Pamela! Contouring side seams has helped fit my high waist in a more flattering way. Trying those tucks at the waist is now on my list of alterations to try.