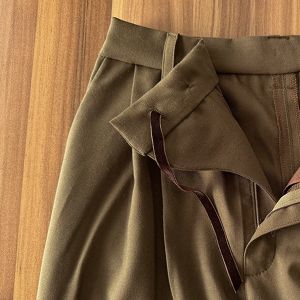
Just installed my first separating zipper in my first Very Easy Very Vogue Pattern (Jacket and Pants) #9574. It was scarry cause I had never done it before, but I did get it in. No absolutely satisfied with the stitching but I can’t really see myself taking it out now. The pattern called for a 20″ zipper but noted that it would have to be trimmed at the top after it was applied. This is the part I was scared of, but it wasn’t that bad.
The jacket has a collar and I think I may have sewned the zipper too close to the top of the jacket neck edge. Any tips on sewing a separating zipper in???? Maybe I should have asked this question before I started – one day I will learn to do that.


Replies
I was unhappy with my zippers for years; I finally realized that one needs to put iron-on interfacing under the zipper area/seam allowance so when one is setting in the zipper, it doesn't stretch.
Also, make the seam allowance wider so there is more room to work. AND, don't sew the zipper seam close to the zipper opening, which is probably natural to want to do, but it is better if that area is wider.
And I practiced by making bags out of scrap material and zippers; it works.
This is great advice. Thanks so much for sharing. I will be making this same pattern again so I will be using your tips.
Do you have any advice about how far up to place the zipper? The pattern called for a 20" zipper and the instructions said to trim it before attaching the collar which I did; but now the zipper is is actually in the seam line with the jacket front and collar. I am going to trim it even further so it won't end up in the seam allowance. What do you think?
Well,
this is just me, but I finally decided to always place the top stop 1/8" below the placement marking on the pattern, that way I have room to get around the zipper when sewing around that top collar area. I would also like to know what other people do, but I always leave that little bit of room on top and sometimes the bottom to accomodate the bulk of the zipper.
From what I have read in my many sewing books, the first thing you do is "key" the zipper, which means stitch a line across the tapes so one can match the zipper placement well (I try not to use the word, perfect) on both sides.
I also shrink/soak all my zippers, as I do interfacings. Depending on what kind of zipper placement and technique, ALWAYS, IF POSSIBLE, sew in one direction. Buy a longer zipper so one doesn't have to bother to unzip the zipper to sew past it, or whatever one does to get around the zipper head. BUT DON'T GET CURIOUS AND RUN THE ZIPPER UP THE TAPE AFTER CUTTING OFF THE TOP OF THE ZIPPER. I did that!!!
If you're interested, I bought a Bernina sewing machine because it was the only one at the time that sewed buttonholes all in one direction; fabulous engineering to better sewn buttonholes.
And I think it depends on what type of garment one is making that determines where the zipper head/zipper is placed; that's why it is good to practice, practice, practice. I finally stumbled on a better application method after sweating and fretting over zippers for years. Dumb luck. I was sewing too close to the zipper teeth in all my applications, that's why the stitching line seemed so uneven and the zipper plackets gapped.
PLUS, I have also overcompensated with centered zipper placement and overlapped the plackets, WHICH REALLY WORKED, when there was pressure put on the cloth during wear.
Here's my solution for long zippers. I purchase the little metal zipper stops (try outdoor fabric wear stores like Textile Outfitters - http://www.justmakeit.com ). I use a wire cutter/pliers to snip off all the zipper teeth down to just below the length I need. I don't like zipper teeth in my seam so I usually pull off an extra 1 or 2. Then I squeeze on a metal zipper stop at the top of teeth on each side. Works like a charm, only takes a couple minutes and you can "customize" to any zipper length.
I just wanted to THANK ALL OF YOU who have given advice here! It is so helpful! After so many years of being away from the craft that I once cherished, I am determined that now I am involved with it again I am going to be better at it than before. And with all of the useful tips and helpful advice I really think this is possible.
Thanks again.
This post is archived.