

Sculpture for the head.
Thistle Cottage Studio Blog
THE ANATOMY OF A HAT IN PROGRESS
Having recently joined The Milliners of Etsy Team/ MOE (etsy.com) a few months ago, I have been so inspired to explore new techniques and materials that I’ve never used before. In the past, my hat lines have been crocheted, cut and sew dressmaker hats, and period reproduction hats built from my own handmade buckram and wire frames.


 Every few months or so, our group of about 200 professional and semi-professional milliners from all corners of the globe, hosts a mock Project Runway competition, with a well known milliner as our judge. A winner is chosen, no prizes are awarded, except for the thrill of being acclaimed by a respected milliner. Our first competition was judged by Amy Hamiltion of Granville Millinery, in Granville, Ohio. Her work has been featured in Victoria and O Magazines, as well as many television shows, to briefly name a few accolades. That competition was featured on the front page of Etsy’s blog, The Storque. I published that link here, in an earlier blog.
We have recently completed our third competition, with the theme of the Royal Ascot Races this month, in England. We were lucky enough to get the well known British milliner, Mark T. Burke to judge this one. He is known for having studied under the royal family’s favorite hatter, Philip Treacy. My recent entry for this project was an elegant black and white, 20 inch wide, semi-sheer silk organza brimmed hat, with a houndstooth motif, handmade flowers and feathers. The crown was formed from buckram and wire on my recently acquired, professional milliners balsa wood hat blocks. I experimented with using non-toxic milliners gelatin, which did a fairly good job of further stiffening the crown, after I steamed and formed the buckram, which has a glue already saturated into the fibers. I decided to add a few more secret ingredients to make it even stiffer. It worked like a charm. I may decide to reveal that secret down the road, so stay tuned!! The brim, however, proved a bit more resisitant to the gelatin. It is tradtionally used on wool felt and straw, which I plan to experiment with this coming fall. This brim was two layers of silk organza, with a layer of netting sandwiched in between for more texture. As I was working on this hat, which was so out of the box for me, I was sure I’d end up eating this one for dinner!!! After listing it for only 10 days, much to my surprise it sold!! So, to solve the dilemma of the not so stiff wide brim, I resorted to a milliners lacquer, that is very toxic, and not so environmentally friendly!!! I have offered up my repentance prayers to Mother Nature!!! The brim was first stiffened with the gelatin, then an additional two coats of lacquer. I tested a sample swatch of this to be sure there would be no adverse reaction of the two stiffeners. The Ascot hat is now drying in my dehumidified garage, and will be packed and shipped to it’s new owner in New Jersey tomorrow, to be worn to a wedding.
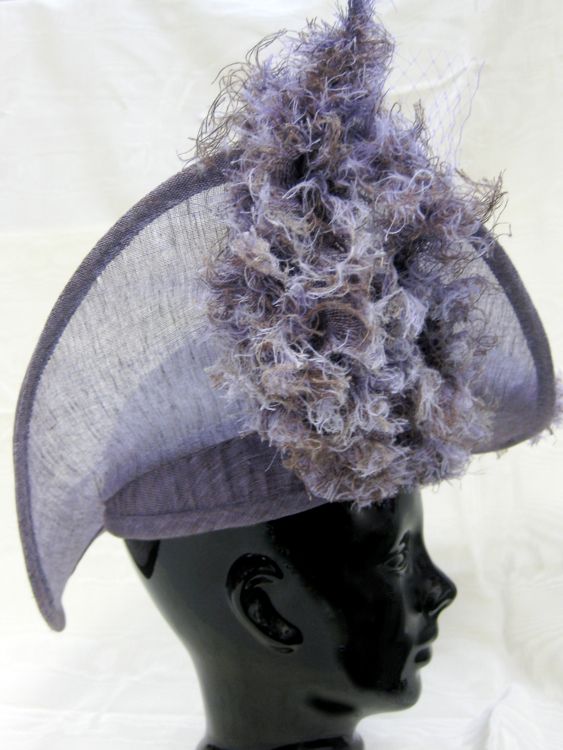
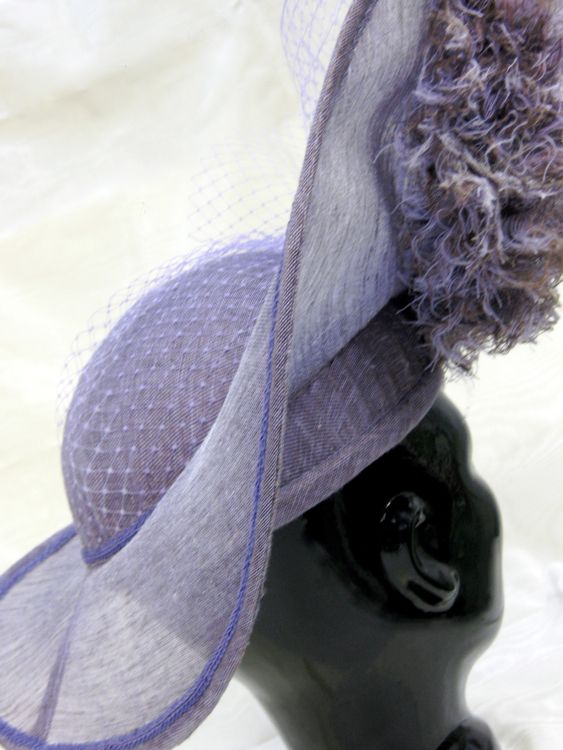
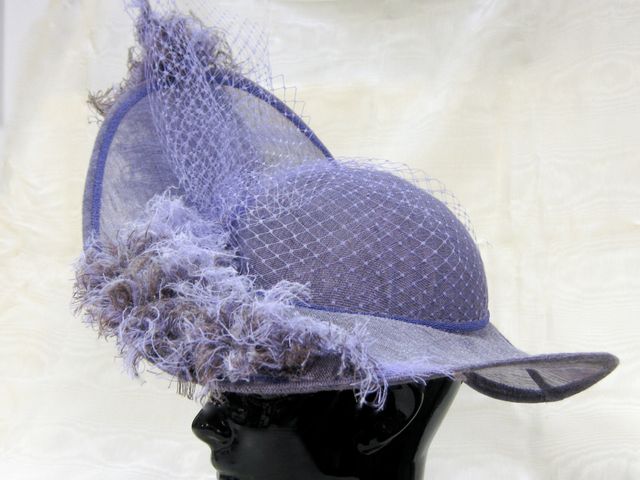
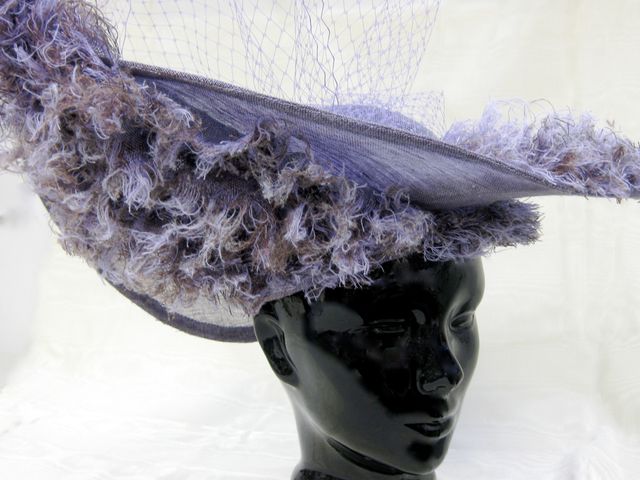
My next hat, nearly complete, which was inspired by the Oscar winning film, The King’s Speech, is a study in sculpture for the head. Based on a 1940’s design, in a beautiful shade of heliotrope, the brim is not set onto the crown in the expected way. It is tilted in a more eliptical fashion, giving the hat a sophisticated, assymetrical tilt. Still not quite ready to tackle straw, I have been using a cotton/linen gossamer; a very light, semi-sheer woven material for this hat. Again, my secret recipe for stiffening the crown, did a fine job on this hat too, which by the way, would not have worked on the brim of the Ascot hat. This hat also evolved in its’ detail with what I like to call, a “happy accident”. As I was thinking about the focal point decoration, I wanted to further the sculptural quality of the design, and began to wire leaf shapes that I would use on the up-turned side of the brim. They were not to my liking, and I began to fray the edges to make them more texturally interesting. By the time I was finished with the first leaf, it looked more like a feather, and the lightbulb in my head went off!! Several more frayed “leaves” later, layered over one another, and sewn to a wired spine, resulted in some very beautiful, even lush ostrich-like, faux feathers. It didn’t take long after for me to realise that the “feathers” were not only beautiful, but they would also be functional with their wired spines, in helping to support the upright positioning of the brim!! Happy, happy accident, indeed!!
This hat will be lacquered and finished in a few days, and uploaded to my ETSY shop for sale. It would be the perfect hat to wear to a summer or early fall wedding, formal occasion, or maybe it will bring you luck at the races!!
Hats off to you!!
Every few months or so, our group of about 200 professional and semi-professional milliners from all corners of the globe, hosts a mock Project Runway competition, with a well known milliner as our judge. A winner is chosen, no prizes are awarded, except for the thrill of being acclaimed by a respected milliner. Our first competition was judged by Amy Hamiltion of Granville Millinery, in Granville, Ohio. Her work has been featured in Victoria and O Magazines, as well as many television shows, to briefly name a few accolades. That competition was featured on the front page of Etsy’s blog, The Storque. I published that link here, in an earlier blog. We have recently completed our third competition, with the theme of the Royal Ascot Races this month, in England. We were lucky enough to get the well known British milliner, Mark T. Burke to judge this one. He is known for having studied under the royal family’s favorite hatter, Philip Treacy. My recent entry for this project was an elegant black and white, 20 inch wide, semi-sheer silk organza brimmed hat, with a houndstooth motif, handmade flowers and feathers. The crown was formed from buckram and wire on my recently acquired, professional milliners balsa wood hat blocks. I experimented with using non-toxic milliners gelatin, which did a fairly good job of further stiffening the crown, after I steamed and formed the buckram, which has a glue already saturated into the fibers. I decided to add a few more secret ingredients to make it even stiffer. It worked like a charm. I may decide to reveal that secret down the road, so stay tuned!! The brim, however, proved a bit more resisitant to the gelatin. It is tradtionally used on wool felt and straw, which I plan to experiment with this coming fall. This brim was two layers of silk organza, with a layer of netting sandwiched in between for more texture. As I was working on this hat, which was so out of the box for me, I was sure I’d end up eating this one for dinner!!! After listing it for only 10 days, much to my surprise it sold!! So, to solve the dilemma of the not so stiff wide brim, I resorted to a milliners lacquer, that is very toxic, and not so environmentally friendly!!! I have offered up my repentance prayers to Mother Nature!!! The brim was first stiffened with the gelatin, then an additional two coats of lacquer. I tested a sample swatch of this to be sure there would be no adverse reaction of the two stiffeners. The Ascot hat is now drying in my dehumidified garage, and will be packed and shipped to it’s new owner in New Jersey tomorrow, to be worn to a wedding.
My next hat, nearly complete, which was inspired by the Oscar winning film, The King’s Speech, is a study in sculpture for the head. Based on a 1940’s design, in a beautiful shade of heliotrope, the brim is not set onto the crown in the expected way. It is tilted in a more eliptical fashion, giving the hat a sophisticated, assymetrical tilt. Still not quite ready to tackle straw, I have been using a cotton/linen gossamer; a very light, semi-sheer woven material for this hat. Again, my secret recipe for stiffening the crown, did a fine job on this hat too, which by the way, would not have worked on the brim of the Ascot hat. This hat also evolved in its’ detail with what I like to call, a “happy accident”. As I was thinking about the focal point decoration, I wanted to further the sculptural quality of the design, and began to wire leaf shapes that I would use on the up-turned side of the brim. They were not to my liking, and I began to fray the edges to make them more texturally interesting. By the time I was finished with the first leaf, it looked more like a feather, and the lightbulb in my head went off!! Several more frayed “leaves” later, layered over one another, and sewn to a wired spine, resulted in some very beautiful, even lush ostrich-like, faux feathers. It didn’t take long after for me to realise that the “feathers” were not only beautiful, but they would also be functional with their wired spines, in helping to support the upright positioning of the brim!! Happy, happy accident, indeed!!
This hat will be lacquered and finished in a few days, and uploaded to my ETSY shop for sale. It would be the perfect hat to wear to a summer or early fall wedding, formal occasion, or maybe it will bring you luck at the races!!
Hats off to you!!
This site is protected by reCAPTCHA and the Google
Privacy Policy and
Terms of Service apply.
See all newsletters


I love making hats although I don't wear them. I think one needs a certain "look" to wear a hat and I don't have it! I love the results of your "happy accident"!
Wow, it would be great if you would write a series of articles for Threads to teach us how to make hats. I have wanted to for years but no one local to show me. I have a couple Vogue hat patterns which might be a good place to start your series and then advance to the hat blocks and other things you are doing. Thank you for sharing!
Is there a great DVD on hat making? I have seen so many lovelly hats and would love to try making " sophisticated hat", but have no idea where to begin or even where to buy supplies.
Great post! Thanks for sharing your "happy accident." Your brim shapes are lovely. I have yet to work with a sheer brim, but you're giving me ideas. I love the black and white hat as well.
Wow!!! this was a wonderfull happy accident!!!! thank you so much for sharing with us your story, and all those lovely pictures!!! I also wish I could make one of those lovely hats!!! you are an artist, and hat-making is an art that needs to be preserve and continue!!!! Best regards, all the way from Costa Rica.
Thank you all so much for your lovely comments!!! I would love to write an ebook, but have no clue how. Alas, my technical skills are restricted to dressmaking and millinery!! I love the idea of approaching Threads with a tutorial, and let them figure out the techno stuff. If you would like to stay in touch, and join my email list, please head on over to [email protected], and leave me yours, and I'll let you know what develops.
Thank you for the article called " Anatomy-of-a-hat-in-progress" it was very interesting. I have a cotton hat with a wide brim and wanted to know if you had any suggestions on how to stiffen the brim. Thank you in advance for any suggestions. Dorothy