
You can apply custom designs to velvet, simply by using heat and moisture.
by Mary Benagh O’ Neil
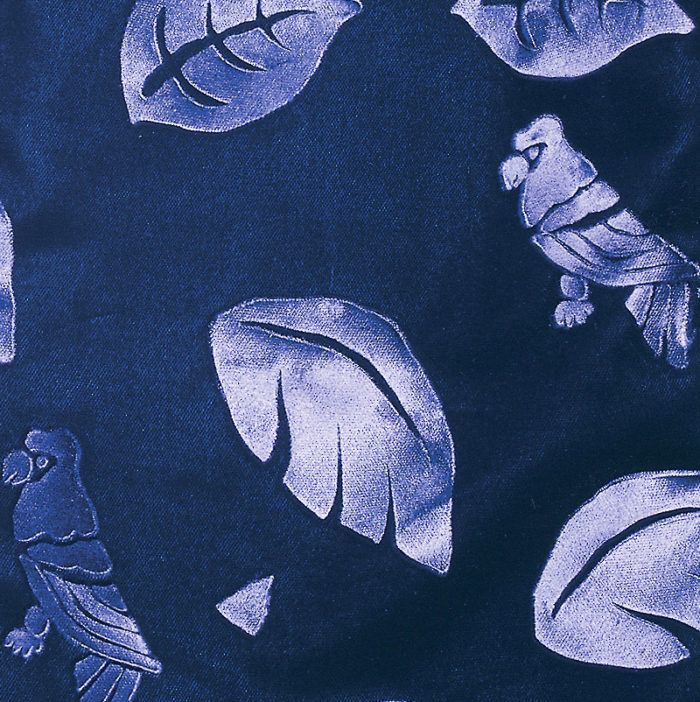
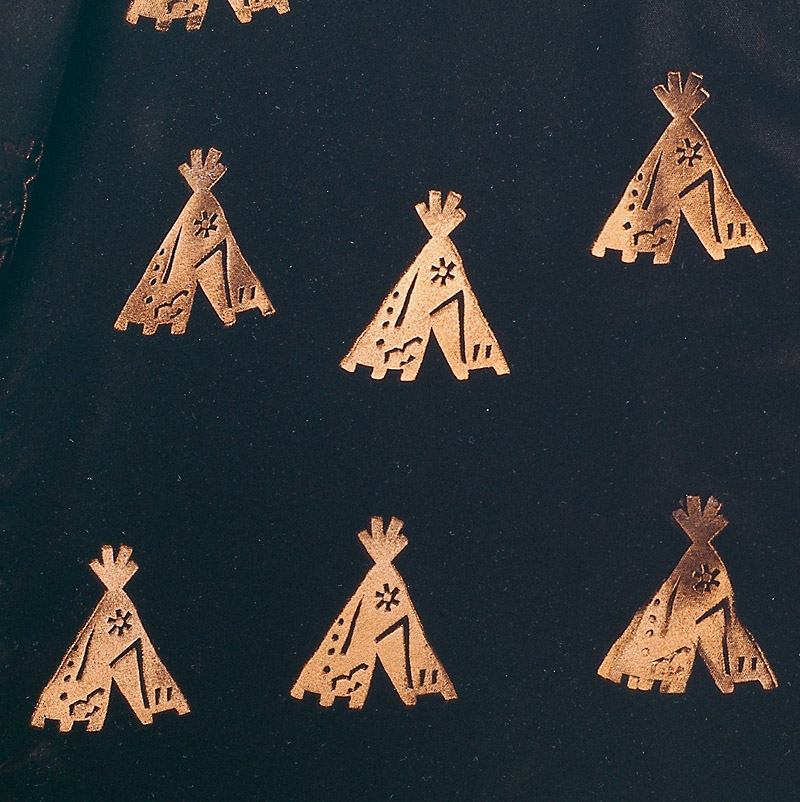
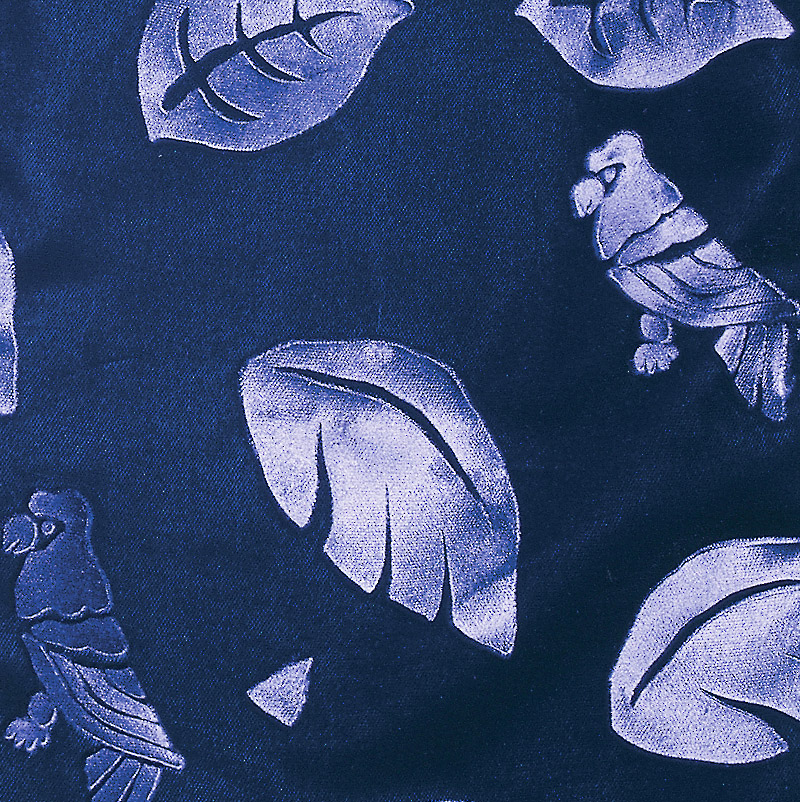
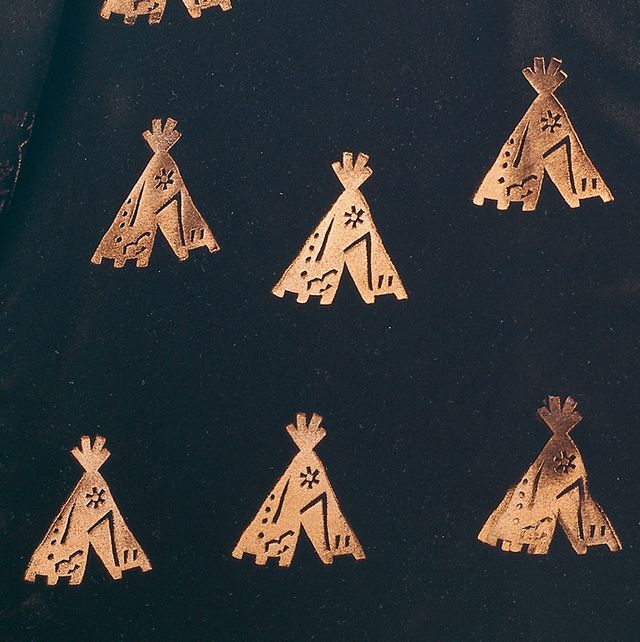
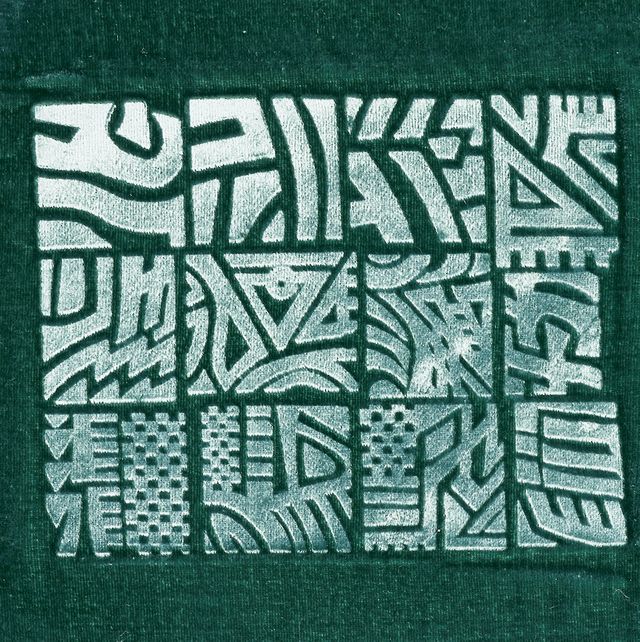
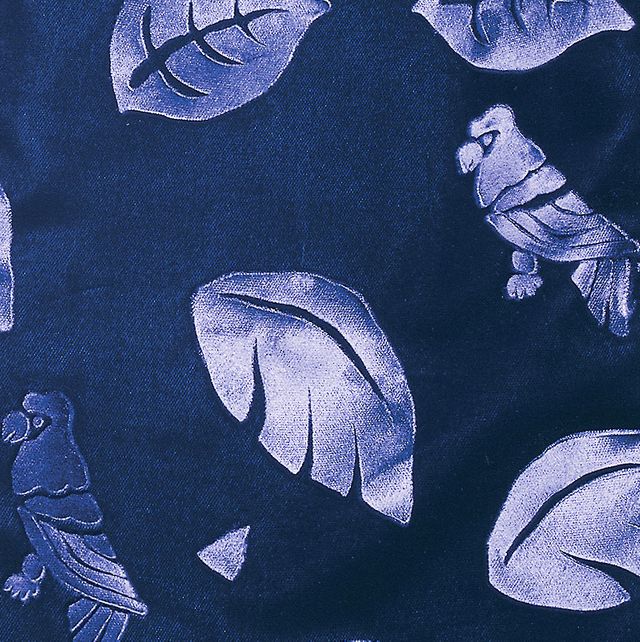
There’s nothing quite so luxurious as velvet, unless it’s velvet with a texture. I’ve seen commercial velvets embossed with bold images, but I discovered how to do this myself completely by accident. While pressing the collar of a vintage velvet jacket, I left a perfect impression of my iron on that collar! Aside from being sorry that I’d messed up a great jacket, a light bulb went off in my brain as I realized that other designs could be applied to velvet the same way, using heat and moisture. I started experimenting with the rubber stamps that my company, Hot Potatoes, sells for stamping paint on fabric. My stamp designs are big and bold, because they developed out of my early work printing with potato carvings. But the beauty of embossing velvet is that your results can be bold or subtle, depending on what designs you choose. Bold, clear designs look like they’ve been carved into the velvet, while smaller, more geometric designs give a subtler, overall texture or work well as borders.

Not all velvets are equal
The velvets that work best for embossing contain a large percentage of rayon, so stay away from nylon or polyester velvets. I’ve found that rayon/acetate blends retain the deepest, most dramatic impressions, and are great for pillows and other home-dec items. For garments, I prefer the fluid drape of all-rayon or rayon/silk velvets, and both take embossing quite well. Whichever velvet you choose, the embossed results will stay put through dry cleaning but shouldn’t be washed. It’s always a good idea to test your stamp on scraps of the garment fabric before you begin stamping an entire garment. If you’re in doubt about a fabric, buy a small amount first, take it home, and experiment on it with stamps. Then you can purchase the fabric you need for the project, knowing that you’ll love the results.
Stamps aren’t equal, either
Rubber-stamping resources
Impress Me
17116 Escalon Dr.
Encino, CA 91436-4030
818-788-6730
www.impressmenow.com
Dana Marie Design Co.
12323 99th Avenue NE
Arlington, Washington 98223-8852
800-691-4293
www.danamarie.com
To create clear impressions on velvet, I suggest that you stick with rubber stamps designed for printing on fabric. These stamps generally have the deeper, bolder lines that you need for good embossing results. Stay away from rubber stamps with shallow, fine lines and lots of detail, like many of those designed for stamping on paper. These tend to look muddy when embossed, and the details get lost in the velvet’s pile. Be careful when you begin testing a new stamp, because some stamps won’t hold up under high heat. The rubber in stamps has already been subjected to high temperatures, but not all foam cushions and glues can take the heat—some may melt. If you’re buying stamps from vendors other than those recommended at right (Rubber-stamping resources), ask whether their stamps have been tested for this technique, and whether they can withstand the heat of an iron.
It’s easy to create an impression
Embossing designs on velvet is utterly simple. All you need is fabric, stamps, an iron and ironing board, and a mister bottle of water. Preheat the iron to a medium-hot temperature (I use a dry setting between wool and cotton), then follow the steps in in the photos below.
Embossing velvet — as easy as 1, 2, 3
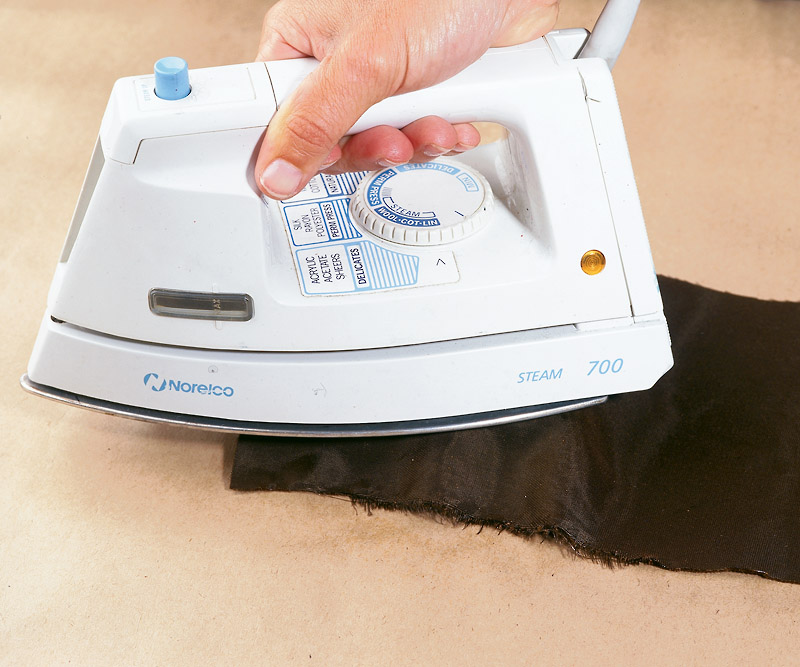
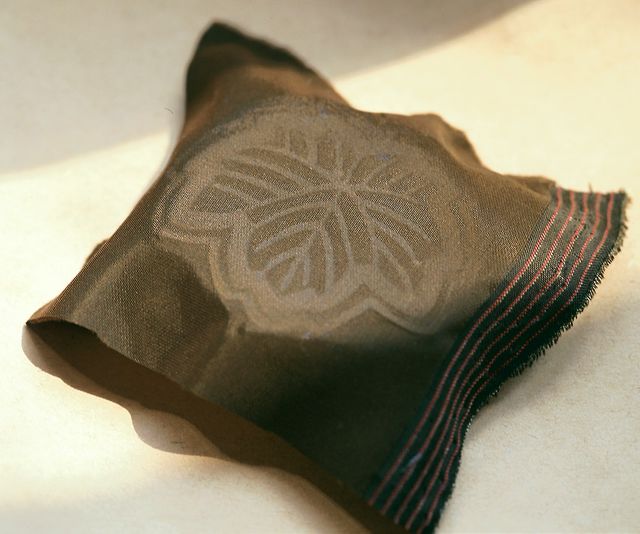
1. After laying a piece of velvet face down on a rubber stamp, mist it with water and press for 20 to 30 seconds.
2. Lift off the iron to reveal the design impressed on the wrong side.
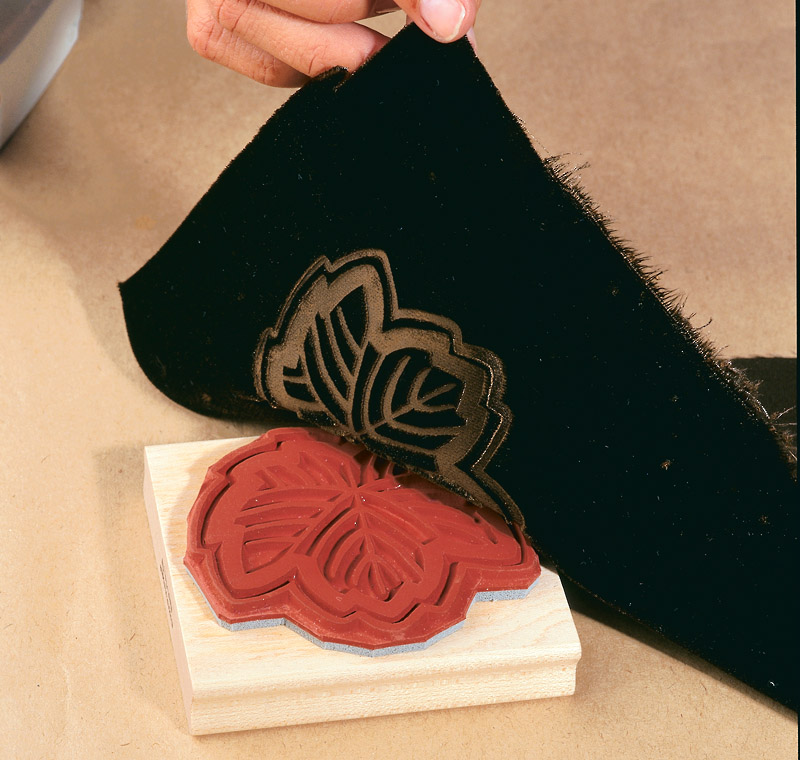
3. Peel back the fabric from the stamp to see the design even more clearly.
You can mist either side of the fabric, but I find it easier to spritz the back, after the fabric’s in position. When pressing, take care not to move or slide the iron for the first five to ten seconds so you don’t blur the image; press firmly for about 20 seconds, and lift the iron straight up off the fabric. If it’s not completely dry, you may want to press again before shifting the fabric.
If your iron’s steam holes show up in the design on your test samples, either move the iron so the holes don’t fall over the design, or glide the iron gently after the first five to ten seconds to remove the marks. A little trial and error will make you an expert.
Place designs on garments
Usually, I scatter the embossed designs evenly over a garment. I never measure or mark the design placement, but just eyeball it to create a pleasing arrangement. Sometimes, though, you may want to measure to make sure that you won’t end up with, say, a perfect fried egg over each breast! Since it’s easier and more efficient to emboss on smaller sections than on an entire length of fabric, I usually cut out the garment pieces first, then emboss them before assembly. That way, I can place the designs first around the face and neck, where they’ll be noticed most, and then work down the garment section. Embossed borders look great, but I stay away from tight borders that have to be matched exactly; I just don’t enjoy planning my designs that carefully. I know that there’s nothing really new under the sun, but I felt as if I’d made a huge and wonderful discovery in my world when I began embossing velvet. You’ll probably find that everyone who sees this fabric just has to touch it, and then wants some for pillows, scarves, clothing, picture frames, or boxes.
You might also try embossing with materials other than rubber stamps (see the box below). If you invent a new use for the process, let me know!
Embossing with other materialsby Annie Coan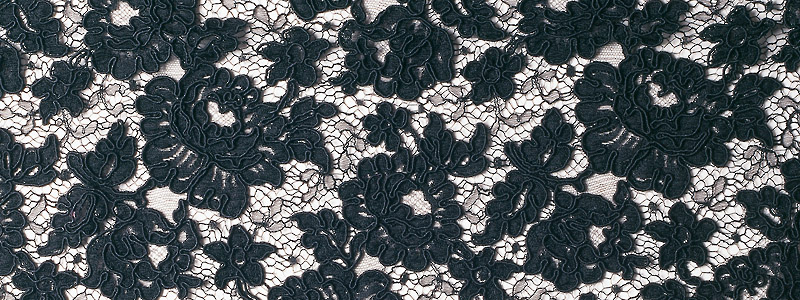
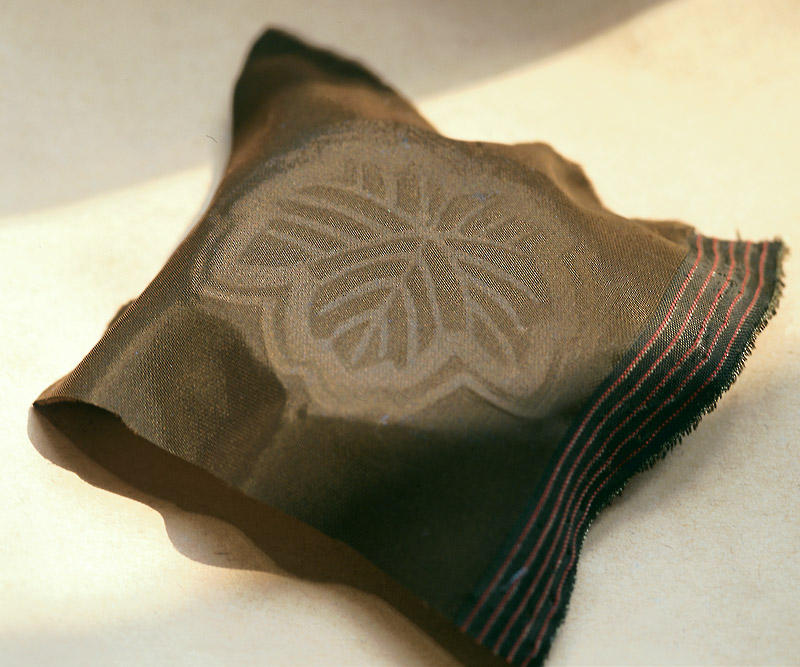
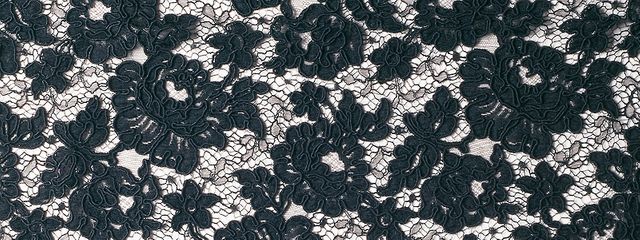
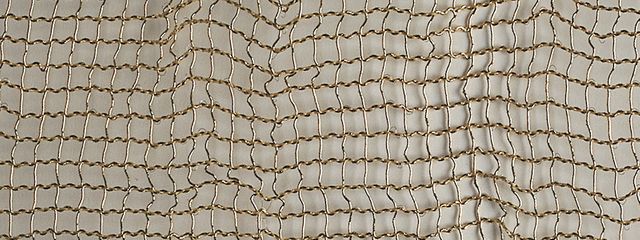
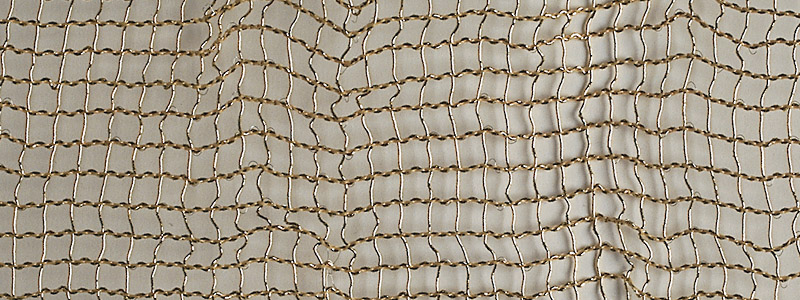 A piece of Alençon lace (above left) and gridded wire trim (above right) were used to emboss the velvet scarf (below).
Rubber stamps can give beautiful, clear results when embossed on velvet, but don’t overlook other embossing materials. Besides stamps, I’ve tried embossing with textured fabrics and even small metal objects like charms, paper clips, and wire. For example, on my scarf, I wanted a subtle, allover texture, and combined two unusual materials for the impressions—costly Alençon lace and an inexpensive gridded wire trim.
First, it’s essential to experiment. I tried embossing with different laces, and found that fine lines and textures didn’t show up. But the raised lines of the Alençon lace worked well. By pressing harder on some areas, I got an intriguing texture, with the lace design fading in and out. The 5-in.-wide gridded trim makes clear impressions because of the wire, and is fun to manipulate. I tried bending, compressing, and twisting the trim, then transferred this texture to the velvet.
To emboss, arrange the wire trim on the ironing board, place the velvet right side down on the trim, spritz the wrong side with water, and press with a hot iron for 30 seconds in each area. Moving the fabric and pressing again, loosely cover the scarf with the gridded design. Finally, repeat the process using Alençon lace on areas of the velvet between the wire design. Check the results frequently to make sure you’re pleased with the arrangement.
Annie Coan sews, embosses, and embroiders in Mohegan Lake, New York.
Mary Benagh O’Neil of Nashville, Tennessee, is the owner of the stamp company Hot Potatoes.
Photos: Scott Phillips and David Coffin


Great instructions. Very inspiring. I use velvet quite a bit in my work, but mainly with free motion machine embroidery.
Haven't tried stamping into it. I feel a play day coming up.... :-)
Birgitte
http://www.SewDanish.etsy.com
Scandinavian Textile Art, Unique Handmade Supplies
Wonderfull idea to use on a one of a kind dress.....Thank you!!
great stuff
fantastic stuff :-)
its soo nice.
Its soo nice.
I appreciate your work