
Woven rose stitch makes a beautiful flower and is very easy to do.
by Karen Kieppe
Woven rose, feather stitch, fly stitch, fly stitch fern, and split stitch are favorites of mine when working with silk-ribbon embroidery. Here’s how I do them, and combine them with some basic stitches to create elegant embellishments..
Woven rose
This makes a beautiful ribbon flower and is very easy to do.
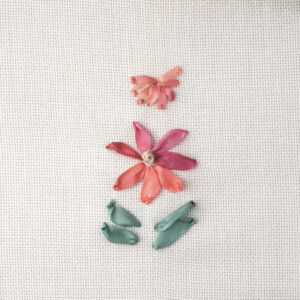
 To make this rose, stitch a foundation of five straight stitches, like the spokes of a wheel, in sewing thread that matches the color of your silk ribbon. Thread the needle with the silk ribbon and, working from the center out, bring the needle up at A, and pull through. Weave the ribbon around the spokes by sliding the needle over B, then under C, alternating spokes all around the wheel, without piercing the fabric. Continue weaving until the spokes are full. Pull the ribbon loosely, allowing twists in the ribbon here and there. Bring the needle down at D, pull through, and knot off.
Feather stitch
This is the basic stitch used for crazy-quilt embroidery.

1. Bring the needle up at A, pull through, loop the thread to the right. Bring the needle down at B; up at C, leaving the loop under the needle, and pull through.
2. Loop the thread to the left. Bring the needle down at D, up at E, leaving the loop under the needle, and pull through. 3. Repeat.
Fly stitch
This is a good stitch to use for leaves on each side of a flower bud.

![]()
![]()
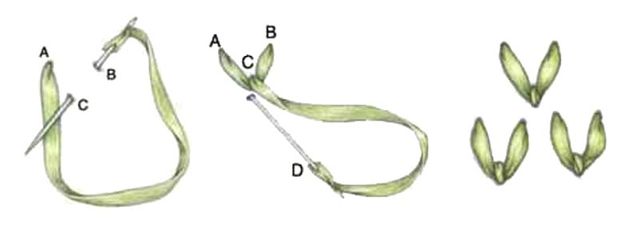
To work, bring the needle up at A, pull through.
Loop the ribbon to the right, bring needle down at B, and up at C, with the loop under the needle. Bring the needle down at D and pull through.
Fly stitch fern
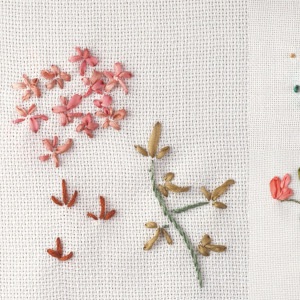
This stitch is ideal for filling in floral designs, the same way a florist would fill in an arrangement with ferns (if stitched in perle cotton) or sprigs of leaves (if stitched in ribbon).

![]()
![]()
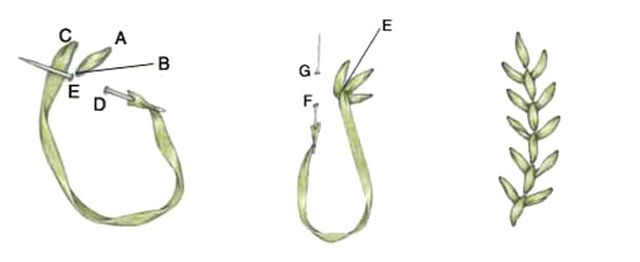
To make this stitch, work from the top of the fern leaf to the bottom. Start with a straight stitch, and bring the needle up at A, and down at B. Bring the needle up at C, loop the thread or ribbon to the right, bring the needle down at D and up at E, leaving the loop under the needle and pull through.
Bring the needle down at F and up at G to start the next stitch.
Split stitch
This stitch can be worked in a straight line or a curve.

![]()
![]()
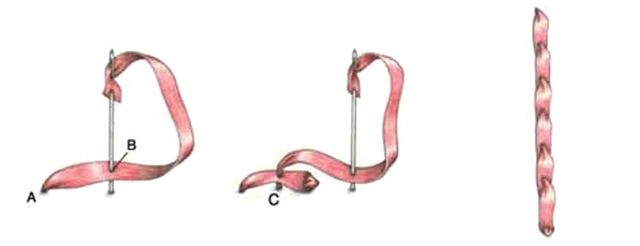
To work, bring the needle up at A, pull through. Loosely lay the ribbon flat on the fabric. Bring the needle down at B (about 3/8 in. from A) splitting the ribbon.
Bring the needle up, split ribbon at C, pull through. Repeat for desired length.
Main Article: Beginners’ Silk-Ribbon Embroidery






what a great tutorial for the beginning silk ribbon enthusiast. thank you
thank you so much. You did great
I just started ribbon embroidery, do I thread needle the same as with floss? I have the hardest time pulling the ribbon through the fabric. Should I use larger woven fabrics? Is there a specific type of ribbon?
Thanks
This post was very helpful for showing my sister how I silk embroider. Thank you.
hi
i am really very much tank ful to u for showing thw basics of ribbon embroidery . iwas infact waiting to see a posting of this.to get a start . iam just asking a question about the ribbon as ,is there a special type of ribbon for this .also is that the same tye of ribbon as we see in gift wrappings and presentation articles.? hope to get a reply
Hi,
Iam a beginner in ribbon embroidery. do we have to use special cloth material for this as it is very difficult in normal clothes. pls help.
Iam a beginner in ribbon embroidery. do we have to use special cloth material for this as it is very difficult in normal clothes. pls
i did them on cotton towel with dabbanam...
WOW..ITS SPLENDID.....