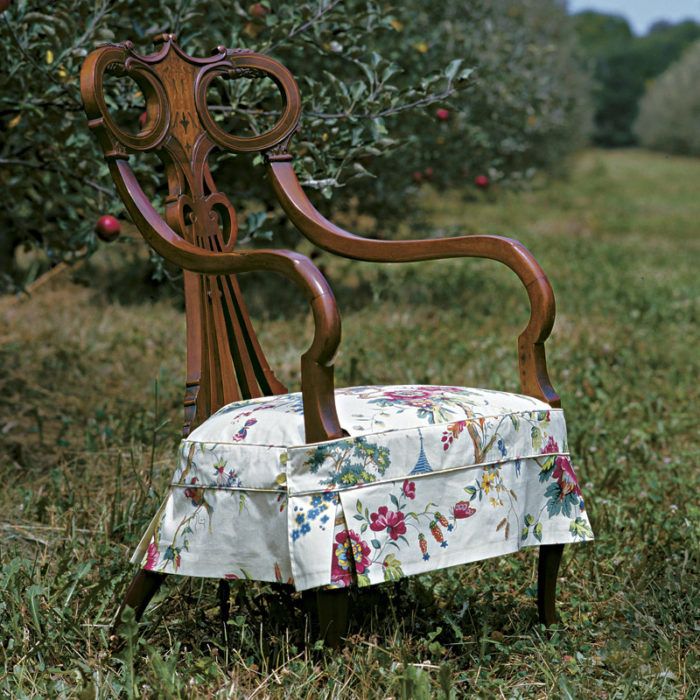
Slipcovers are one of the all-time secret weapons of decorating. More than functional, they’re an interior-design opportunity. Garment sewers are many steps ahead of the rest of the world who must rely on expensive interior designers and upholsterers to create these versatile room brighteners. Sewers already know about making a fitting muslin and cutting and constructing a garment-skills so easily applied to slipcovering furniture that you’ll be amazed at the simplicity of it. And if you love to sew, you know the lure of beautiful fabric. Here’s your chance to expand your textile palette with the rich variety of high-quality decorator fabric available from home-furnishing stores and through interior designers.
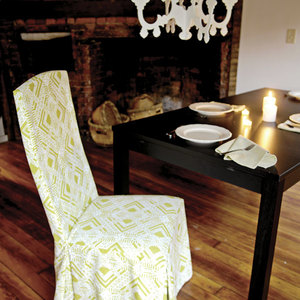
From a practical standpoint, you may want to use slipcovers to match a room to the season. Or perhaps you’d like to simulate an upholstered look, either temporarily (while you decide on larger issues of your decor) or as a final design. (For some ideas, see Dress up your chair.) In any case, I’d like to show you just how easy it is to breathe fresh air into your home or apartment with the simplest of slipcovering projects: a seat cover for a beloved or interesting side chair. And for those of you who are new to sewing, don’t worry. Making a chair cover is an ultraeasy way to practice basic sewing skills.
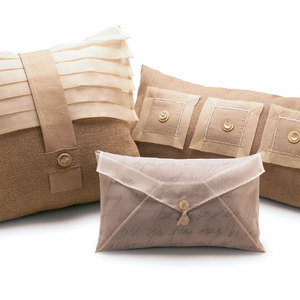
Combine sumptuous fabrics, exotic closures, outrageous trims, different pleat treatments, or even your favorite embellishments.
Study your chair
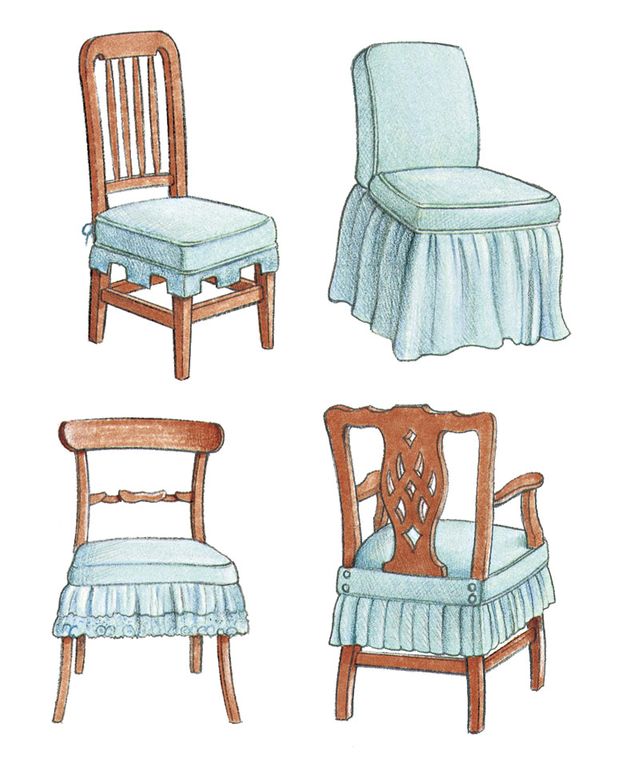
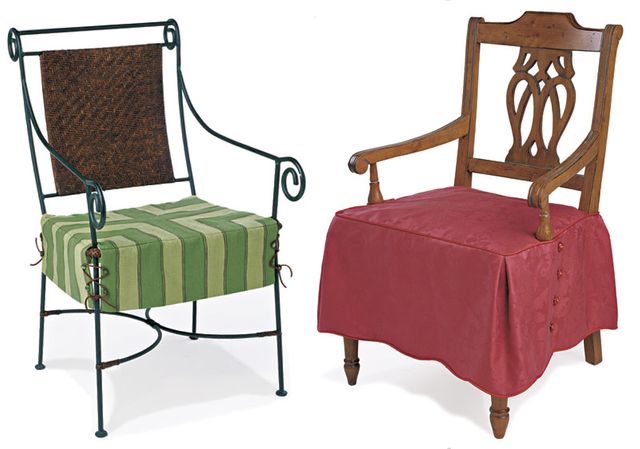
You don’t need home-decorating experience to design a slipcover. But I do suggest you start by taking a good look at the piece of furniture you want to work on. Side or occasional chairs almost always come with their own distinct personality. And because the slipcover will leave the chair’s back, arms, and legs exposed, it’s nice to relate the slipcover’s style to the chair’s design. Or conversely, it’s fun to deliberately contrast the chair with its cover design, which is a good way to integrate an oddball piece of furniture into your decor. Take out your sketchbook and try a few design ideas, like those in my drawings above. Or start with the classic seat-top, band, and skirt style as I’ve done for the chair at top left. Sketch different proportions of band width to skirt height, think about pleats or gathers to turn the corners at the legs, and dream up details using piping or other trim. You can even take photos of your chair, then trace your ideas over them.
 |
 |
 |
 |
Suit the slipcover to the chair’s style, using the patternmaking process described in the photo-essay. The patternmaking process is the same, regardless of the style you choose.
Of course, choosing the fabric for your chair is also part of the fun. Fabric that you love but might not want to wear now becomes fair game for your furniture. Although dressmaking fabrics can work fine for a slipcover, upholstery fabric is made for the job and will stand up to lots of use and abuse. For your first project, choose a fabric that’s not too heavy, dense, or loosely woven, so that it will be easy to work with. If you want a washable slipcover, be sure to preshrink the fabric by running it through the washing machine.
Fit your chair
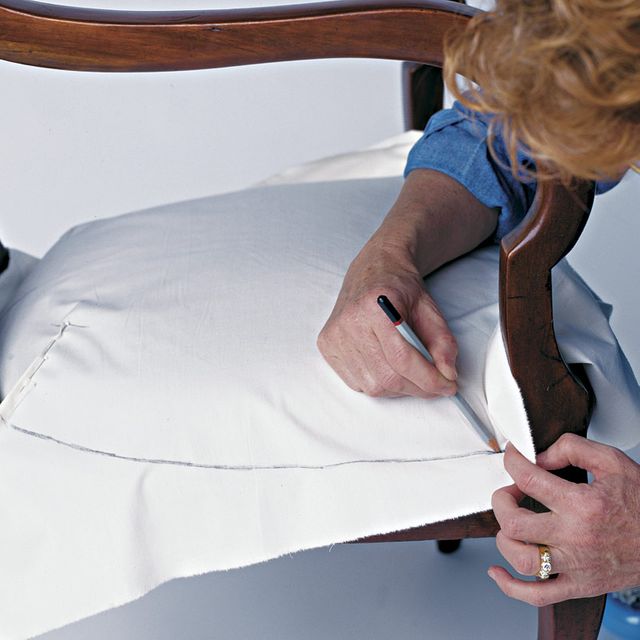
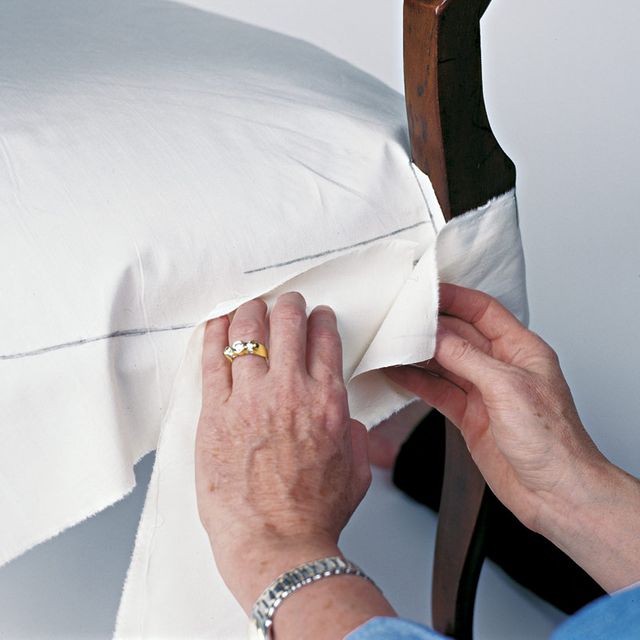
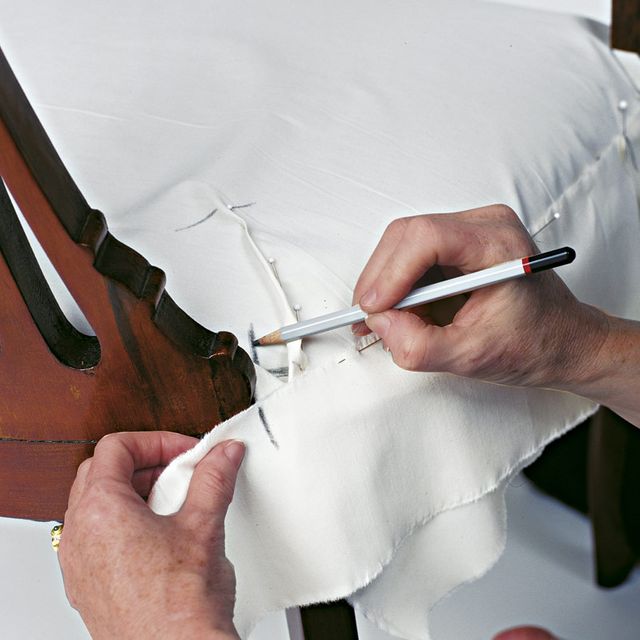
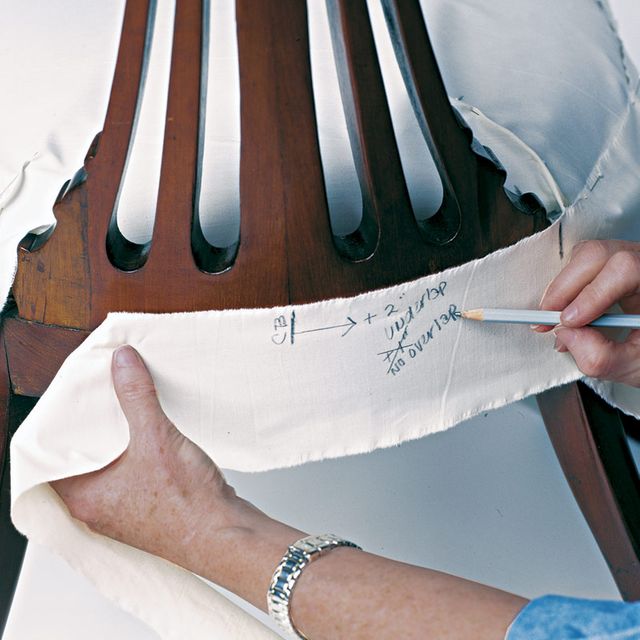
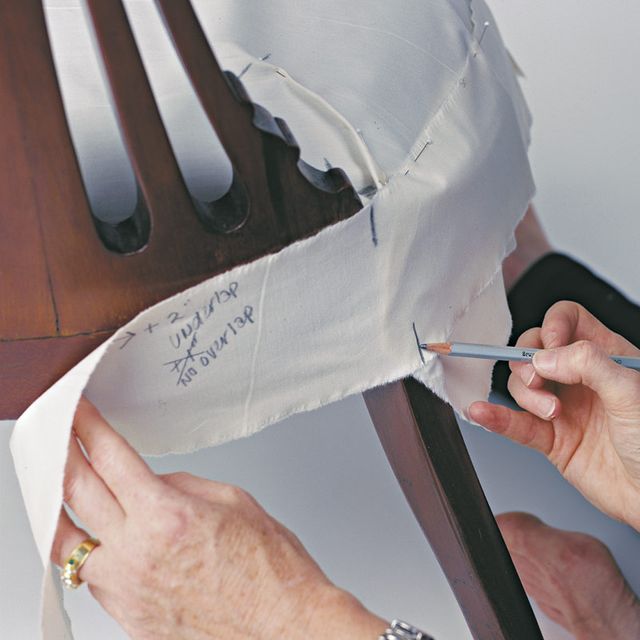
Making a muslin pattern for your slipcover allows you to refine its design. A muslin is especially helpful for deciding whether you want a snug fit or a looser European style with more ease, as is currently popular (shown in my slipcover examples on these pages). While making a muslin, you can also work out the finishing and closure details and produce a working pattern complete with markings and notes. To make a fitted muslin with a seat, band, and skirt for your chair, follow the steps outlined in the photos below.
“Drape” a muslin pattern
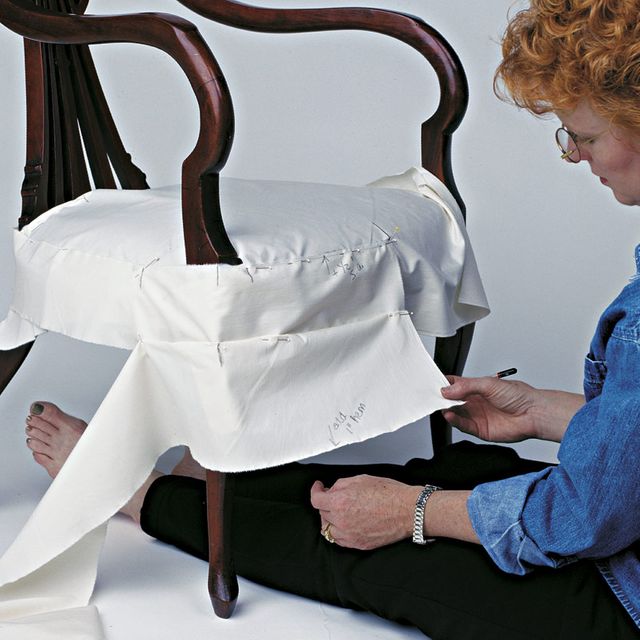
Have on hand pieces of muslin large enough to accommodate each pattern piece needed for your chair slipcover. Position the chair on the floor or on a table so that you can work comfortably.
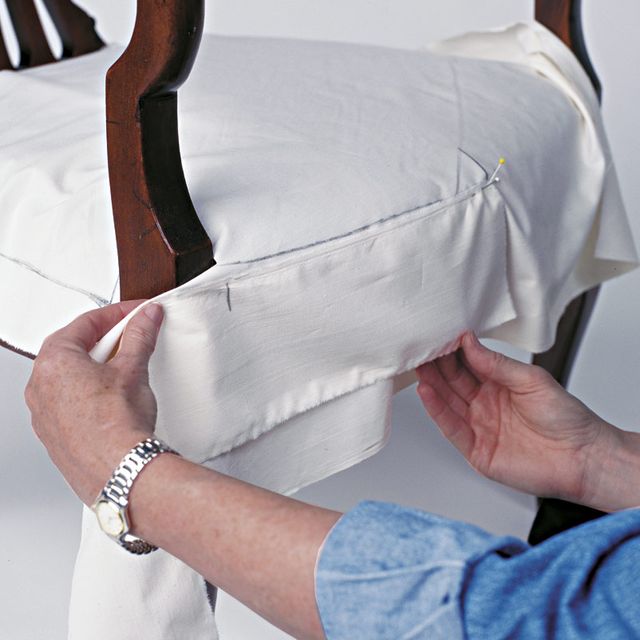
| 3. Use strips of muslin to make bands, positioning and pinning them to the seat. |  |
| 4. Engineer closing flaps with overlapping sections of band near the arms and back. Indicate button-and-loop closure placement. |  |
| 5. Mark matching notches and construction notes on the muslin. |
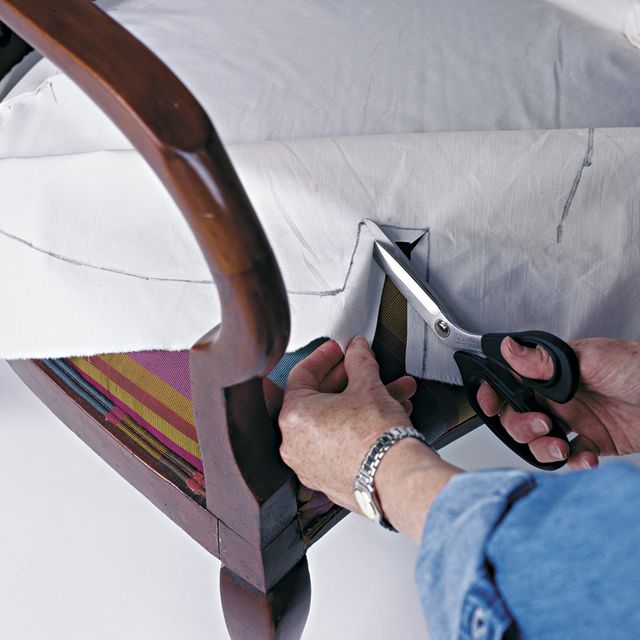
Note that the band that wraps around the chair below the seat often eliminates the need for a lot of darts or tucks and acts as a smooth vertical transition from the seat to the skirt. The number of overlapping closures needed in the band and skirt depends on the chair’s anatomy. Each above-the-seat element, such as a back and arms, needs a separate opening. Allow enough overlap in the closure to ensure a smooth fit with no gaps in the skirt (see the sewing instructions below). The skirt will need pleats at the legs if they splay out from the chair, but instead of making these pleats in the muslin, just mark where they’ll meet at the center of the legs.
Sew a chair-seat slipcover
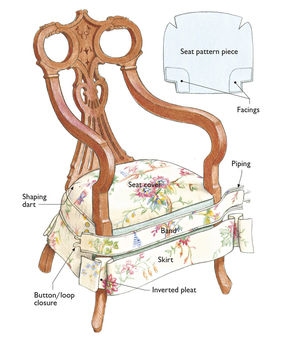
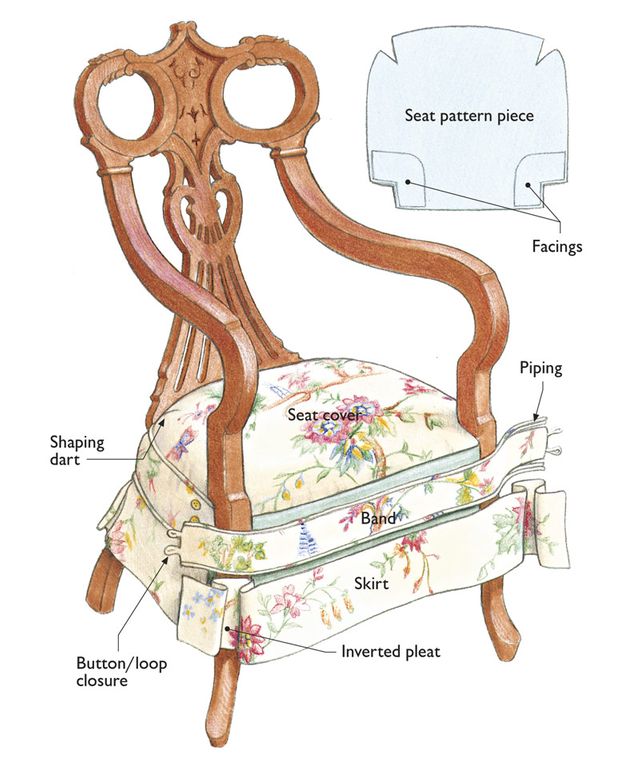
1. Stitch darts in chair seat.
2. RSs together, sew facings to cutout openings, trim seam allowances (s.a.s), turn to WS, and press.
3. Make piping or use purchased trim. Sew piping to top and bottom of bands, trimming the cord from piping at seams. Turn under ends of bands. Topstitch.
4. RSs together, sew top edge of bands to outer edges of chair seat.
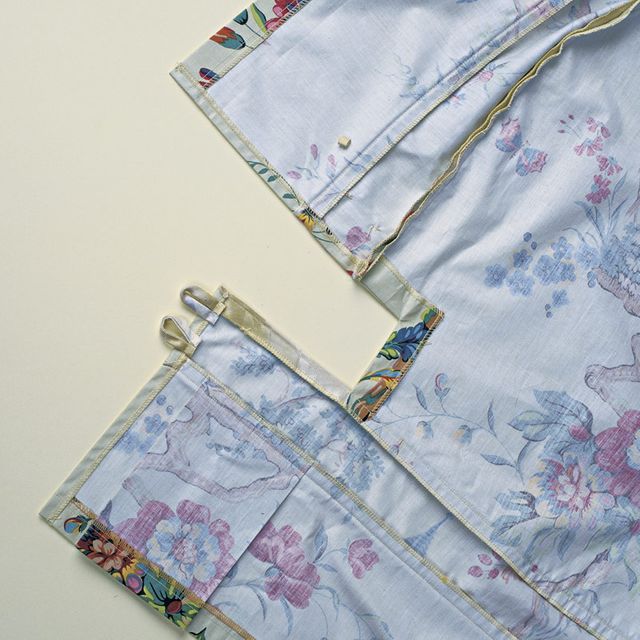
5. Finish skirt hem. Fold pleats where marked. Baste. Turn under side edges of skirt. Topstitch. RSs together, stitch skirt to bottom of band. Topstitch ends of skirt and band in one step.
6. Sew button loops and buttons or other closures.
7. Put slipcover on chair, sit, and relax.
I do suggest making a pleated muslin for your chair if the legs splay dramatically and you’re unsure how deep to make the pleats. Make any other notes and marks on the muslin that will help you later on to match and sew the pieces.
Prepare a muslin pattern
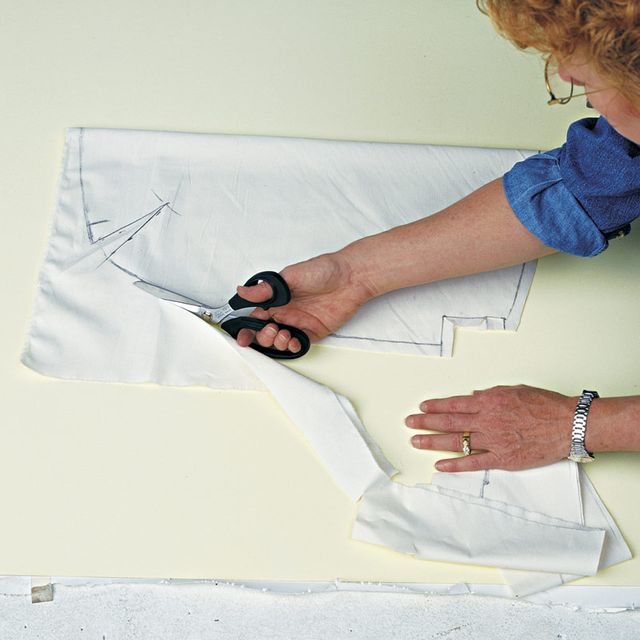
Once you’ve completely pinned and fitted the muslin on the chair, stand back and take a look. How do the proportions look? How about the location of the band’s overlapping closures? If your eye is satisfied, unpin the muslin from the chair, separate the components, and lay them flat. Use a French curve and a straightedge to fine-tune the seamlines, darts, and other markings. Add seam allowances to the seat, band, and skirt. Add the fabric needed for the inverted pleats (they should be at least 2 in. deep), along with hem allowances to the skirt pattern. Cut out the pattern pieces, folding the seat section in half along the centerline to ensure symmetry. You’ll also need facings to finish the cutout edges of the overlapping-closure areas of the chair’s arms and back. If you want to make a pattern for these, cut a rectangle at least 1-1/2 in. larger than the openings. Or simply measure and cut the slipcover fabric directly, without a pattern, when you’re ready to face.
Place your muslin pattern pieces on the right side of your slipcover fabric, and cut them out. If there are any motifs in the fabric that need to be centered or positioned strategically, trace the muslin pieces on paper first to make a see-through pattern.
Construction is easy
The process of sewing a slipcover uses the familiar techniques of garment sewing. Sewing darts, facings, pleats, and piping are basic skills that are certainly easier to do on a simple slipcover than, say, a jacket. Sewing hems, topstitching seams, and creating closures are terrific practice for more complex projects. Clip and notch curves in their seam allowances, as you would in garment sewing. Pressing rules apply to slipcover construction, too. Press open seam allowances as you finish them, and press pleats carefully to create crisp edges.
To sew the slipcover for the muslin pattern, follow the steps in the drawing above. Finishing the details on a slipcover are the same as for garment construction. Hems look nice when invisibly sewn by and or topstitched on a machine. Buttons and loops work nicely for closures, as do heavy snaps or Velcro. And you can accessorize your chair with a pillow or two, using leftover or complimentary fabric.
After you’ve made one side-chair seat cover, you might start eyeing other furniture in your home, and I encourage you to apply the basic principles you’ve just learned to more complex pieces of furniture. Or just stick to chair-seat covers. You can start collecting interesting chairs at flea markets and antique shops to apply your newfound craft. Let your imagination contribute to the beauty of the chair, and see how it can instantly uplift your surroundings. Then cozy up in your new chair.
Linda Lee is an interior designer and a contributing editor to Threads. She is the author of Sewing Stylish Home Projects.
Photos: Nathan Ham; drawings: Bob LaPointe
More on home decoration:
• Video: How to Make Reversible Chair Covers
• How to Make an Abstract Pillow Top
• How to make a Faux-Foliage Rug




Log in or create an account to post a comment.
Sign up Log in