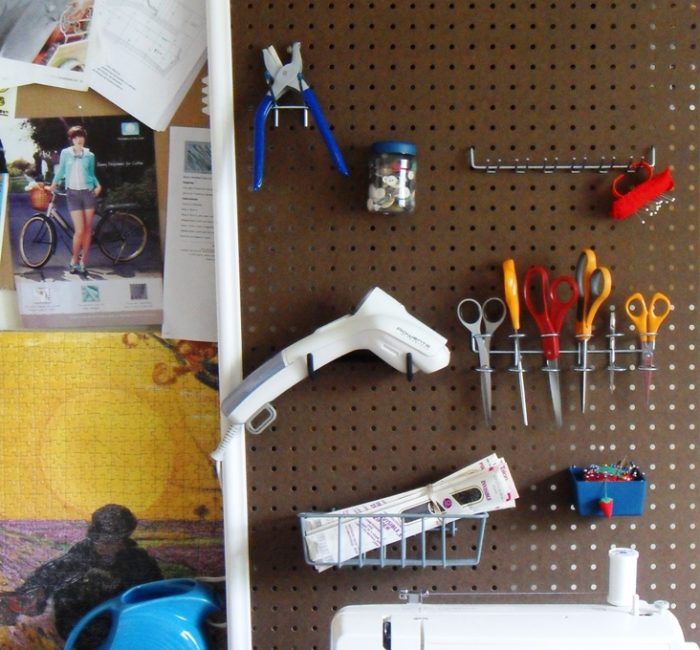
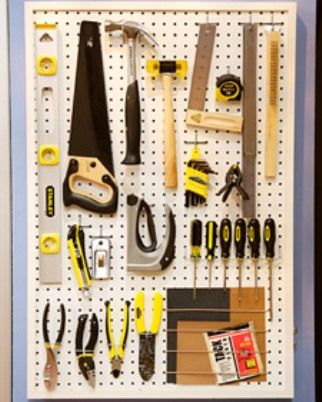
It's not yet painted or even fully framed, but it was too tempting to start placing tools on my new pegboard.
There’s something in me that doesn’t love a bare wall. (My apologies, Robert Frost!)
I think it’s great to organize what you can on the wall in a work environment. That way, your tools or references are visible and accessible, yet out of the way. Here at Threads, my workspace is papered with upcoming issue color palettes, fashion images, contact information, and so on.
A few weeks ago, I blogged about seeing sewing room photos on Flickr, and one of my favorites featured sewing tools on pegboard. Long before that, I blogged about having a dedicated sewing room (for the first time in my life). The inspiration and the opportunity are coming together – I’ve finally started a pegboard project.
I found instructions and a how-to video for a Pegboard Organizer at MarthaStewart.com. My grandfather’s tool shed pegboard wasn’t finished like this! Martha’s version just looks so pretty. The pegboard is painted, and is set within a picture frame – which serves a dual purpose. It covers the pegboard’s edges and acts as a spacer between the back of the pegboard and the wall.
I haven’t gotten that far in the process yet. Because I wanted to keep the pegboard at a large size (2 feet by 4 feet), I started to think that a ready-made picture frame was too expensive. I cut my own frame from inexpensive “picture frame” molding.
I got the simulated wood stuff, which I was able to cut/miter with an old steak knife. The one problem with making my own an edging is that I will have to figure out an attractive and easy way to space the pegboard from the wall. Any suggestions? I’m considering using wooden furring strips, or ones of the simulated wood. I think if I’d used a smaller piece of pegboard, I would follow Martha’s method of fitting the pegboard in a commercial frame.
A proliferation of pegs
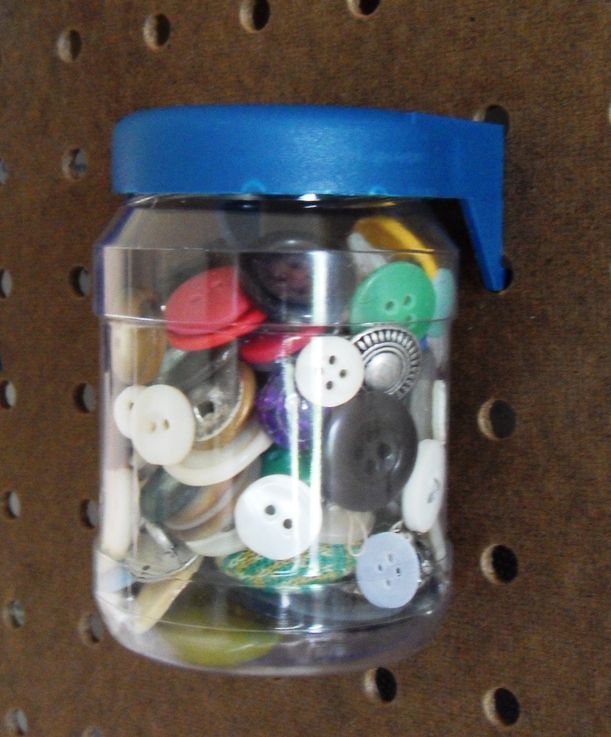
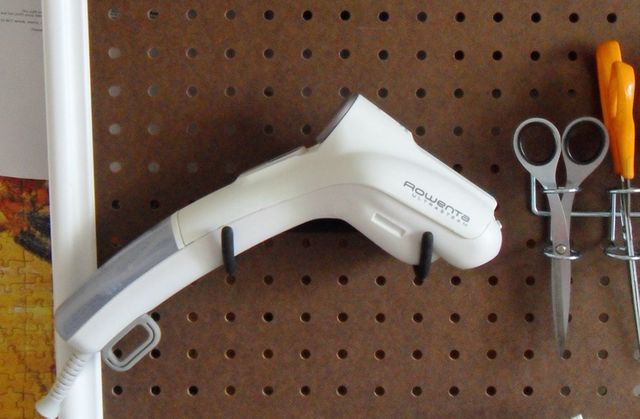
Things have changed since my grandfather’s pegboard. I bought the Real Organized assorted peg collection for starters. It included the classic screwdriver holder and individual pegs, but also had some new pieces – small jars with pegged lids; plastic bins with solid sides and bottoms, and plastic peg locks, which keep the peg hooks from wriggling loose. I also bought a special power drill hook, which turned out to be a perfect fit for my little hand steamer. In the video included in the Martha Stewart pegboard tutorial, she mentions threading elastic through the pegboard to hold documents.
Do you have any tips or tricks for keeping sewing notions handy? And on the other hand, are there any tools or notions you recommend I keep tucked away? I know I prefer to keep thread in a drawer – it gathers dust so quickly. I’d be glad of your suggestions and any advice on the spacing question.
After I finish painting the pegboard, adding the framing, and figuring out a spacer solution, I’ll be able to play with where to put objects. That’s half the charm of pegboard. Not only does it hang out on the wall, it’s easy to rearrange.






When I bought the "accessories" for my pegboard, a little assortment of different size pegs, it came with some little rubber spacers to hang it. They keep the board away from the wall enough to allow the little pegs to be put in or taken off the board. I think that they'e be deep enough to allow the picture frame molding as well.
I keep all of my scissors and rotary cutters on the board and all of my rulers.
I punched holes on the two top ends of a zip log bag to keep a tracing wheel and all the different colored papers. I had a little shelf there that held a pretty can for marking pencils and other similarly shaped things. In order to have it accessible it was too close to the area where fabrics would be moving through the space and I kept knocking it over. I keep them flat in a little box now.
One other thing that has helped me organize notions that I use often is a tea chest. It is about 2.5 inches deep, 14 inches square and has spaces that are the size of tea bag, about sixteen of them. Bombay Co. made it for a gift box of fancy tea. It now holds different needles, presser feet that don't fit in the machine storage, wash away thread, small screwdrivers, extra bobbins, safety pins, razor blades, etc. It's full! I keep that to the right of my machine and it's very helpful.
For spacers to keep the pegboard away from the wall, buy some doweling, about 3/4 inch should be thick enough. You only need a foot or so of it. Using a miter box and hand saw, cut sections of dowelling about 1 inch long.
Next, using a power drill and a 1/4 inch bit, drill holes through the center of your dowel pieces. (from flat surface, to flat surface, not on the curved sides).
This creates "wooden washers" or "donuts".
You can now mount your pegboard directly to the wall using these thick wooden washers. They keep the board off the wall. Your screws need to go through a metal washer, then through the pegboard, then through the wooden washer (or donut) and then into the drywall and hopefully, if you've measured correctly ahead of time, into a stud.
You might need one or two in the middle area if you have a very large piece of pegboard.
One 'spacer' that's easy to find is in the plumbing section at the local hardware store. Look for 1" lengths of small diameter white plastic plumbing pipe - cost about a dime apiece. I used them to mount a trellis outdoors for the same purpose - just to leave space behind it.
You can buy corks at a craft store.They come in a variety of
sizes, so you should find what would suit your purpose. I have
a couple glued to the back of my headboard so that it doesn't
leave any marks on the wall.
We live in an old bungalow, and have picture rail in the living room and dining room. When I was putting up the pegboard in my sewing room, I discovered there's also picture rail in there! So I fastened some picture wire to the board along with a strip of wood as the spacer, and hung the pegboard. Once I got it balanced, it doesn't move around. I mounted my thread rack on it, and still had lots of room for scissors, rotary cutters, rulers, and jars that hold needles and other goodies. I like the idea of threading elastic through holes to hold odd-shaped items. Someday when I paint my sewing room, I'll take everything down and paint the pegboard too!
I've been wanting to mount pegboard on the side of a set of wooden shelves I use in the sewing room. I used old nuts (from bolts) as spacers for pegboard in my old kitchen (before I moved). I've looked in hardware areas of stores for mounting sets and haven't found any yet so I may resort to large nuts again. I'm still trying to put the sewing room together so I can find things since I moved!
My husband made my peg board for me. We used 2X2 pieces of left over wood for the spacers. It works great, you just have to be careful of the placement of the screws when you screw the spacers to the peg board so that those screws are not in the way of screwing the finished board to the studs in the wall.
Mine isn't painted yet and I haven't bought the additional pegs I need. I was originally going to keep all my thread on the board, but I have since changed my mind because of the dust that would collect on it. Now I am going to keep all my sewing accessories. It is great to be able to quickly find all those things when you need them.
My pegboard is mounted using rubber spacers that have holes in them through which you put the screws. They are made for mounting things that need to be kept away from the wall. You can find them in the hardware area or just ask one of the employees. This way you don't have to do double the work by attaching a spacer and then screwing it on. I bought several different types of pegboard hangers and my sleeve board hangs "around" a large one, as do my two pressing boards; my sleeve roll is in plastic and hangs from the loop closure, various other tools: Fastube turners, rulers, buttonhole cutter,, etc. are in clear plastic bags or packaging with holes that hang from a peg. I'm trying to find a peg with a basket that can hold my pressing ham. I have a 4-drawer plastic rolling cart that sits next to my machine table with needles, marking tools, measuring tapes & small rulers, and various scissors. It keeps those frequently used items close by, but not cluttering up my workspace.
I have been using a pegboard for years. Since I do specialty sewing, I have a wide range of notions and accessories for diffferent projects. I keep the peg board mounted above a small table from a children's set to hold other items that don't hang well. This keeps everything neat, accessable, and easy to find. I even hang my small cutting mats using clip hangers (the kind for pants and skirts.)
Hey sewers, how about using old sewing machine bobbins as spacers? I know I usually have two or three which are beginning to wobble or need replacing. Maybe small thread spools would work too. Betcha could make a frame with some 1/4 inch plywood too and add batting, then cover with fabric for a nice fabric covered frame - then staple gun it around the pegboard....
To BarbaraSki and anyone else interested in baskets & peg board:
I found wired narrow rectangular baskets designed to go with closet/kitchen door systems at my local Home Depot. The hooks lined up with my pegboard holes(1/4 inch), so I bent them to the correct angle and inserted them into the peg board holes. Voila! White vinyl covered metal baskets on my white painted peg board. My pressing ham, seam roll, press cloth, spray bottle, starch water bottle and iron cleaner all fit in this basket which is positioned near my ironing table. My ham holder has a hole in one edge, so I hang that above the basket on its own hook.
Also, Ikea sells a metal iron holder, which I found can fit on hooks on pegboard. It wasn't designed for pegboard, but the top has metal rod at the corners, and this rod fits nicely into two U shaped hooks(one on each side of the holder), so ALL my pressing gear in in easy reach of my board.
I took the base/support from an old Babies Crib; not only was it framed all round, but there was an additional framing piece as an extra support across the centre from side to side. This framing was just deep enough to allow me to use regular Peg-Board Fitings to hold items in place.
Sadly, last time I moved house my "New" sewing room did not have enough wall space available fo me to re-use it for notions and sewing gear. BUT It did fit nicely into the 'dead' space behind the door into the Laundry /utility room, where it holds many household and woodworking tools in an effective array so I can readily find the Yardstick, 4' Level, or Handsaw.Just to be safe I have the whole board screwed to anchors in the wall and a small Cup Hook screwed into the frame at the same height as the door handle, then a short bungee cord goes from the handle and clips into the cuphook to keep the door open.
I also have a similar piece mounted just below the ceiling in my kitchen to hold tools that I use but not every day;
In behind my actual Machine Table I have an IKEA Shelving unit; one of the 11" deep ones, which a friend machine sawed in half so instead the shelves are now 5 1/2" deep. This holds Jam Jars full of Buttons, sorted by coour, shape, 2 hole/4 hole/ shank, even by size in s cases. The jars that some "Canned Fruit" now come in are also good for this purpose, and a certain Malted Milk Drink favouired by Brits also comes in a good jar for re-purposing.
Down on the floor I have some lengths of sturdy Cardboard Tube fitted into a Kitty Liter Plastic Pail; enough to fill it and stand up by probably half again of their height. Yardsticks, and stiff narrow rolls of materials such as 'Sticky Backed Plastic' fit in there.
Since I have, in the past, lost a much beloved cat to Sepsis causes by ingesting thread which then cut into his digestive tract, any "work-in-progress" such as Canvas or Embroidery work lives in a basket with a lining and a drawstring top so I can close it off easily and prevent inquisitive cats from exploring; of course my remaining cat is so bored by life she is hard pressed to do any evil these days!
Liz
What a lot of thoughtful and creative ideas! Thank you all. My mother had a pegboard that held everything for her sewing projects and she had another smaller one that held keys. When we came into the house we would just hang our keys. Very handy. Mother's pegboards were covered with inexpensive burlap and the hook holes in the burlap were separated and spread threads in the fabric. Burlap is loosely woven enough that it is easy to separate and just place however many holes you need. The burlap was attractive in itself so she didn't need a frame.
Wow! So many ideas. I didn't think I had room in my sewing room for pegboard becaus three walls are bookcases, which hold my fabrics and thread boxes, magazines, etc. The fourth wall is my design wall and it is 8 feet wide, which brings it just to the corner of the closet. However, I was looking at the room now after reading this article and realzed that I could put pegboard on the back of the closet door! Right now I have hanging baskets there that hold my interfacing rolls and such, but it is very inefficient to dig through the big baskets. I know my husband has extra peg board in the garage and I am going now to look for it!