
In Threads #180 (Aug./Sep. 2015), author Raminta Vilkiene explains how to use an industry technique for creating a pattern from an existing garment, without disassembling the garment. She demonstrates the process on a pair of jeans, which you may want to learn in order to duplicate your favorite pair.
In this Web Extra, Raminta explains how to copy pants that have darts rather than a back yoke. The basic steps for creating a pants pattern are the same as in Raminta’s Threads article. Once you know the basics of rubbing off a jeans pattern (see Threads #180), you can move on to different styles.
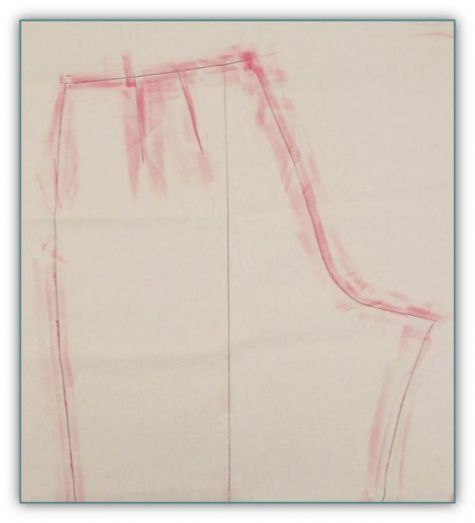
1. Rub off the pant back, using wax tailor’s chalk on muslin, and be sure to capture the impression of the dart or darts.
2. Mark the darts on the rubbing, indicating the stitching lines’ location and length.
3. Measure each dart’s intake, the distance (at the waist seamline) between the stitching line and the dart’s fold. Multiply this by 2 to obtain the full width of the dart.
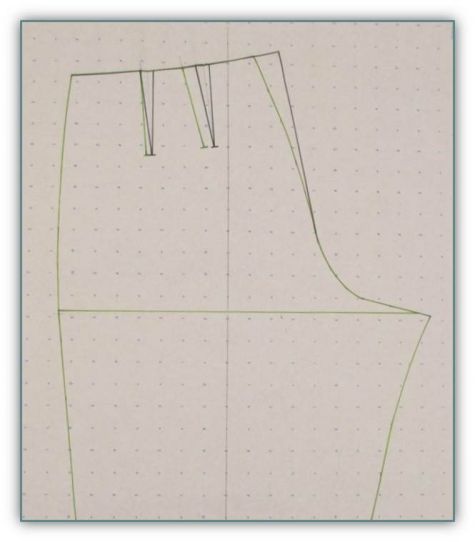
4. Trace the pant back rubbing onto pattern paper, as described in Threads #180. Mark the original dart stitching line(s).
5. Adjust the pant back pattern. At the center back extend the waist edge by the total amount of the dart intake. In this case there are two darts, so add the intakes and increase the pant waist by that amount. Redraw the waist seam.
6. Redraw the center-back seam from the waist edge to the beginning of the crotch curve, making sure that its intersection with the waist seam is a right angle .
7. Mark the new darts. They may not be in the same position as the original markings. Measure the pants to determine how far the darts are from the center back seam and side seams, as a guide to placement. Add seam allowances to all edges.
Will you try this technique?



Thanks , this is the information that I needed.