
Line a Jacket Like a Pro
Install a jacket lining entirely by sewing machine
Lining a jacket creates a beautiful interior finish and prolongs the garment’s life by preserving its original shape. Lined pieces slip over other garments more easily, cling less, and can be warmer.
Some jacket patterns include separate pattern pieces for linings, while many do not. Don’t let the lack of a pattern stop you from lining a jacket. You can make lining pattern pieces easily with just a few adjustments to the original jacket pieces.
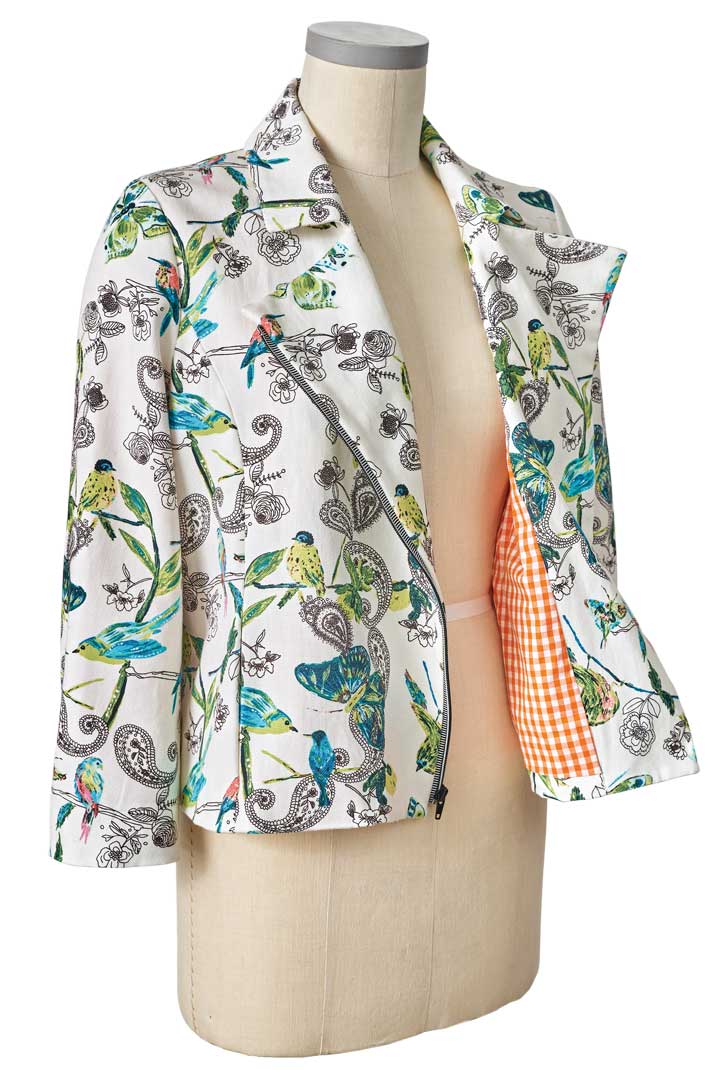
There are many methods for sewing a lining into a jacket, including sewing it completely by hand and various machine-and-hand combo versions. The expression “bagging the lining” means installing a lining entirely by machine. There are several approaches to this. Whatever method you are using, the corners where the front facings meet the hem call for special finishing, as the facing edge typically remains exposed. I’ll show you a technique for machine-sewing those corners as part of the lining attachment process. The sewing sequence is different from the usual bagging process, so read carefully to understand the method. It takes a few more steps, but the finish is clean and neat.
Create the patterns
This technique calls for specific hem and seam allowances at the jacket and lining edges. Adjust the garment pattern pieces as described. Use the adjusted patterns to draft a lining pattern, following the red lines on the illustrations below.
Revise the jacket pattern
The jacket pattern needs a 2-inch-deep hem allowance on the front, front facing, back, and sleeve pieces. To attach the lining by machine, the jacket must have a back-neck facing. Make it as wide as the front facing at the shoulder seam.

Linda Lee is the designer of Sewing Workshop patterns, a Bluprint instructor, and an author. This article first appeared in Threads #207 as…
Start your 14-day FREE trial to access this story.
Start your FREE trial today and get instant access to this article plus access to all Threads Insider content.
Start Your Free TrialAlready an Insider? Log in


According to the picture in Step 4 of the sleeve hem, your stitching would be on the outside of the jacket and the sleeve would be sewn shut.This makes no sense--you missed an important step in how to align the fabrics to sew it properly. Also, it would have been easier to read if you'd done more (twice as many?) pages on the PDF--the print is too tiny to read the bold numbers used for the seam allowances (I had to enlarge it to 150% in order to read it--and I have trifocals!). Even printing the PDF was no help as the type is way too tiny. I'm sure I'm not the only person with this problem. I've 'bagged' linings before many times and the only thing I did differently was the jump pleat at the front facing--I like your method better than that given in Vogue Men's suit pattern instructions.
Thanks for this article.
A few things are not clear, and I would be grateful for feedback (Lining newbie here):
1. Step 2 of "prepare the hem and facing": is the corner staystitched on just the hem allowance or both fabric layers?
2. When are the basting stitches of the center-back pleat supposed to be released? I must be missing that even though I've read the article multiple times.
4. Where would I find instructions for "blind-catchstitching"? I've never heard that term.
THank you.
On my to-do list are pattern and fabric for an unlined coat, and I had been wondering how to draft and insert a lining. Your article couldn't have been more timely.
Best Regards,
Claudia
Hi, Claudia,
Here are answers to your questions:
1. In step 2, staystitch only on the hem allowance; you'll need to be able to unfold it in future steps.
2. You can remove the back basting stitches at any point after the lining has been installed. I usually wait till very close to the end--the basting controls the pleat during construction. You're right--we never told you when to take them out!
4. Blind catchstitching: Search for "catchstitch" here at ThreadsMagazine.com, to learn the basic stitch. A blind catchstitch is done between the hem allowance and the body of the garment, so it doesn't show. As shown in step1 of "Complete the lining installation," fold the hem allowance up into its final position, then fold its raw edge down by 1 inch. Catchstitch along that fold, securing the hem allowance to the sleeve. This leaves a 1-inch band of hem allowance loose. That band is where you attach the sleeve lining hem in step 4.
I hope that helps! Good luck with your coat.
Carol J. Fresia, Threads Senior Technical Editor
Hi, Terri W,
In the illustration to step 4 of hemming the sleeve, the various parts have been straightened and flattened for clarity--as you probably know, when you do this sewing on an actual garment, the sleeve and its lining are pretty twisty and hard to see.
To clarify, you align the sleeve and its lining with right sides together and raw edges aligned, then sew around the hem through both layers. This does not sew the sleeve closed--it just joins the lining to the sleeve at the hem.
I agree with you about the size of the type, or at least about having trouble reading it. I am in the same boat, and when I work on these pieces on my computer in the office, I enlarge them to 200% (sometimes more). That's the beauty of the pdf--you can make it as big as you need!
Carol J. Fresia, Threads Senior Technical Editor
Thank you, Carol.