
How to Sew Couture Trim and Buttonholes
Two unusual techniques elevate a coat
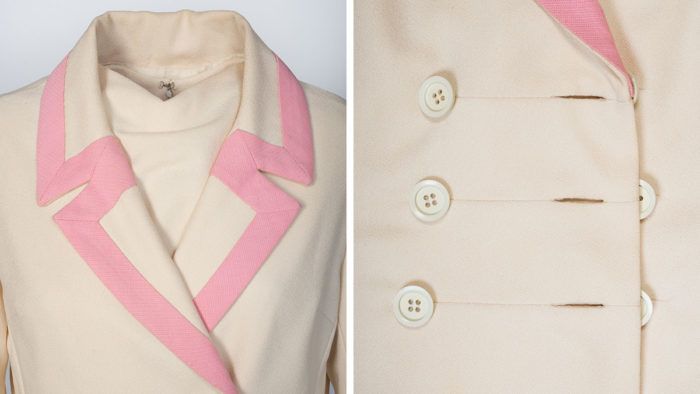
Bias binding accents garment edges, but it can make them bulky. The wider the binding is, the more difficult it can be to achieve a smooth and flat finish. For the contrasting trim shown on the back cover, French designer Jacques Esterel skipped a binding and instead appliquéd mitered 1-1/8-inch-wide silk bias strips by hand along the exposed collar and lapel edges. This method is time-consuming and requires control to get a precise result. You can try the following alternative method that adds the contrast band by machine early in the garment construction.
The double-breasted coat also features what, at first glance, look like in-seam buttonholes, and yet the coat front panel is cut as a single piece with no available internal seamlines. The sleek and unobtrusive buttonholes are openings in three narrow, horizontal darts. This ingenious solution is worth considering when you want a nearly invisible opening for a button.
Contrasting edge band
You can make this type of trim up to 2 inches wide. Begin by making separate edge band patterns. Sew the band pieces to the collar and lapel, then proceed with construction as usual. The process is shown on a collar pattern but is the same for a lapel.

1 Begin the patterns. On the original collar pattern, mark the seam allowance. Draw in the desired contrast band’s seamline, which will be its inner edge. Add a seam allowance for the contrast band and an alignment line for the band. Draw a diagonal line through the corners.
2 Make the contrast band pattern. Trace the collar pattern from the outer cutting line to the contrast cutting line. Cut the piece and transfer all the lines to it.
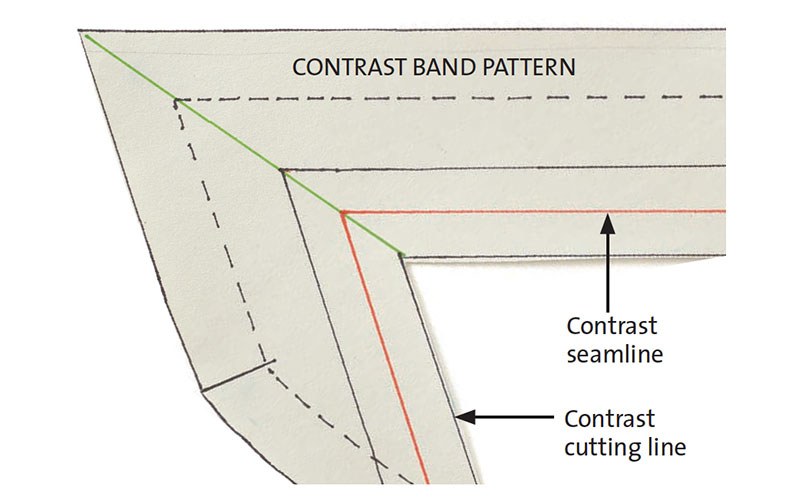
3 Prepare the pieces. Cut a collar piece from the original pattern, and mark the contrast alignment line and…
Start your 14-day FREE trial to access this story.
Start your FREE trial today and get instant access to this article plus access to all Threads Insider content.
Start Your Free TrialAlready an Insider? Log in


Log in or become a member to post a comment.
Sign up Log in