
How to Sew a French Knot
Little knots paint a whole scene
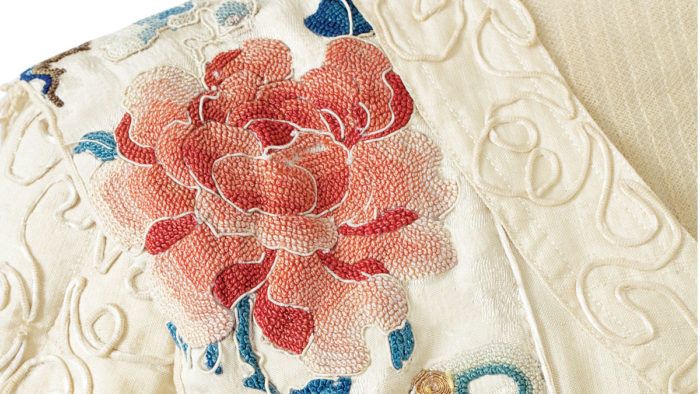
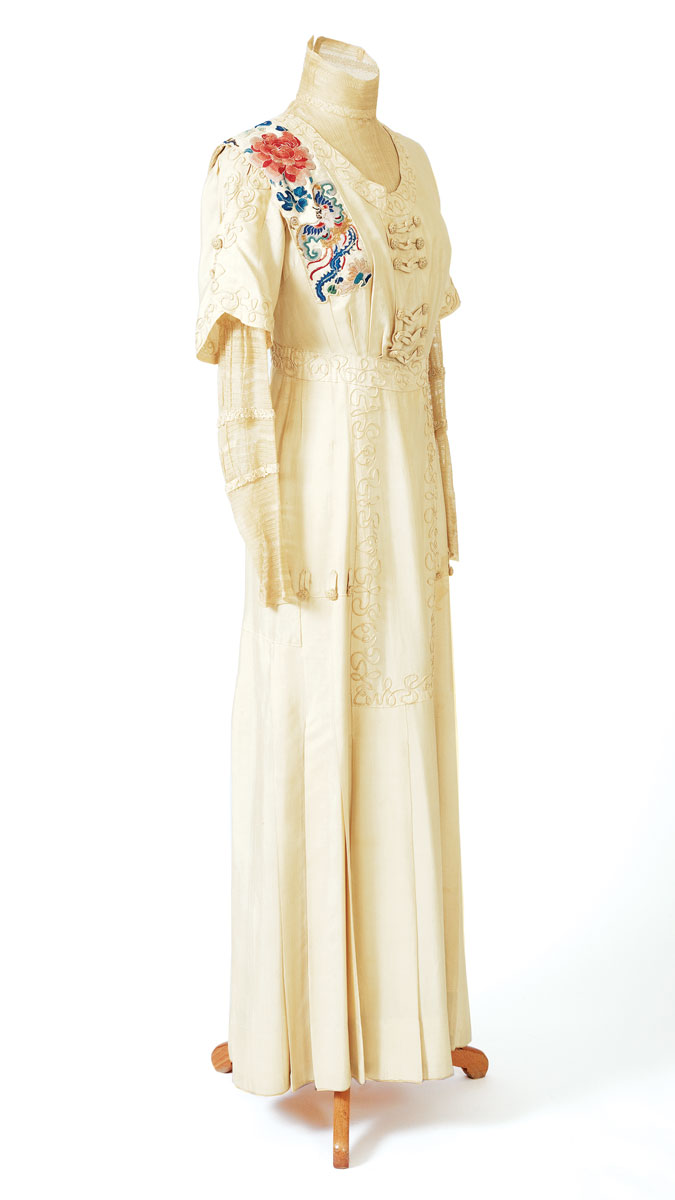
East meets West in this circa 1910 delicate beauty. Asian influences take main stage in the form of brightly blooming embroidery that adorns the right shoulder. This focal point consists of hundreds of tiny, colorful, hand-sewn French knots that are clustered and framed by couched cording. The backdrop for this exotic paradise is a rich, butter-yellow silk shantung dress that features a host of sweet details: crocheted Chinese ball-and-frog closures, demure tulip sleeves, a tucked waist with couched cording, and a feminine, floor-length pleated skirt. Read this article from Threads #159 to learn how to make a perfect French knot.
 |
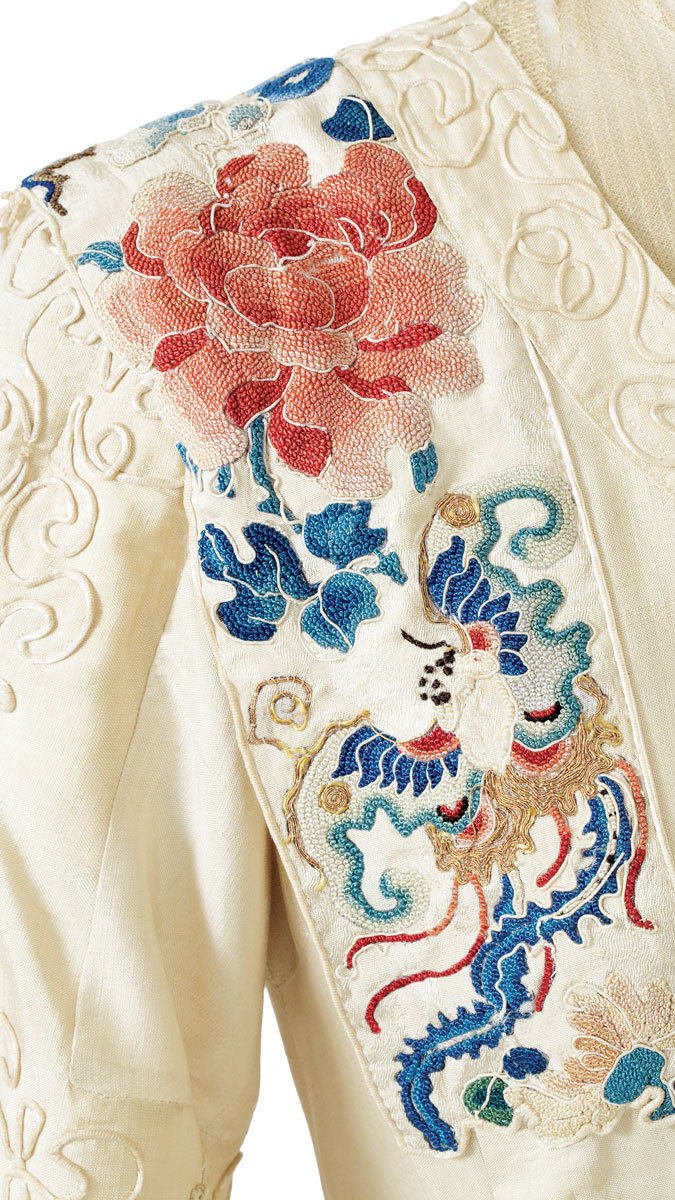 |
You’d think a stitch that can fit on the head of a pin couldn’t make much of an impact, but not so. When French knots are clustered together, the result is stunning. Learn the secrets to sewing a French knot so you can make hundreds with nary a flaw, as inspired by the embellished gown on the back cover.
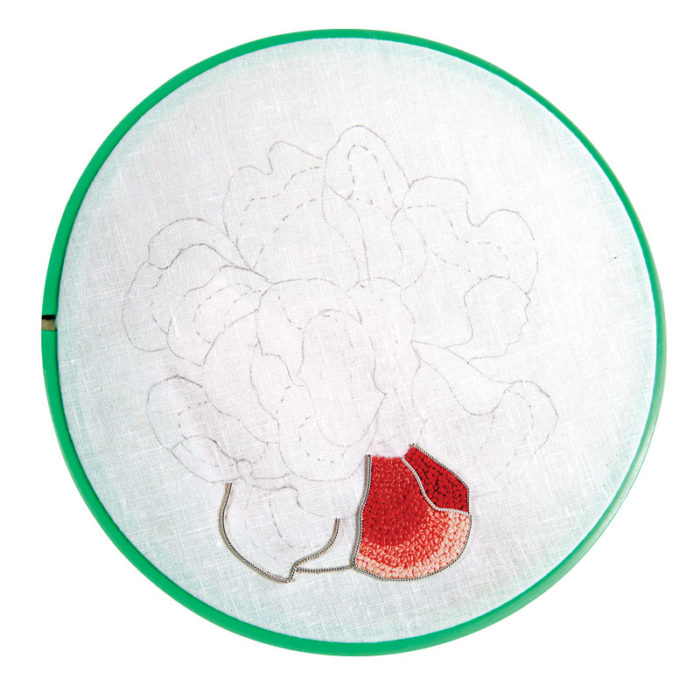
Copied from the Western Costume gown, the pattern used includes color gradations on each petal. Outline the solid lines with stemstitch embroidery or a fine couched cord. Use five floss shades, graduating from light to dark, to fill in the outlines.
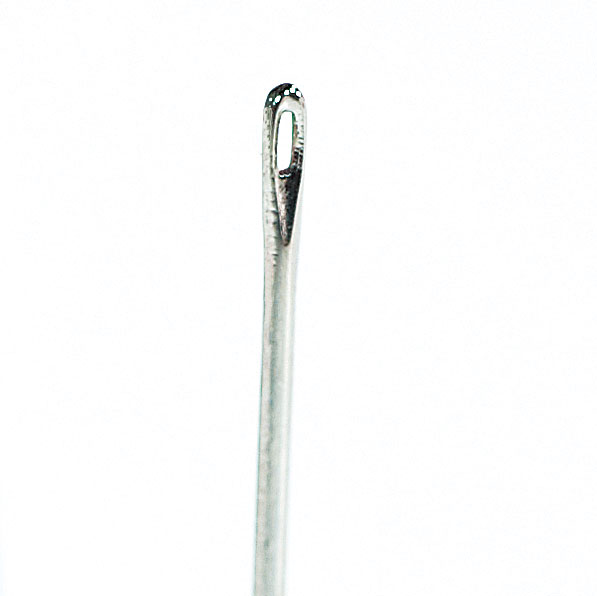
1. Use a milliner’s needle. The eye area is the same width as the shaft and will pull through the wrapped thread more easily than another needle type.
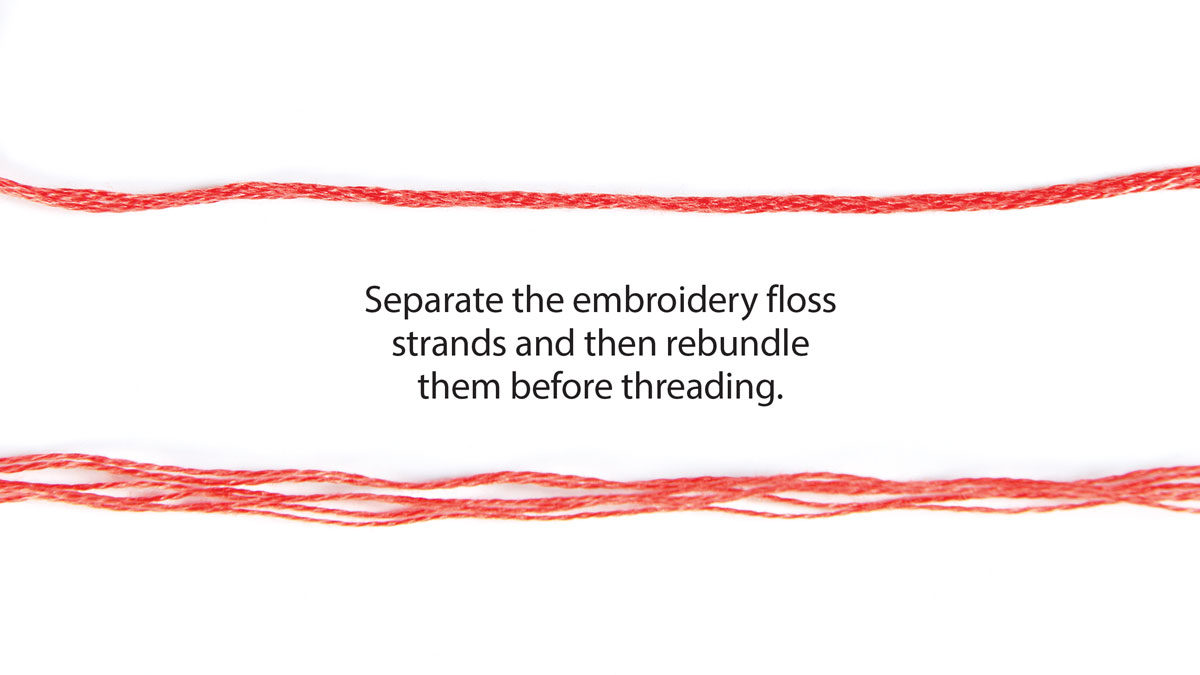
2. The thread sets the size of the knot. Use one or more strands of embroidery floss or pearl cotton for larger knots. This sample was made with DMC embroidery floss. After cutting the floss length about 18 inches, separate the strands to add loft to the knots when they are stitched.
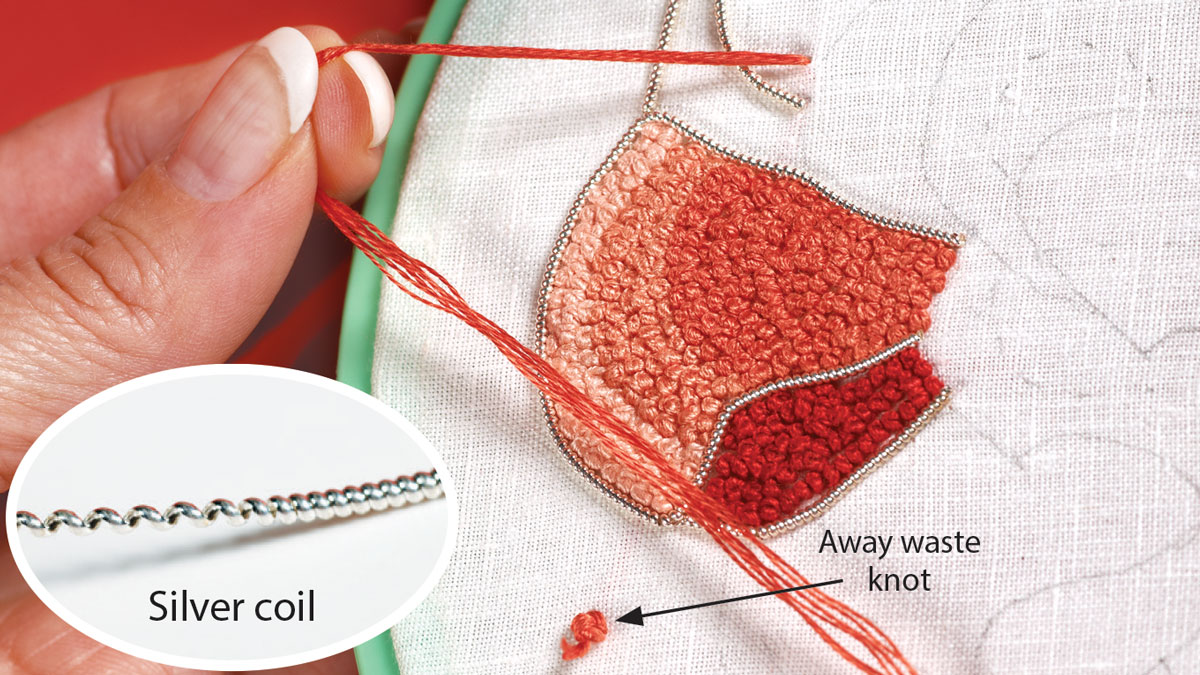
3. Stitch at least part of the outline; a fine silver coil is couched here. Then start with an “away waste knot” outside the embroidery area on the right side. (Later, clip off this knot, and weave the tail into the back of the embroidery.) Bring the threaded needle up from the wrong side. Hold the thread with the opposite hand about 3 inches above the fabric.

4. Position the needle behind the thread. Then use the opposite hand to wrap the thread over and around the needle once.
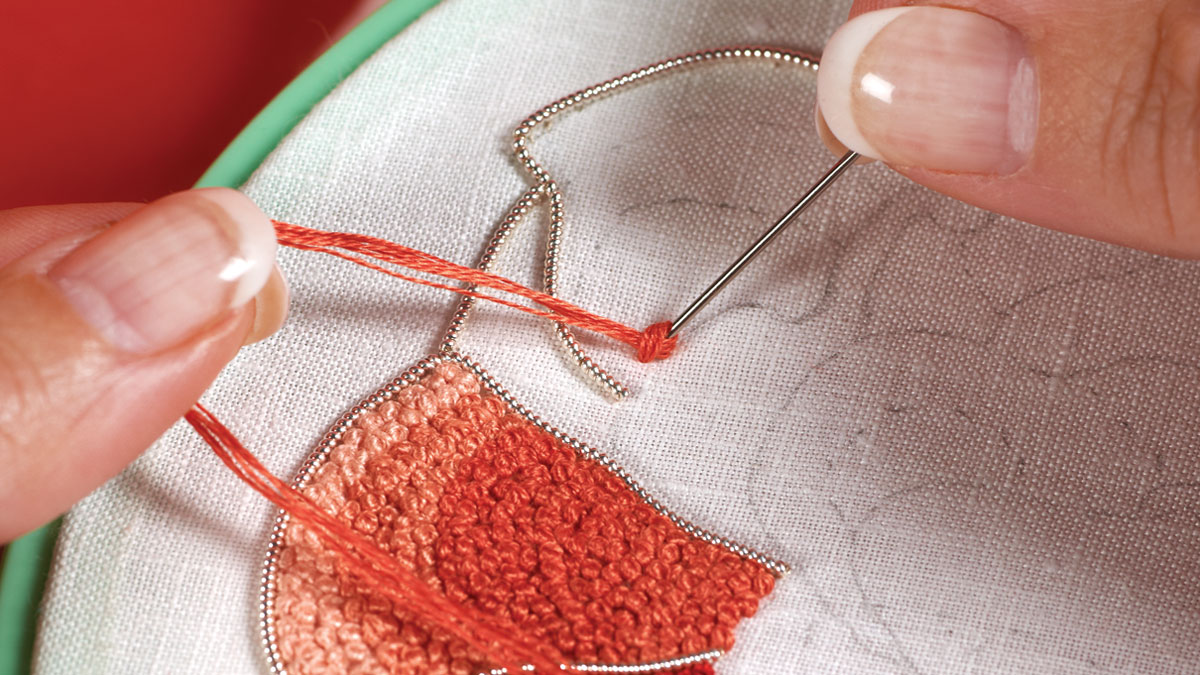
5. Put the needle point into the fabric a thread or two away from its entrance hole. Push it straight down, but not all the way through.
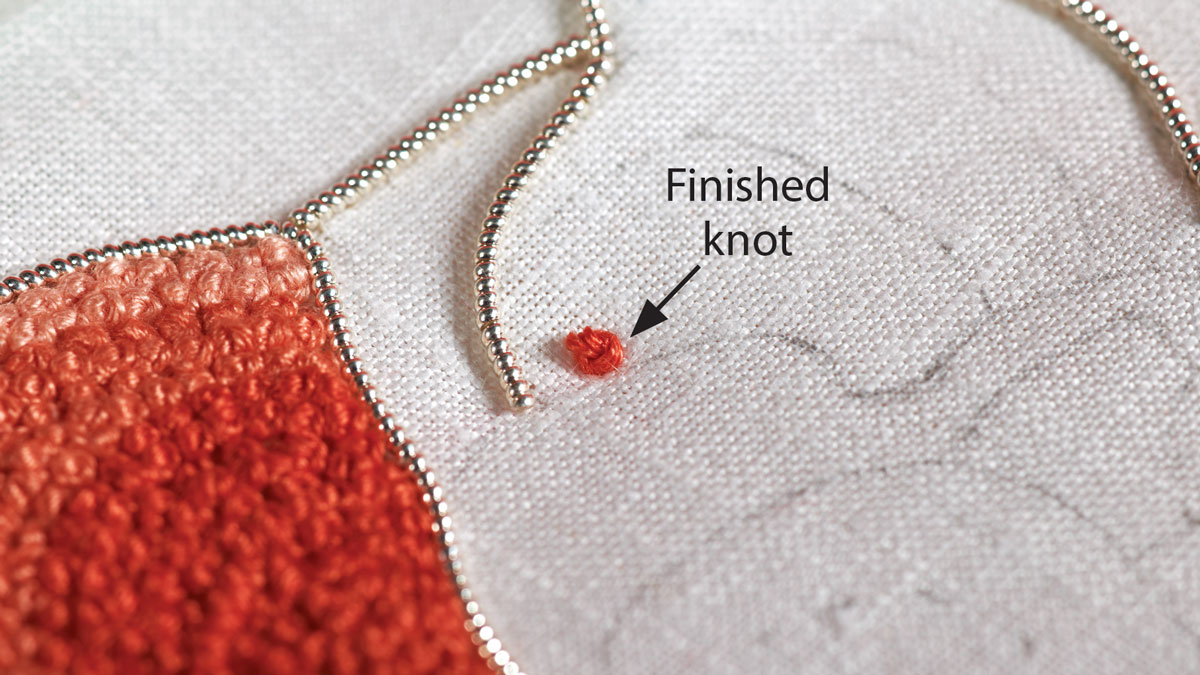
6. Pull the thread gently with the opposite hand. This slides the wrap closer to the fabric. Keeping your thumb over the wrap on the needle, draw the needle through the fabric. Repeat for each new French knot.


Log in or create an account to post a comment.
Sign up Log in