
How to Sew an Elegant Velvet Appliqué
An easy way to mimic the look of intricate hand embroidery

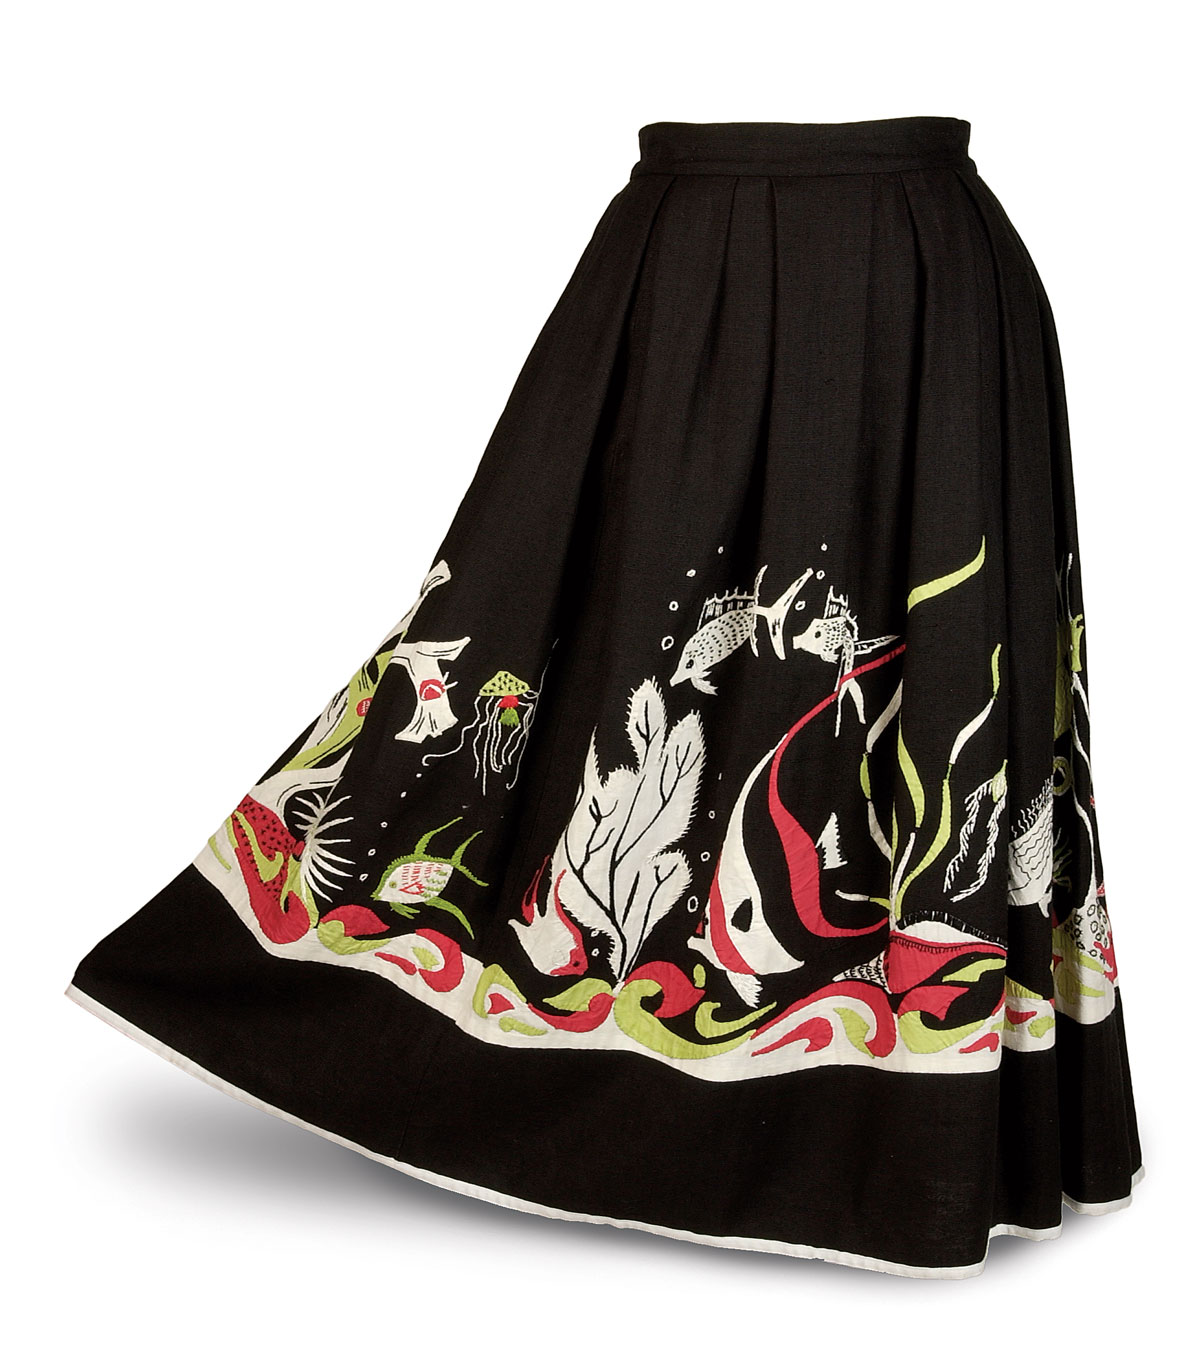
A fanciful underwater scene decorates the entire hem of this black linen skirt, which probably dates from the mid-20th century; it’s now in the collection of Carole Rothstein. Appliquéd by hand in white, lime green, and hot pink cotton, the marine creatures and their surroundings are embellished with lots of hand embroidery to establish texture and pattern. And even though the hem circumference of the skirt is quite large, the design motifs are never repeated; the four unique quadrants are shown at left and below. You can sew great-looking appliqué by machine, too; read on to learn more about design and technique from Threads #110.
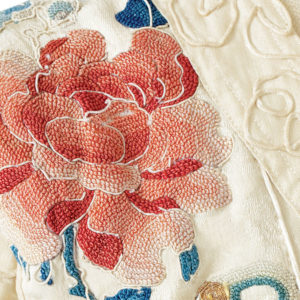
If you love the look of traditional needlework, but long for a time saving, more modern alternative, you’ll fall in love with my velvet appliqué technique. I’ve borrowed the aesthetic of crewel embroidery (which is worked with wool yarn and distinguished by rich texture and vibrant color), but instead of creating texture from intricate hand stitches, I let the loft and sheen of crushed velvet do most of the talking-cutting it into small motifs that I sew to a background fabric with basic machine stitches, which add further interest.
In fact, what makes this embellishment so special, and easy to do, is the way I stitch the appliqués to the background (see below for more details). Instead of securing them with the usual satin-stitch outline, which looks too contrived for my taste, I use a multistep zigzag stitch, which softens the edges and adds another layer of texture. I use an open satin stitch to create decorative scrolls and vines on the background, between the appliqué. And for a fanciful touch, I add fabric paint and a sprinkling of beads to the motifs. Follow my lead, and you’ll be whipping out opulent garments and accessories in no time flat.
|
|
|

Sheets of clear mylar (stencil plastic) and clear vinyl from the art supply store work well for appliqué patternmaking. Use polyester-covered cotton thread for all stitching, and, if contrast is desired, choose colors that will pop against both the background fabric and velvets. Test-stitch on fabric scraps to determine the best stitch width and density.
 |
 |
First stitch the scrolls
Transfer the scrolls onto lightweight tear-away stabilizer. Place the stabilizer face down onto the wrong side of the background fabric; baste in place. With the stabilizer side up, sew 1/8 inch away from one side of the marked line using a straight stitch and zipper foot. Pivot at the end of the line, and sew 1/8 inch away from the other side of the marked line.
Turn the work so the right side of the fashion fabric is facing up. Sew over the straight-stitch outlines using a narrow, open satin stitch and a clear embroidery foot.
Then create the appliqué pieces
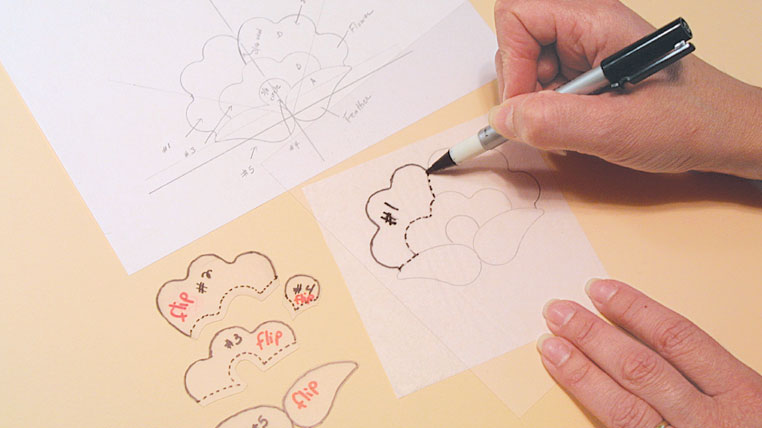
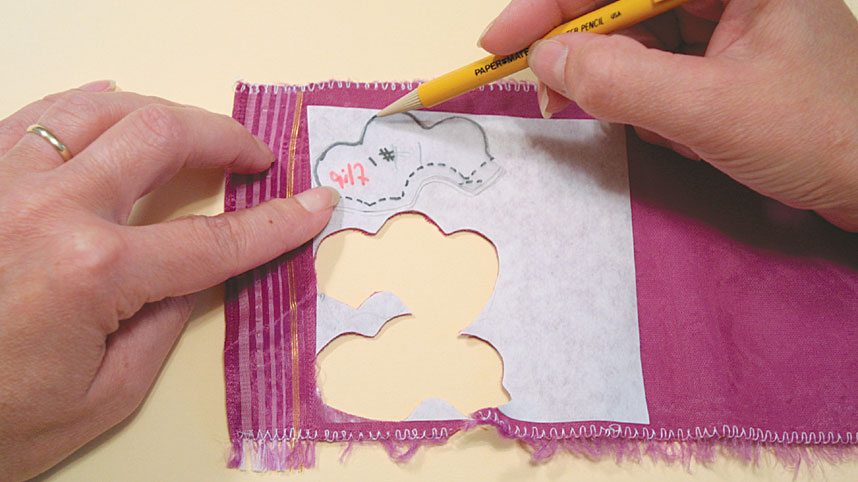
Number each component of the appliqué. Trace each onto clear mylar; identify by number. Mark the edges that will be overlapped with a dotted line and add 1/8-inch seam allowance to these edges only; cut out.
Fuse paper-backed lightweight adhesive, such as HeatnBond Lite, to the wrong side of the velvet. Place a pattern piece face down onto the paper backing, trace, then cut out. Repeat for all velvet colors.
 |
 |
 |
Last position and sew on the appliqué
Trace the full appliqué motif onto lightweight vinyl, and pin it over the stitched scroll. Remove the paper backing from the velvet pieces and align them under the vinyl using an awl. Remove the vinyl.
Fuse the motif in place using a press cloth and a dry iron fitted with a soleplate cover (to ensure that the steam holes don’t mark the velvet). If needed, fluff the velvet nap with a toothbrush.
Line up the center of your clear embroidery foot with the velvet edge (so half of the stitch is on the velvet and the other half is on the garment fabric), and sew slowly around each piece using a multistep zigzag stitch. Tear away the stabilizer.
First pick a project
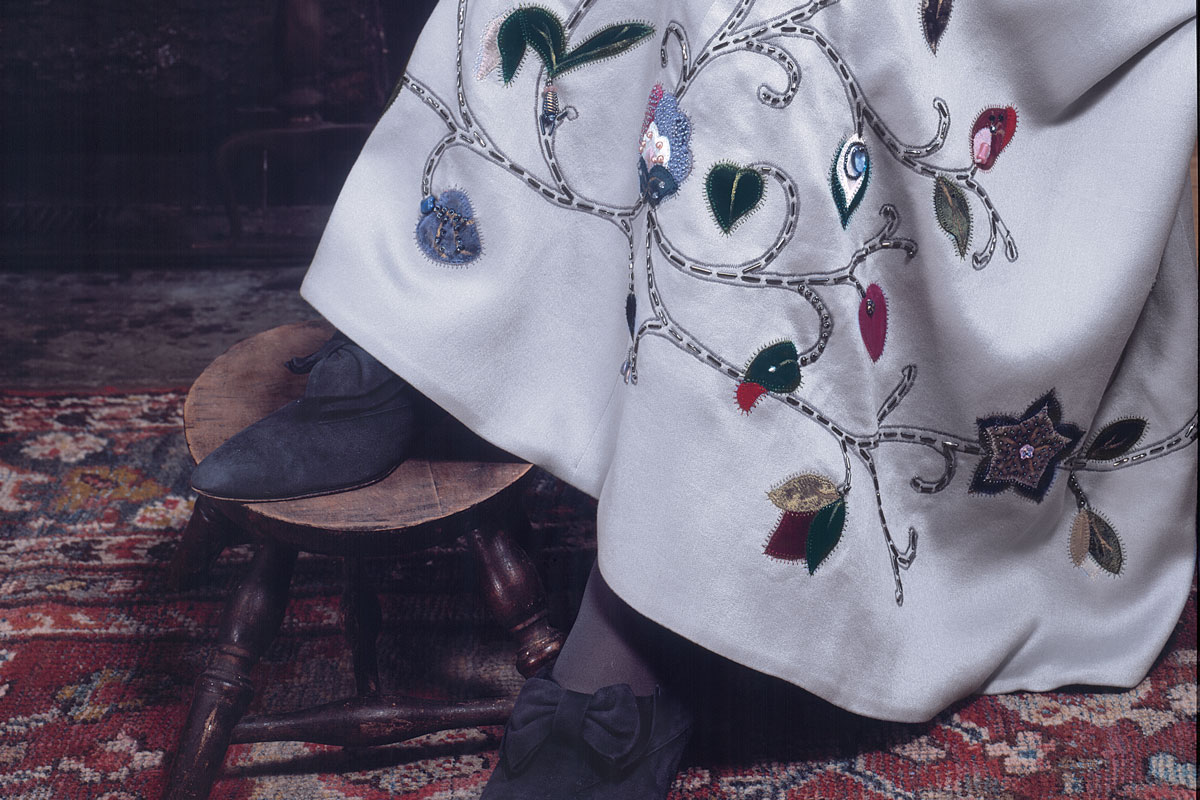
You can add textured velvet appliqués to a great variety of projects, from large items such as curtains or bed and table coverings, to smaller accessories like pillows or frames. And of course, velvet embellishment adds a striking, one-of-a-kind touch to garments-adorning skirts, jackets, dresses, even snaking up a pants leg. You don’t have to create a project from scratch in order to embellish it; items existing in your home or closet may provide the perfect canvas.
Focus on fabric
Once you settle on a project, there are two fabrics to consider before you jump into creating the appliqué design. The first, of course, is velvet, but remember, all velvets are not alike. For this technique, you need a velvet that crushes beautifully so it will give the appliqués a three dimensional look without much further decoration. Stay away from silk velvet-it doesn’t crush well and the pile eventually restores itself. Acetate velvet is the better choice, because when it’s machine-washed and air-dried, the resulting creases are permanent. (To enhance the creased effect, you can press the dry, crushed velvet from the wrong side, using an up-and-down motion of the iron.)
The second fabric to consider is your background fabric. I like to use a sturdy fabric that’s compatible in weight to the velvet, such as medium-weight silk, wool, linen, or cotton (including denim). Stay away from a lightweight fabric be cause the appliqués will appear stiff and rigid compared to it, and avoid using a napped fabric, a s the appliqué texture and stitching will get lost in the background texture.
Choose your motifs
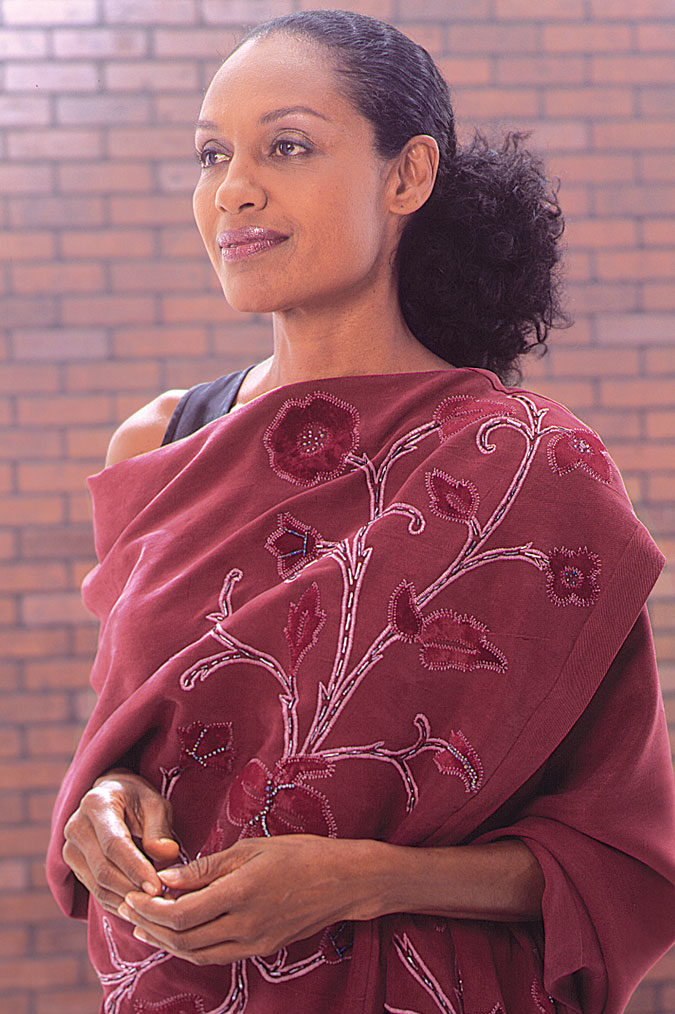
Next turn to my favorite part of the process-developing shapes for the appliqué. In truth, the sky’s the limit-geometric shapes work just as well as traditional florals. Seek inspiration in books on historical embroidery or in shapes found in nature or around the home; even printed fabric can offer appealing motifs. You can also use purchased quilt templates or embroidery transfers as a basis (see photo at left for a sampling of inspirational sources).
I do recommend keeping all motif shapes simple, with fairly gentle curves; this will make stitch ing around the edges easier. Keep a stack of tracing paper on hand as you experiment with and refine motif shapes. (If you make good friends with a local copy machine, it will make reducing and enlarging your designs a cinch.)
Beads and add paint detail
After you’ve stitched the scroll outlines and appliquéd the velvet motifs, add sparkle and highlights with metallic paint and beads. Use these ideas or create your own.
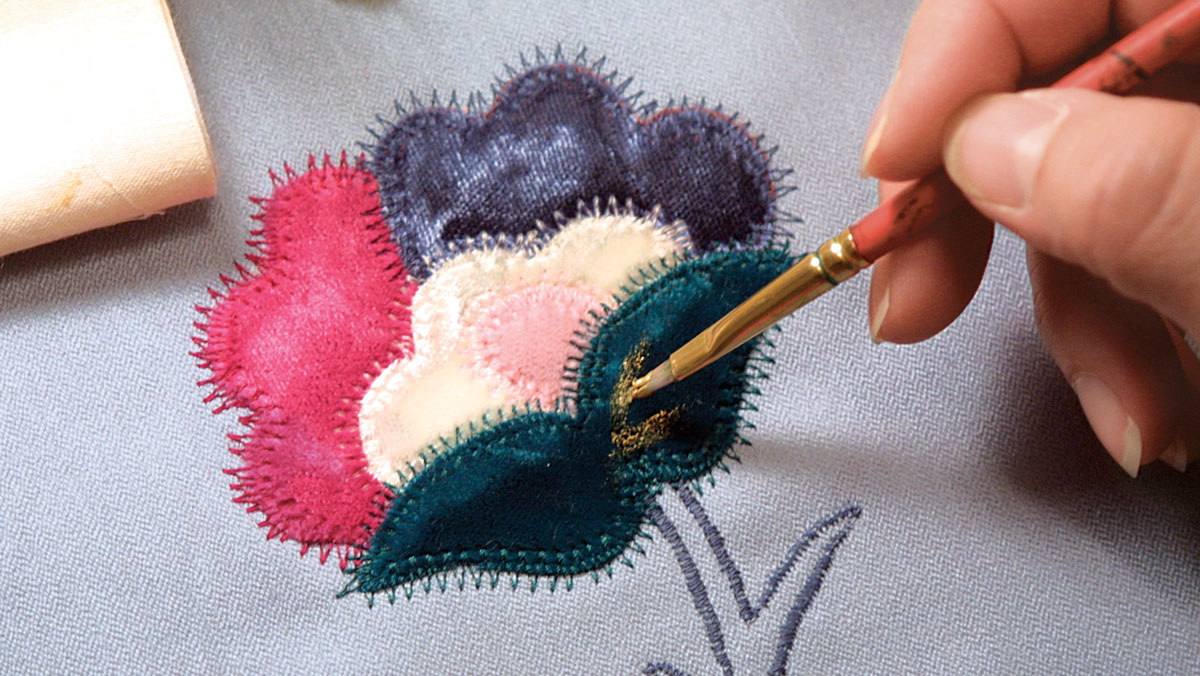
Brush on metallic paint
Lightly stroke silk-appropriate fabric paint onto the velvet with a damp, fine-tipped paintbrush. Let dry, then heat-set with a press cloth and a dry iron fitted with a soleplate cover.
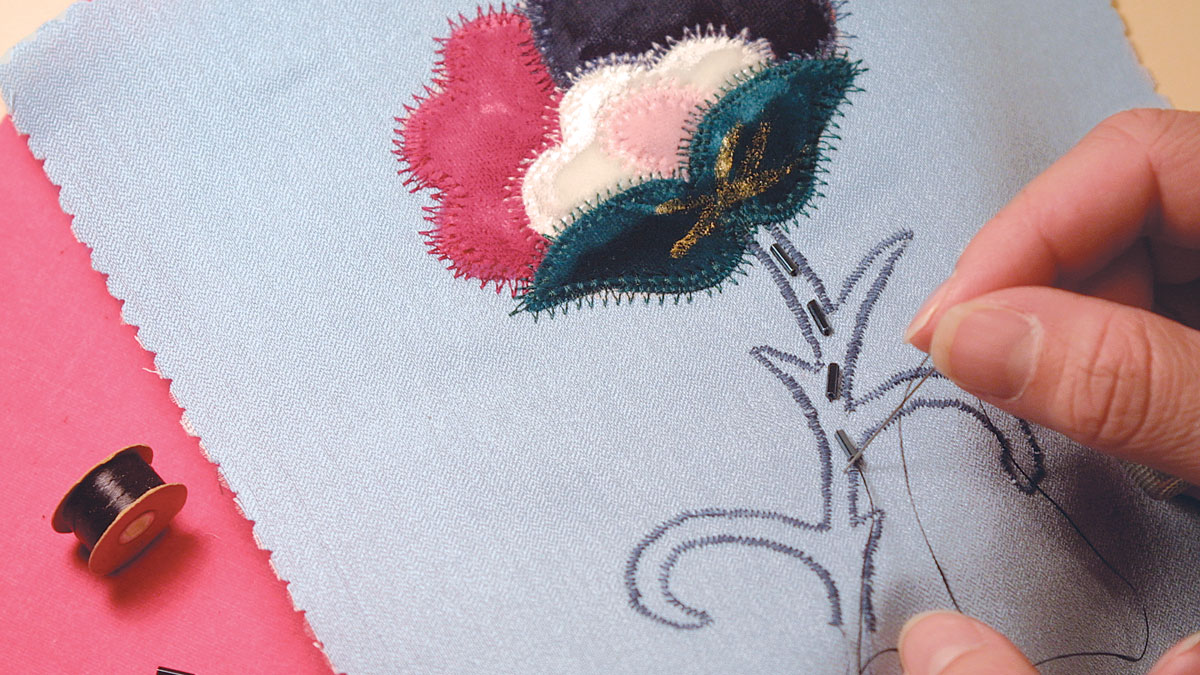
Fill in the scrolls with bugle beads
Using beading thread in a color that matches the beads, evenly space and sew bugle beads.
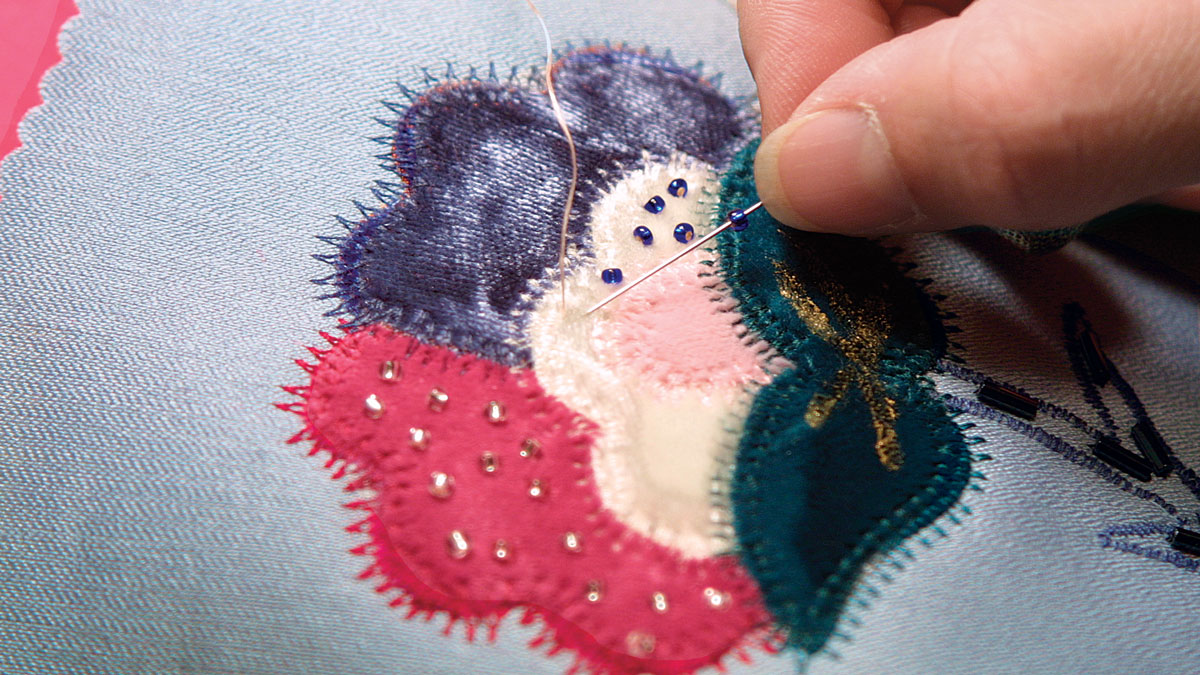
Sprinkle seed beads on the velvet
Using beading thread in a color that matches the beads, sew seed beads in a random pattern within each velvet section.
Arrange the design
After deciding what motifs you’ll use, the next step is to combine them in a pleasing arrangement on your garment or accessory. To determine accurate design placement, make a few paper copies of the motifs, and simply pin them in place on the pattern pieces (also make a tracing of the pattern if you prefer). Keep in mind that it’s perfectly fine to place appliqués across seams; in fact, this usually creates a more cohesive overall design.
When you perfect the appliqué positions, draw sweeping scrolls or other decorative lines around or between the motifs to tie them together. Then color the motifs with pencils or markers to deter mine the best color combination.
Stitch the scroll lines first
Your marked pattern pieces now become reference sheets as you pre pare to stitch your design. First, cut all your garment pieces from the background fabric. Then transfer the decorative scrolls or other connecting lines to them; it’s best to add decorative stitching and the appliqué to flat fabric pieces, but if your design crosses a seam, you’ll need to sew that seam before you transfer the scrolls. Because I don’t like to mark the fabric itself, I transfer the scrolls to lightweight tear away stabilizer (which also stiffens the fabric for easier stitching), then position and baste the stabilizer on the wrong side of each fabric piece before I stitch.
Then affix the appliqués
After I finish stitching the scrolls, I turn my attention to cutting and arranging the appliqués and sewing them on in accordance with my plan (see the “Three steps to appliqué” on p. 69). Once they’re stitched in place, fabric paint and beads can be added for sparkle and shine (see the bottom of p. 70 for more on embellishing). At this point, the garment or project is ready to be assembled per the pattern instructions.
From beginning to end, the whole process really couldn’t be easier, but people will “ooh and aah” over the results and definitely mistake this embellishment for painstaking handwork.
Anna Mazur sews and beads in Avon, Conn.


Log in or create an account to post a comment.
Sign up Log in