
How to Sew Velvet Bands
Create narrow appliqués with a challenging fabric
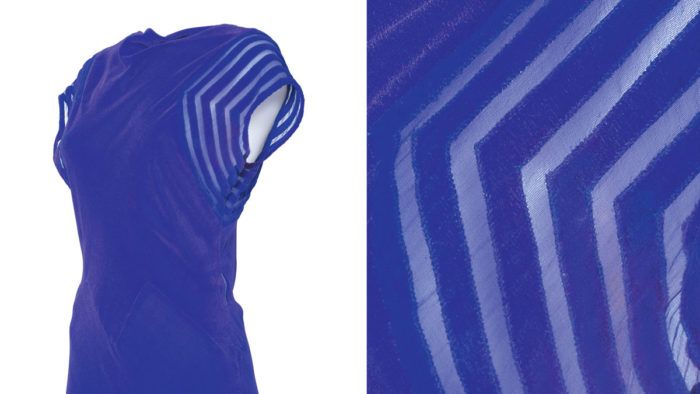
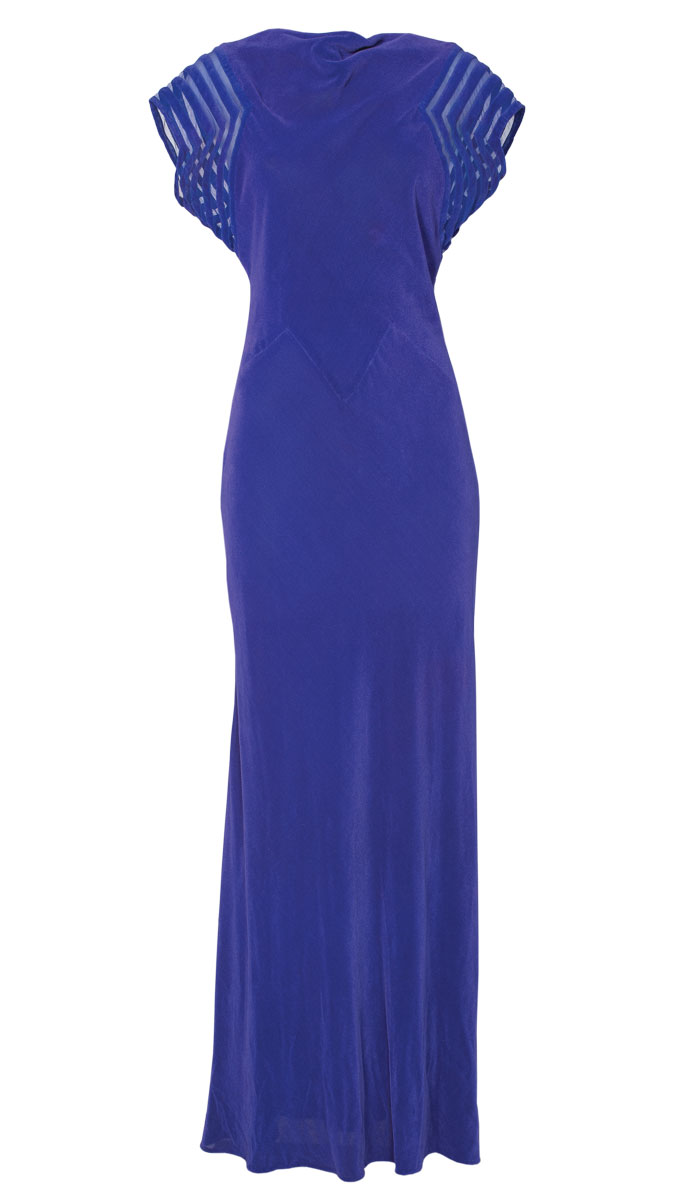
Self-fabric ornamentation is an understated yet elegant addition to any textile or garment. When paired with a sheer companion fabric, the results are fetching. This circa 1939 velvet evening gown is a good example of how exquisite the combination of self-fabric and sheer fabric can be. The bands’ angular shapes echo the dress’s back V-neckline (not shown) and the zigzag waistline seam. Learn a clever method for working with velvet to create your own evenly spaced, shaped bands. Read this article from Threads #212 to learn more.
Self-fabric bands along a garment’s edges are a classic way to outline a silhouette. Those who prefer not to wear ruffles and lace can create a beautifully defined shape that’s subtle and sophisticated.
The slinky purple dress on the back cover features velvet bands sewn on a sheer ground. Velvet’s structure makes it a difficult fabric to work with. Depending on the fiber content—it can be made from fibers as varied as mohair, silk, rayon, polyester, or acetate—it may be stiff and brushy, or fluid and drapey. It should be cut and sewn in one direction so the pile catches the light at the same angle and the color looks uniform. You’ll also need to be careful of “bruising” the pile during sewing and pressing. All these characteristics may deter you from sewing with velvet, but I’ll show you how to successfully turn it into appliquéd bands.
The method that works best is to sew shaped fabric bands with velvet on the top, and an organza facing on the bottom. Then appliqué them to a sheer fabric such as silk organza or chiffon. It’s best to complete the appliqué while the section is flat, then incorporate it into the garment. This isn’t a quick and easy technique, but the results are timelessly lovely.
1. Layer the velvet with a sheer backing fabric. With right sides together, place the velvet atop a piece of silk organza. Draw the desired band shapes on the velvet’s wrong side. For 1⁄2-inch-wide finished bands, make them 1 inch wide, then mark 1⁄4-inch-wide seam allowances within the widths. The bands can be adjoining along their long edges. This makes a more efficient use of the fabrics, and provides stability for stitching.
2. Stitch and cut the bands. Set the machine for a 2.5-mm-long straight stitch, and sew along the stitching lines. A walking (even-feed) foot may make this easier. Then cut along the cutting lines to separate the tubes.

3. Turn the bands right side out. Sew a darning needle threaded with heavy thread across one open end of the tube and gently slide the needle, eye first, through the tube.
4. Press the bands. Lay them, velvet side down, on a scrap of velvet, and press lightly to flatten, rolling the seams slightly to the organza side.
5. Apply a hem trim. Cut a 1-inch-wide velvet strip, the length of the sleeve hem plus two seam allowances. With its right side against the sleeve’s wrong side, and cut edges aligned, sew with a 1⁄4-inch-wide seam allowance (A). Fold the velvet strip up (B), then to the sleeve’s right side, with the seam at the hem edge. Turn its cut edge under 1⁄4 inch and hand-sew it to the sleeve (C).

6. Attach the remaining bands. Position the flattened bands, velvet side up, on the sheer sleeve’s right side and hand-baste along the center of each band. Hand-sew the band edges to the sheer fabric, with a fell or slipstitch. Complete the sleeve following the pattern instructions. Remove the basting stitches.

Shortcut technique
Applying velvet bands can be greatly simplified by using matching velvet ribbon, but two factors make this method less desirable in a special-occasion garment. First, the ribbon has smooth selvages that enable tidy topstitching along both edges, but produce a more casual result. Second, the velvet bands on this dress are cut with an angled shape. If a ribbon is used for this style the angle has to be mitered, causing pressing issues, and leaving a visible seam at the angled join.
Contributing Editor Judith Neukam re-creates vintage embellishments from her home in Omaha, Nebraska.
From Threads #212


Log in or create an account to post a comment.
Sign up Log in