

A classic hat or two can become lifelong staples in any wardrobe. They never really go out of style. Two hat styles that always look fresh are the 1940s men’s fedora and the 1920s flapper’s cloche.
To amp up the fashion factor of these toppers, you can change their trimmings to suit your mood or the flavor of the season. The two techniques described below add modern flair to either vintage style. Whether you choose a simple, yet striking, ribbon band or a fabric flower crafted from bias strips, you’ll never want to wear a plain-Jane chapeau again!
The Stingy-Brim Fedora
This timeless menswear hat has long been embraced by all genders. Vamp up its style with a braided band and floral adornment made from tubes of bias-cut plaid.
Shopping list
- 1 yard medium-weight woven fabric, such as plaid flannel
- Fedora
- Hand-sewing needle
- Measuring tape
- Pins
- Ruler
- Safety pin
- Scissors
- Sewing machine
- Thread
- Tube turner or bodkin
1. Measure the hat’s circumference around the base of the crown. Cut three bias fabric strips this length plus 3 inches. Then cut an 8-inch strip, a 30-inch strip, and a 48-inch strip. Make all bias strips 1 1/4 inches wide.

2. Form fabric tubes. With right sides together, fold each strip in half lengthwise, pin, and stitch 1/4 inch from the raw edges. With a tube turner or bodkin, turn the tubes right side out.

3. Braid a band. Use a safety pin to pin the three same-length tubes together at one end. Braid the tubes, and pin at the other end. Stitch through all layers at each end to secure.

4. Create looped petal layers. Form a loop with 6 inches of the 48-inch tube. Pin at the base. Make a matching loop opposite the first, forming a figure eight. Pin and repeat until you have seven “petals.” Trim the excess. Hand-stitch the center to secure all the loops. From the 30-inch tube, make a second petal layer using 4 inches of tube for each petal. Secure with stitches.

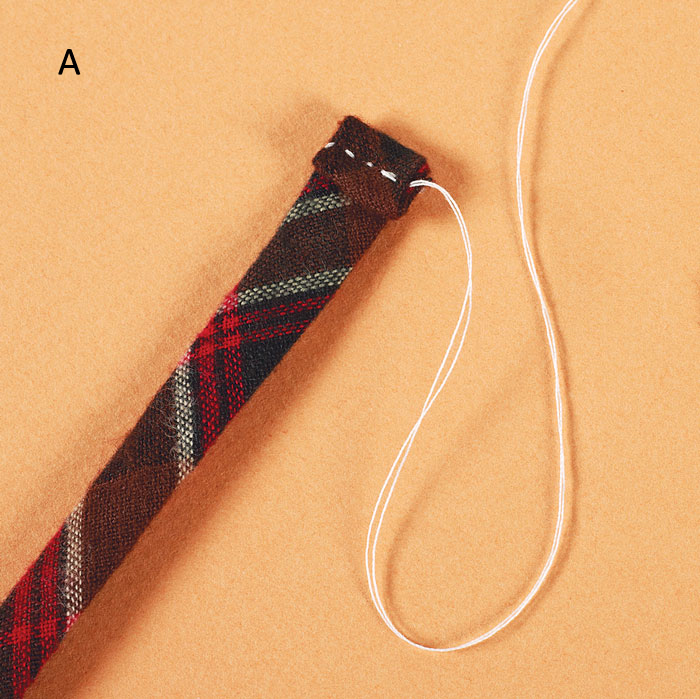
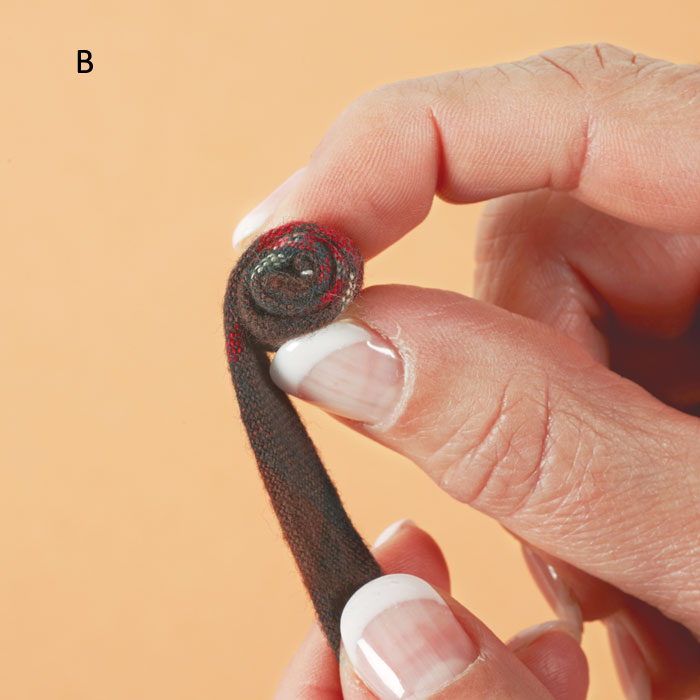
5. Coil the flower center. Make a tiny, closed loop at one end of the remaining 8-inch tube (A). Secure it with a few hand stitches. Coil the tube around the loop, stitching as you go, to form the flower center (B).
6. Wrap the braided band around the crown’s base, overlapping the ends. Hand-sew to secure the ends. Place the smaller petal layer on the larger one, and hand-stitch them together at the center. Place the flower over the braided band’s overlapped ends, and hand-stitch in place. Hand-stitch the coiled flower center in place, using small whipstitches around the edges.

The Shy Cloche
Ribbons and feathers may seem like feminine fripperies, but both have traditionally been used for men’s hats. For a new twist, I chose a vintage metallic ribbon with a woven feather motif to create a simple knot band that enhances the elegance of the bell-shaped cloche.
Shopping list
- 1 yard of 2-inch-wide ribbon
- Cloche hat
- Measuring tape
- Hand-sewing needle
- Pins
- Scissors
- Thread
1. Measure the hat’s circumference around the base of its crown. Cut a ribbon piece this length plus 11⁄4 inches. Cut another piece of ribbon 3 inches long.

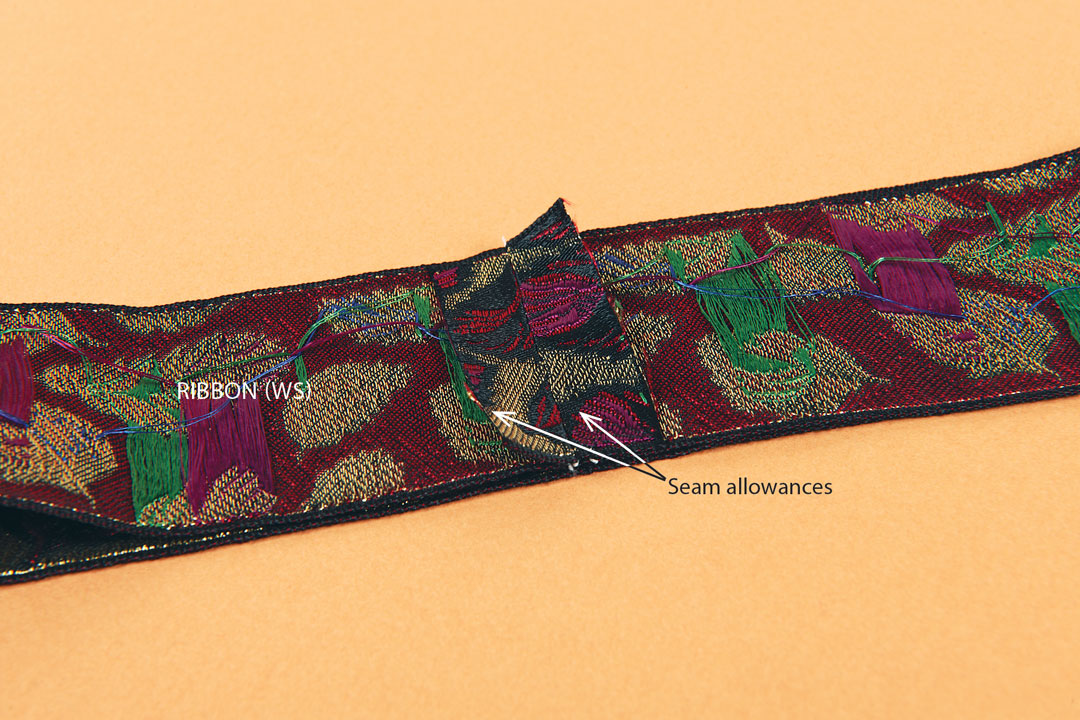
2. Sew the ribbon band. With right sides together and a 1/2-inch-wide seam allowance, sew the long ribbon piece’s ends together. Press the seam allowances open.
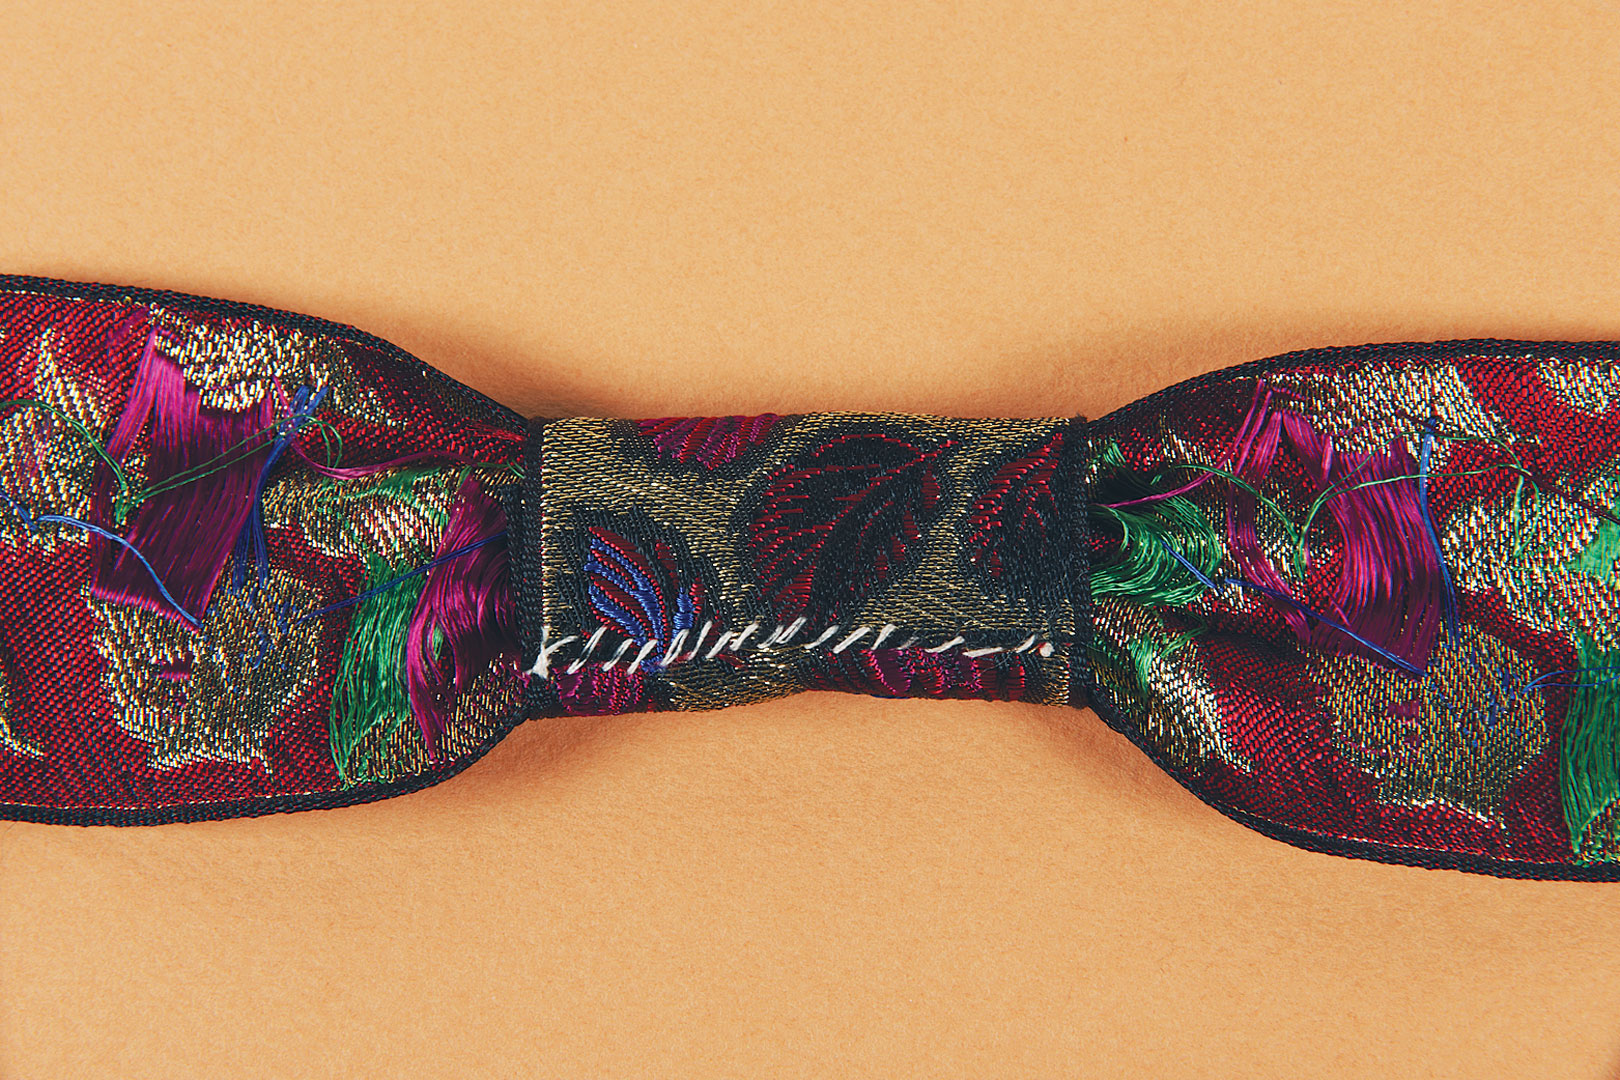
3. Gather the ribbon band. Make a few running stitches through both seam allowances and the ribbon, parallel to the seam. Knot the thread ends on one edge. Pull the opposite thread ends to gather the ribbon to half its width (1 inch). Knot the remaining thread ends to secure.

4.Wrap the 3-inch ribbon piece, right side out, around the band at the seam. Overlap the raw ends on the band’s wrong side and stitch together. Slip the band onto the hat. Tack to secure.
Envisioning Vintage
Unique ribbons—old, new, or vintage in style—lend a special flair to a hat-trimming project. Here are a few of my favorite online shops for old-time versions:
Cal Patch is a multitalented author, designer, and teacher. Check out her creations at CalPatch.com.


Log in or create an account to post a comment.
Sign up Log in