
Sew a Back-Wrap Dress with a Triangular Envelope Collar
Add an intriguing back flap to a sheath

I recently saw a wedding dress that had an unexpected and attractive back detail. The dress was a back-wrap style, featuring a faced, asymmetrical triangular envelope collar. This neckline created a flattering line and an opportunity to display a beautiful contrasting fabric. In my version, I added simple ties to define the waist.
To replicate this design, start with any princess-seamed sheath pattern that has a center-back zipper.
Once you’ve adapted the pattern, you can make countless looks: Choose solid fabrics in subtle contrasting tones, prints, or high-contrast color blocking. The dress would be stunning in black with a sheer black collar and ties or with a crisp white collar. A wool crepe version worn as a jumper could make a unique office look. Enjoy the versatility.
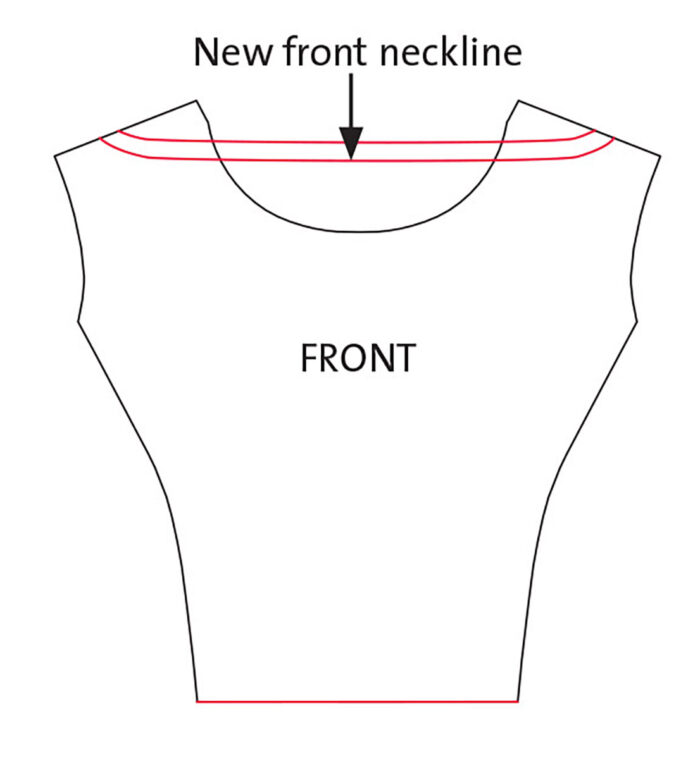
Change the neckline
This dress has a wide bateau neckline in front and a surplice-style V-neckline in back.
1- Adjust the front neckline to a bateau neckline. Narrow the shoulder seam to the width of a strap, about 2 inches, and redraw the neckline. Add a seam allowance.
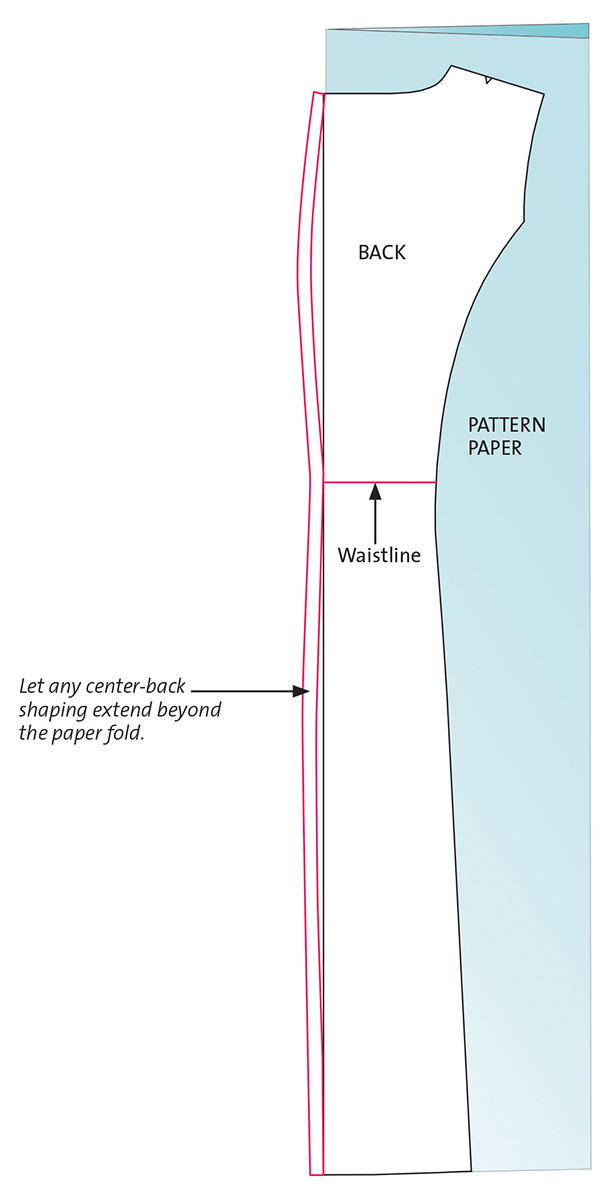
2- Begin revising the center-back pattern. Place the half-pattern on a sheet of folded pattern paper, with its seamline along the fold. If the seam includes shaping, align the neckline edge with the fold and let the curves overhang slightly. Cut a new center-back pattern on a fold so it is one piece. Duplicate to create two full center-back patterns.
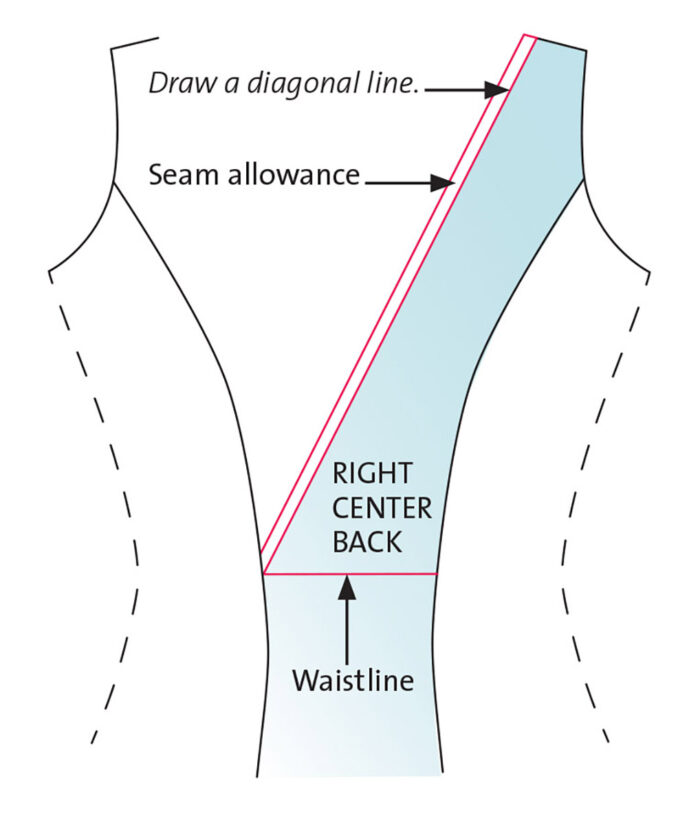
3- Alter the back right side. Narrow the shoulder so it matches the front shoulder. On one pattern, draw a diagonal line from the right shoulder seamline at the neck edge to the left waistline. Add a seam allowance along the line and label the pattern “Right center back.”
4- Alter the back left side. On the remaining pattern, draw a corresponding diagonal line from the…
Start your 14-day FREE trial to access this story.
Start your FREE trial today and get instant access to this article plus access to all Threads Insider content.
Start Your Free TrialAlready an Insider? Log in


Log in or become a member to post a comment.
Sign up Log in