
Learn to Make Continuous Sleeve Plackets for Shirts and Blouses

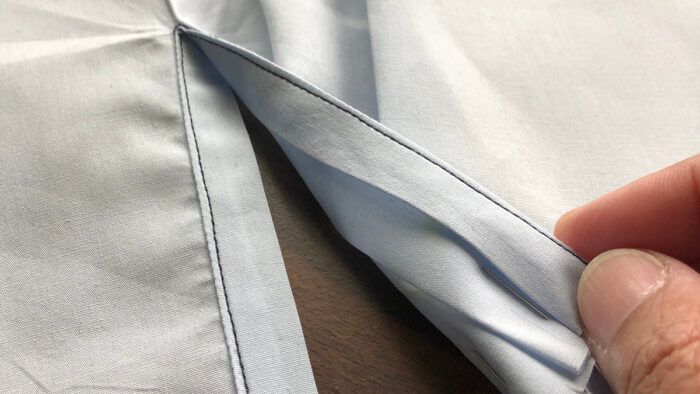
Continuous sleeve plackets bind the raw edges of the opening in each sleeve near the cuff. The continuous placket is the most commonly used method for ladies’ shirts and blouses. The other is the tower placket. Either style can be used on ladies’ or men’s shirts; it’s really your preference. Find out how to construct continuous sleeve plackets, below.
How-to for continuous sleeve plackets
My instructions show how to create a continuous placket on the right sleeve. You need to make one for the left sleeve, too. To save yourself from a headache, do both sleeves at the same time, so you can be sure they will mirror each other. This keeps you from having two left or two right sleeves.
Mark the sleeve, cut the placket
1. Mark the location of the sleeve pleats with tailor’s tacks or with your desired fabric marking method. Be sure all markings can be removed. Also mark the end of the cut sleeve opening point for the continuous placket. I marked this with blue threads. The sleeve opening is usually 4 inches or a little more. You can measure the opening on your pattern before marking.
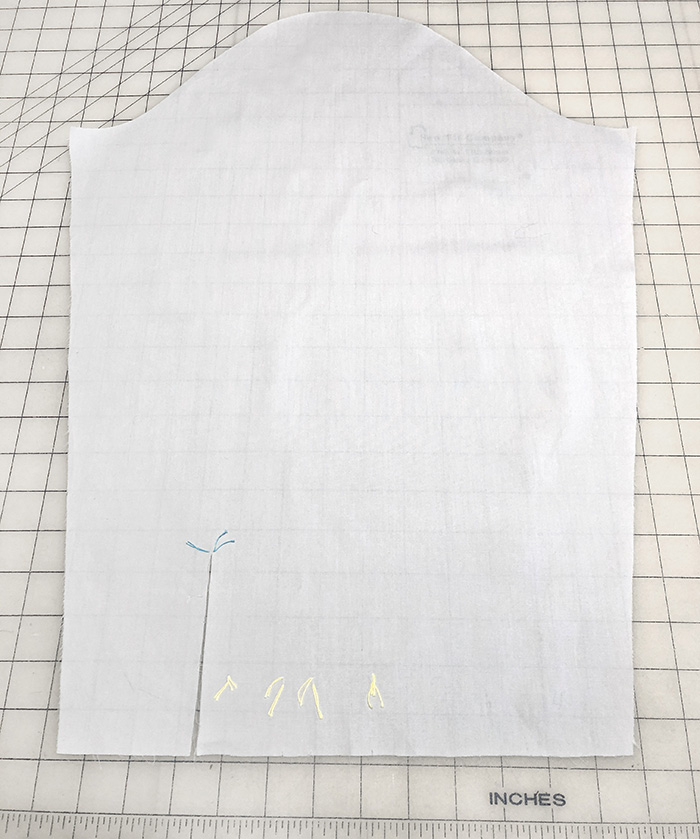
2. After measuring the opening, make sure the continuous placket bindings are long enough to fit into the space. In the sample, mine are close to 8 3/4 inches long. You can always cut them longer for insurance. The excess can be removed after you’ve installed them. The width is about 1 1/2 inches to 2 inches wide. That’s an ideal width for lightweight to medium-weight fabrics.
Note: The fabric strip at the bottom of the image below is the continuous placket before folding or pressing.

Fold the placket in half to check that it will fit into the opening.

Tip 1: If you are working with a…
Start your 14-day FREE trial to access this story.
Start your FREE trial today and get instant access to this article plus access to all Threads Insider content.
Start Your Free TrialAlready an Insider? Log in


Log in or become a member to post a comment.
Sign up Log in