
Create a Vintage Detachable Wrap with Pockets
Draft and sew a button-on shawl with pockets
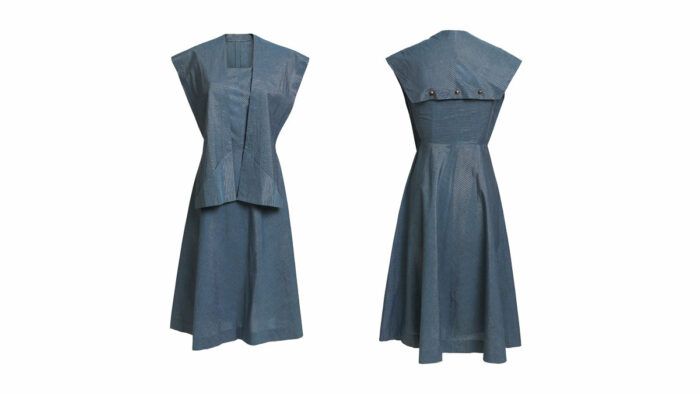
In the 1950s, sleeveless or strapless dresses (and patterns for them) often included a cropped jacket, bolero, or other cover-up to complete the look. This off-the-rack, two-piece ensemble takes an intriguing tack. Instead of a jacket, it has a matching button-on wrap. The simple halter dress is made of blue chambray cotton with fine stripes in metallic gold. The stripes have been mitered to form chevrons at the center-front bodice and front and back skirt seams. When the sun got too strong or evening temperatures fell, the wearer could button on the matching shawl. From the back, it looks like a sailor collar. In front, it appears to be a straight, sleeveless jacket, with pockets at the hem. Find out how to draft and sew a similar shawl to elevate any strapless dress.
During a field trip to Helen Uffner Vintage Clothing in Long Island City, New York, the Threads staff discovered an adorable two-piece dress from the 1950s. It comprises a simple fit-and-flare strapless dress, with an optional halter neckband, and a matching shawl that buttons to the dress’s back. When attached, the shawl looks like a sailor collar from the back and an unstructured sleeveless jacket from the front. It even has pockets. Whether you’re looking for protection from a breeze or from the sun’s rays, this cover-up is an easy-to-make solution.
You can create a similar shawl to go with existing strapless or halter dresses, or plan one as part of a coordinating ensemble. The basic pattern shown is drafted from your measurements to achieve an effect like the vintage inspiration. Once you’ve made the pattern, you can adjust the dimensions as desired for wider shoulders, longer or shorter front pieces, custom edge shapes, or different pockets. For a jacket-length shawl, you’ll need about 1-1/2 yards of fabric; you can estimate by measuring from the bottom of one shoulder blade to the desired length in front, and add about 6 inches.
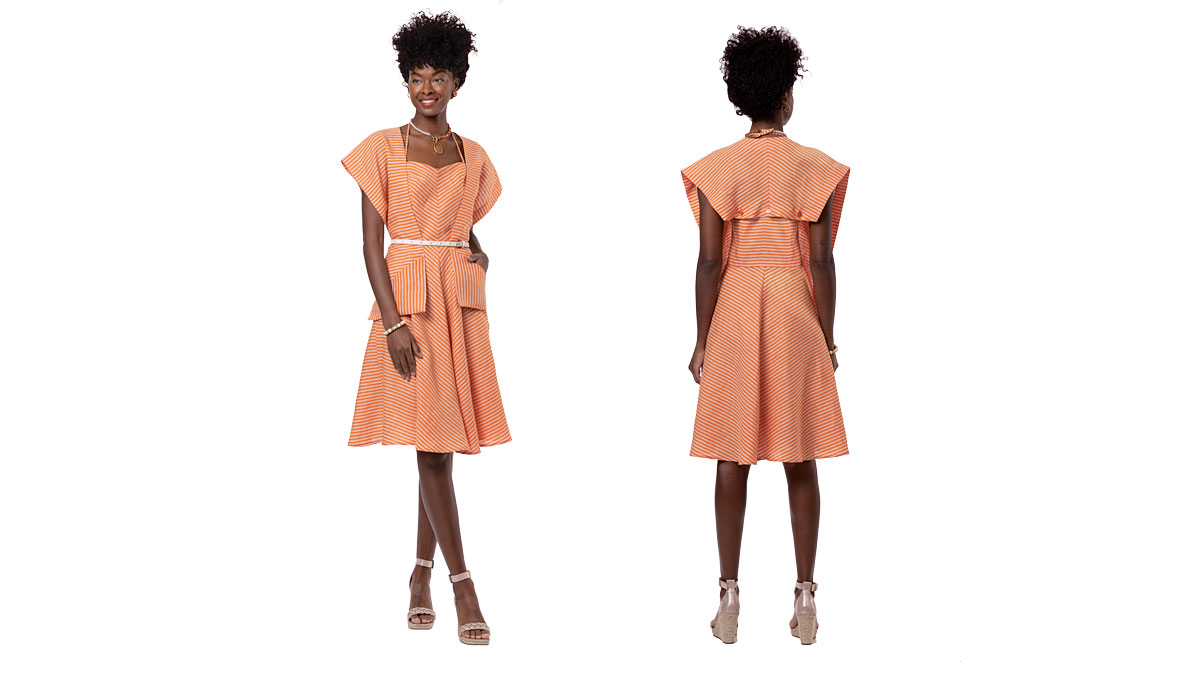
We show a single-layered version, but you could make a fully lined or reversible one if preferred. As in the inspiration garment, our example is made from striped woven fabric, for a lively summer look. For fall, consider making a tweedy wool pinafore dress with matching shawl; in winter, a velvet strapless gown would look dazzling with a matching wrap lined in silk. The button attachment means you can conceal or reveal your shoulders at will.
Take measurements
The shawl pattern is drafted from your measurements and is based, in part, on the fit of the strapless dress you plan to attach it to. Complete the dress first, or at least make a muslin that fits as the finished dress will.
1. Find the center-back length. Put on the dress or muslin. Measure from the prominent vertebra at the back neck down to the dress’s upper edge at center back.

2. Establish the back width. Measure across the dress’s upper back edge, between the underarm creases. This is the
back width.
3. Establish the desired length. Measure from the back neck around to the front, over the bust, and down to the preferred length. Our example is 29 inches long, and ends at the upper thigh. One way to decide how long to make the front panels is to determine your preferred pocket level; the bottom of the pocket is at the shawl’s hem edge.

Draft the neckline
Start with a large sheet of paper, at least 20 inches by 45 inches. You’ll need a protractor, a yardstick, and a fashion curve.
1. Establish the inner angle. Draw a line at least 30 inches long. This line will be the shawl’s front inner edge. Place a mark about
12 inches from the upper end. With this point as the vertex, mark an angle of 57 degrees (the angle used in the original garment). Extend this angle leg by at least 10 inches.
2. Find the angle’s center. Fold the paper, aligning the angle’s legs, and make a crease that extends by 12 inches or more on both sides of the vertex. This crease bisects the angle.
 Carol J. Fresia is Threads’ senior technical editor.
View the full article by clicking View PDF below:
View PDF


Log in or create an account to post a comment.
Sign up Log in