
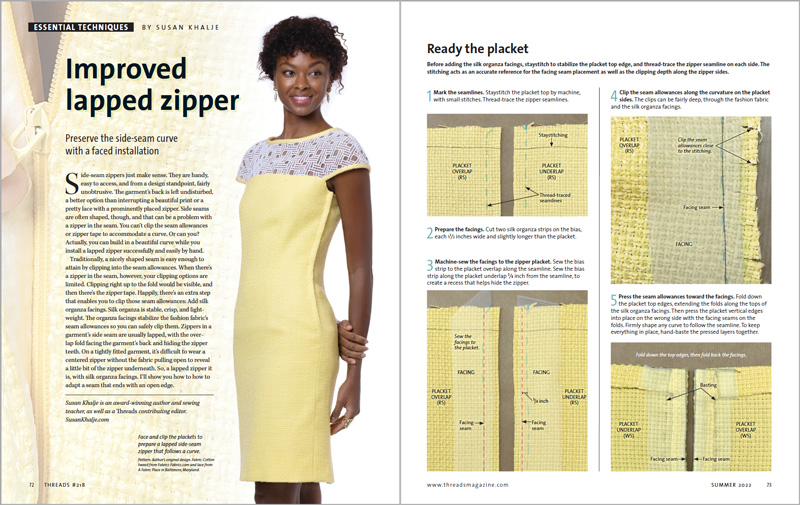
Sew a Side-Seam Zipper that Conforms to Your Curves
Added facings and clipping lead to a smooth look
Side-seam zippers just make sense. They are handy, easy to access, and from a design standpoint, fairly unobtrusive. The garment’s back is left undisturbed, a better option than interrupting a beautiful print or a pretty lace with a prominently placed zipper. Side seams are often shaped, though, and that can be a problem with a zipper in the seam. You can’t clip the seam allowances or zipper tape to accommodate a curve. Or can you? Actually, you can build in a beautiful curve while you install a lapped zipper successfully and easily by hand.
Traditionally, a nicely shaped seam is easy enough to attain by clipping into the seam allowances. When there’s a zipper in the seam, however, your clipping options are limited. Clipping right up to the fold would be visible, and then there’s the zipper tape. Happily, there’s an extra step that enables you to clip those seam allowances: Add silk organza facings. Silk organza is stable, crisp, and lightweight. The organza facings stabilize the fashion fabric’s seam allowances so you can safely clip them. Zippers in a garment’s side seam are usually lapped, with the overlap fold facing the garment’s back and hiding the zipper teeth. On a tightly fitted garment, it’s difficult to wear a centered zipper without the fabric pulling open to reveal a little bit of the zipper underneath. So, a lapped zipper it is, with silk organza facings. I’ll show you how to how to adapt a seam that ends with an open edge.
Ready the placket
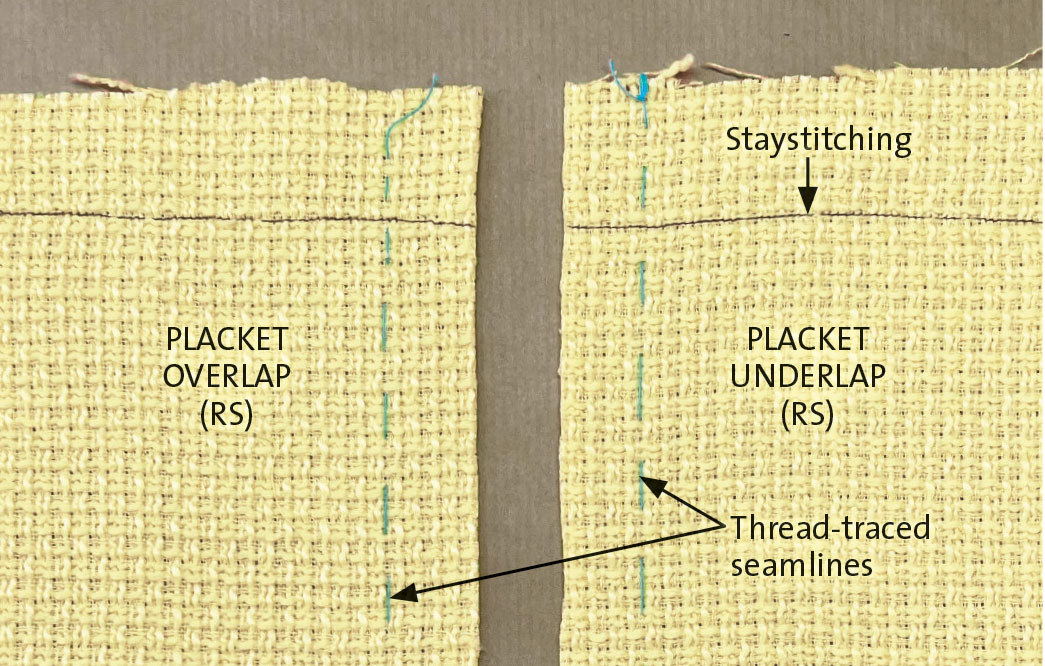
Before adding the silk organza facings, staystitch to stabilize the placket top edge, and thread-trace the zipper seamline on each side. The stitching acts as an accurate reference for the facing seam placement as well as the clipping depth along the zipper sides.
1. Mark the seamlines. Staystitch the placket top by machine, with small stitches. Thread-trace the zipper seamlines.
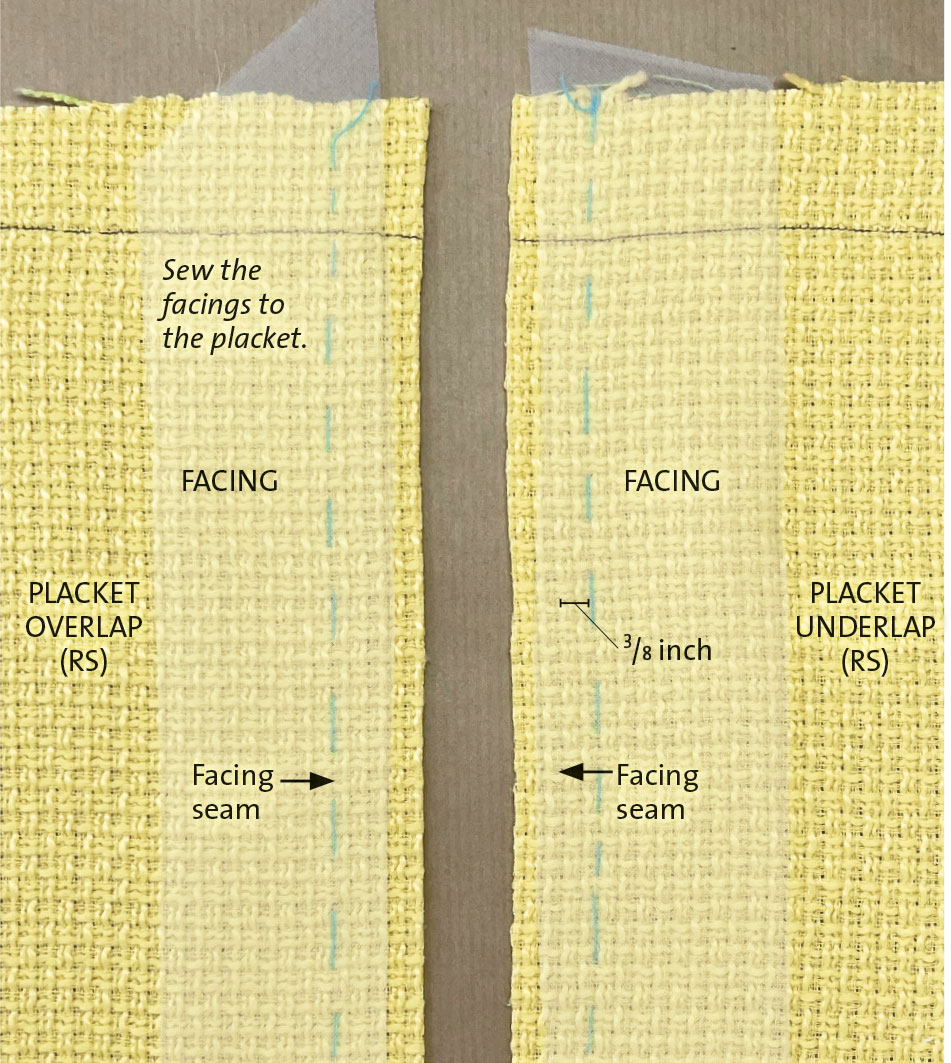
2. Prepare the facings. Cut two silk organza strips on the bias, each 1-1⁄2 inches wide and slightly longer than the placket.
3. Machine-sew the facings to the zipper placket. Sew the bias strip to the placket overlap along the seamline. Sew the bias strip along the placket underlap 3⁄8 inch from the seamline, to create a recess that helps hide the zipper.
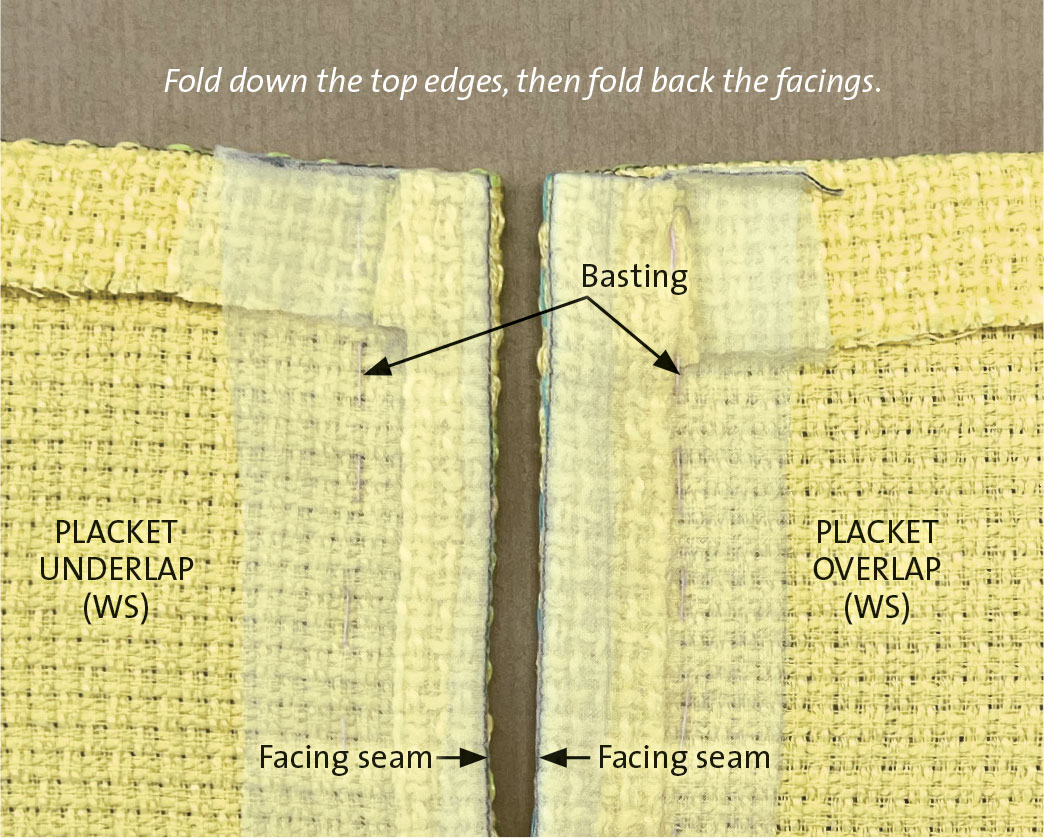
4. Clip the seam allowances along the curvature on the placket sides. The clips can be fairly deep, through the fashion fabric and the silk organza facings.
5. Press the seam allowances toward the facings. Fold down the placket top edges, extending the folds along the tops of the silk organza facings. Then press the placket vertical edges into place on the wrong side with the facing seams on the folds. Firmly shape any curve to follow the seamline. To keep everything in place, hand-baste the pressed layers together.
 Susan Khalje is an award-winning author and sewing teacher, as well as a Threads contributing editor.
SusanKhalje.com
View the full article by clicking View PDF below:
View PDF


Log in or create an account to post a comment.
Sign up Log in