
Riffs on a Trusted Pattern: Upholstery Jacket

It’s Month 11 of my self-imposed Tabula Rasa Jacket (TRJ) pattern challenge, and it’s time to share my upholstery jacket.
When I approached this month’s project recently while in Michigan, the gorgeous fall colors had peaked and the days were getting short. Any minute, we could find ourselves covered in snow. It was time for this snowbird to fly south. I wanted to get one last project under my belt before heading to the southernmost sewing room.
A weighty, boldly printed fabric
I had found an interesting upholstery fabric earlier in the spring and had been pondering and moving it into the next month’s project all summer long. I figured it was now or never.
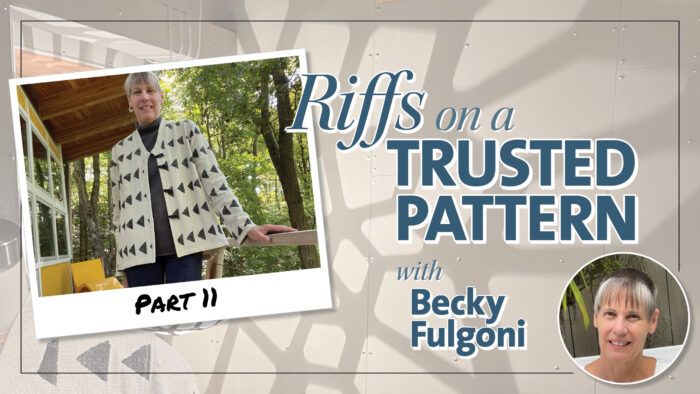
The fabric resembles mud cloth. It is a heavy, rustic woven, natural-colored cotton with a dark gray design that looks to be block printed on the surface. It is distinctive, and I wasn’t sure if my idea of making it into a jacket would work. I finally told myself: “It’s just fabric.” So I took the leap.

Planning the details
This project started with the basic Fit for Art Patterns TRJ. I wanted a V-neckline, and a small standing collar, both of which are part of the original draft. I also wanted a long flared hem that dipped at the center back and a deep pleat at the back to add volume. Not sure what to do for closures, I left a hefty seam allowance at the center fronts.

I went back and forth several times between running the design horizontally or vertically on the jacket. The horizontal orientation finally won out. Little fabric was left after I cut the pieces—so there was no turning back.

Tips for using upholstery fabrics
I want to share some notes about using…
Start your 14-day FREE trial to access this story.
Start your FREE trial today and get instant access to this article plus access to all Threads Insider content.
Start Your Free TrialAlready an Insider? Log in


Another winner! The front binding looks a bit more narrow than the pattern. Can you share the width of the binding? I've been wanting to make something with buttonholes in the CF seam. Your technique looks so easy so thanks for sharing. Hope you will consider doing another 12 months of the TR pattern. So many great ideas!
Hullo! The in seam buttonholes are quite simple to make and very tidy. I really like the way they work. I think the band on this jacket is about 3/4 of an inch. I would recommend making your band wide enough so that there is at least 1/4 inch before the button starts. So if you have an inch button you would have 1/2 inch on each side of the buttonhole when the jacket is done up. A 3/4 inch band would give your button a nice amount of space. Hope that makes sense! And I am still using the TRJ all the time...it really is my go to pattern.