


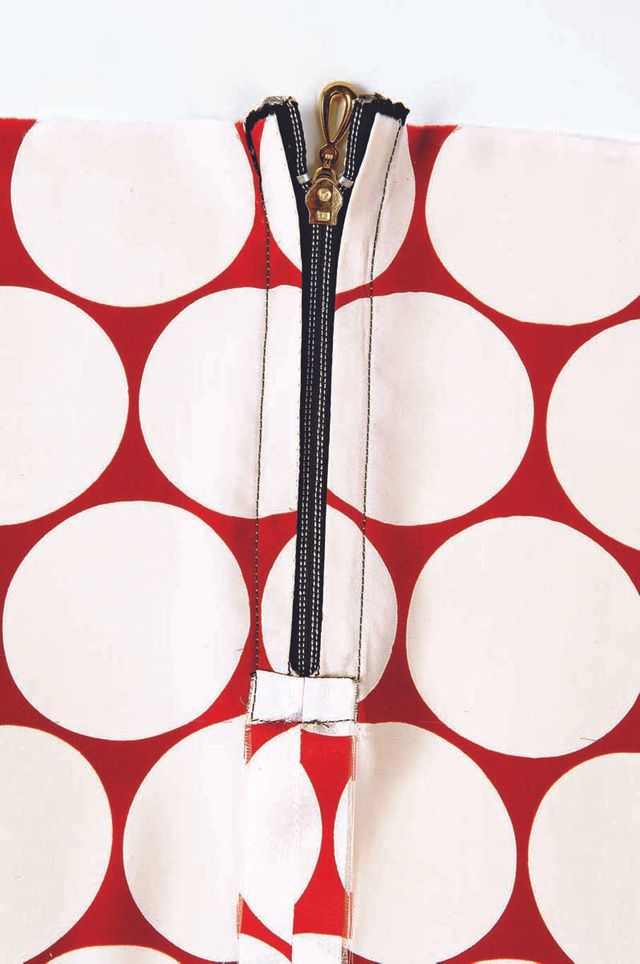
Exposed zippers are the perfect way to show off high-quality zippers that have unique details.
When installing an exposed zipper, you can throw all the zipper-insertion rules out the window. Turn the seam allowances to the right side, topstitch the zipper over them to conceal the fabric edges, and let the zipper tape show on the outside of the garment. Choose a matching or contrasting zipper for even more stand-out style. Here are six steps to sew an exposed zipper:
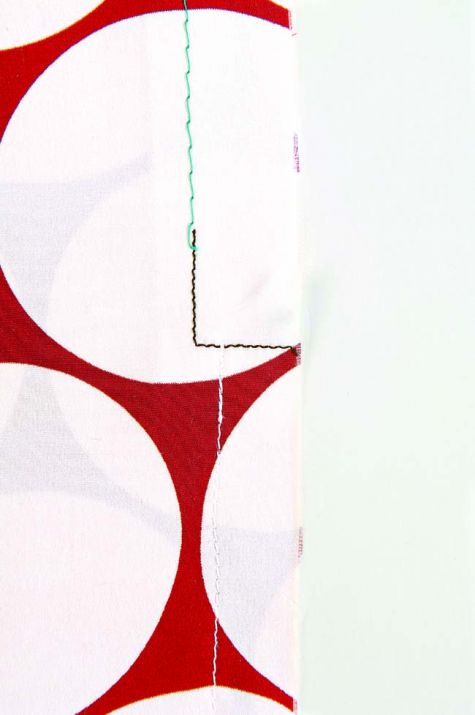
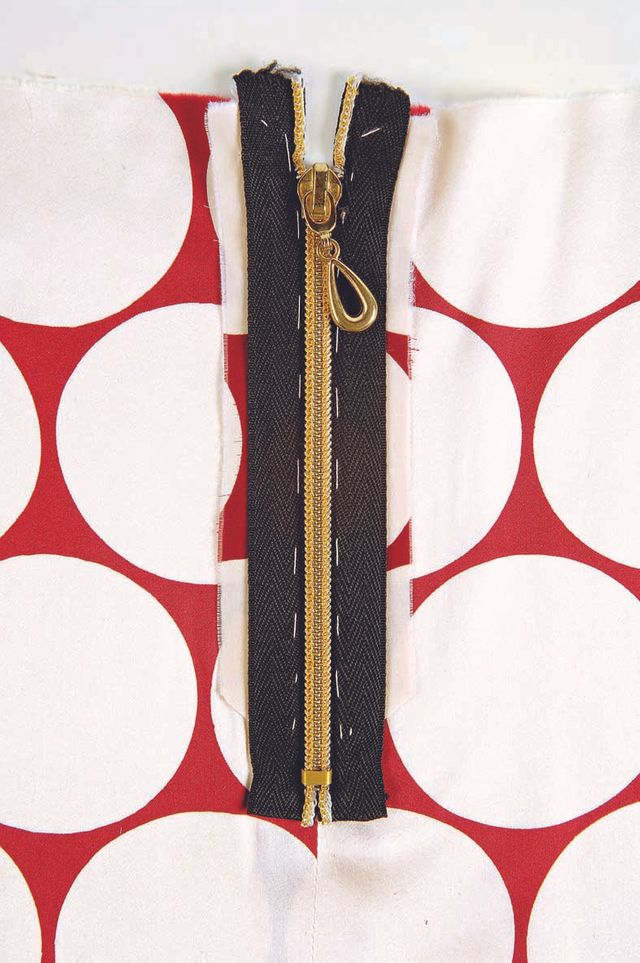
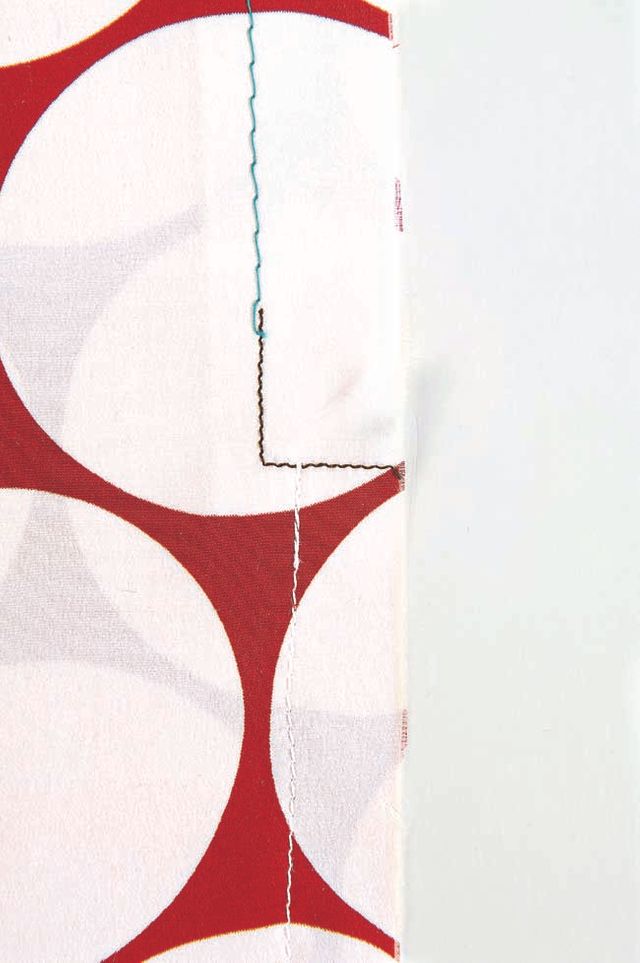
1. Before sewing the seam, stabilize and staystitch. Fuse a 1-inch-wide interfacing strip to the right side of both zipper seam allowances. Staystitch 3⁄4 inch from the edge on the interfaced section. Pivot at the point the zipper will end, and sew off the edge. Then position both layers right sides together, and use a 5⁄8-inch seam allowance to sew the seam below the zipper opening.
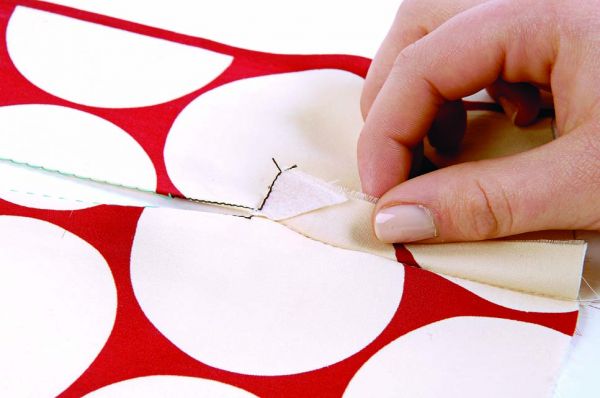
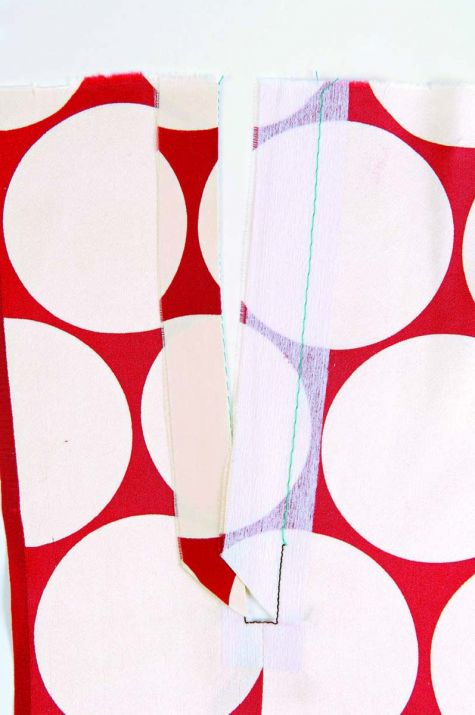
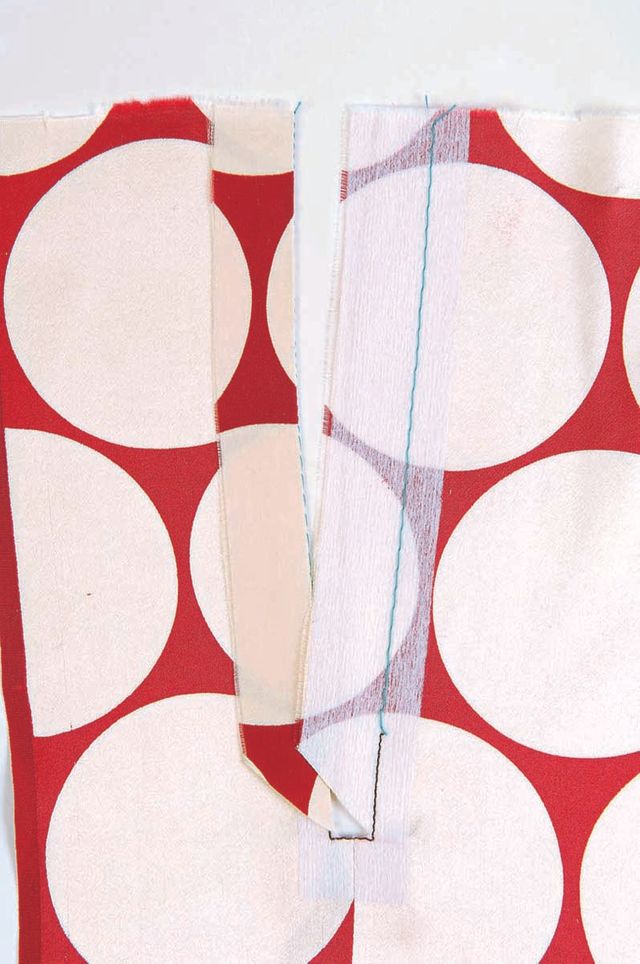
2. Clip and press the seam open. Diagonally clip into the seam allowances at the zipper base. Press the triangles formed at the zipper base to the wrong side under the seam allowance. Press the seam allowance open below the zipper. Turn the zipper seam allowance to the right side along the staystitching, and press.
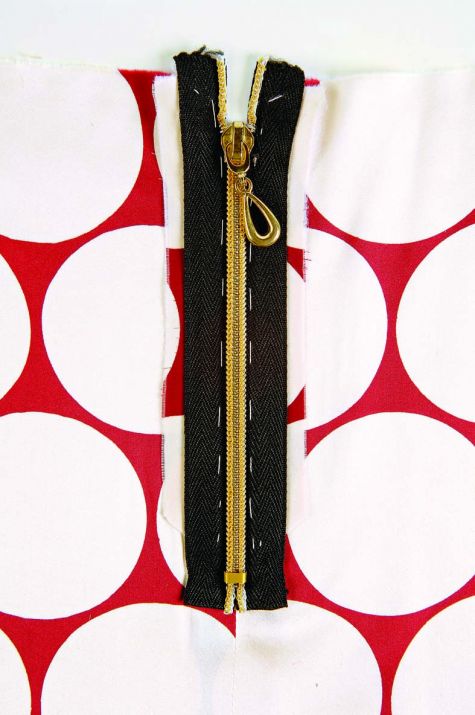
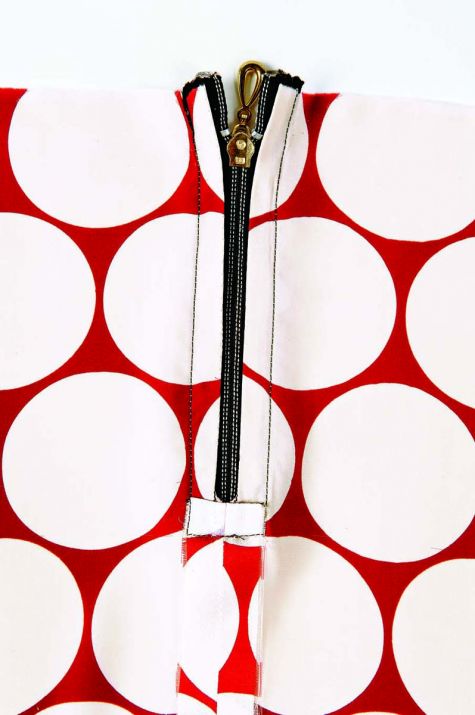
3. Baste the zipper to the garment. Position the zipper on the right side over the garment seam so the teeth aren’t covered by any fabric on the wrong side. Baste the zipper tape to the seam allowances close to the teeth. Turn under the bottom raw edges of the zipper.
4. Sew the zipper to the seam allowance. Load your machine with a zipper foot, and sew the zipper tape to the seam allowance as basted close to the zipper teeth.
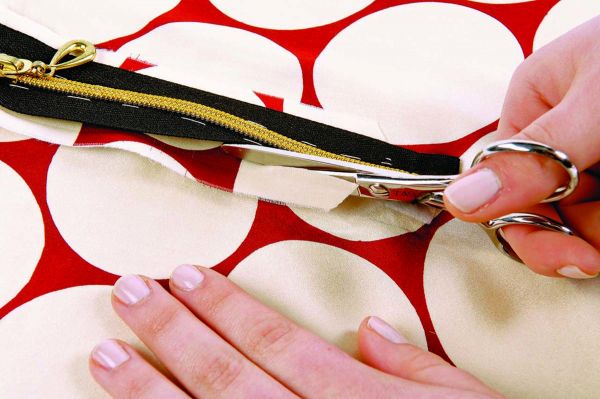
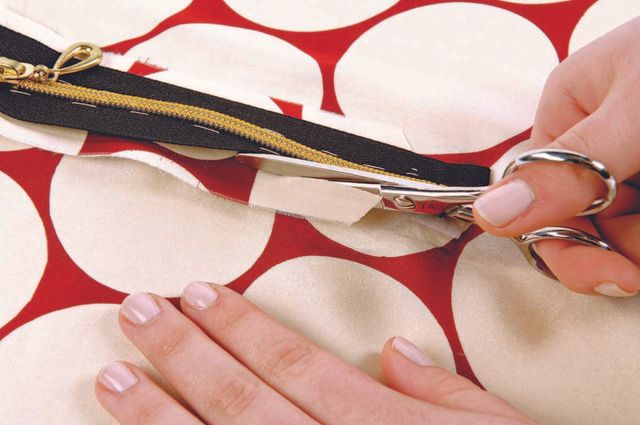
5. Trim away the seam allowance. Cut away the seam allowance that extends beyond the zipper tape. Be careful not to cut the garment.
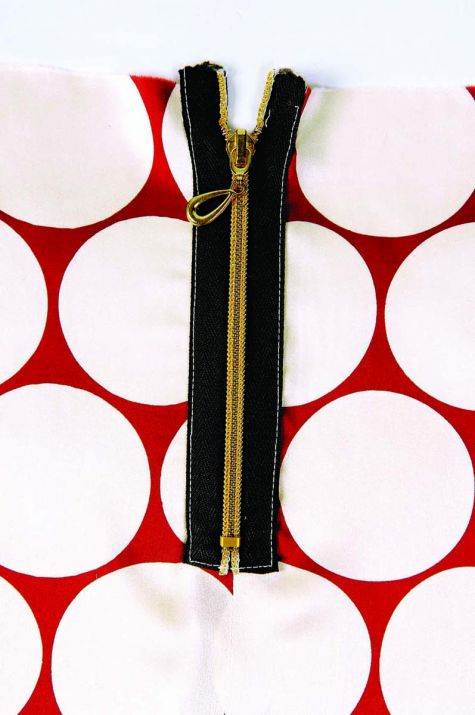
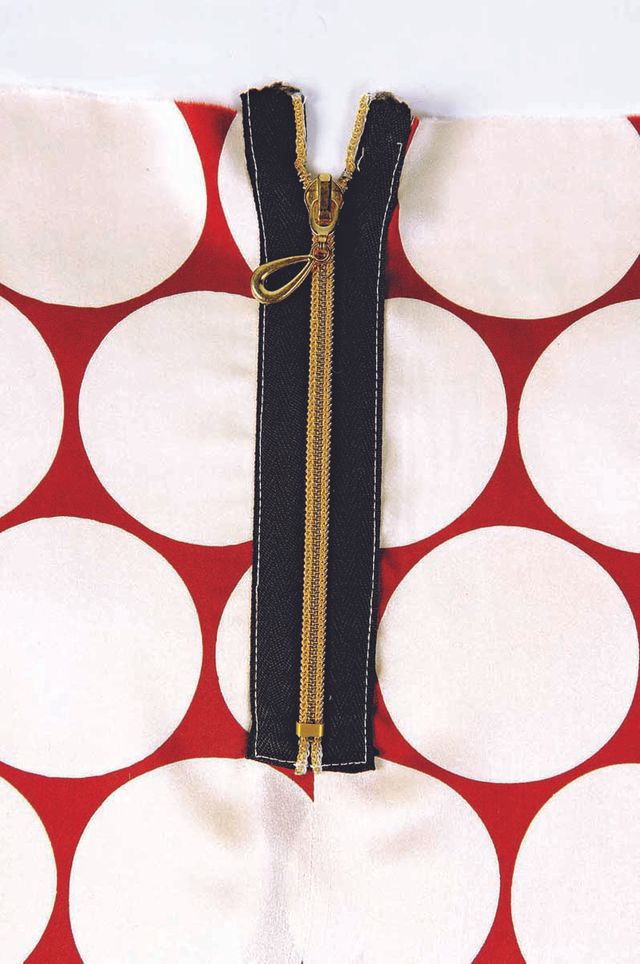
6. Finish the zipper. Use a zipper foot to edgestitch the zipper in place from top to bottom along each side. Sew across the zipper base to secure. Related Article: A Look at Exposed Zippers This article first appeared in an article by Anna Mazur for SewStylish, Spring Fashion 2009.


I would like to see a demo on a zipper that is still on the underside of the fabric, but has about 1/4-3/8 inch of actual zipper tape exposed on each side. I am fine until I have to deal with the lower stop.