
Learn Couture Techniques for Building a Waistband | Video
Watch as Susan Khalje shares couture construction and finishing techniques for sewing waistbands.
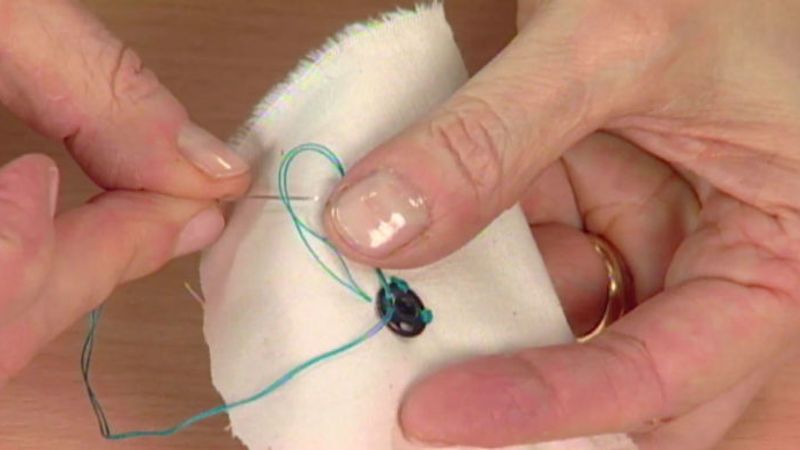
In this video tutorial, sewing expert Susan Khalje explains how to create durable, comfortable, and expertly finished waistbands with internal ribbon stays and securely stitched fasteners.
With the right tools and couture techniques demonstrated by Susan, you can achieve expertly sewn waistbands.
This video is based on “Build a Better Waistband,” Threads #165, Feb./March, 2013. You can read an excerpt from the article here.
This site is protected by reCAPTCHA and the Google
Privacy Policy and
Terms of Service apply.
See all newsletters


Thank you for the excellent video by Susan. Susan mentioned a couple of times that the waistband lap treatment is for a right-handed person. Is it considered correct by sewing standards to reverse the direction for a left-handed person?
This was a great video.
One thing I would like to see is a video tut on doing a hand-picked zipper. Mine never look quite right.
Thanks.
Pat
Thanks Susan, great video! I've never used grosgrain ribbon before, so it would be good to try it. There is always a problem with interfacing and seam bulk when trying to do buttonholes, so this might be the perfect solution. I am interested in how you would finish the ends of the waistband and whether that is any different to what I normally do. Are there any articles or videos that show that?
How does the grosgrain deal with the curve that is present at the top edge of the piece?
This is a great video, Susan!
EmbroideryDetail, regarding the direction of the lap of the waistband, in the industry, the standard “right over left” (the wearer’s right and left) for women’s clothing is applied in the front, and then “moves’ around the body from the front, so that a left closure is front over back, and, looking at a back closure, appears to be left over right. This lap standard is quite modern, so in a couture garment, you can probably lap whichever direction you prefer.
Moonbeams, although I don’t know of a Threads hand-picked zipper video tutorial, Susan Khalje has a discussion of hand-picked zippers at https://www.threadsmagazine.com/item/5135/a-hand-picked-zipper-is-worth-the-effort and there is at least one video on YouTube.
user-2297052, if you want to add a curve to the top edge of the waistband, you may want to use your favorite search engine to compare grosgrain and petersham. Because of the different edge finishes on these, petersham can generally be shaped with an iron, while grosgrain typically cannot.
Excellent visual explanation. I was not doing this stitch correctly . Thanks so much.
Linda s
To answer a couple of your questions, yes, the orientation could certainly be changed for a left-handed person - after all, it's all about ease of use (and the logic of that), so yes, absolutely. And those are just the sort of adjustments that are incorporated into couture garments.
As for the curve of the grosgrain, it's flexible enough to handle to curve at the top of the skirt/trousers, and of course, once that waistband fashion fabric goes on, it straightens out.
There are times when grosgrain needs to be shaped - and that's when it's used as a sort of inner yoke at the top of a skirt of trousers - and in that case, it does have to be shaped. And if you're using the right kind of grosgrain - the type with the little scallops along the edges, then you can steam it into a gentle curve. You can put it on top of the garment itself, or the pattern - that will guide you in shaping it - you'll see what curve it needs to take. Just sort of curve it and gently pull it as you iron - and you'll find that it curves. You may need to repeat the process a couple of times - it will incorporate a little more curve with each pressing.
Hi Susan, I was wondering how you attach the fabric hangers to skirts or pants with a side zipper? Or do you have another method for these garments? Cheers, Michelle
to Michelle -
Good question!
In that case, I think I often use a clip hanger. Of course you can do the standard hanging loop thing, but I'm never thrilled with that. And from an engineering/weight point of view, using a clip hanger is probably going to support the garment the best, which is what you want.
the visual explanation was excellent thank you
Thanks for this video...
Thanks for this explanation
So nice its good video .
Thanks for the great video.
Just want to point out a mistake in the narration.
I believe you mean to say about 8 inches for each length of the hanging loops instead of 3 inches as you had mentioned. I checked against your other article with regard to couture skirts.