


You can choose unexpected combinations of fabrics and trim
by Gloria Kirchhoff
from Threads #91, pp. 68-69
This alternative to reupholstering or slipcovering is fast and simple to make, easy to launder, and, if you choose to make a wardrobe of wraps, can be changed frequently for the occasion or season.
 More on home decoration:
• Video: How to Make Reversible Chair Covers
• How to Make an Abstract Pillow Top
• Slipcover a Side Chair, Dressmaker-Style
• How to make a Faux-Foliage Rug
![]()

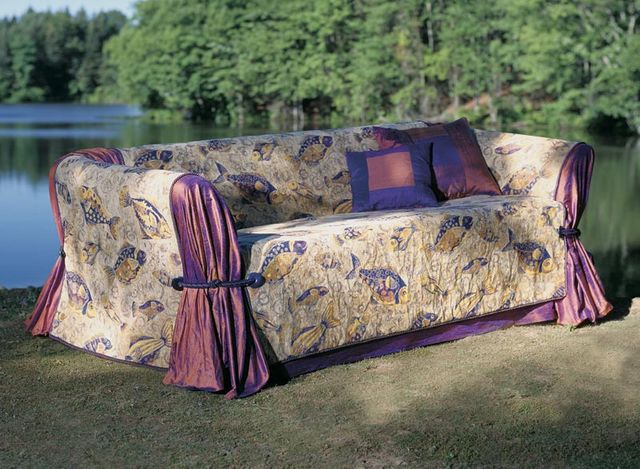
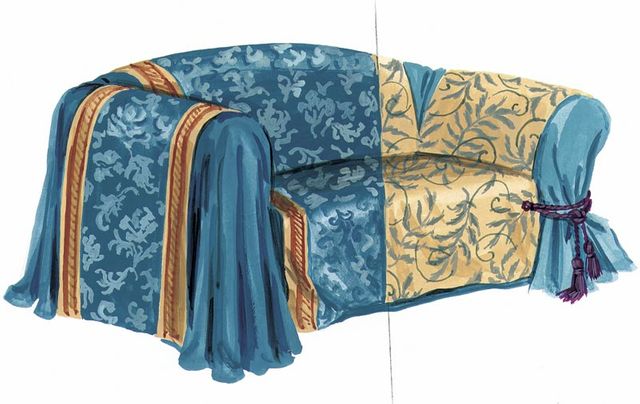
A sofa wrap is made of three elements: an underlayer, a cross-shaped top piece, and a decorative treatment at the sofa corners. The top piece of the wrap shown here is made of fish-patterned tapestry fabric, which contrasts the iridescent silk dupioni underlayer. Just follow the instructions below for an effortless way to change the style or mood of your living room.
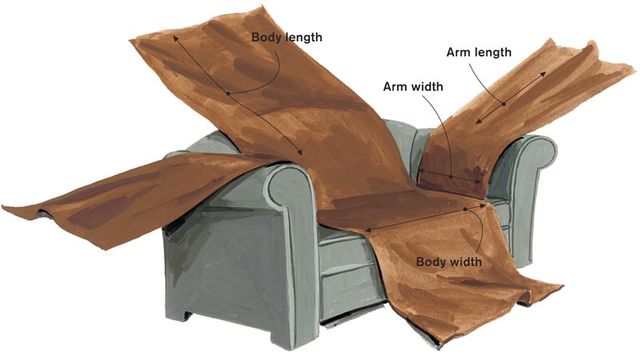
Measuring
Begin by taking four basic measurements: body length, body width, arm length, and arm width. Now it’s easy to calculate the dimensions of the two-part, cross-shaped top piece and the underlayer. Note that body and arm dimensions can vary according to your preference: the illustration below shows body and arm pieces that are narrower than those in the photo above.
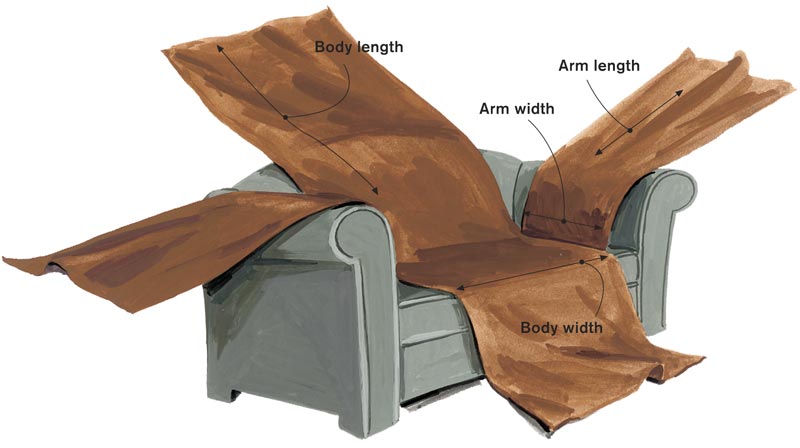
For top piece:
1. To determine body length, measure sofa from front to back starting at floor in front of sofa and ending at floor in back, and add 12 in. tuck-in allowance and twice hem allowance.
2. To determine body width, measure across sofa seat from arm to arm and add twice hem allowance.
3. To determine arm/side length, measure from where seat meets arm, over arm to floor, and add 12 in. tuck-in allowance, plus hem allowance.
4. To determine arm width, measure sofa arm from front to where arm meets back, and add twice hem allowance.
For underlayer (as shown below):
Length = step 1 above.
Width = step 2 plus twice step 3, minus twice hem allowances.
Cutting the fabric
For body: Cut fabric or piece fabrics to equal measurements determined in steps 1 and 2 above.
For arms: Cut two pieces of fabric to measurements determined in steps 3 and 4 above.
Fabric grain: Directional prints all “stand” vertically in sofa wrap, so grain on arm section runs perpendicular to that on body, and top edge of each arm section is sewn to seat of body section.
For underlayer: Piece fabric to fit dimensions listed above. Drape unfinished cloth on sofa and trim one corner to be level with floor, then fold underlayer in quarters, and cut remaining corners to shape. Hem.
Sewing the sofa wrap
1. Pin short edge of each arm section to body section and seam (determine seam placement by fitting on sofa).
2. Press hem in place on all sides and stitch or bond in place.
3. Decide how to dress corners.
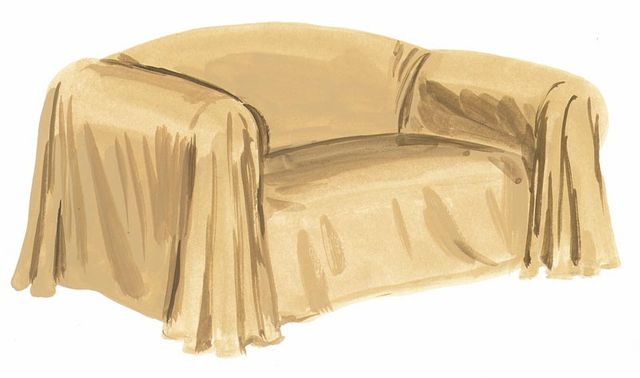
 Underlayer: With cover and sofa centers aligned, drape fabric over sofa so front and back hems touch floor, and extra fabric pools in seat. Drop each side over arm, until hems touch floor. Tuck all pooling fabric behind cushions.
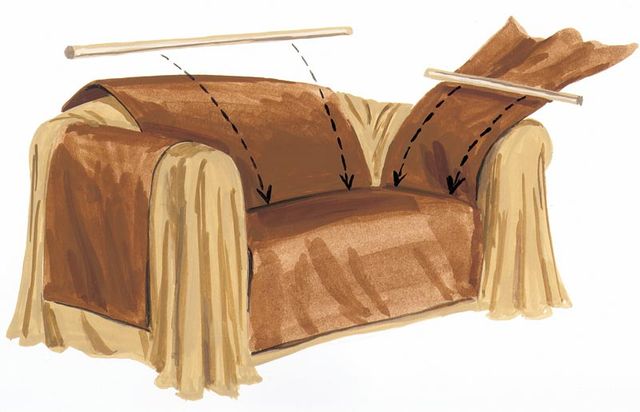
 Top piece: Center body of top piece on sofa body with side extensions aligning with arms, and tuck in behind cushions until hemlines are properly located.
 To keep sofa wrap in place when you sit down, cut 5/8-in. to 1-in. wooden dowel the length of each tucked edge, and bury it deep inside tuck when dressing sofa. If sofa sides are curved, use PVC pipe cut to length and bend to shape.
Variations on a theme
You can customize your sofa wrap by choosing a theme that pulls colors or subjects from the decor and any collections in your home or from your personal style. My passion for vintage fabrics, for example, offers endless resources for smashing sofa wraps made from flea-market blankets, draperies, or tablecloths. The sofa wrap is a great way to use and live with fabric you love but might not wear. A magnificent piece of fabric can be worked into a sofa wrap even if it is not large enough to make the entire wrap (see Other sofa strategies).
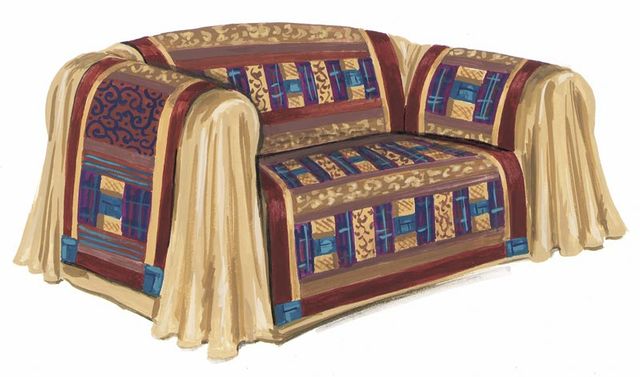
 Pieced top layer.
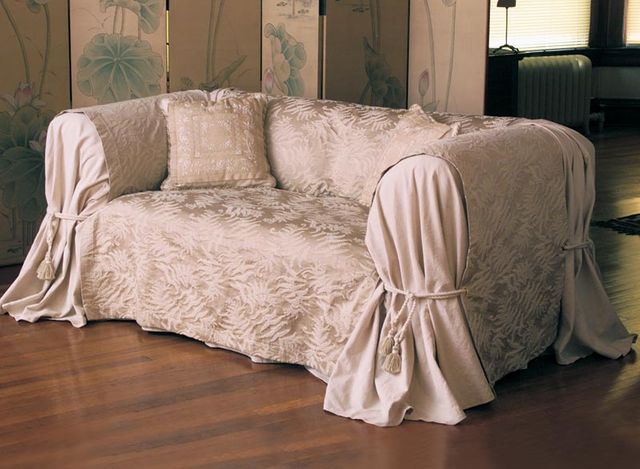
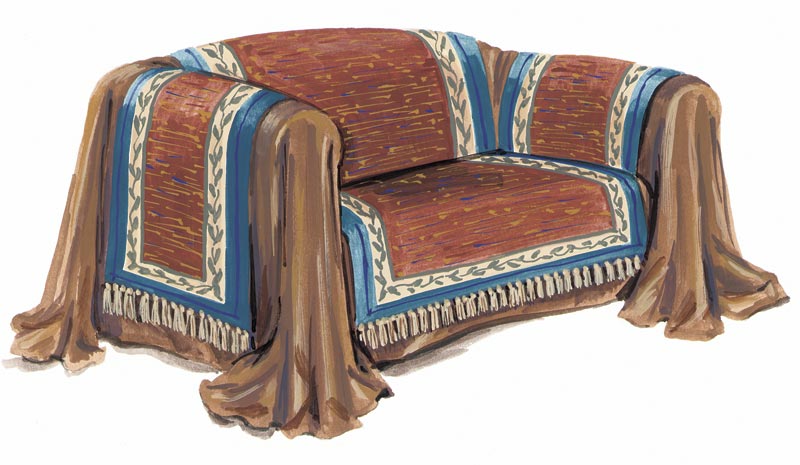 Top layer with braided trim and fringe and underlayer pooling on floor.
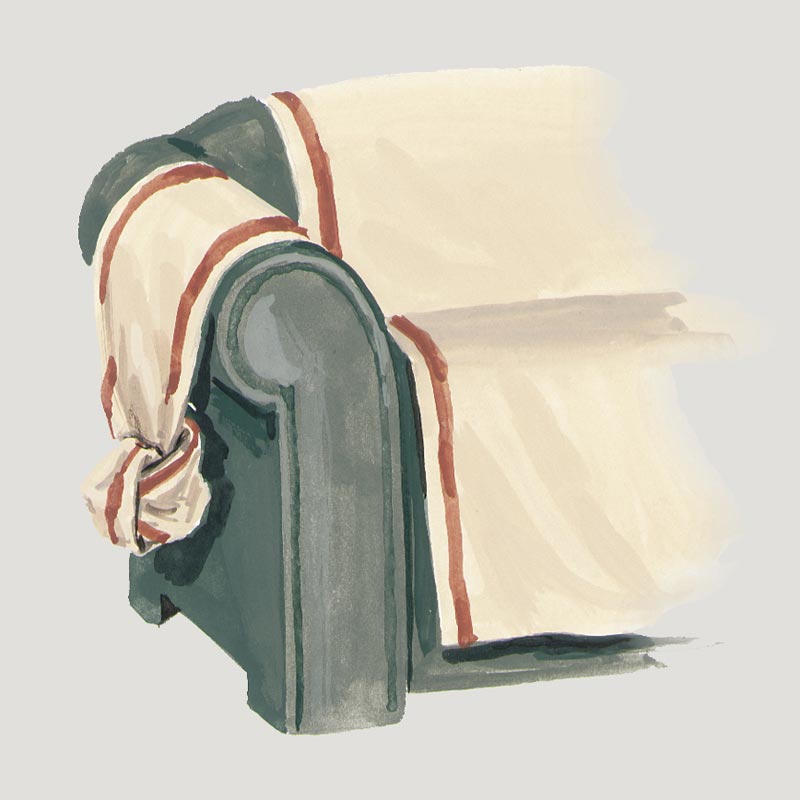
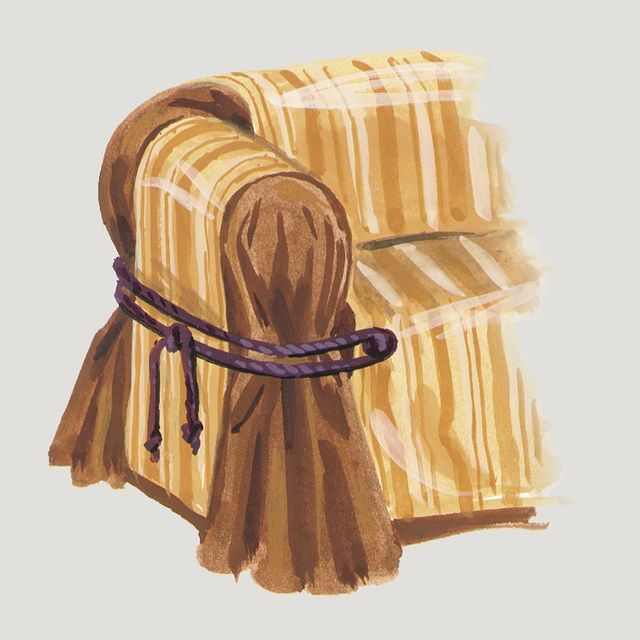
Closures
Usuallly the fabric or fabric combination you choose has a certain character or ambience, which can be accentuated by the corner treatment. This treatment can make the difference between average upholstery and spectacular results in the same way that carefully selected accessories can bring a garment to life. Use your imagination and experiment with various approaches to corner “closures” and embellishment; see Ideas for corner treatments to get started.

![]()
![]()
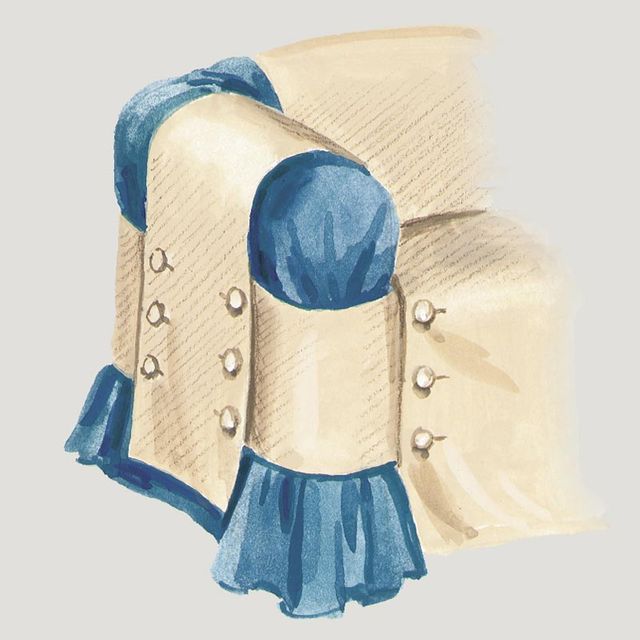
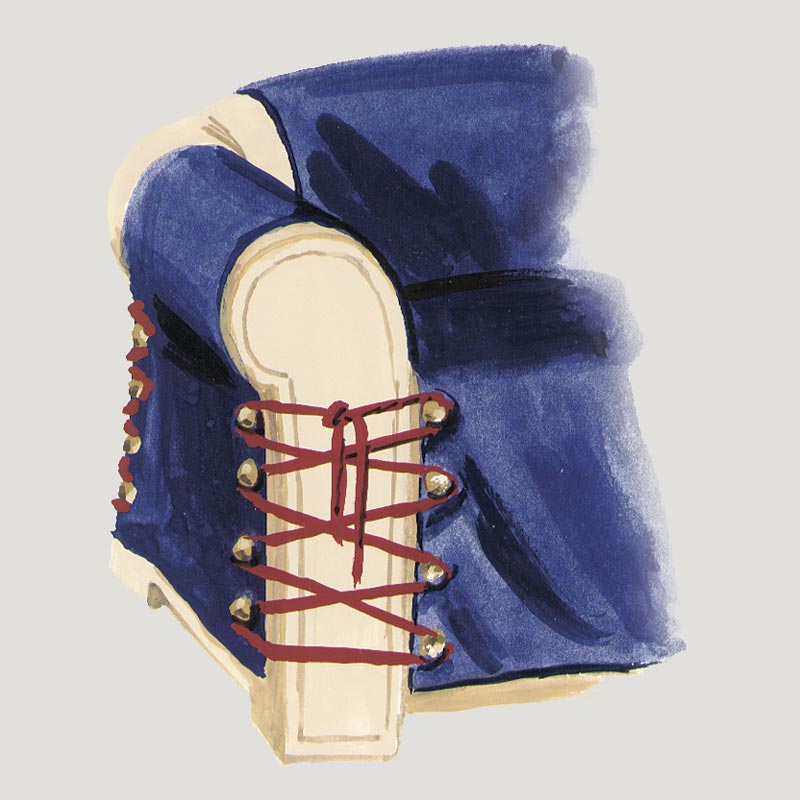 Cord pulled through large grommet on front and tied to sofa side. Arm piece bundled and tied in large knot. Wrap laced together through small brass grommets.
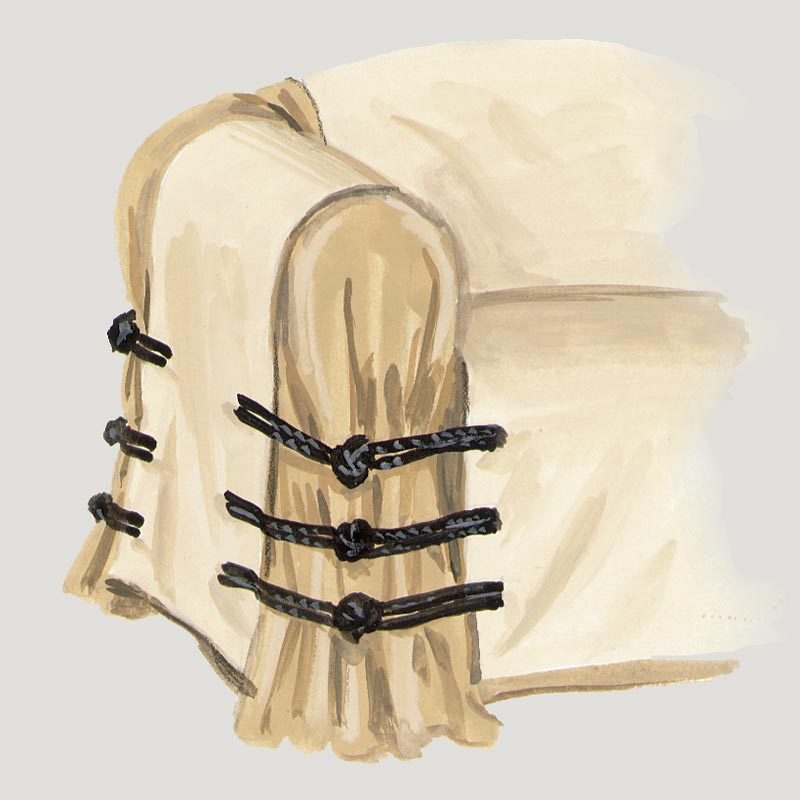
![]()
![]()
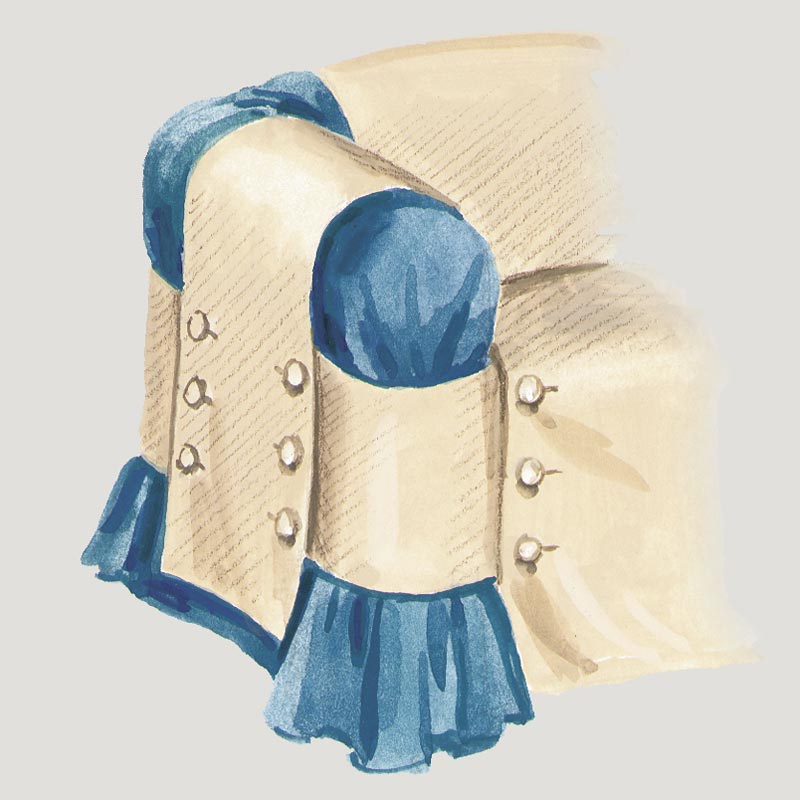
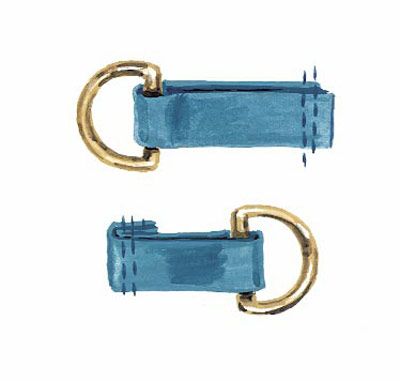
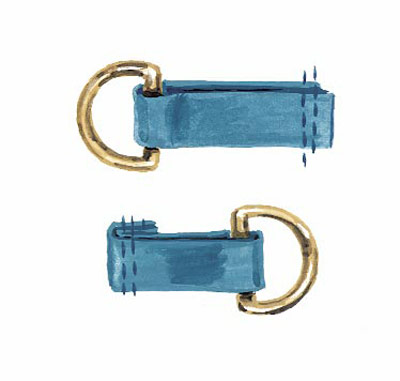 Simple frog loops over Chinese ball button at corner. Inserted panel, buttoned, snapped, or zipped at edges. Many corner treatments involve using cording, which can be threaded through tent grommets or any type of ring- brass, wood, or rubber-for tying. To attach the rings, sew fabric tabs, folding them over the rings as shown and topstitching them in place.
Photo: Sloan Howard; illustrations: Carolyn Fanelli


Thanks! It looks like a new sofa!
I LOOOOOOVE this site. I have been contemplating one or the other of these techniques to cover my lounge. Never thought to put the two ideas together. See what happens when you bother to spend some time to give a website a thorough examination. I think I may spend the next week just roaming around in this one. I finally know which direction to take with this project (& having tidied my sewing room come studio it's not like I don't have enough fabrics to do this). Stashes are great arent they. I found fabrics including silks I have no memory of owning. Thank you again.
I chane my window dressings to suit the seasons so now Im doing the same with all the furniture. This is driveing my hubby around the bend,but I have slowed down on rearranging the furniture he doesnt stub his toes anymore LOL
very interesting thanks!
This is EXACTLY what I've been looking for !
However, I don't think I'll go with the sumptuous & varied fabrics shown ( though the difference in colours in your illustrations shows us exactly how the concept works ) .
I'd prefer something simpler - 2 or even just one fabric(s).
What a blessed alternative to the horrible time-consuming & daunting task of making a fitted cover, which ,if I did ever manage to make it, would never really fit well.
I'm really going to try this .I have a large amount of a wheat-colour light fleece, which will cling well & stay put.
Can't thank you enough for this great project!
Thanks! I am in my first step to sewing this.
Does anyone have any suggestion on how to make this idea work on a t cushion chair? The arms are shorter as the t part of the cushion are in front of it?
I really want to use this concept but need help in ideas on how to get the arm draping to work.
THIS IS JUST WHAT I NEEDED FOR MY COUCHES I'M GLAD I FOUND THIS WEB PAGE..!!!
[url=http://www.whosyomama.com/#c57z]ED pack[/url]
Looks beautiful. Anyone know where I can find a pattern for a cover for a Wingback couch and chair?
I use to make and sell pillow covers using this same concept. Never once thought of it as a furniture cover. I just LOVE, LOVE, LOVE this. This solves my whole problem of how to cover my old couch and not have to deal with detailing the curved arms and low back. Totally takes care of the base, then just need to cover my pillow backs! Thanks sooooo much!!
This is awesome design
This is an amazing way of making your sofa a vintage one. Inspiring.
looks beautiful