
Boning: Not Just for Corsets
Engineer stability into all sorts of fitted garments with this couture technique
Thinking of boning in a garment usually brings to mind a strapless gown or bustier. Everyday garments, however, don’t need to be boned, because they hang from the shoulders or waist and depend on gravity to keep them looking right. I’ve nonetheless found there are times when a few bones in a daywear garment are indispensable. For example, they can help a seam, skirt yoke, oversized waistband, square neckline, or decorative fold stay put. Boning in these places isn’t stiff or uncomfortable; I use flexible metal boning that’s lightweight and has nonpoking metal tips. Plus, it’s easy to install, with a few ground rules in mind. I’ll give you some examples of places I’ve found boning effective and then show you how to add it to a garment.

Where to bone and why
A well-fitting garment is designed to not only look good but also assure the wearer that it isn’t riding up or slipping down as she moves. For example, the fabric of a fitted skirt with a high-yoked waistband tends to ride up at the hips, choosing the path of least resistance, and moving toward the smaller waist circumference and away from the hips. At the same time, the section of waistband above the waist wants to collapse or slip down. Boning the waistband solves both problems.
Other garment areas that benefit from boning include necklines, side seams, and midriffs. Square necklines are notorious for gaping, especially when they span much of the chest. A length of boning, placed horizontally along the base of the square, keeps the edge straight and close to the body. Necklines that form a wide V often sprout drag lines along the edge, and if the garment has sleeves, arm movement intensifies the problem. But all these problems are easily fixed with small vertical sections of boning.
I also often use bones to straighten side seams on a bodice, even if the garment isn’t strapless. The bones serve to counteract gravity, and keep a bodice made with a soft, drapey fabric from sagging. If the garment happens to be a one-shoulder dress, side-seam bones will even out the tension produced by one side being supported and the other left to fend for itself.
For bodices with a V-shaped waist, bones are invaluable. Three pieces of boning radiating from the base of the V work beautifully to arbitrate the battle between the horizontal tension of the hips, and the vertical style of a nicely formed V.
Useful places for boning
Flexible spiral-steel bones keep necklines from gaping, bodices from sagging, waistbands in place, and sculpted folds from rising up.
|
|
 |

Flexible spiral-steel bones keep necklines from gaping bodices from sagging, waistbands in place, and sculpted folds (like those in the skirt below) from rising up. (Skirt is author’s original design, but you could adapt any straight skirt pattern).
For a skirt on a wedding or party dress that gathers fabric to the back—or that sculpts folds in back or front—boning sewn to an underskirt maintains the skirt’s graceful folds. The wearer can move about freely without worrying that her carefully arranged folds are shifting or riding up. The draped fabric is invisibly tacked to the boning casing along the seamlines on both sides of the hips.
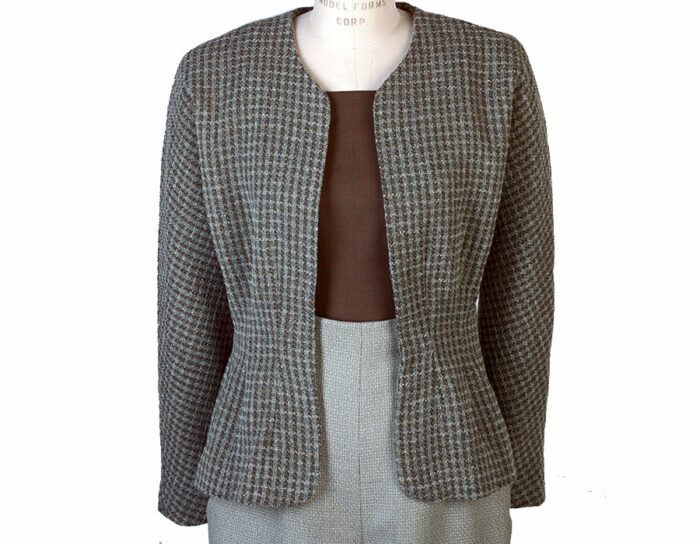
There are many more places to use boning: in bodices that lace up the back; in off-the-shoulder-sleeves; in wide, turned-backed cuffs; in a stand-up collar that’s reluctant to behave; and in contour fabric belts and handbags. The blouse, pants, and jacket shown here use bones in the shaped waistband, around the jacket’s waistline, and at the blouse’s neckline to add structure to soft, drapey fabrics. When considering places for boning, keep in mind that the bones will only be effective in fitted areas close to the body, sort of like an external skeleton.
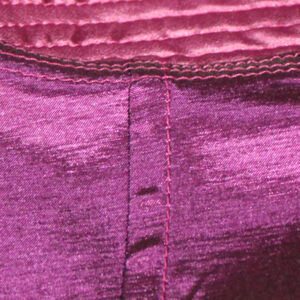
On fabrics where the boning might show through to the right side, buffer it with a layer of flannel. Underline an entire garment section with flannel, or stitch a piece of flannel a little larger than the bone to a silk-organza underlining, as shown in this sample.
Luckily, boning can often be added after the garment is complete and you notice something sagging or puckering. Just stitch on a casing, and slip in the appropriate-sized bone.
All bones are not equal
My favorite type of boning is made from 1/4-inch-wide spiral steel. These bones are strong yet lightweight and amazingly flexible. When properly placed, they’re undetectable on the garment’s right side and are comfortable to wear. You’ll want to have the right size bone handy. They’re sold by the piece and come in 1/2-inch increments from 1/2 inch to 17 inches (for sources, see Spiral-steel boning by mail). I usually keep a variety of sizes on hand.
When you want short pieces of boning—for use in a stand-up collar, for example—it’s fine to use polypropylene boning instead of spiral-steel boning, since not much strength is needed. This type of boning comes packaged in a coil; you can straighten it out with a little heat from your iron and easily cut it to length, rounding the ends.

It’s a simple process to install boning, since it only needs a fabric channel to hold it. I sew channels from silk organza, which is lightweight and easy to hand-stitch, though you can use the heavier premade cotton boning casing (remember to wash it first to pre-shrink it). Take care to not make the channels too loose or too narrow—3/8 inch wide for 1/4-inch boning is about right. Sew the machine-stitched channels by hand over seam allowances or by hand or machine onto an underlining.
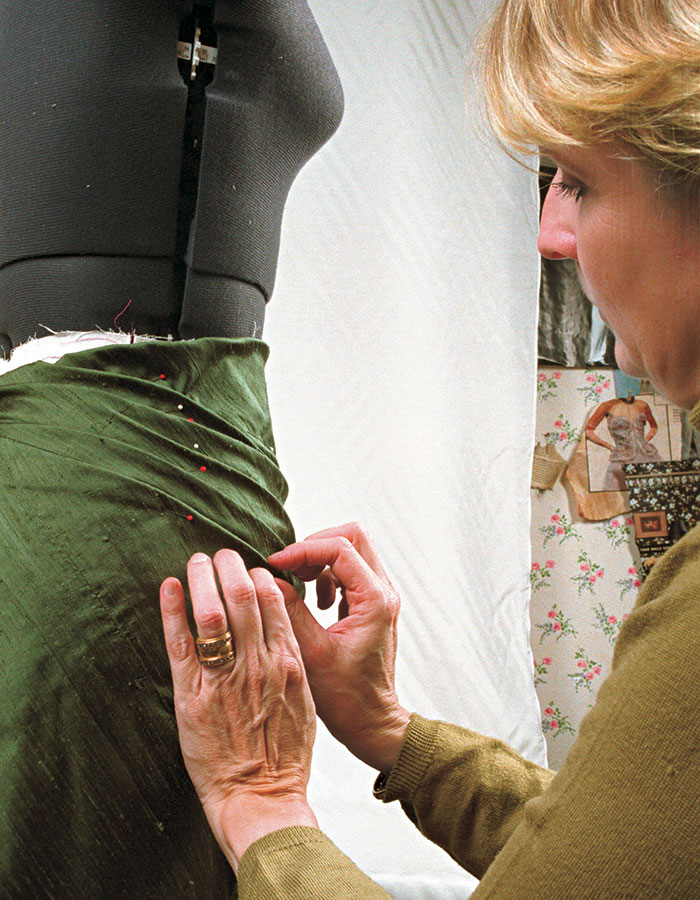
To Install boning
Sew a Y.. i n. channel for ‘I.·in. bone from silk organza (left photo). Stitch it to the underlining or over a seam allowance along the same stitching lines as the channel (left center), sewing across one end, then complete the garment (right center). Insert the boning after construction, and hand-stitch openings closed. Boning in the side seams of a skirt underlining provides the perfect anchor for free-form folds on the hip (right).
|
|
|
|
|
|


If you decide you need a bone after the garment is constructed, of course, you’ll need to sew the channel into place by hand. If, during construction, you’ve looked ahead and determined the location of your bones, sew the channels to the underlining, but leave one end open and the bones out while sewing the garment- it’ll be much easier to work with- and put them in for fitting. After the garment is complete, close the channel’s open end with hand stitches.

Invisible from the outside
No one needs to know there’s boning in your garment. When the bone is positioned over a seam allowance, the casing usually adds enough opacity to keep it from showing on the outside. If your garment fabric is lightweight, or you want a bone where there’s no seam allowance, keep the bones from showing on the outside by putting a layer of flannel (pinked to soften the edges) between the fabric and the channel (see the photo below). “Spot-underlining” keeps the bone from showing without having to layer an entire section with heavy flannel. Be sure to make a test sample first, since this technique works only when the fashion fabric is moderately opaque- there shouldn’t be any discernable color difference where the flannel is applied. Textured fabric like boucle or dimensional lace will naturally conceal boning.

After your boned garment is complete, use care when pressing it. If you press directly over the boning, you’ll run the risk of making an imprint of it on the right side of the garment, even if you use a pressing cloth. Instead, press boned areas face down into a soft surface like flannel or a terry cloth towel.
Now that you know how easy and useful it is to add boning to your garments, use it freely for adding structure to the soft, drapey fabric of fitted garments or in areas that want to head in a direction the opposite of what you’ve got in mind. So use your imagination and ingenuity, and you’ll find that bones will never let you down.
Spiral-steel boning shoppingFarthingales Lacis |
—Susan Khalje is a couture sewer in Glenarm, Maryland, and author of the book Bridal Couture (Krause Publications, 1997) and Linen and Cotton (The Taunton Press, 1999).
Photos, except where noted: Laura White
Drawings: Karen Meyer
from Threads #87, pp. 56-59


This was a great article. I am making a jacket from Simplicity 4044, a retro 1940's pattern replica. It has a raised back neck that comes around to the front. The pants in this pattern has a raised waist with no waistband and the center front is rounded and split at the center front. The pattern only indicates interfacing for the waist of the pants and the front facing of the jacket but no support for the raised neckline.
The interfacing of the pant waist is insufficient and crumbles when I bend or sit.
I think the suggestion of using boning may be the solution to my delima.
Thank you Susan Khalje, you are the tops!!!!
Sandra Taylor
The quality of the inner is also very important. It should be smooth. If not your feet will be frothy.
Very Useful - Thank you
I found this article browsing a blogger's pininterest. What a good idea for me. I have a drapey coat with a belt that is made from the same cloth. The untied belt is always twisted around when I go to tie it. So this could quite possibly be a solution. Just knowing where and how many I will need is next.
Actually I have bought a steampunk corset from a corset store http://www.corsets4u.com/ but now I am facing the boning problem in it. I was looking for an alternative solution for this. Now I just read your article and this idea will definitely solve my problem. Thanks for sharing such an informative post.
Quality of the inner is even more important, it is the part the person actually feels. So outer look is important but no to forget to inner one.
I had a loose chambray dress that looked kinda off a bit and when I tried the boning technique it turned out great. Now it looks quite feminine and nice. Thank you for the informative article, I had a few questions answered.
Hello AnyOne :-)
I am looking for a way to bond together plastic dress boning ends.
Can anyone help me?
Thanks Tee