
Add Channels for Boning and Finish Seams All at Once

The method I’ve been using lately to simultaneously finish seams and create channels for boning came from the need to streamline my bustier- and corset-making projects.
Building structure into a corset or bustier
I make a lot of strapless bodices. I’m not sure how I became fascinated with this design discipline, but over the years, I’ve draped and patterned more bustiers and corsets than I can remember. Depending on the design, adding structure to the torso can be a challenge. The typical techniques include an inner layer with boning stitched to it, stitching the boning directly to the fashion fabric, or creating bias channels to encase the boning. These all work well and, when correctly implemented, will yield beautiful results.
Because the understructure changes depending on the design, I never settle on just one technique that will always work. However, I have recently been making strapless dresses that require a foundation with another dress or drape on top of it and have needed to streamline the construction.
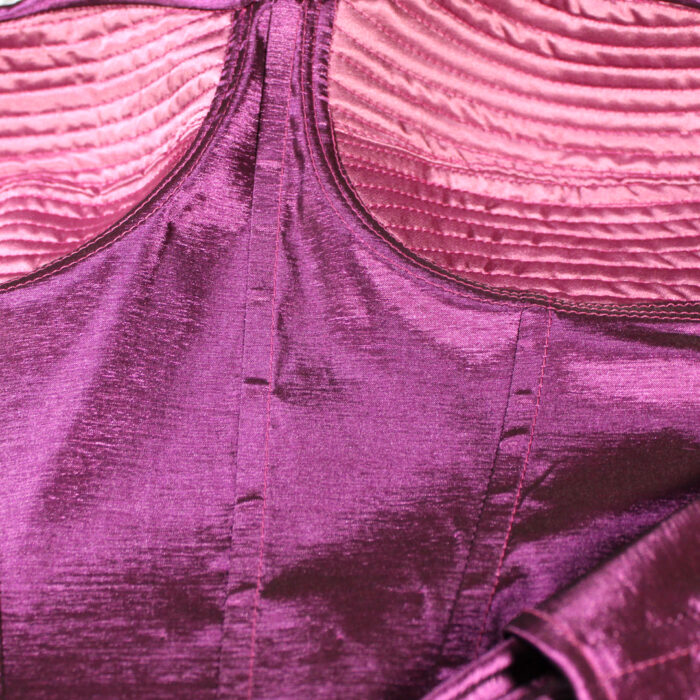
In the past, I would quilt these understructures in cotton broadcloth. That gave me the structure I wanted, but they would be warm and inflexible. After some experimentation, I found stretch taffeta works well for these understructures because it gives the desired fit, and it is breathable and flexible enough to be comfortable. I can still pad the bust cups to give the figure shapely form. Because the fabric stretches, there is no need to line the foundation.
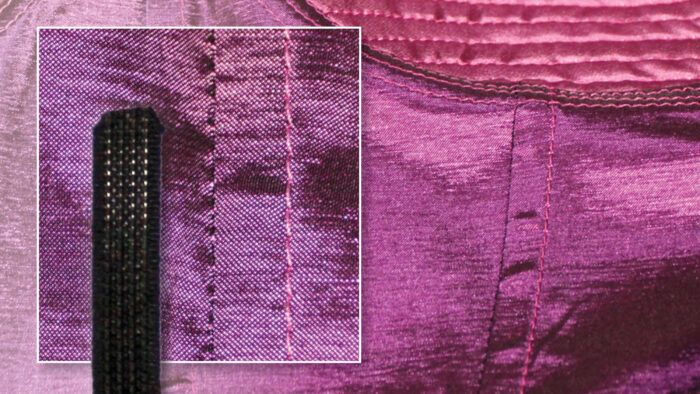
Streamlining with flat-felled seams
The only issues I needed to address were finishing the seams and adding channels for boning. Again wanting to streamline the process, I played around with flat-felled seams. They immediately solved both problems. Not only could I finish the seams, but I could easily slip the boning…
Start your 14-day FREE trial to access this story.
Start your FREE trial today and get instant access to this article plus access to all Threads Insider content.
Start Your Free TrialAlready an Insider? Log in


Log in or become a member to post a comment.
Sign up Log in