

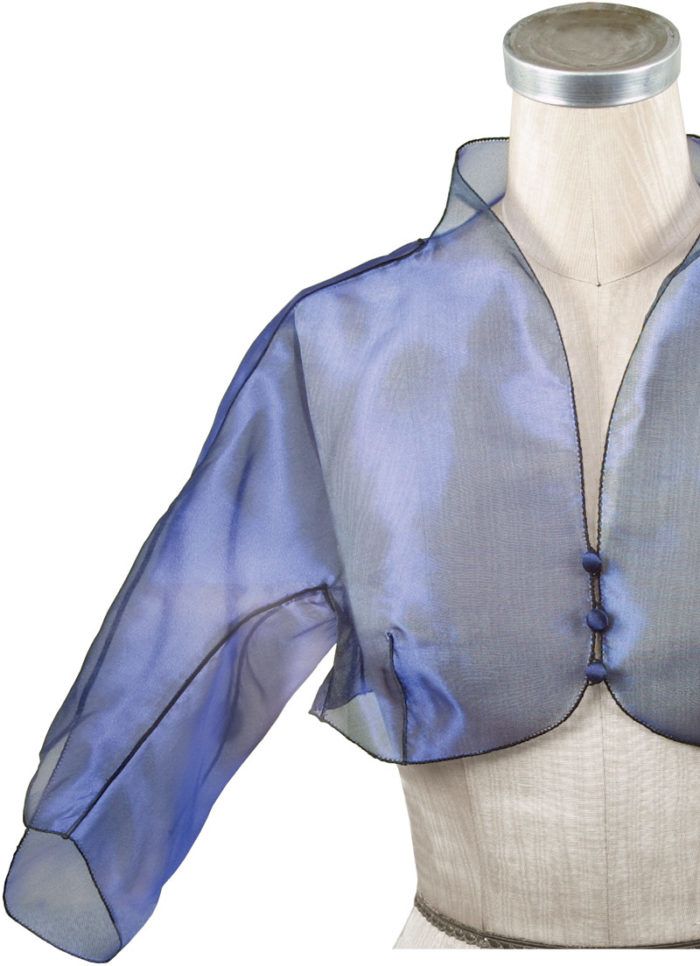
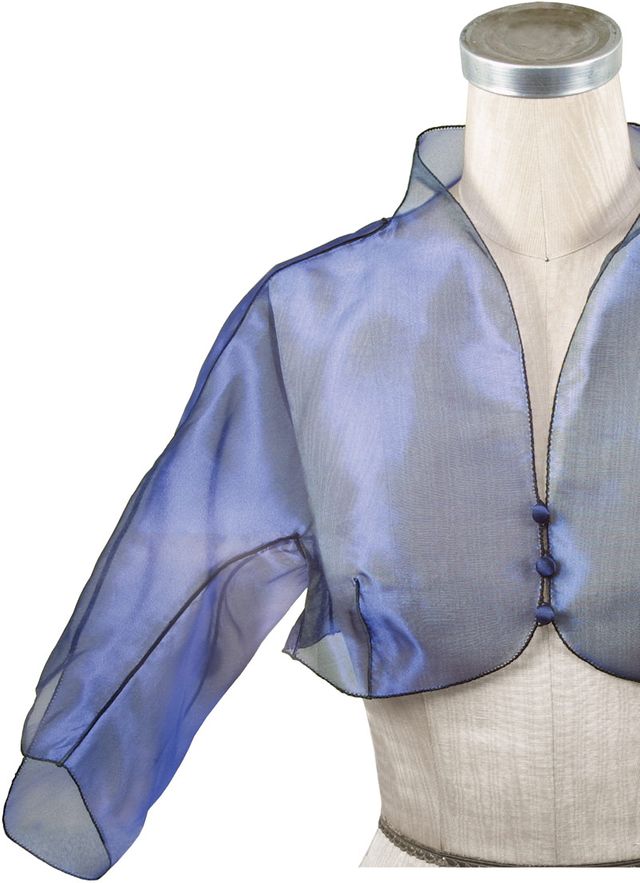
When you’re making a single-layer sheer garment, your seams and edges can never be too thin, too clean, or too strong. The techniques I used to put together the little jacket at right are an attractive combination of these qualities. They’re useful on any type of sheer or very lightweight fabric, they stabilize any edge they’re applied to, and they’re easy to do.
Preparation for my seam and edge techniques is a little different from what you may be used to. To begin, mark the seamlines and hemlines on your tissue pattern if they are not marked. Then mark cutting lines 1 inch outside these lines. Next, trace all the marked lines onto the fabric using dressmaker’s carbon paper and a tracing wheel; do not cut out any pattern pieces until you staystitch the seamlines as explained in Step 1, below.
To minimize puckering, switch to a single-needle throat plate-if possible on your machine-for all straight staystitching on seams and edges. Just remember to switch back to the zigzag plate when needed. Choose thread to match or contrast your fabric as you wish, and use the same color for basting and final sewing. Always complete seams before finishing hems and edges.
In the photos below, I’ll walk you step-by-step through my processes, and introduce you to my secret clean-up weapon: an as-cheap-as-possible electric men’s razor, invaluable for whisker-free edges, and available in most drugstores (sweater defuzzers or fabric shavers are too powerful). If you come up with any interesting applications of these techniques, by all means let us all know.
Satin-stitched seams
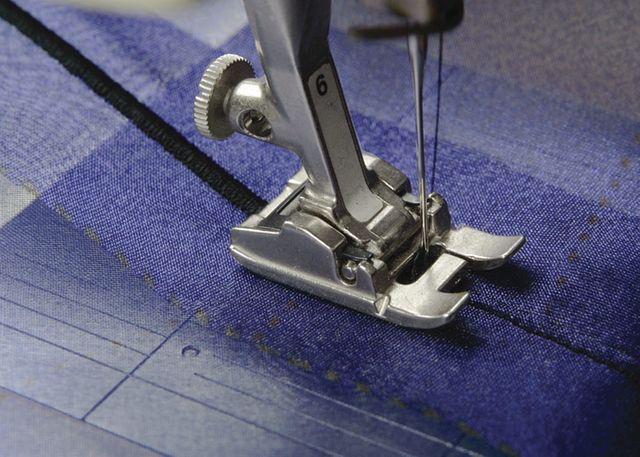
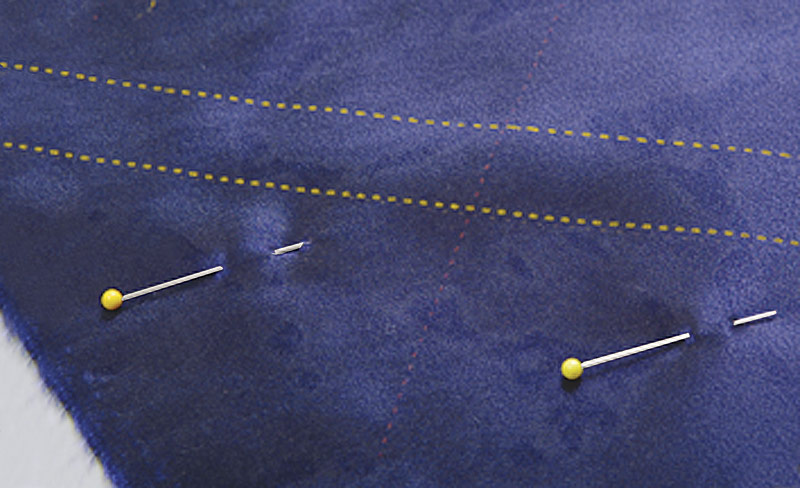 1. Pin the marked but uncut fabric to a tissue paper stabilizer that matches the thread color as closely as possible. Staystitch through the fabric and stabilizer along all seamlines using a 2mm/14spi (stitches per inch) stitch length, for this and all subsequent straight stitching.
![]()
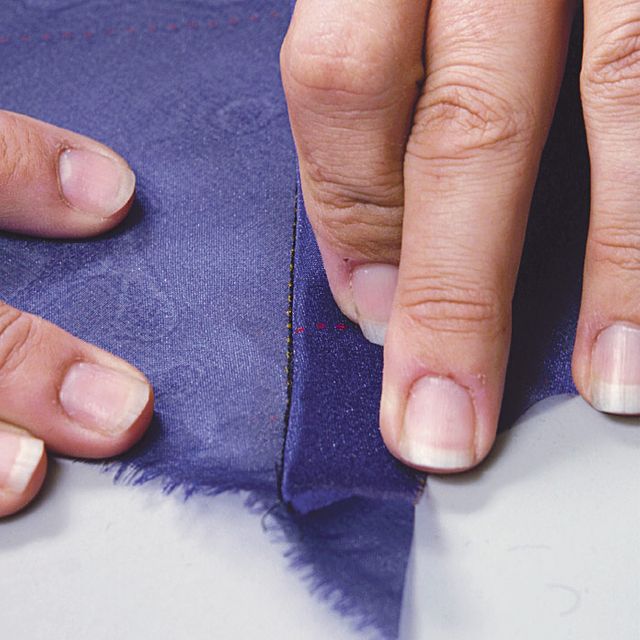
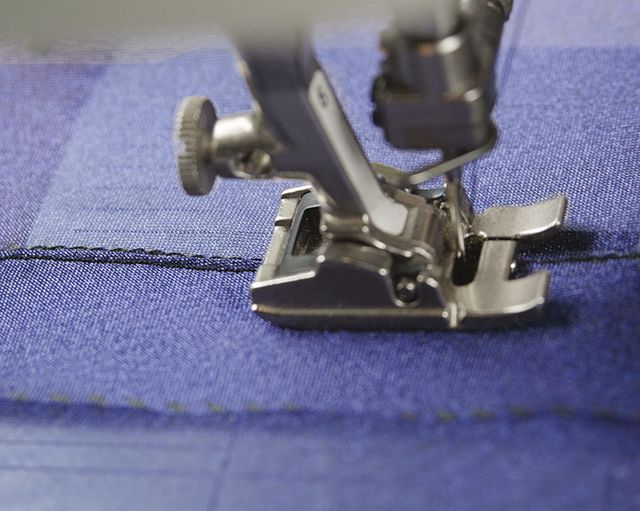
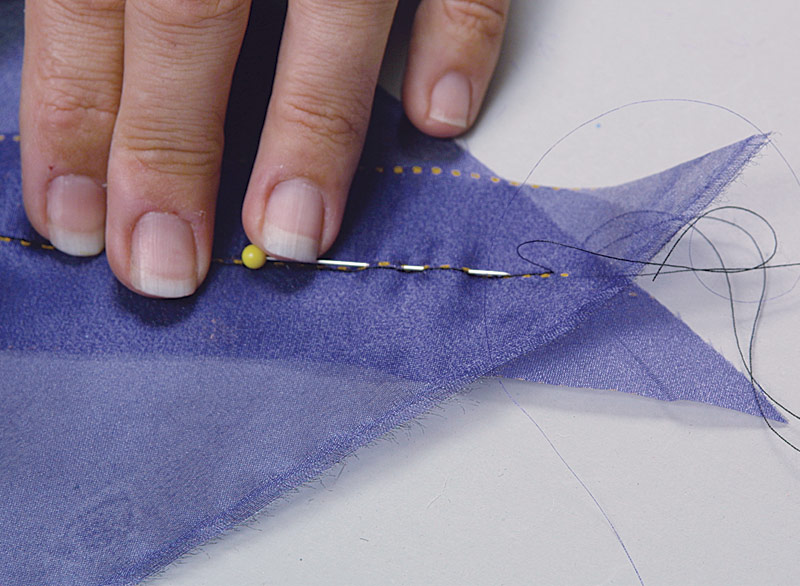 2. Tear away the tissue paper and cut out the garment pieces on the marked cutting lines. To form a seam, overlap the joining edges, matching seamlines exactly and pin-basting on the seamline as shown. Sew the seam.


3. Fold over and press one seam allowance exactly on the seamline, covering the stitching (left). Sew the seam again (right), stitching 1/16 inch from the fold, holding the folded allowance in place and catching both the folded allowance and the unfolded allowance underneath. Repeat, folding the other seam allowance in the opposite direction and stitching 1/16 inch from the fold on this side.
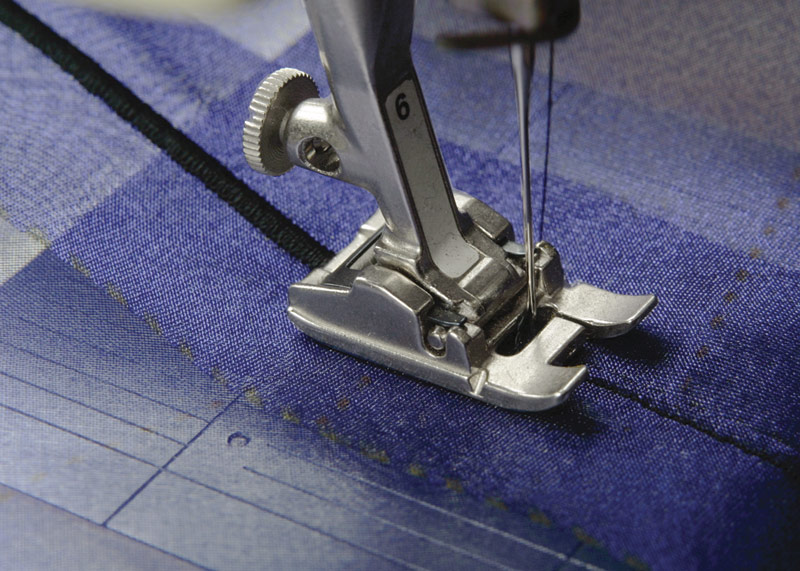 4. Set your machine for a satin stitch that’s wide enough to cover the rows of straight stitching-3 to 4mm wide should work. Change the throat plate if necessary. Using a good-quality rayon or polyester embroidery thread, stitch completely over the seam from the right side. Loosen the top tension slightly for a cleaner satin stitch.
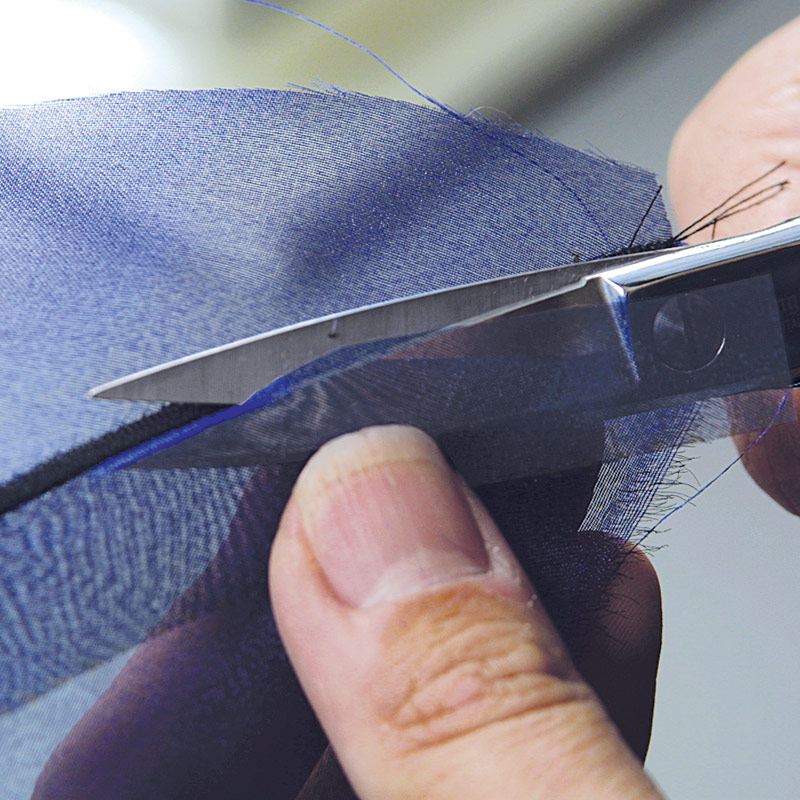

5.Trim away both seam allowances as close as possible to the satin stitching. Folding each seam to expose the trimmed edges, shave away any untrimmed thread whiskers using an electric razor.
Couched, hemstitched edges
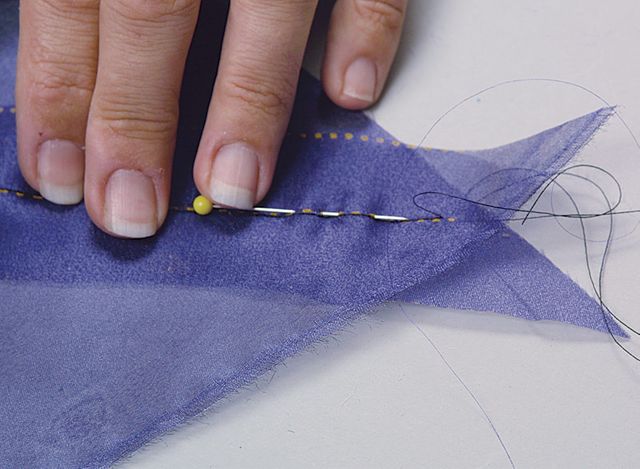
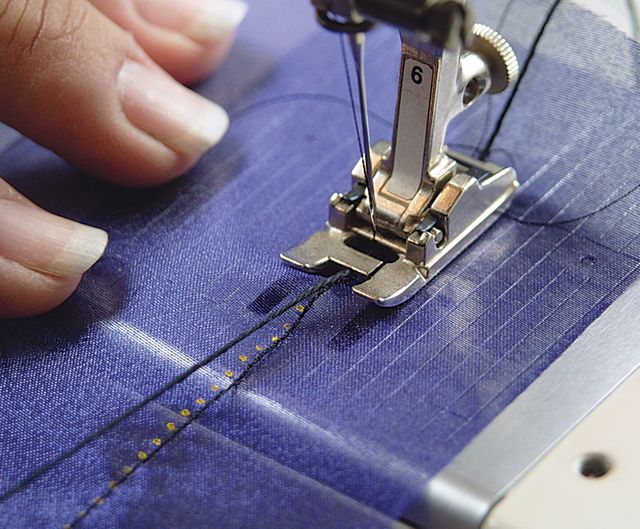
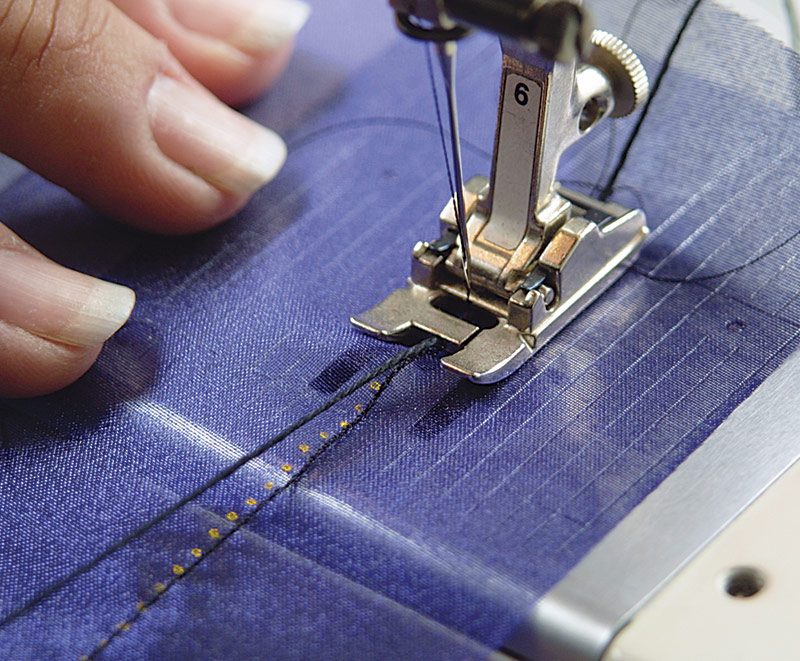 1. Using a 2mm/14spi stitch length and a tissue paper underlay, staystitch the traced hemline. Set your machine for a 1 to 1.5mm zigzag and length of 2.5 to 3mm. Lay a length of any weight pearl cotton (color-matched to the other thread) exactly over the staystitched hemline and zigzag over it.
![]()
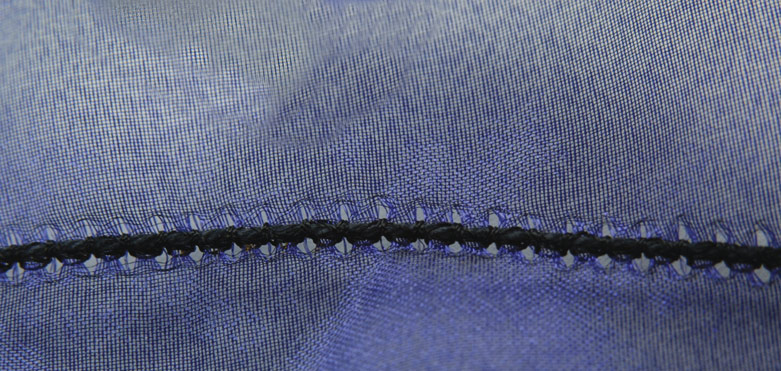
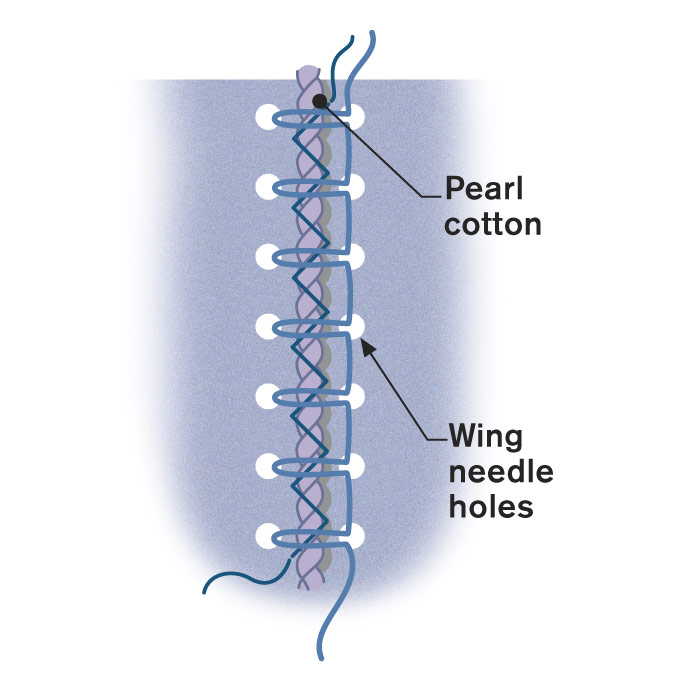
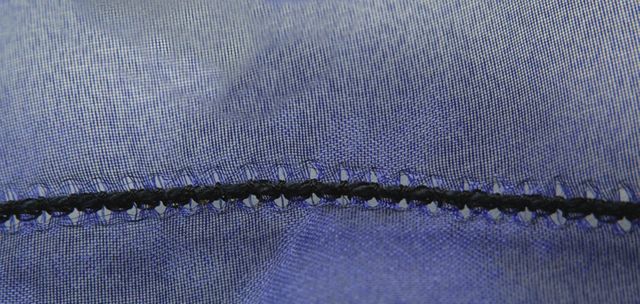
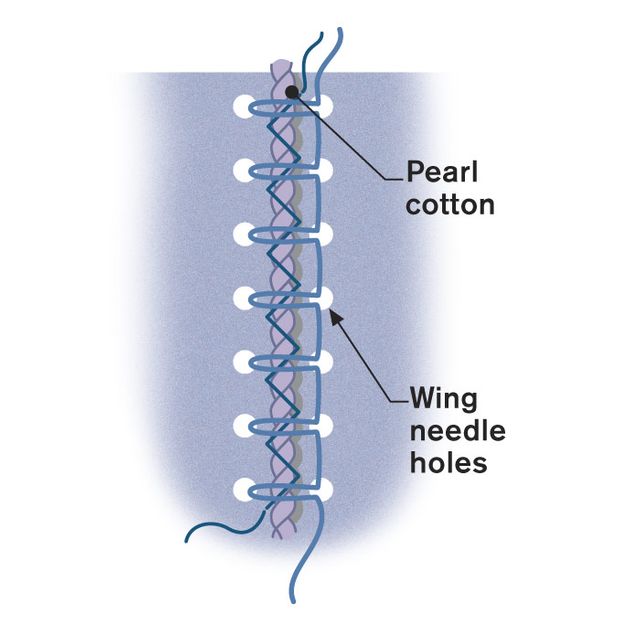
2. Install a wing needle, and set your machine to a blanket stitch (see drawing at right), with a width of 2mm and length of 3mm. Using a good-quality rayon or polyester embroidery thread, blanket-stitch over the couched pearl cotton, forming mock hemstitching holes (above).
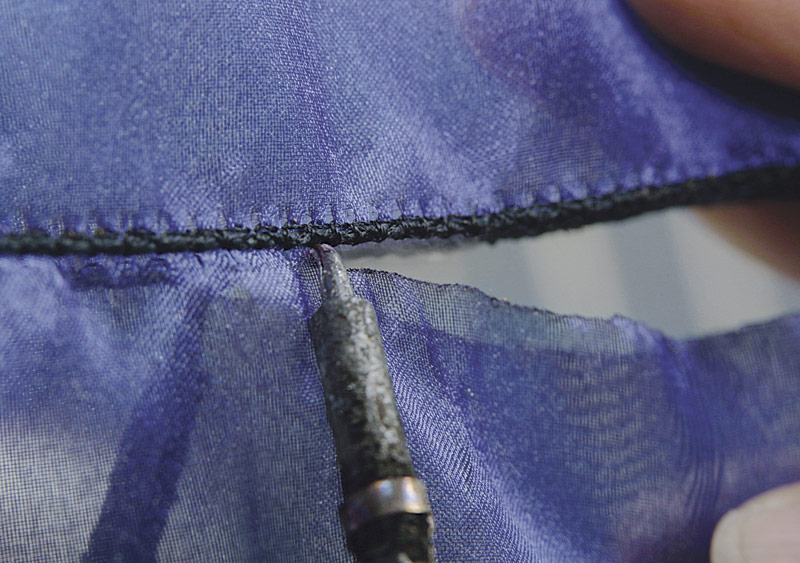 3. Trim the hem allowance as close as possible; use an electric razor to clean away whiskers. If you’ve used a polyester fabric, you can clean-cut the allowance using a heated stencil cutter, as shown. Be sure to choose a rayon embroidery thread, since it has a higher melting temperature than polyester, so the fabric will melt away before the thread is damaged.
Kenneth D. King’s design studio is in New York City.
Photos: David Page Coffin; drawing: Linda Boston


Thank you so much for this tutorial; you saved me! My daughter asked me to hem the sheer backdrop for her wedding. I hadn't sewn in a few years and I had no idea how to tackle the seams with organza. This tutorial was easy to follow and the backdrop turned out perfectly!
I need help with: side seam came open from too much stress, what can be done to reinforce this much needed seam?
The jacket is beautiful! I am wondering if you would recommend using a serger set to a rolled hem stitch to finish the raw edges after sewing the seams? I think one could lay the pearle cotton thread along the hemline so that it is incorporated into the hem.