
Understand Turn of Cloth in Rolled Collars and Lapels
Learn what you need to do when fabric takes a curve.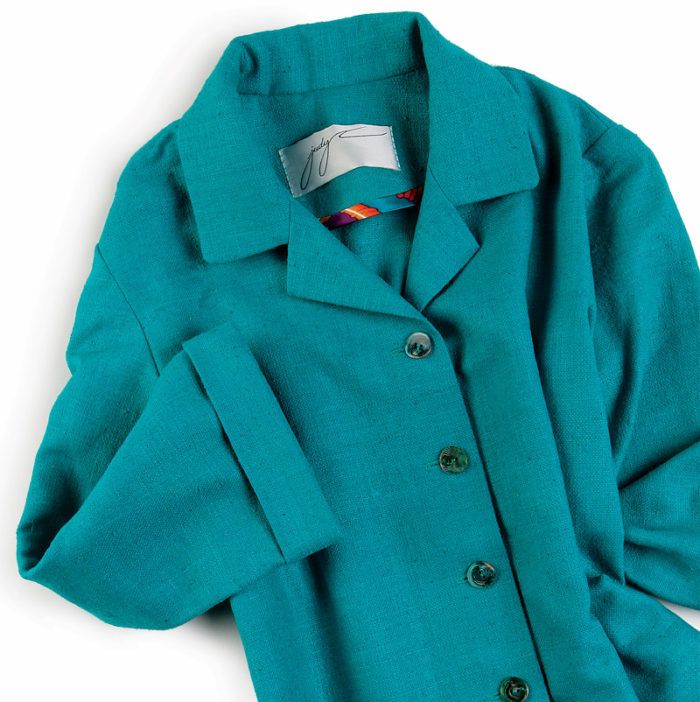
Learn how to compensate for turn-of-cloth— when an outer curved layer of fabric is slightly longer than an inner curved layer.
In sewing, turn of cloth can affect a garment’s center-front edges, cuffs, pocket flaps, and other areas. However, it is most obvious in rolled collars and lapels. Beautifully fine-tuned lapel edges rely on adequate turn of cloth.
Try this to find out how the turn of cloth works: Place two identically sized fabrics one on top of the other, then roll, bend, or fold them. The top layer appears shorter than the bottom layer and once identical edges no longer match. This is because of the turn of cloth. Simply put, an outer curved layer is slightly longer than an inner curved layer. To compensate for the curve, you need to adjust the size of the fabric layers before you start sewing.
 |  |
Every fabric has different turn-of-cloth requirements. I’ll show you how to determine the amount of extra fabric needed to keep your edges matching and where to add it. The heavier the fabric, the more turn of cloth is required.
For the best results, calculate the amount to allow for turn of cloth based on the fabric you’re using. Once you’ve applied turn-of-cloth considerations, see how this simple effort pays off.
Why does it matter?
On a beautifully sewn collar and lapel, the enclosed edges turn neatly under to the wrong side, and the seam is not visible from the side that shows when the garment is worn. If the turn of cloth isn’t taken into consideration, the upper collar and lapel area of the front facing “steal” some fabric from the undercollar and lapel, causing the seams to curl back to the visible side.

When the layers are adjusted for the fabric’s turn, the underlayer edge stays behind the outer edge. The sample at left shows layers meeting equally on the edge. The…
Start your 14-day FREE trial to access this story.
Start your FREE trial today and get instant access to this article plus access to all Threads Insider content.
Start Your Free TrialAlready an Insider? Log in


Now I get it! I read the article "Understanding Underlining" and from that article didn't understand how to adjust for the turn of the cloth. This article cleared it up. Thanks! Great article!
This information alone is worth half the subscription price to your magazine. I am saving my nickels. Thanks!
Thanks and Great article........