
Mini Purses for Hanukkah Gelt
Multipurpose bags are great for the winter holidays, and are versatile all year round.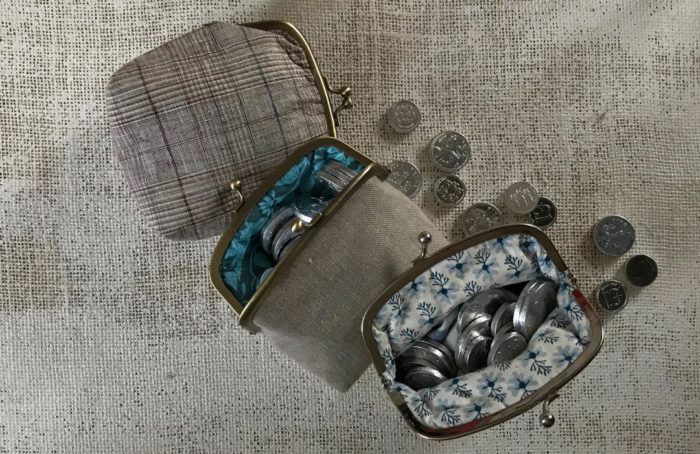
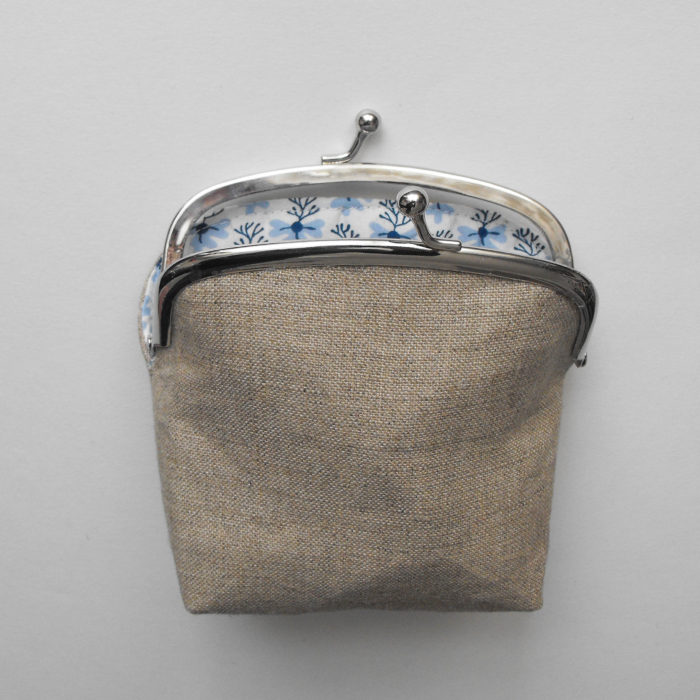
These plain linen clip purses ping open to spill their shiny contents and reveal a richly patterned lining. Stash your Hanukkah coins, tuck in a gift card, or fill these mini purses with your favorite miniature goodies.
Make one or several; they’re quick to create and are a fun way to use up the prettiest scraps from your stash. Each little gem can be used again as a makeup bag, travel sewing kit, or first-aid kit. They are about 6 inches by 5 inches.
Tools and supplies
- 14-inch by 12-inch fabric rectangles: two of plain linen for the outer layer and two of fancy fabric for the lining
- Two 14-inch by 12-inch pieces of heavy fabric stiffener (a nonwoven interfacing)
- 5-inch-wide glue-in purse frame (Supply4Bag.com)
- Fabric glue
- Fabric pen or tailor’s chalk
- Iron
- Scissors
- Sewing needle and pins
- Sewing threads to match the fabrics
Assemble the purse
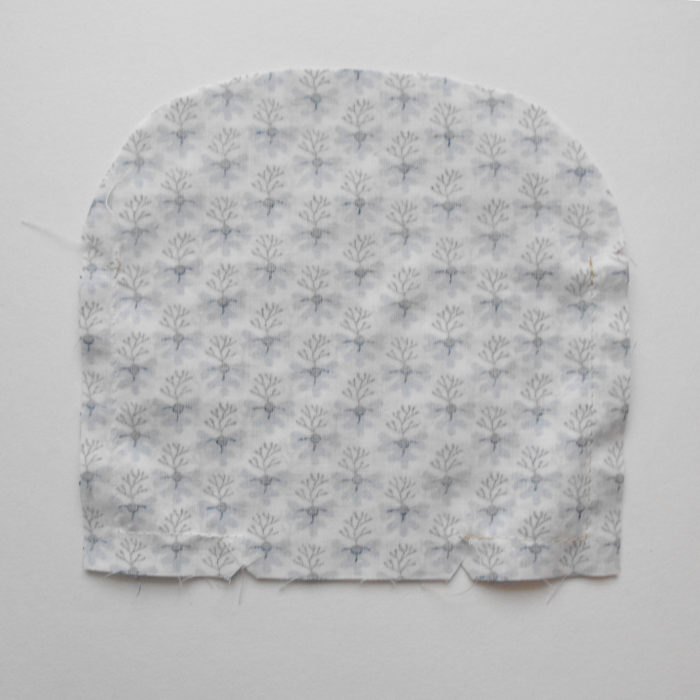
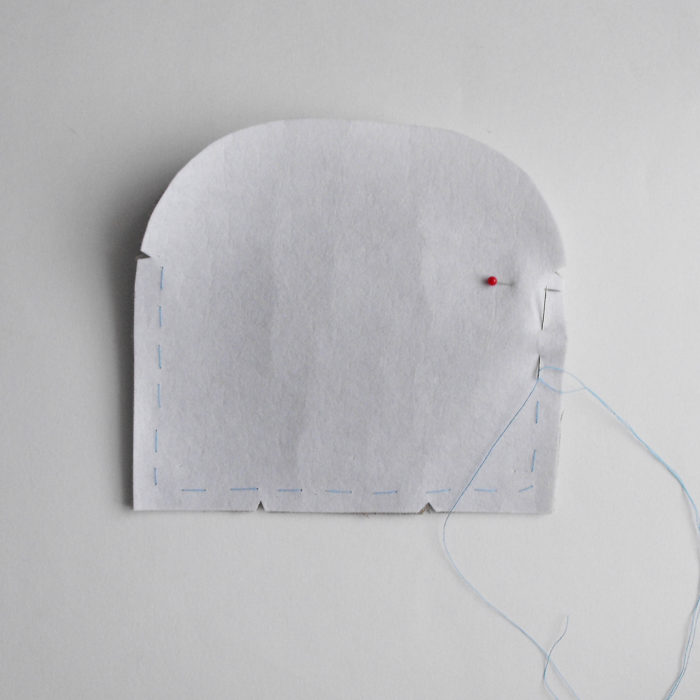
Cut two pattern pieces (click for template and see below) from your outer fabric, lining fabric and fabric stiffener. Note: The shapes of clip frames vary subtly, so make sure you have a template that fits your frame. If no template was supplied, look online for tutorials to walk you through making your own. The amount of fabric needed may change if your frame is different from the one shown.

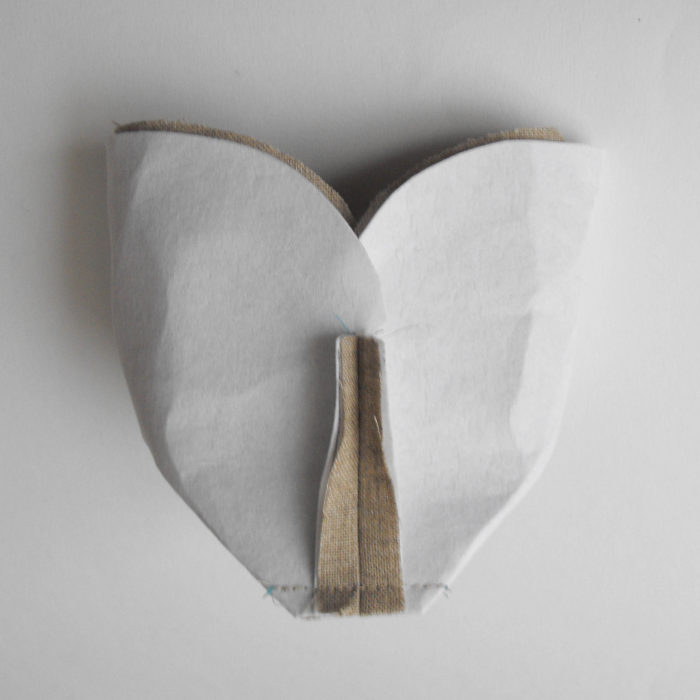
1. Sew the lining.
With right sides together, layer the two lining pieces, aligning the raw edges; pin. With a 3/8-inch-wide seam allowance, sew down one side, across the bottom, and up the other side, between the two marked dots. Leave a turning gap of 2 1/2 inches in the bottom seam, as indicated by the notches. Backstitch at the start and finish of all stitching. Press the seam allowances open. This is a bit fiddly, so take care not to scorch your fingertips with steam.
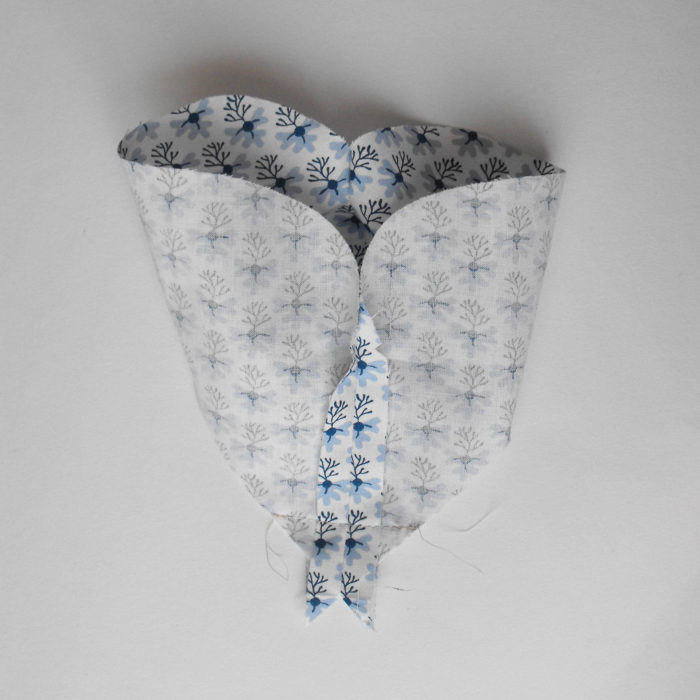
2. Box the corners.
With the work still wrong side out, push the bottom corners out and away from the seam. Align the side seam with the bottom seam and press flat so that the corner forms a triangle. Measure 1 inch from the corner along the side seam, and draw a line perpendicular to the seam line. Stitch along this line. Trim the seam allowance to 1/8 inch wide. Repeat for the remaining corner.
3. Assemble the outer layers.
Place the two pieces of outer fabric with right sides together, and sandwich them between the two pieces of fabric stiffener. Pin and/or baste around the edges. Stitch through all layers together to join the side and bottom seams, using a 3/8-inch-wide seam allowance. Backstitch at the start and finish to strengthen.
4. Box the corners.
Press the seam allowances open, then follow step 2 to create box corners.
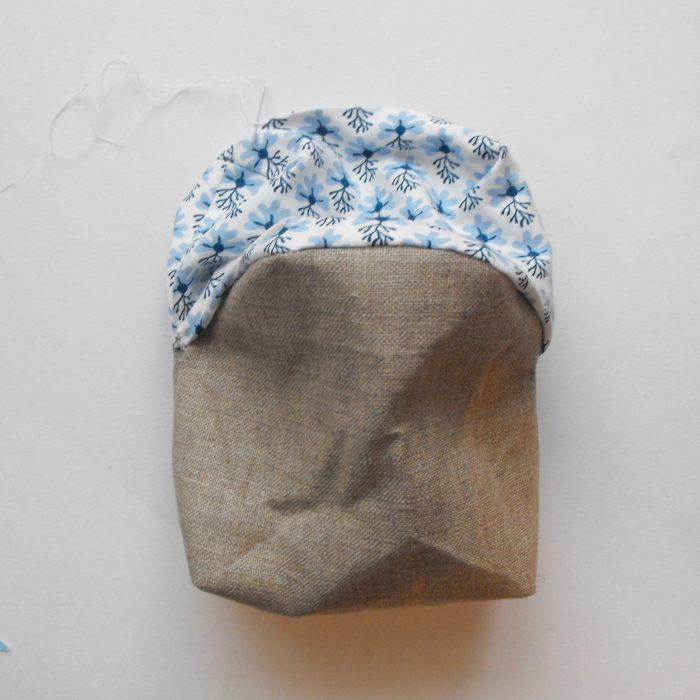
5. Pin the lining in place.
Cut notches in the outer and the lining pieces just where the stitching starts and ends. Turn the lining piece right side out and place it inside the outer, stiffened shell (which is still inside out). Align all the raw edges and the side seams, and pin.
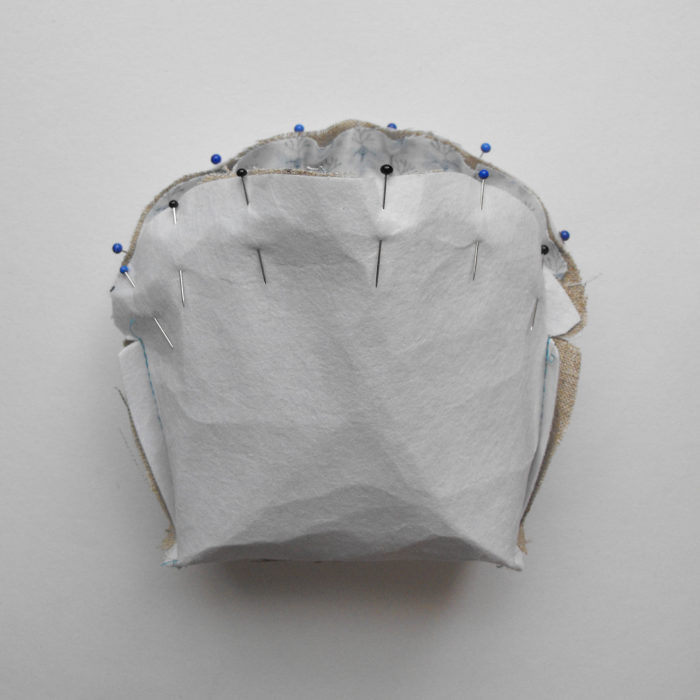
6. Sew the lining to the outer layers.
Starting at the top center of one side, around the top opening, using a 3/8-inch-wide seam allowance. Stop at
the side seams with the needle down, raise the presser foot, and manipulate the work under it so that you can continue without breaking the stitching.
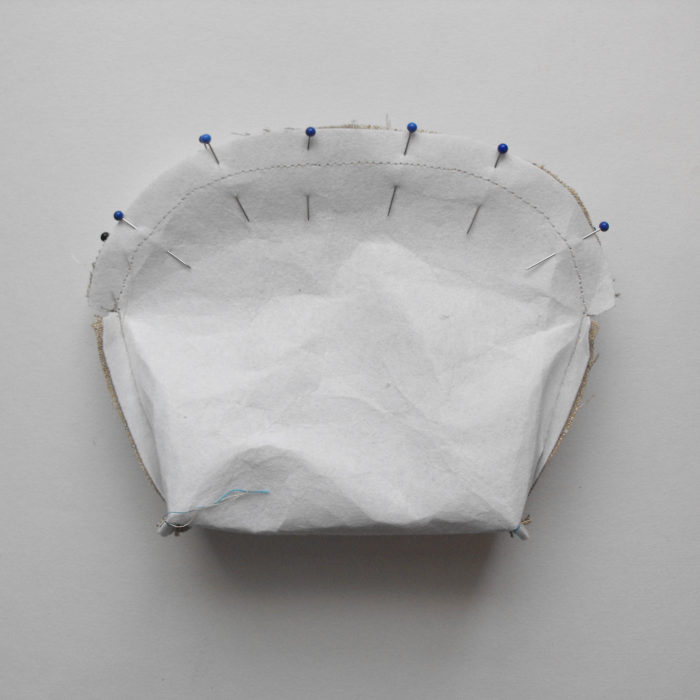
7. Notch the upper seam allowances.
Clip V-shaped notches into the allowance along the curved upper edge. Take care not to cut the seamline.
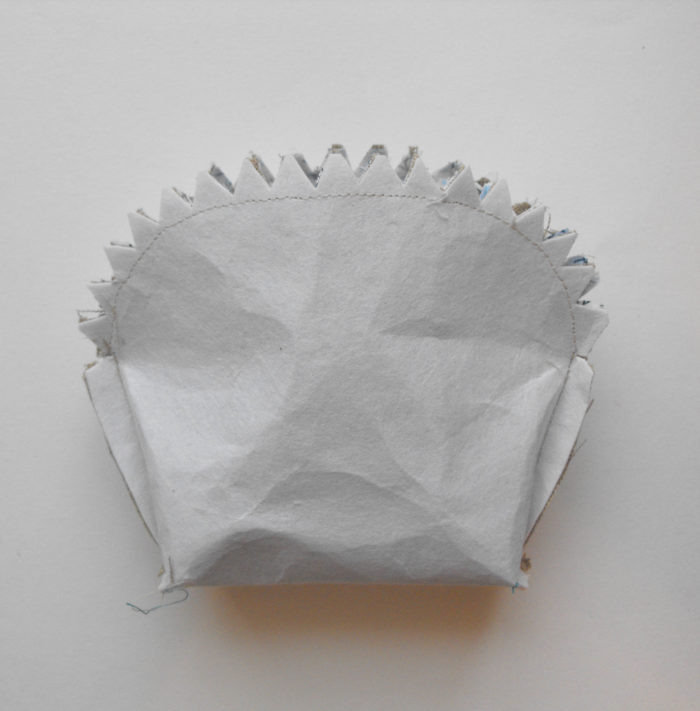
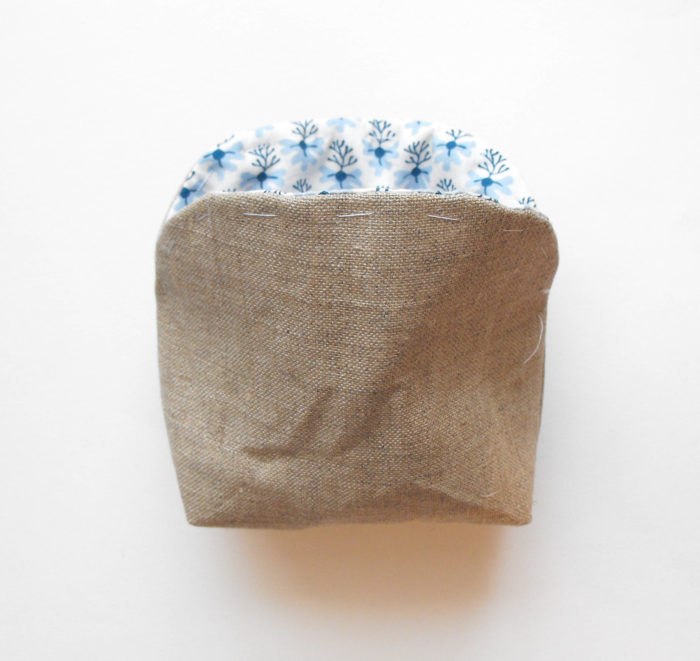
8. Turn right side out.
Carefully ease the purse right side out through the turning gap in the lining. Slipstitch the turning gap closed by hand.
9. Topstitch the upper edge.
Manipulate the layers along the upper seams to form a crisp edge all around the top opening. Pin or baste, then topstitch 1/16 inch from the edge.
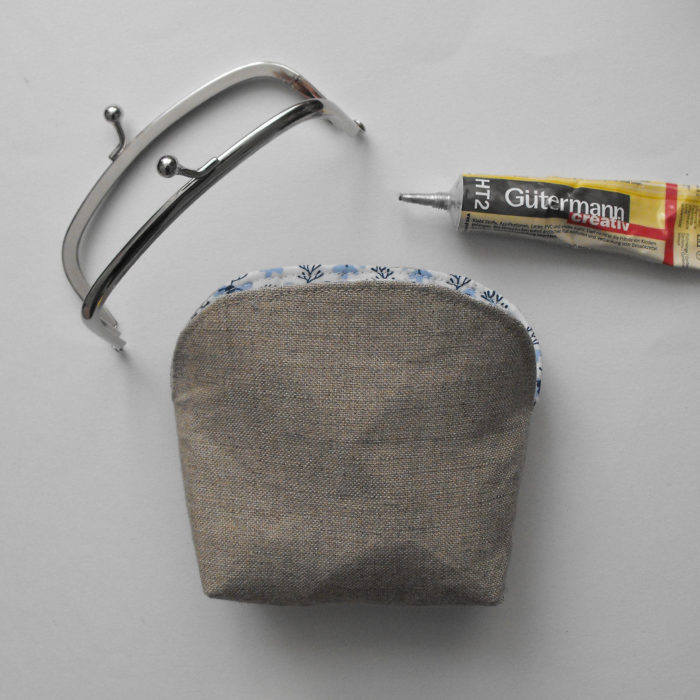
10. Attach the purse frame.
Open the frame wide. Run a line of fabric glue along the inside of one half
of the frame, starting and stopping 1/16 inch from the hinge at either side. Apply glue to one side of the fabric purse’s opening, starting and stopping 3/8 inch from each side seam. Insert the fabric into the frame, taking care that the sides are at similar levels first and then feeding the center in. Use your fingers or a knitting needle to ensure the fabric is snug, and make sure the line of topstitching is hidden. Leave to dry fully before gluing the other side.
More Winter Sewing Ideas
12+ Projects for the Winter Holidays


Hanukkah (and other Jewish) fabrics + craft supplies available at http://www.1-800-dreidel.com.
https://www.1-800-dreidel.com/hanukkahfabrics.aspx