
Make a Dress Form Arm
A fitting double is more accurate with a custom limb
A dress form, especially one that has been customized to resemble your figure, is an invaluable fitting tool. However, a standard torso-only form doesn’t give you a complete picture. Whether you’re fitting a garment or designing one, a dress form arm helps you see how a sleeve looks in relation to a bodice.
You can purchase an arm for a dress form, but it’s easy and inexpensive to make one yourself. Better still, you can size it to your personal measurements. It’s the work of an afternoon to create one arm or a pair. Here’s my technique for measuring, drafting the pattern, sewing and stuffing the arm, and attaching it to a dress form. You’ll draft a sleeve pattern for the arm, which is shaped by a slight but realistic elbow curve. As a bonus, you can add ease to the pattern and use it for
a garment sleeve.
Take body measurements
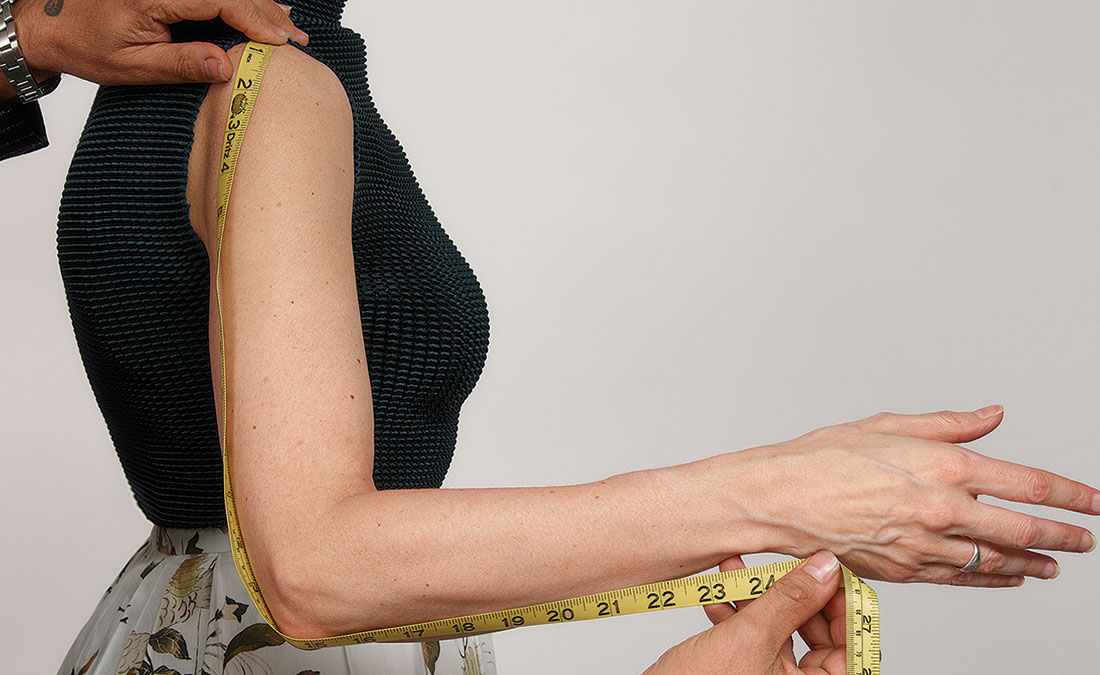
Enlist the help of a friend to ensure these measurements are as accurate as possible. Record each dimension, as you’ll use them to draft the arm pattern.
1. Measure the full arm length. Take this measurement with the arm bent at a 90-degree angle. Start directly over the shoulder joint, and lay the tape measure along the back of the arm, over the elbow joint, and end at the prominent outer wristbone.
2. Find the elbow, or upper arm, length. Repeat the measurement in step 1, but end at the elbow point. This measurement is typically 9 inches to 10 inches shorter than the full arm length.
3. Measure the shoulder joint circumference. Measure around the shoulder from the top of the shoulder joint, around the underarm, and back to the top. This oval corresponds to the armhole circumference when you draft the arm pattern.
…
Start your 14-day FREE trial to access this story.
Start your FREE trial today and get instant access to this article plus access to all Threads Insider content.
Start Your Free TrialAlready an Insider? Log in


Another brilliant article by Dr Kenneth King--this is one for the personal archives, folks. Finally, a way to check and adjust fit of the sleeve/shoulder junction with a 3D model of the moulage! With a slightly more robust shoulder tab, I hope to better model the impact of forward, rounded, sloped, and/or high/low carriage of the shoulder joint. Thanks for the inspiration Dr King. Any great ideas for modeling narrow shoulders???