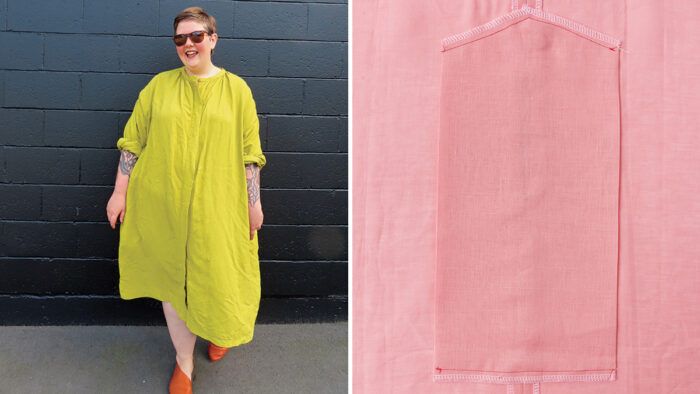
Editor’s note: For the Huon Dress pattern by Muna and Broad, author and designer Leila Kelleher includes the holy grail of frock design features: sizable and secure side-seam pockets. What makes each pocket unusual is how the pocket bag extends to the side seam’s front and back, forming a deep pouch that hangs straight down. The pocket’s contents—whether they are as small as lip balm or as large as a phone—likely won’t fall out, even when you sit. With some easy pattern drafting, you can make a similar pocket for your own garments. Leila walks through the process below. Note that this pocket may not be suitable for fitted styles.
Prepare the pieces
1. Draft the pocket pattern
Cut a piece of paper to the desired finished pocket height and twice the desired finished width. Fold it in half along its vertical center, then fold its outer edges in toward the center fold. Refold along the center with the edges within. Draw a diagonal line from the top of the center fold to the outer folds and cut. Add notches to mark the pocket opening: Place the upper notch level with the lower end of the slanted top, and the other far enough below it to give space for your hand to fit through. Add seam allowances on all edges. This becomes the pocket pattern.
2. Cut two pockets
Use self fabric or a sturdy but low-bulk pocketing material. Mark the notches with chalk or tailor’s tacks. Serge the vertical edges.
3. Mark the pocket location on the garment’s side seam
Determine the desired upper point and place a notch there. Place another below this, the same distance apart as on the pocket bag.
Construct the pocket
1. Attach the pockets to the garment
With right sides together and notches aligned, sew one pocket to each front piece. Stitch between the notches, along the pocket openings. Repeat to join the opposite edges to the garment’s back.
2. Understitch the pocket openings
Stitch the seam allowances toward the pocket, beginning and ending 1/2 inch short of each end of the existing seamline.
3. Sew the garment side seams
Position the garment with right sides together and raw edges aligned. Pull the pockets away from the seams. Sew from the top of the seam down to the top of the pocket seam; backstitch. Then sew from the bottom of the pocket seam to the garment’s lower edge, backstitching to secure the stitching at the pocket opening.
4. Close the pockets’ vertical seams
Fold back the garment’s seam allowances and sew the upper and lower vertical seams. These seams should originate exactly from the point where the pocket opening seam ends.
5. Press and sew the pockets into shape
Press open the side and pockets’ seam allowances. Fold the pockets flat, aligning the center seams and upper slanted edges. Then sew the top and bottom seams, keeping the pocket free from the garment. Serge the edges.
6. Secure the pocket to the garment
Pin the top half of the pocket to the garment’s side seam. From the garment right side, stitch in the ditch of the side seam from the pocket’s point to the top of the pocket opening. From the wrong side, topstitch the top, angled edges to the garment. This anchors the pocket to the garment. You can leave the sides and bottom free, as in this example, or topstitch all the edges.
Photos: Mike Yamin. Illustrations: Steven Fleck.


Now, that's a cool idea.
I love this idea! I'm working on my first project with pockets, and I think I'll be using this one! Question though, is there a actual name to this style of pocket? Like there's welt pockets and patch pockets, does this style have a particular name, or just a variation of an in-seam pocket? Thanks!
I don't know of a special name for this pocket, but it is truly ingenious! It looks cute, and it really holds your belongings securely.
Carol Fresia, Threads Senior Technical Editor