
Sleeve Cutout Technique
Negative spaces are positively beautiful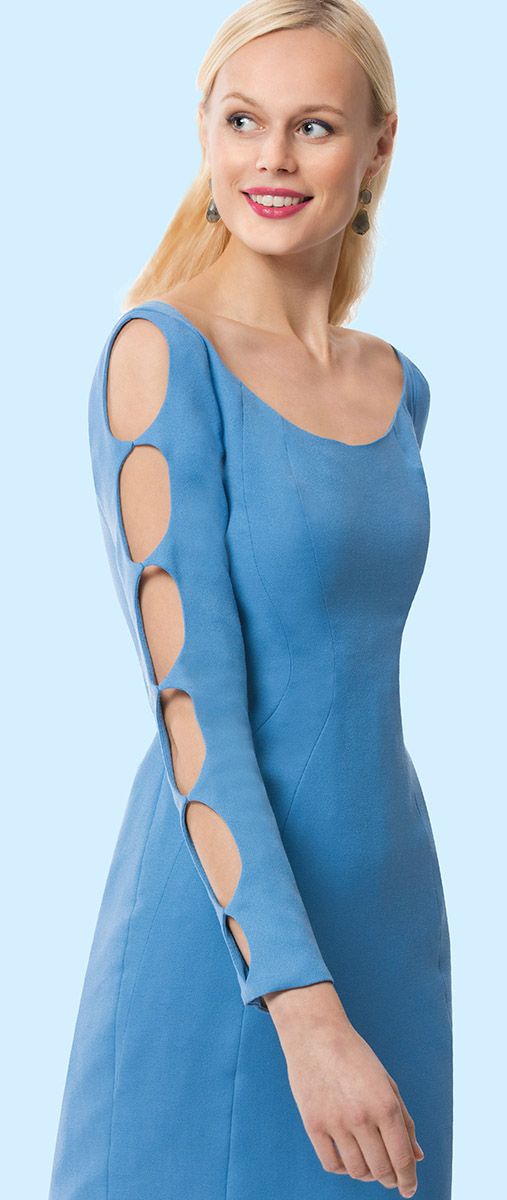
Most embellishments add something to a garment, but removing something can draw attention just as effectively. A row of intriguing cutouts on a garment’s sleeves reveals alluring glimpses of skin. I used this sleeve cutout technique to add dramatic oval-shaped cutouts to the dress at right and diamond-shaped cutouts to the special-occasion jacket on page 21, but you can create cutouts in other shapes, too. This peekaboo effect is surprisingly simple to create.
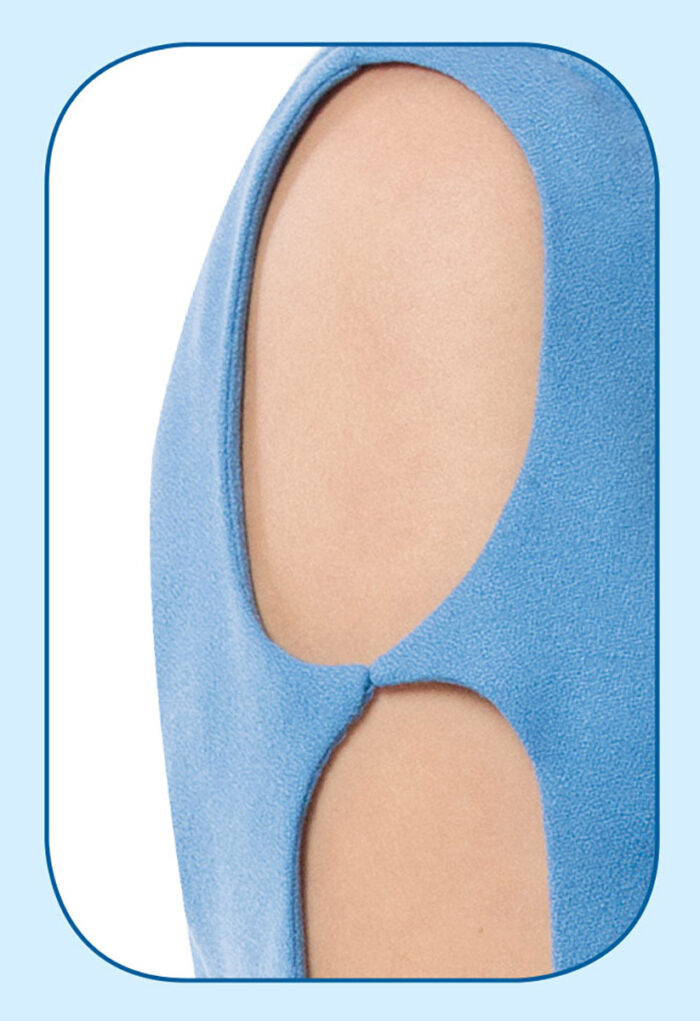
My method requires splitting the sleeve vertically, then drafting half the cutout shape on each side. The ends of each cutout half form points that abut and are tacked together. A separate, self-fabric facing for each sleeve half gives a clean finish to the cutout edges. The sleeve may be partially lined or unlined. This sleeve treatment enhances a dressy look and provides a touch of drama to daywear.
Adapt a patternStart with a close-fitting sleeve pattern for a woven garment. The closer the sleeve fits—without restricting movement—the better the overall effect. Make any fitting adjustments necessary before adapting the pattern. You’ll need pattern paper, a ruler, pencil, seam gauge, and, optionally, a template to help create the desired cutout shapes. 1. Locate the sleeve’s shoulder point. Draw a vertical line from the shoulder point to the hem, centered on the sleeve. Fold the pattern in half along the line. |
Start your 14-day FREE trial to access this story.
Start your FREE trial today and get instant access to this article plus access to all Threads Insider content.
Start Your Free TrialAlready an Insider? Log in


Log in or become a member to post a comment.
Sign up Log in