
Lola’s Palazzo Trousers
Learn clever techniques for sewing doll garments
It’s been a spectacular fashion season—if you’re 11-1/2 inches tall. From the introduction of more representative dolls in the past several years, to this summer’s blockbuster movie Barbie, we’ve seen a lot of statement style in extra-extra-extra small sizes. If you, like me, began your sewing career dressing Barbie and her friends, you may feel nostalgic about this renewed embrace of our earliest fashion icon.
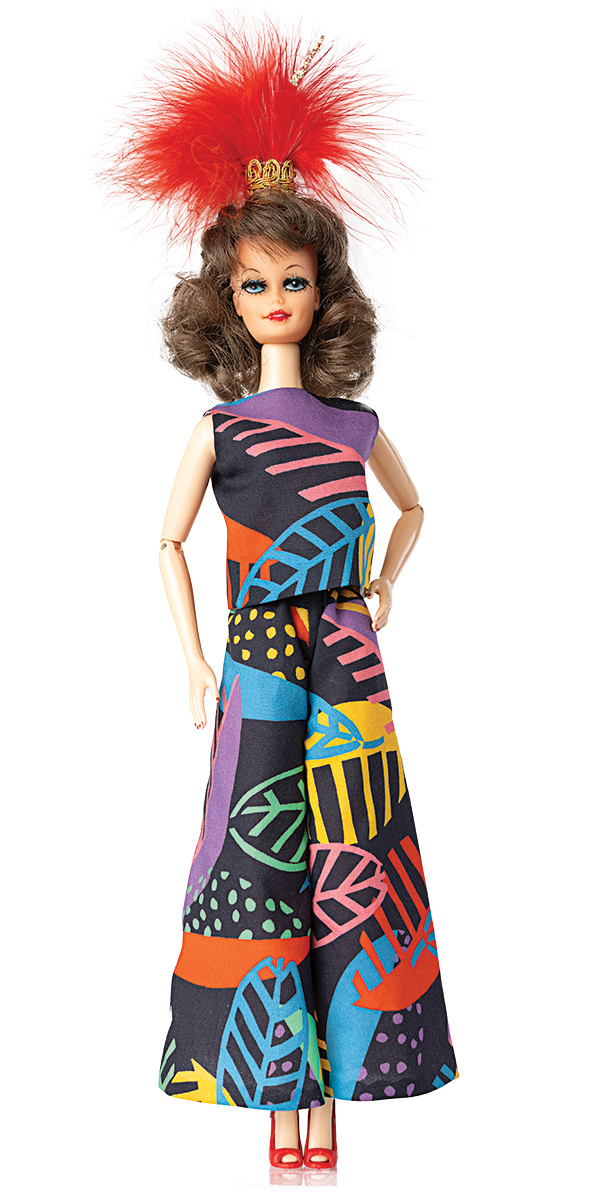
I’ve always loved designing and sewing little outfits for fashion dolls. They can have a wardrobe that’s much more glamorous than most people need for daily life. Recently, I took my doll sewing to a new level and wrote a whole book about former showgirl “Lola,” her trials and tribulations, and her excellent clothes. It’s called Doll Couture: Creating Custom Clothes Featuring the Story of Lola (The Taunton Press, 2023). One garment that didn’t get into the book was a pair of palazzo trousers. At full human scale, this wide-legged silhouette is casual and easy to wear, but offers more drama than an average pair of trousers. I decided Lola needed this garment, too.
Trouser Front Construction
With this method, you stitch seamlines before cutting along the seam allowances. This makes it easier to handle the small pattern pieces.
1. Trace and transfer the pattern

Print the pattern and trace it onto silk organza with a FriXion pen. Trace it onto the fashion fabric’s wrong side with pencil or FriXion pen. You may need a light box to see the pattern through the fabric. Trace two copies on each fabric; flip the pattern for left and right sides. Include directional arrows to indicate center front. Cut the fabrics roughly around the tracings, leaving plenty of excess at all edges.
2. Pin the center front seams

Place the organza layers together, with the pattern outlines aligned. Pin along the center-front seam. With right sides together, do the same for the fashion fabric. Then pin each pair of fabrics to paper strips; this makes it easier to sew.
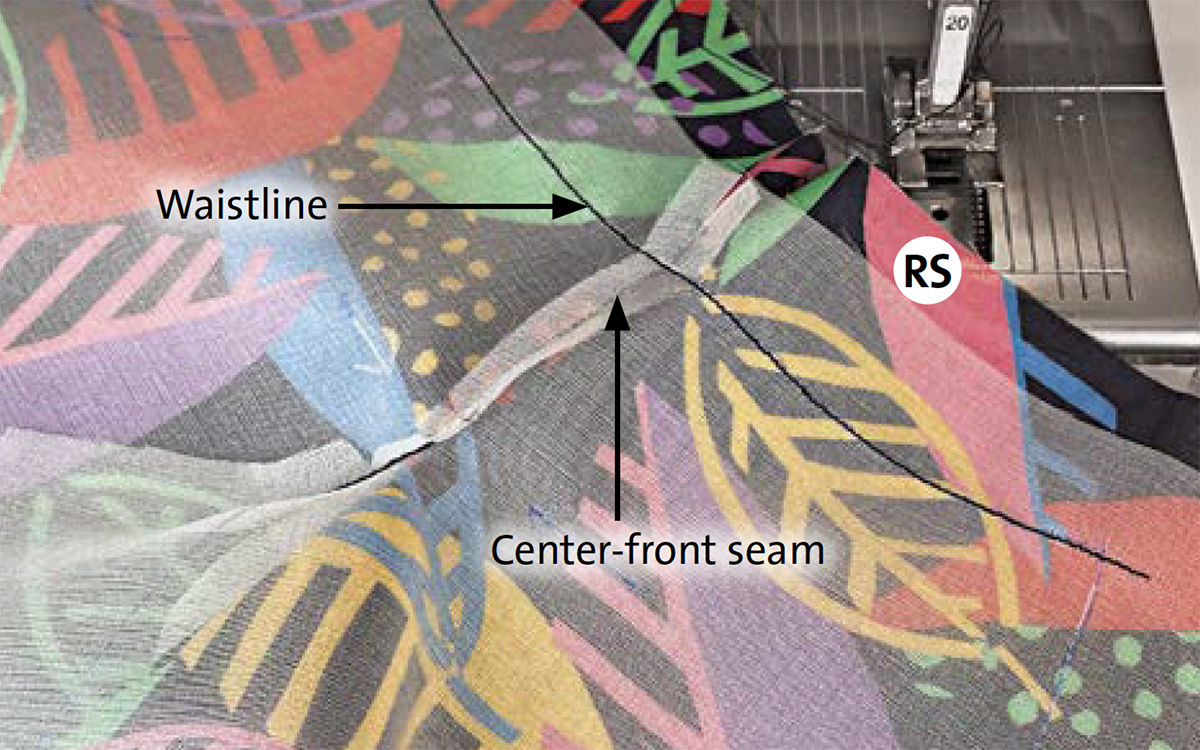
3. Sew the seams

Set the sewing machine for a stitch length of 1.5 mm. Sew the center-front seam on the fashion fabric and the organza layers.
4. Trim and clip the seam allowances

Tear away the paper, then trim the seam allowances to 3/16 inch wide. Clip into the curves.
5. Press the seam allowances open

Work over a narrow point presser or other wooden tool.
6. Join the organza and fashion fabric layers

With right sides together, pin the layers together along the waist seamlines and along the hem edges. Then sew, following the marked seamlines.
7. Trim and press


Trim the hem seam allowances with a wavy-edged rotary cutter blade. With scissors, trim the waistline allowance to 1/8 inch. Press all the allowances toward the organza. Turn the work right side out and press the edges flat.
Waistline Treatment
Insert the elastic while the garment is flat. This is not a preferred method for a full-size garment, but it’s the only way to manage a tiny waist circumference.
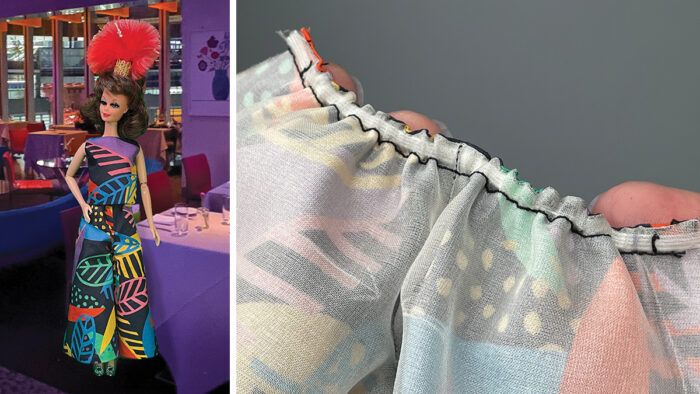
1. Stitch a casing

Sew parallel to the waist edge, 1/4 inch from the finished edge.
2. Mark the elastic

Use 1/8-inch-wide elastic, and place two marks, 2-3/4 inches apart. Don’t cut the elastic. Sew one end to a darning needle.
3. Insert the elastic

Thread it through the casing, matching the first end to one center-back seamline. Machine-sew to secure this end.
4. Match the remaining end

Stretch the elastic and match the mark to the other center-back seamline. Anchor the elastic. Trim the elastic ends to about 1/2 inch.
Back and Inseam Assembly
This is a one-seam trouser style, so there are no side seams to worry about.
1. Sew the center-back seam

With the fashion fabric right sides together, pin the center-back seam through all four layers. Follow the marked seamline to sew the seam. Finish the allowance with a zigzag stitch, 1.5 mm long and 1.5 mm wide.
2. Trim and seal the allowances
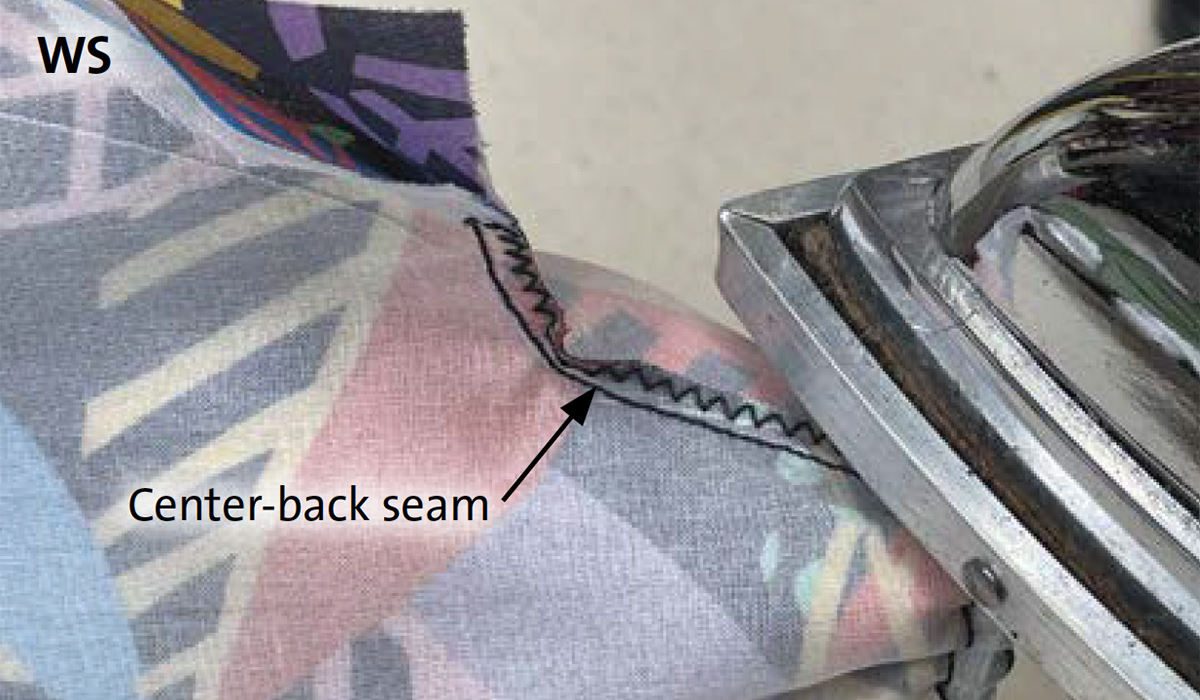
Cut close to the zigzag stitching and apply a fray block. Then press the allowances to one side.
3. Sew the inseams

With the fashion fabric right sides together, pin and sew the inseams. Match the crotch seams and hem edges, and stitch in one pass. Finish the allowances with a zigzag stitch.
4. Secure the seam allowances

Trim and seal, as in Step 2, then press the allowances toward the back.
Contributing Editor Kenneth D. King has cloned couture for Barbie in New York magazine. KennethDKing.com
View PDF


Log in or create an account to post a comment.
Sign up Log in