


Using sequins to write letters may be time-consuming, but the results are stunning.
Fun techniques for adding text to projects
There are a surprising number of ways to add text to fabric. Some techniques are straightforward, while others require several materials and more time. The method you choose is a matter of personal preference and will generally be based on the result you’re trying to achieve. Below, I’ll describe nine ways to write on fabric so you can decide which technique(s) works best for you.
1. Heat Transfer Paper
This is a quick and easy way to iron a printed image directly onto fabric. To achieve this effect, you’ll typically need to print the design’s mirror image onto heat transfer paper with an inkjet printer. However, you’ll need to refer to the manufacturer’s instructions for your specific paper. (In this example, we used Silhouette’s printable heat transfer material for light fabrics.) Next, cut around the object(s) as close to the ink as possible. Then, press down on the image with a hot iron before peeling off the backing.
 It helps to practice this technique at least once before transferring the actual design to the fabric.
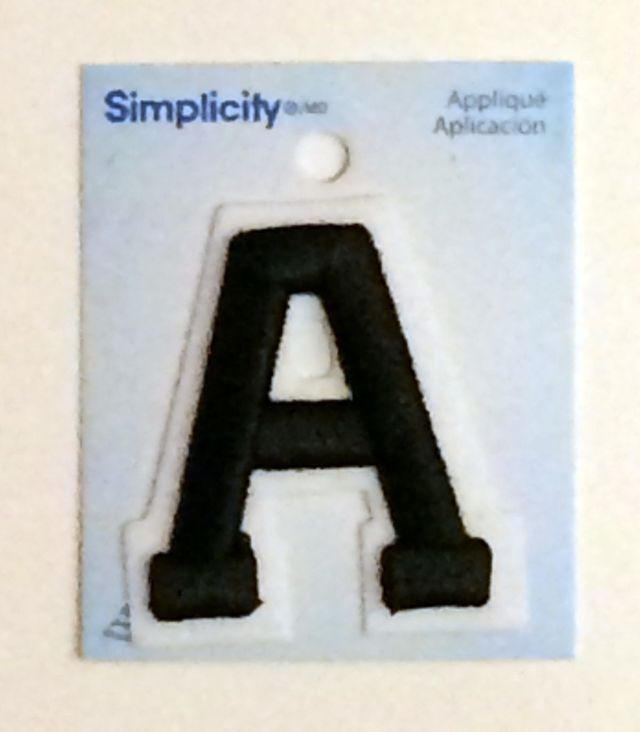
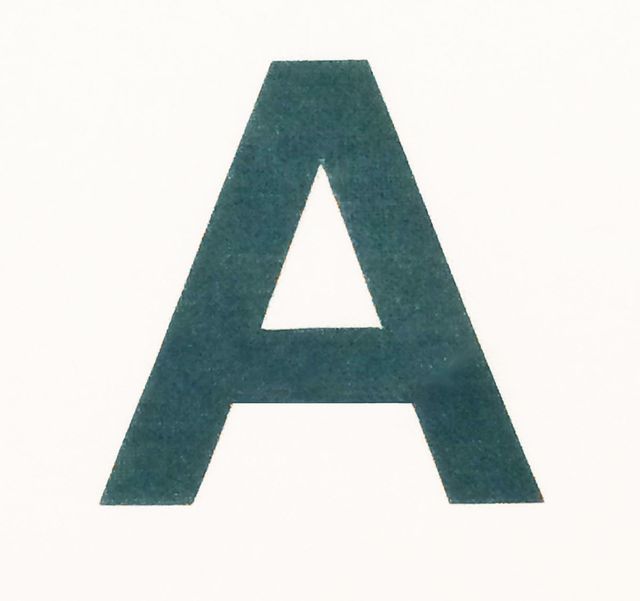
2. Iron-On Appliqué Letters
It doesn’t get much easier than ironing a precut appliqué letter onto fabric. Simply place the appliqué right side up on the fabric’s right side in the desired location. Cover the appliqué with a press cloth and press the letter with a hot, dry iron. Note that directions for this technique vary, so be sure to refer to the manufacturer’s instructions for your specific appliqué.

The letter shown is one of Simplicity’s iron-on embroidery letters.
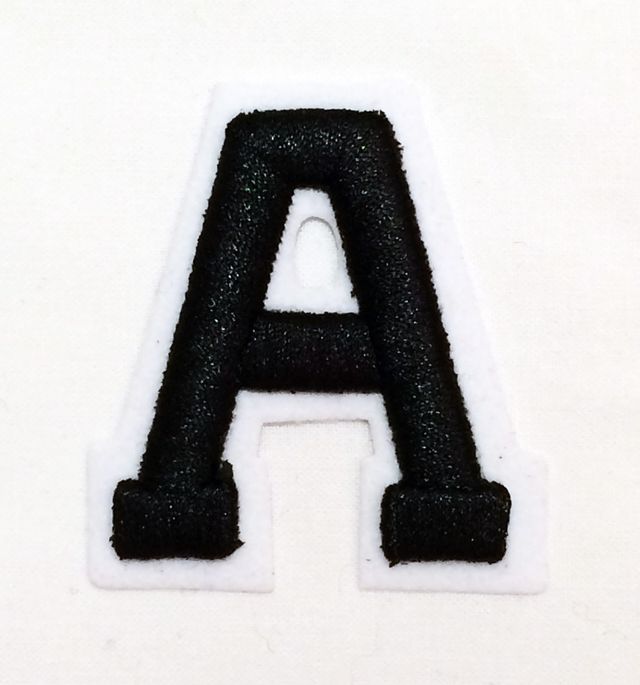
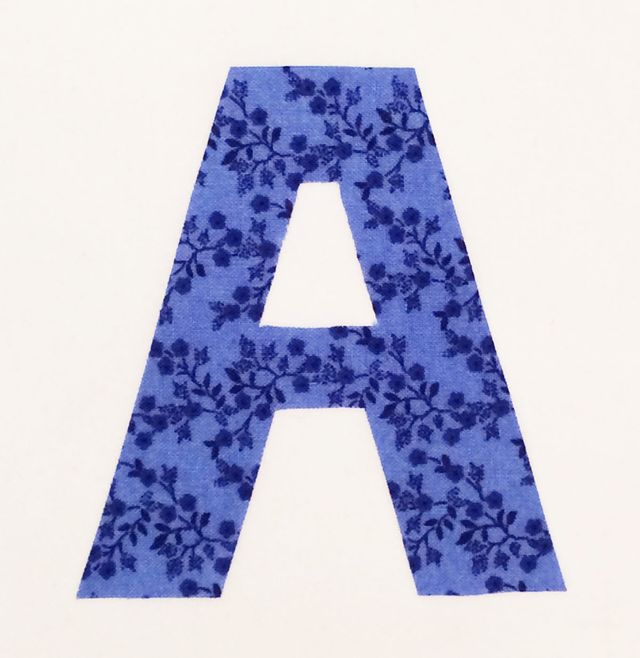
3. PreCut Iron-On Letters
This process is similar to option 2 and requires you to read the manufacturer’s instructions thoroughly before beginning. To apply a Dritz iron-on letter, as shown below, set a dry iron to its cotton setting. Place the letter, adhesive side down, on the fabric in the desired location. Cover the letter with a press cloth, and press on the letter for 15 to 20 seconds. Finally, remove the sheet while it’s still hot.
 You’ll be amazed at how quickly this process works.
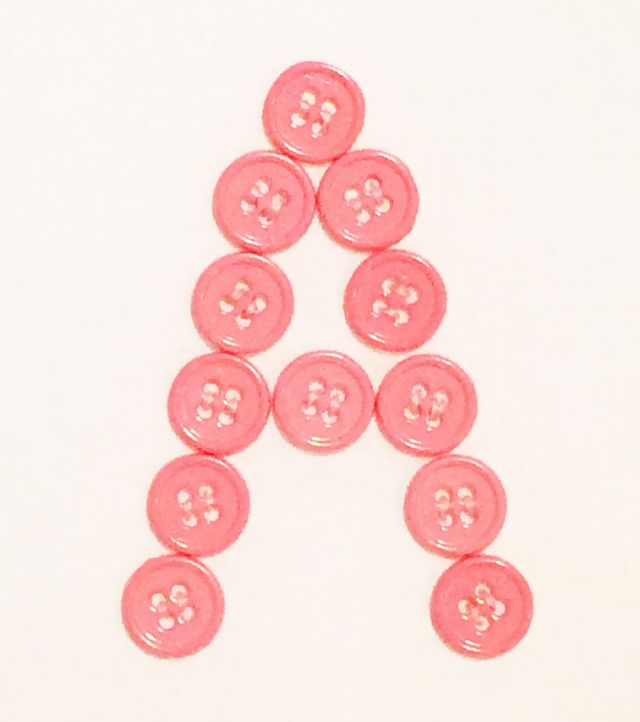
4. Buttons
This option is more time-consuming than the last, but it’s much more interesting and fun to create. To begin, select a button size and shape that works best for your project. Use an embroidery hoop to hold the fabric taut. Then, plan out the orientation. Double-thread a hand-sewing needle and begin sewing the design, one button at a time.

Before you begin sewing, consider lightly sketching the design on the fabric’s right side with a pencil or water-soluble marker to keep the buttons properly aligned at all times.
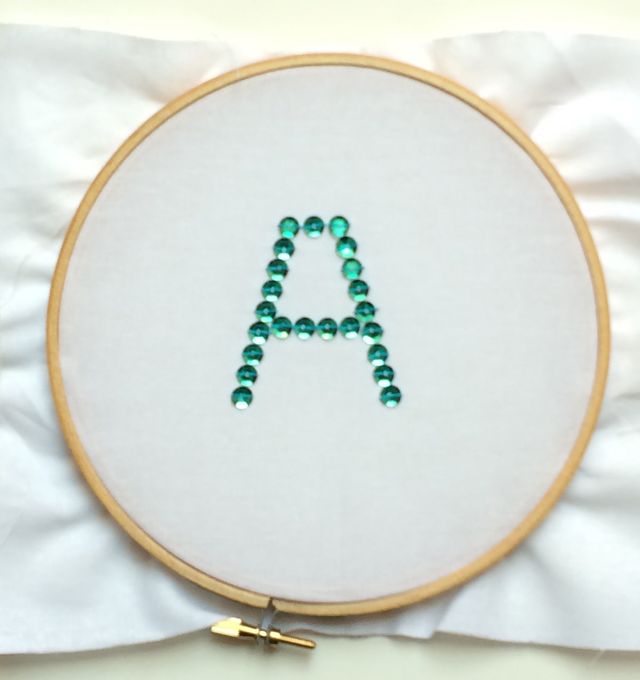
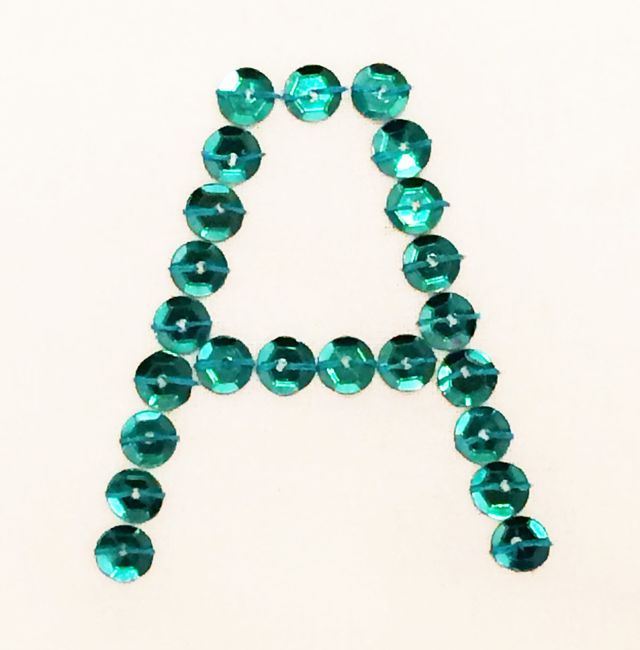
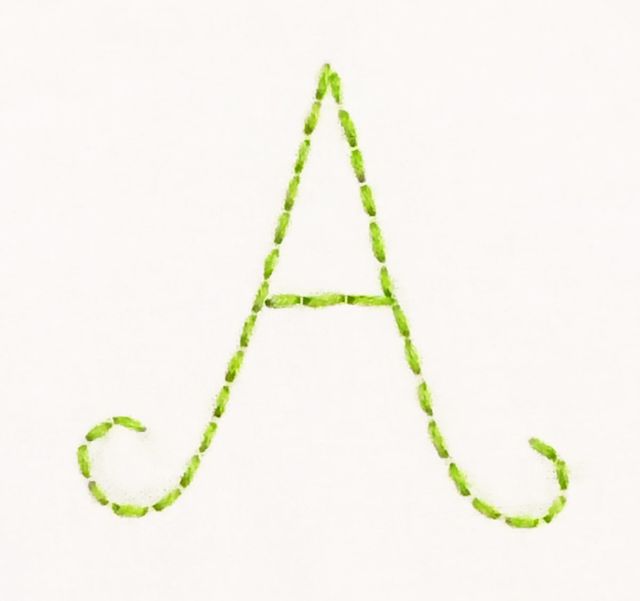
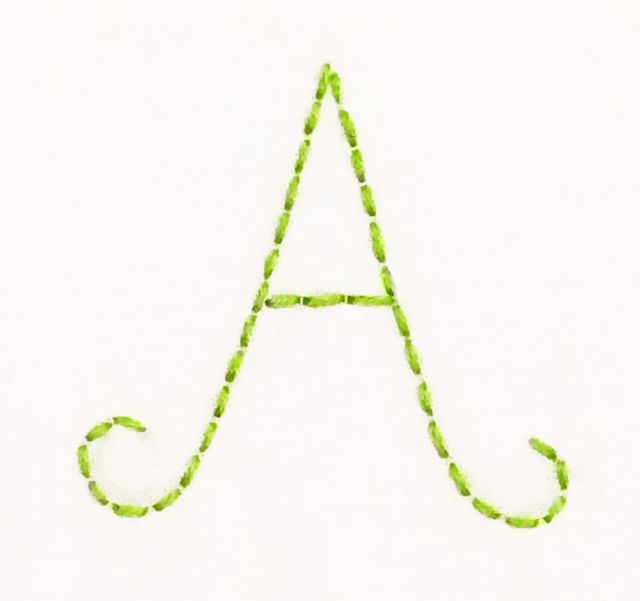
5. Sequins
Writing with sequins is a great way to add sparkle to what could have been a bland project. Begin by selecting a sequin size and shape that works best for your project. Next, use an embroidery hoop to hold the fabric taut. Now, it’s time to plan how you’d like to orient the sequins. If desired, lightly draw the design on the fabric’s right side with a pencil or water-soluble marker. Finally, double-thread a hand-sewing needle and begin sewing the design, one sequin at a time.

Sequin letters are eye-catching and easily secured with two stitches per sequin.
6. Fabric Markers or Paint
For a speedy text design, write on fabric with fabric markers or paint. You may want to use a stencil, ruler, or a light pencil outline to help you get started. Otherwise, freehand-sketch the letter to give it more personality. Last, consider using multiple colors to add more interest to the design.

A ruler was used to help make these fabric marker lines straight and crisp.
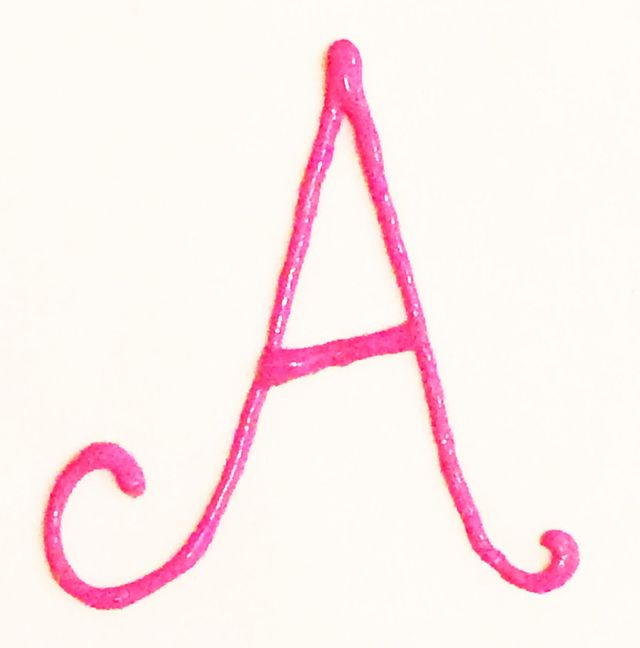
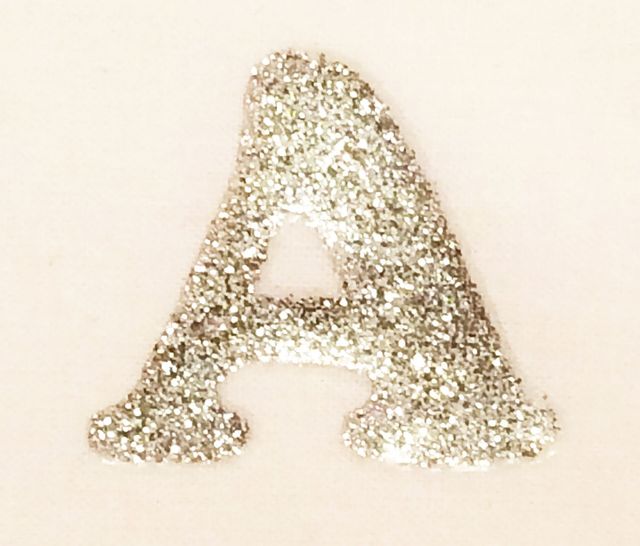
7. Puffy Paint
Puffy paint is great for adding texture and dimension to a project. Multiple puffy paint colors can be layered without mixing together like other paints. Just don’t pile on too many coats or the liquid will take hours to dry. To write with puffy paint, simply draw the desired letter freehand, or use a pencil to lightly sketch the design on the fabric before you begin. Be careful not to squeeze too much liquid out of the bottle at once.
 Add some dimension and shine to your project with puffy paint.
8. Hand Embroidery
Hand embroidery is similar to sewing letters with buttons or sequins. However, it only requires an embroidery hoop and embroidery floss. Begin by hooping the fabric. Then, single- or double-thread an embroidery needle with embroidery floss. If desired, lightly draw the letter with a pencil on the fabric’s wrong side so the lines don’t show through, and refer to the wrong side for the proper needle placement before each stitch. While a variety of embroidery stitches are appropriate for this technique, we used a simple backstitch in the example below. Another option is to machine-embroider letters on fabric.

Add some personality to your embroidered letters to really make them stand out.
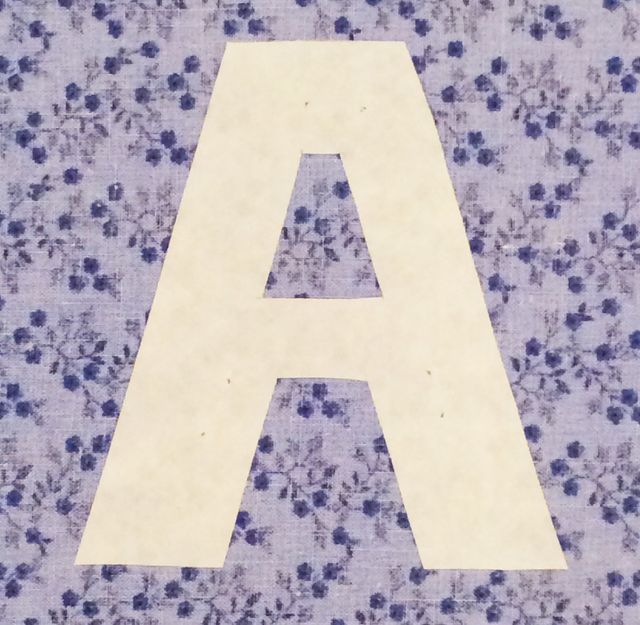
9. Fuse Fabric Letters
If you’re looking to add a strong color or print to a project, this is the way to go. Therm O Web’s HeatnBond Ultrahold iron-on adhesive enables you to bond fabric letters to fabric with minimal effort.
 Start by drawing a letter’s mirror image on the adhesive’s paper side. Cut out the letter and adhere it to the fabric’s wrong side with a hot, dry iron.
Next, use the paper’s outline as a guide to cut the letter from the fabric.
 Continue by peeling off the paper to reveal the shiny adhesive, which has bonded to the fabric’s wrong side.
Finally, place the fabric letter right side up onto the fabric’s right side, and press the letter in place with an iron to adhere it to the fabric.

For extra strength, appliqué the letter to the base fabric.
What ways do you generally write on fabric? Are there additional techniques you would suggest? Please share your thoughts in the comments section.


I'm blessed to have a Janome MC9900 sewing & embroidery machine. Previously I had a Husqvarna Viking Designer 1 sewing & embroidery machine. So I love writing on fabric with machine embroidery.
Enter the world of rubber stamping. I have a set of letters and use permanent ink to stamp when the feeling hits. On my new granddaughter's daddy quilt I added "Be smart. Be happy. Play fair. Love well."
Sequins look very nice to me this option like the most
Fantastic Work...Keep it up
amazing work.
3d embroidery digitizing