


You can easily drape your own skirt to solve the problem of an uneven skirt hem.
by Kathleen Cheetham
excerpted from Threads #132, pp. 40-45
An uneven skirt hem is just one symptom of an ill-fitting skirt that doesn’t hang properly. The good news is that you can easily drape your own skirt and solve this problem. The skirt-draping process starts where the difficulties emanate-with the “hang” of a skirt at the top, which, of course, is your waist, tummy, and hip. I’ll show you how.
A skirt is the simplest garment to drape. You’ll need a sewing friend, 3 to 4 yards of light- to medium-weight muslin fabric, and your ability to stand for about 60 minutes.
![]()
 Fabric held at the waist and falling from the hip is on its way to becoming a skirt.
Trade off with your sewing friend and drape each other. Wear the shoes you would with a skirt and your best-fitting foundation garment. The shoes ensure the same posture that you’ll have when you’re dressed in finished garments.
If you have a dress form you’ve made or bought that matches your size and shape perfectly, you can drape that for an accurate fit as well. But be aware that a dummy may need a slight layer of padding first so you can build in some breathing room; otherwise, the resulting pattern may be too tight.
In the end, you’ll have a basic skirt sloper that can serve as groundwork to design other skirts. This sloper can lead you to A-line, gored, flared, or any other skirt style pattern. And, every skirt you design from this sloper automatically fits and hangs beautifully.
Prepare the muslin for the skirt front
When you prepare muslin fabric for draping, it is important to cut the fabric straight on the lengthwise grain and keep the waist and hem edges square. Press and align the fabric. Then use your measurements described below to figure out the size to cut your muslin.
• Place a pin or otherwise mark a side seam position on your clothes or body so you’re sure to measure to the same side seam location.
• Measure across your fullest horizontal circumference-either the hip or tummy-from center front to side seam marker. Add 2 to 3 inches to this measurement for ease and seam allowances. Multiply the total by two to establish the width to cut your muslin fabric skirt front.
• Cut the muslin piece 5 to 6 inches longer than your desired skirt length. Along the lengthwise grain of the fabric, identify and mark the center grainline with a felt pen.
Prepare the muslin for the skirt back
The skirt will have a center-back seam, so plan to cut two pieces of fabric after taking and adjusting these measurements:
• Measure across the fullest part of your hip from center back to side seam just as you did for the skirt front. Add 3 to 4 inches to this measurement for ease, plus 1 inch for the center-back seam allowance.
• Cut two pieces of fabric for the back, with each the width calculated above and the same length as the front piece you cut earlier.
Baste seams and try on the skirt
![]()
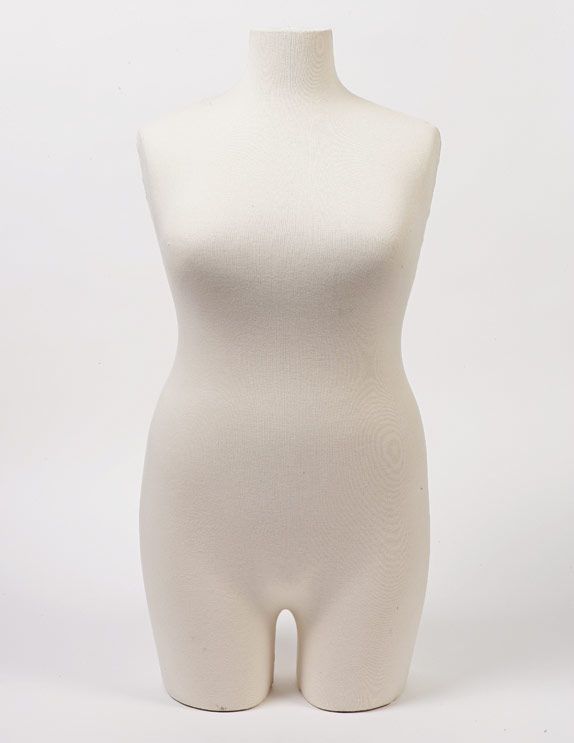
 We used a plus-size mannequin (below) because it has more curves than the plus-size dress form shown above. The mannequin’s hourglass shape serves as a better model for forming darts.
Machine-baste the front to the backs along the side seams. Baste the centerback seam, leaving 12 inches open at the top.
1. Tie narrow elastic comfortably around the waist. Then, with the seam allowances to the outside, pull on the skirt muslin and tuck it under the elastic.
2. Arrange the fabric with the center-front and center-back lines aligned on your body. Throughout the draping, keep the center lines positioned properly on the body and perpendicular to the floor.
3. Now stand straight with your weight shared equally on both feet while your sewing friend adjusts the skirt until it hangs evenly. Begin adjusting from the top, using the waist elastic to hold everything in place. Move the skirt up and down under the elastic until the side seams and the center-front and center-back seams hang perpendicular to the floor.
4. Once all vertical lines are hanging correctly, make sure the hem is parallel to the floor. Adjust as necessary.
5. You may notice the fabric above the waist elastic is not even-that’s okay. What’s important is that everything below the waist hangs smoothly and evenly.
Baste seams and try on the skirt
Smooth wrinkles into darts
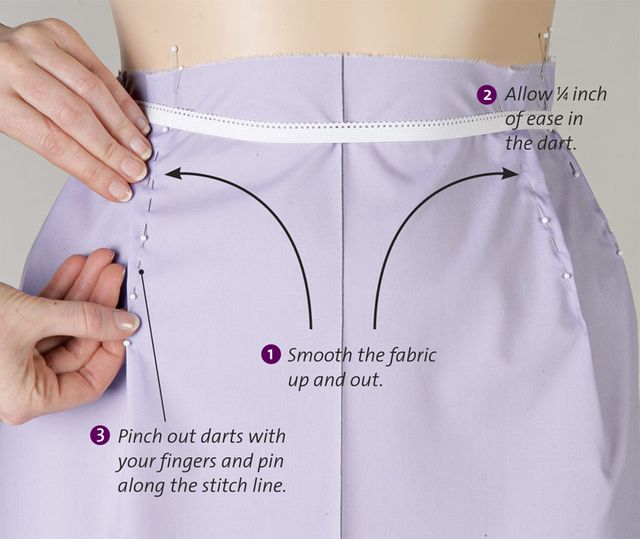
1. When you are satisfied that the skirt hangs perfectly, pin the darts. Lift the waist elastic and pinch out the excess fabric that forms between the hip and the waist. Smooth the fabric across the tummy and hip level. You want the fabric to drape smoothly from the most prominent point of the figure. Typically, I position one dart below the bust point on the front or shoulder blade on the back, then another halfway between the side seam and the first dart. Allow the figure to direct where and how many darts to use. Curvaceous figures need more darts than straighter figures.
2. When pinning each dart, let a 1/4-inch space float between the skirt and body for ease. Keep the dart points above the fullest part of the tummy or hip.
3. Continue pinning the darts all the way around the skirt. As you work, make sure the skirt remains straight and smooth with side seams perpendicular and the hem parallel to the floor.
Smooth wrinkles into darts
Tip: Quick way to guesstimate dart amount
You can guesstimate the amount of dart control you’ll need in each skirt quadrant by pinching out one large temporary dart right down the center front and center back. The depth of the flap is the approximate amount you’ll pinch out on each side of the center line-divided by however many darts work best for your shape.

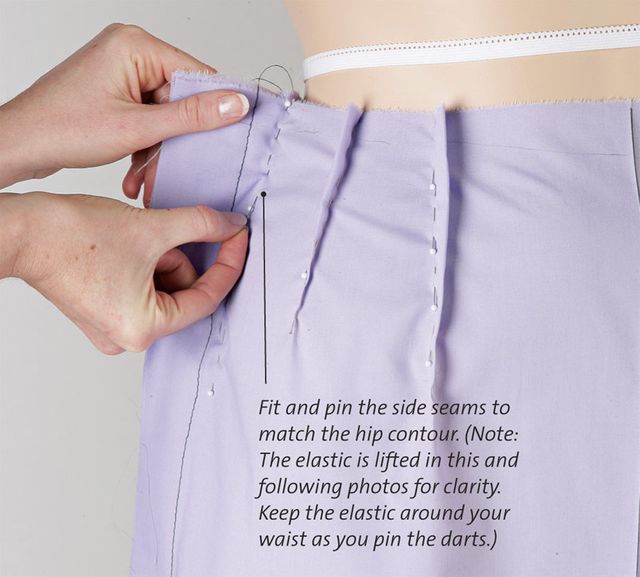
Shape the side and back seams
Along the side seam, outline the hip curve with pins, leaving 1/2 to 1 inch of ease on each side. The ease amount is a personal preference and also determined by body type. A fuller hip and tummy needs more ease. Remember that you must have enough room to sit without straining seams or creating tight stretch lines.
If there is a dip in the back at the center-back seam, you can pin that in as well to shape the seam to an accurate contour of your body.
Shape the side seams
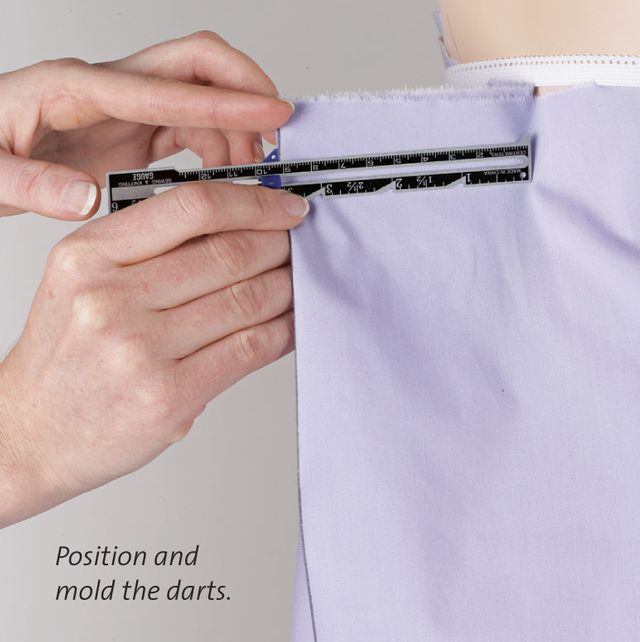
Mark seams and darts on your muslin
If you have an asymmetrical figure, creating a separate pattern for the right and left sides of the body can be a benefit. However, if your figure is reasonably symmetrical, one side of the muslin is all you need to make a conventional pattern that is cut on the fold of a double layer of fabric.
1. Mark the hipline and the kneeline at the side seam.
2. Dot marks around the waist using the elastic as your guide. I like to mark above the elastic.
3. Using the pins as your guide, mark the darts and seamlines and add the notches.
Mark seams and darts on your muslin
Convert the fabric to a paper pattern
Remove the muslin. Double-check that all pins have been marked using a felt pen. Remove the pins. An old piece of foamcore under your pattern paper makes recording your marks safe and easy. You won’t have to worry about marking your table.
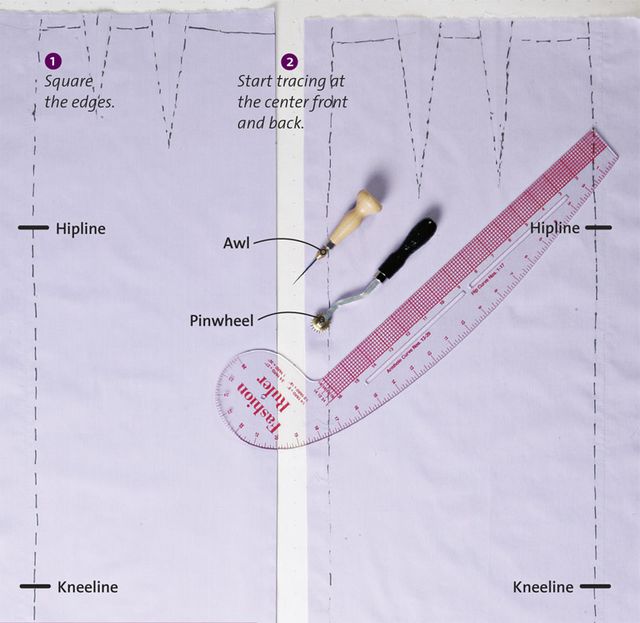
1. Smooth the muslin and square the edges. Use an awl and pin tracing wheel to punch the key points into the paper right through the fabric.
2. Begin with the center-front and center-back lines. These lines will be your straight-of-grain references. After you’ve traced all lines, lift the muslin from the paper.
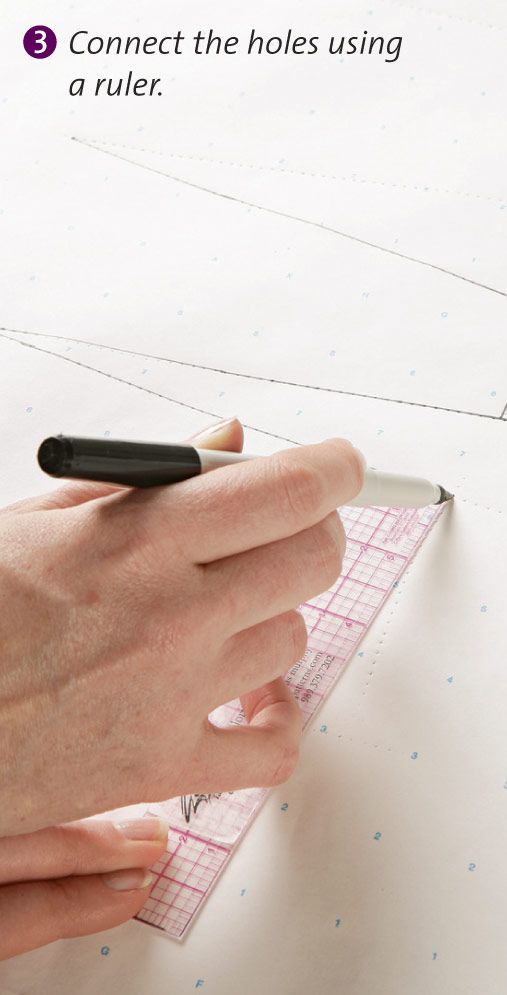
3. Use a ruler, L-square, and curve to connect the punched “dots” to finish your pattern. Remember, your sloper does not include seam allowances. Expect to see uneven punched lines. These won’t provide a good pattern and must be straightened.
Convert the fabric to a paper pattern
![]()

Square corners and even lines
Beginning at the center front, draw a straight line connecting the waist point to the hem edge by following the punches. Use this line as the squaring-off point for the remainder of the pattern.
• Square the hem from the centerfront line.
• Square the side seam and center-back seam from the hem up to the hip curve or center-back indentation.
• Along the waistline, square 1 inch out from the center-front line.
• Draw the grainline on the skirt front and skirt back parallel to the center lines and perpendicular to the hemline.
Tip: Get square
In finalizing the pattern, use an L-square extensively. Look for L-squares and other patternmaking tools at tailoring-supply outlets or at the bookstores of colleges and universities that teach patternmaking. An alternative to an L-square is a quilting ruler.
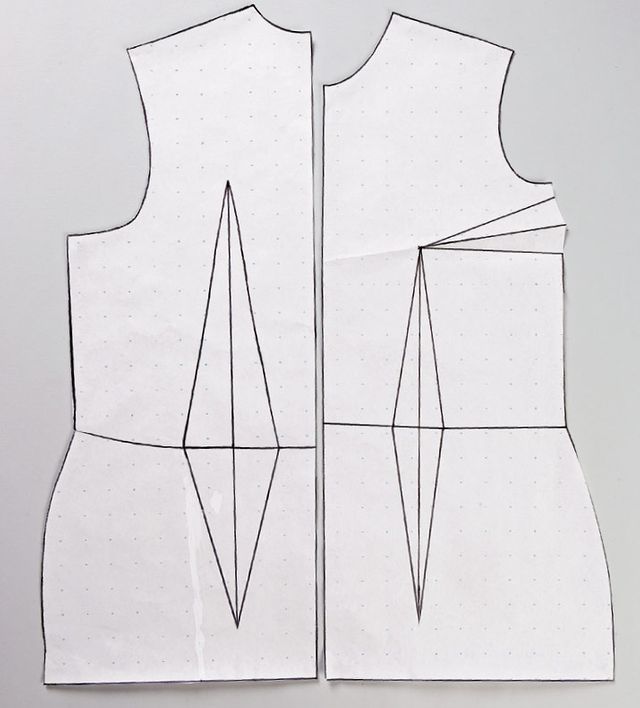
Finish the pattern
To finish the waistline edge, shape the darts by bringing the dart legs together and folding the dart as you would if sewing. Then fold the dart toward the center front. Cut the pattern along the waistline, following the curve of the waist to give your dart the correct shaping at the waistline edge. Remember, there are no seam allowances on a sloper pattern. Label your pattern pieces with your name, date, waist, and hip measurements.
When your sloper pattern doesn’t look right
When you look at the completed flat pattern, it’s interesting to see how your figure emerges. It may not look like the typical commercial pattern for the socalled perfect figure. Don’t be surprised to see your curves sitting higher or lower than the standard. Notice how your waistline is shaped. It’s common to see dipping from back to front and your darts may resemble the shape of a wine glass rather than a straight wedge. All of these nuances in shaping guarantee a finer fit and result in a satisfying sewing experience for you.
Kathleen Cheetham specializes in plus-size patterns. Visit PetitePlusPatterns.com. This article is the third installment of our four-part Plus-Size Draping series, which also includes “Try Plus-Size Draping for the Best Bodice Ever” (April/May 2007), “Add a Sleeve to Your Bodice” (June/July 2007), and “Design Your Own Skirt” (October/November 2007).
Model photo: Joseph Kugielsky; hair and makeup: Kristina Foreman. Process photos: Scott Phillips


Log in or create an account to post a comment.
Sign up Log in